
# PoC Operation Process
Please Note
This document details the PoC steps. You can follow the steps below to complete the PoC operation for the FinClip product. If you have any questions during this process, please feel free to contact us for assistance and support. You can click here to view relevant explanatory information about the PoC.
# Step 1: Register and Log in to the FinClip Platform
- If you are testing in the "Public Cloud (SaaS)" environment, visit the FinClip.com Registration Page (opens new window) and follow the prompts to create an account;
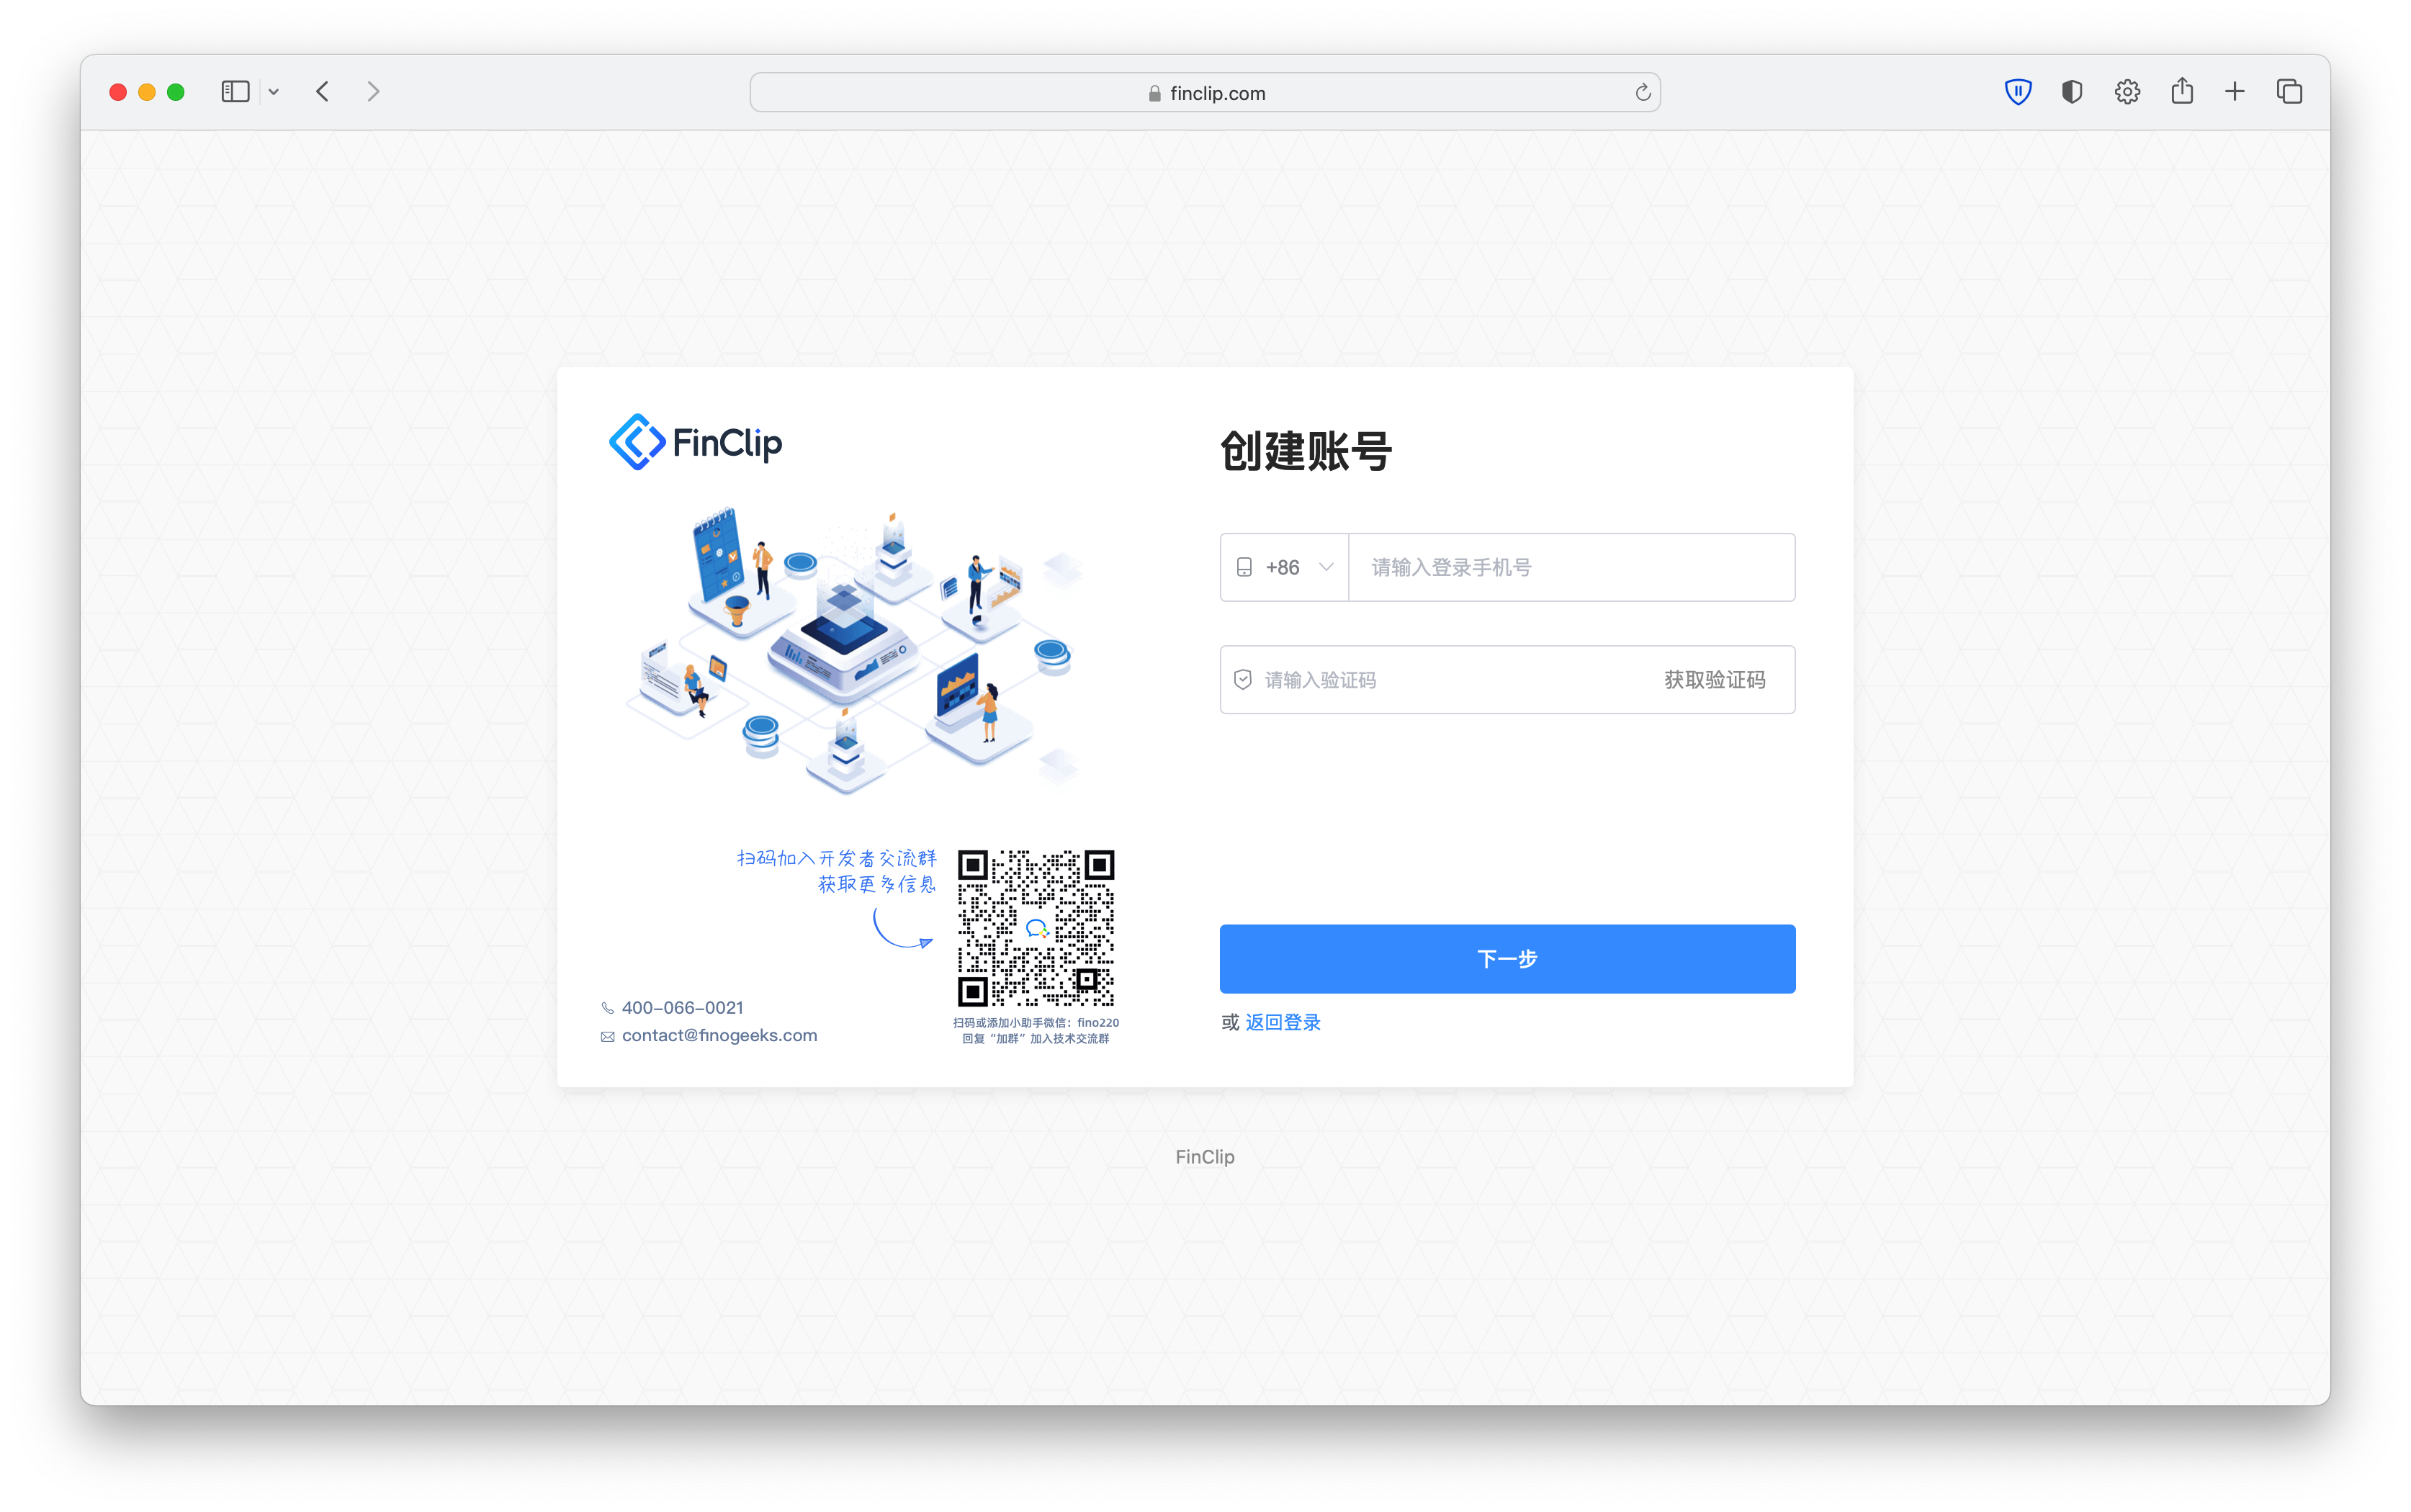
- If you are testing in the "Private Cloud" environment, you need to create an account yourself within the enterprise side (you can refer to 1. Platform Registration).
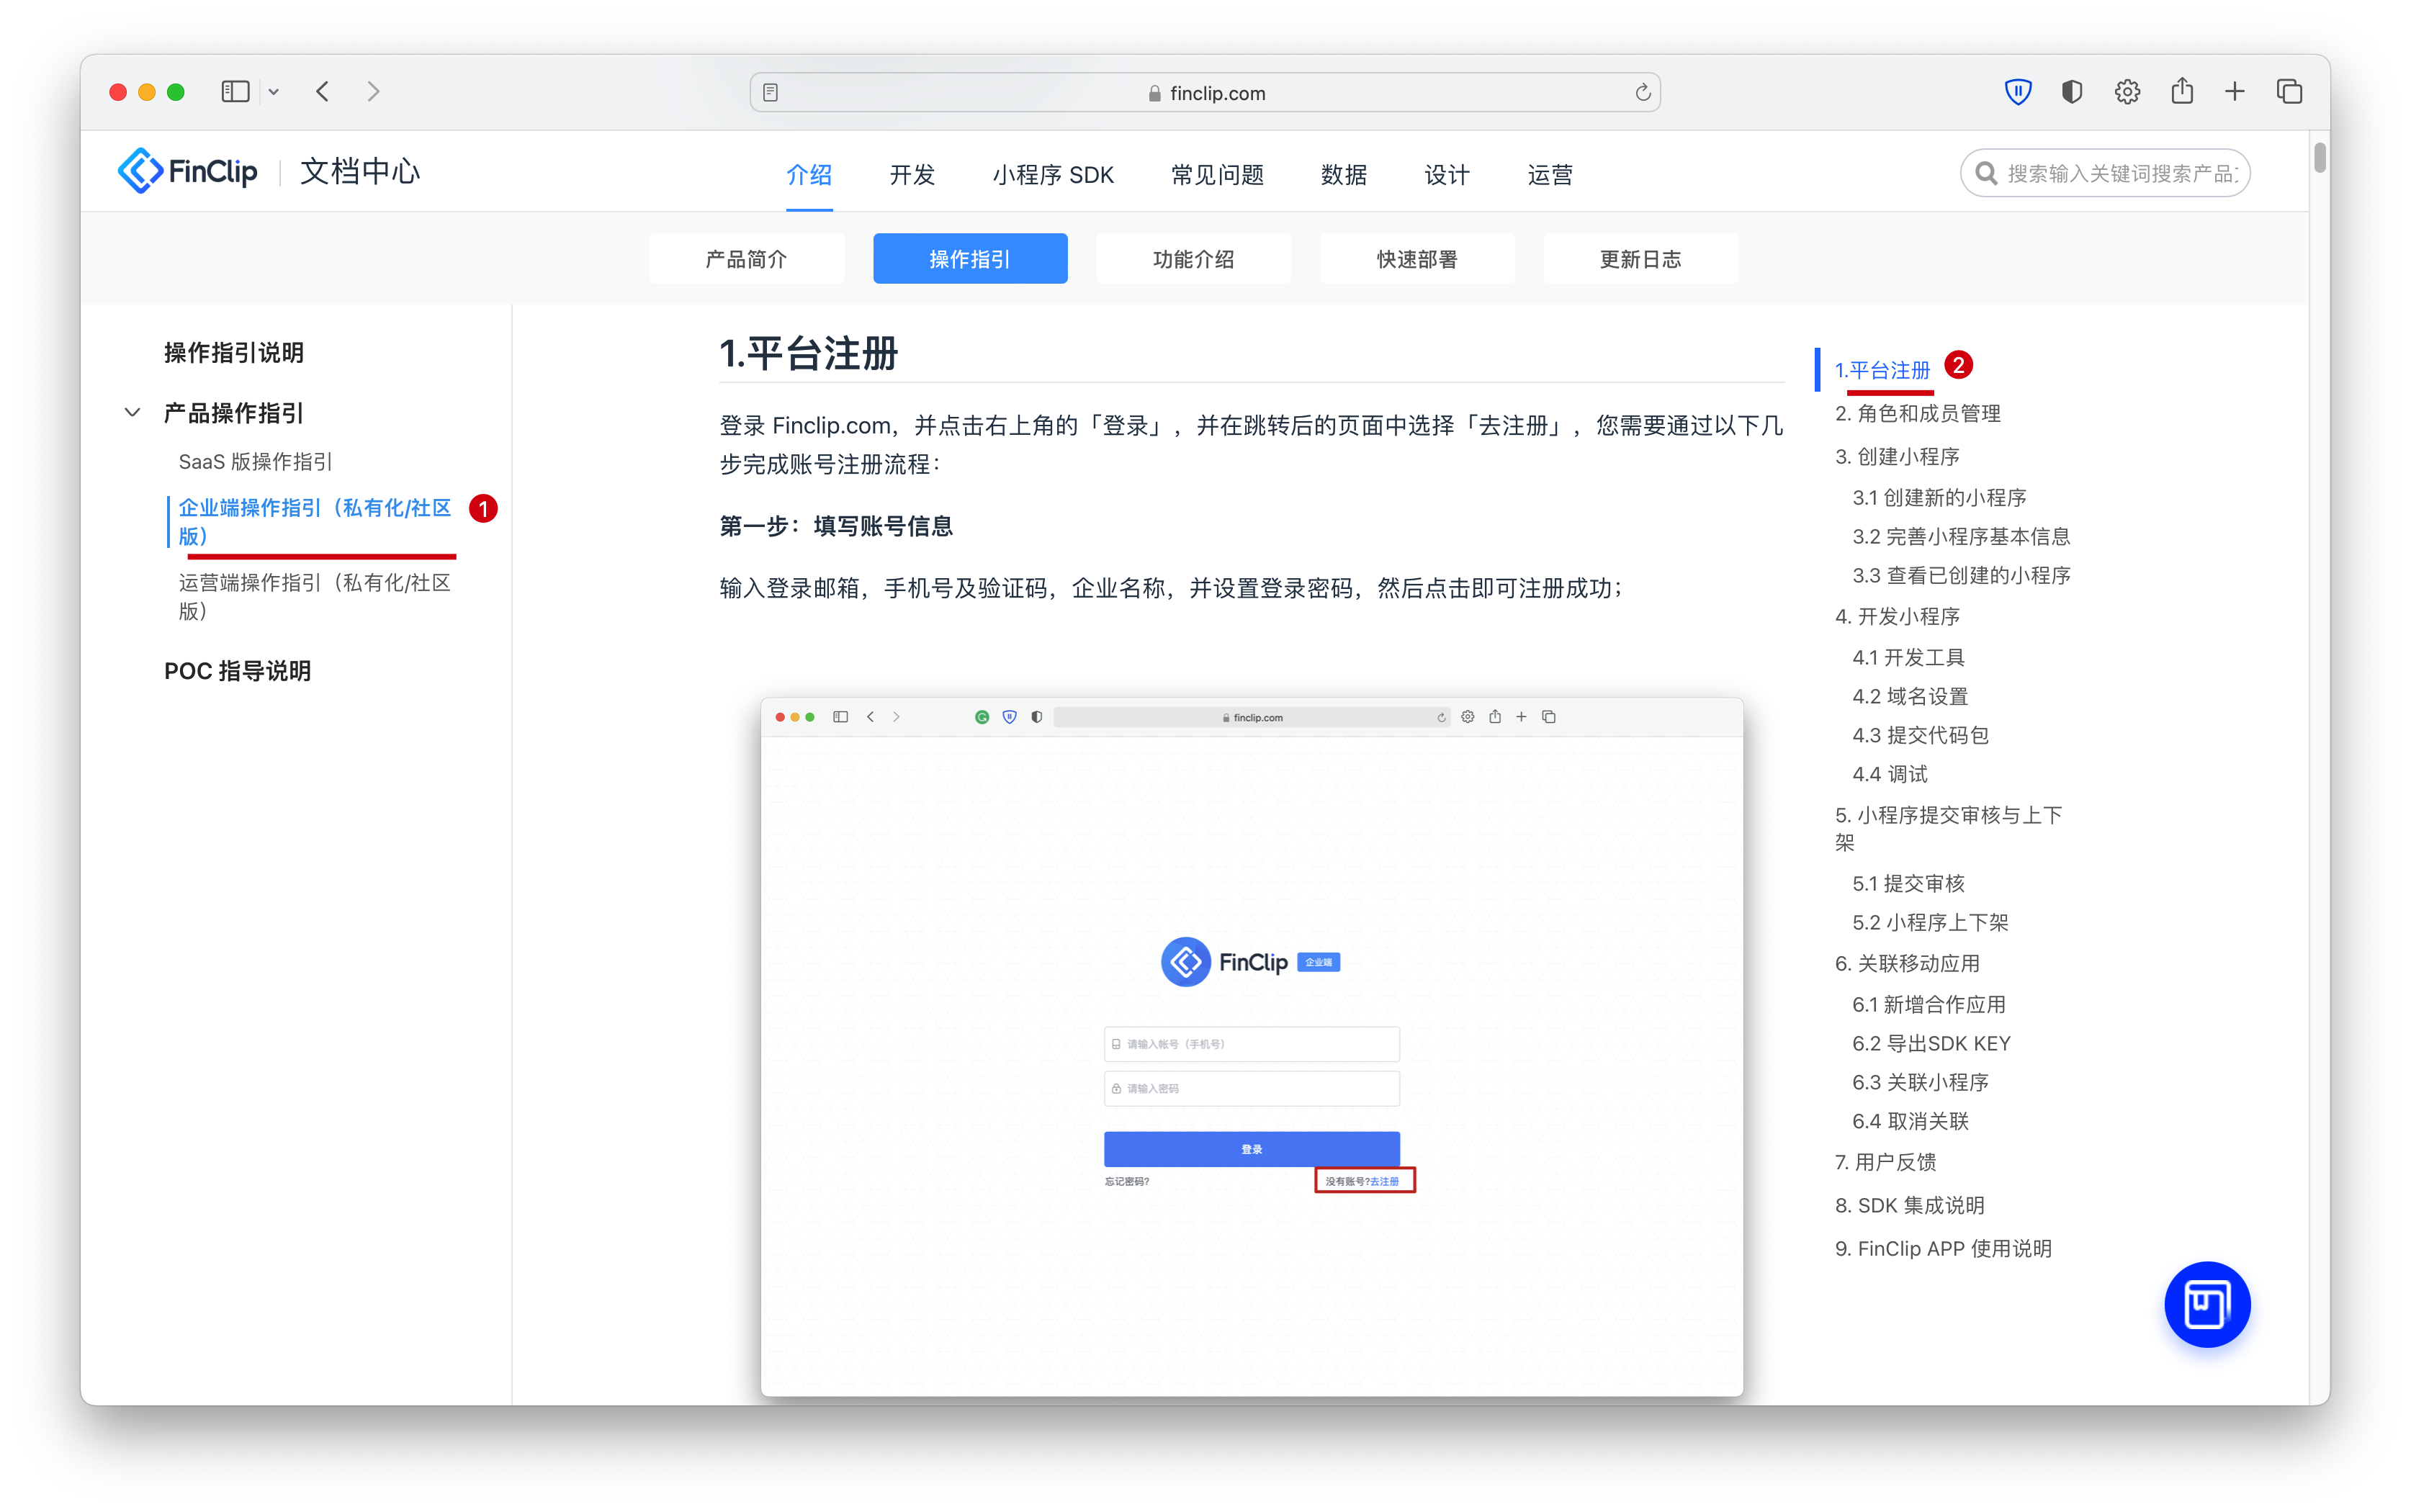
After the account is created, you can log in to the FinClip Management Console. Steps 2, 4, and 5 in this guide need to be performed within the Management Console.
# Step 2: Create a Mini-Program
Log in to the FinClip Management Console, click "Create Mini-Program" on the homepage (or under "Mini-Program Management - My Mini-Programs" on the left sidebar), fill in the Mini-Program Name, Category, Tags, Description, and upload the Mini-Program Avatar, then you can create the Mini-Program.
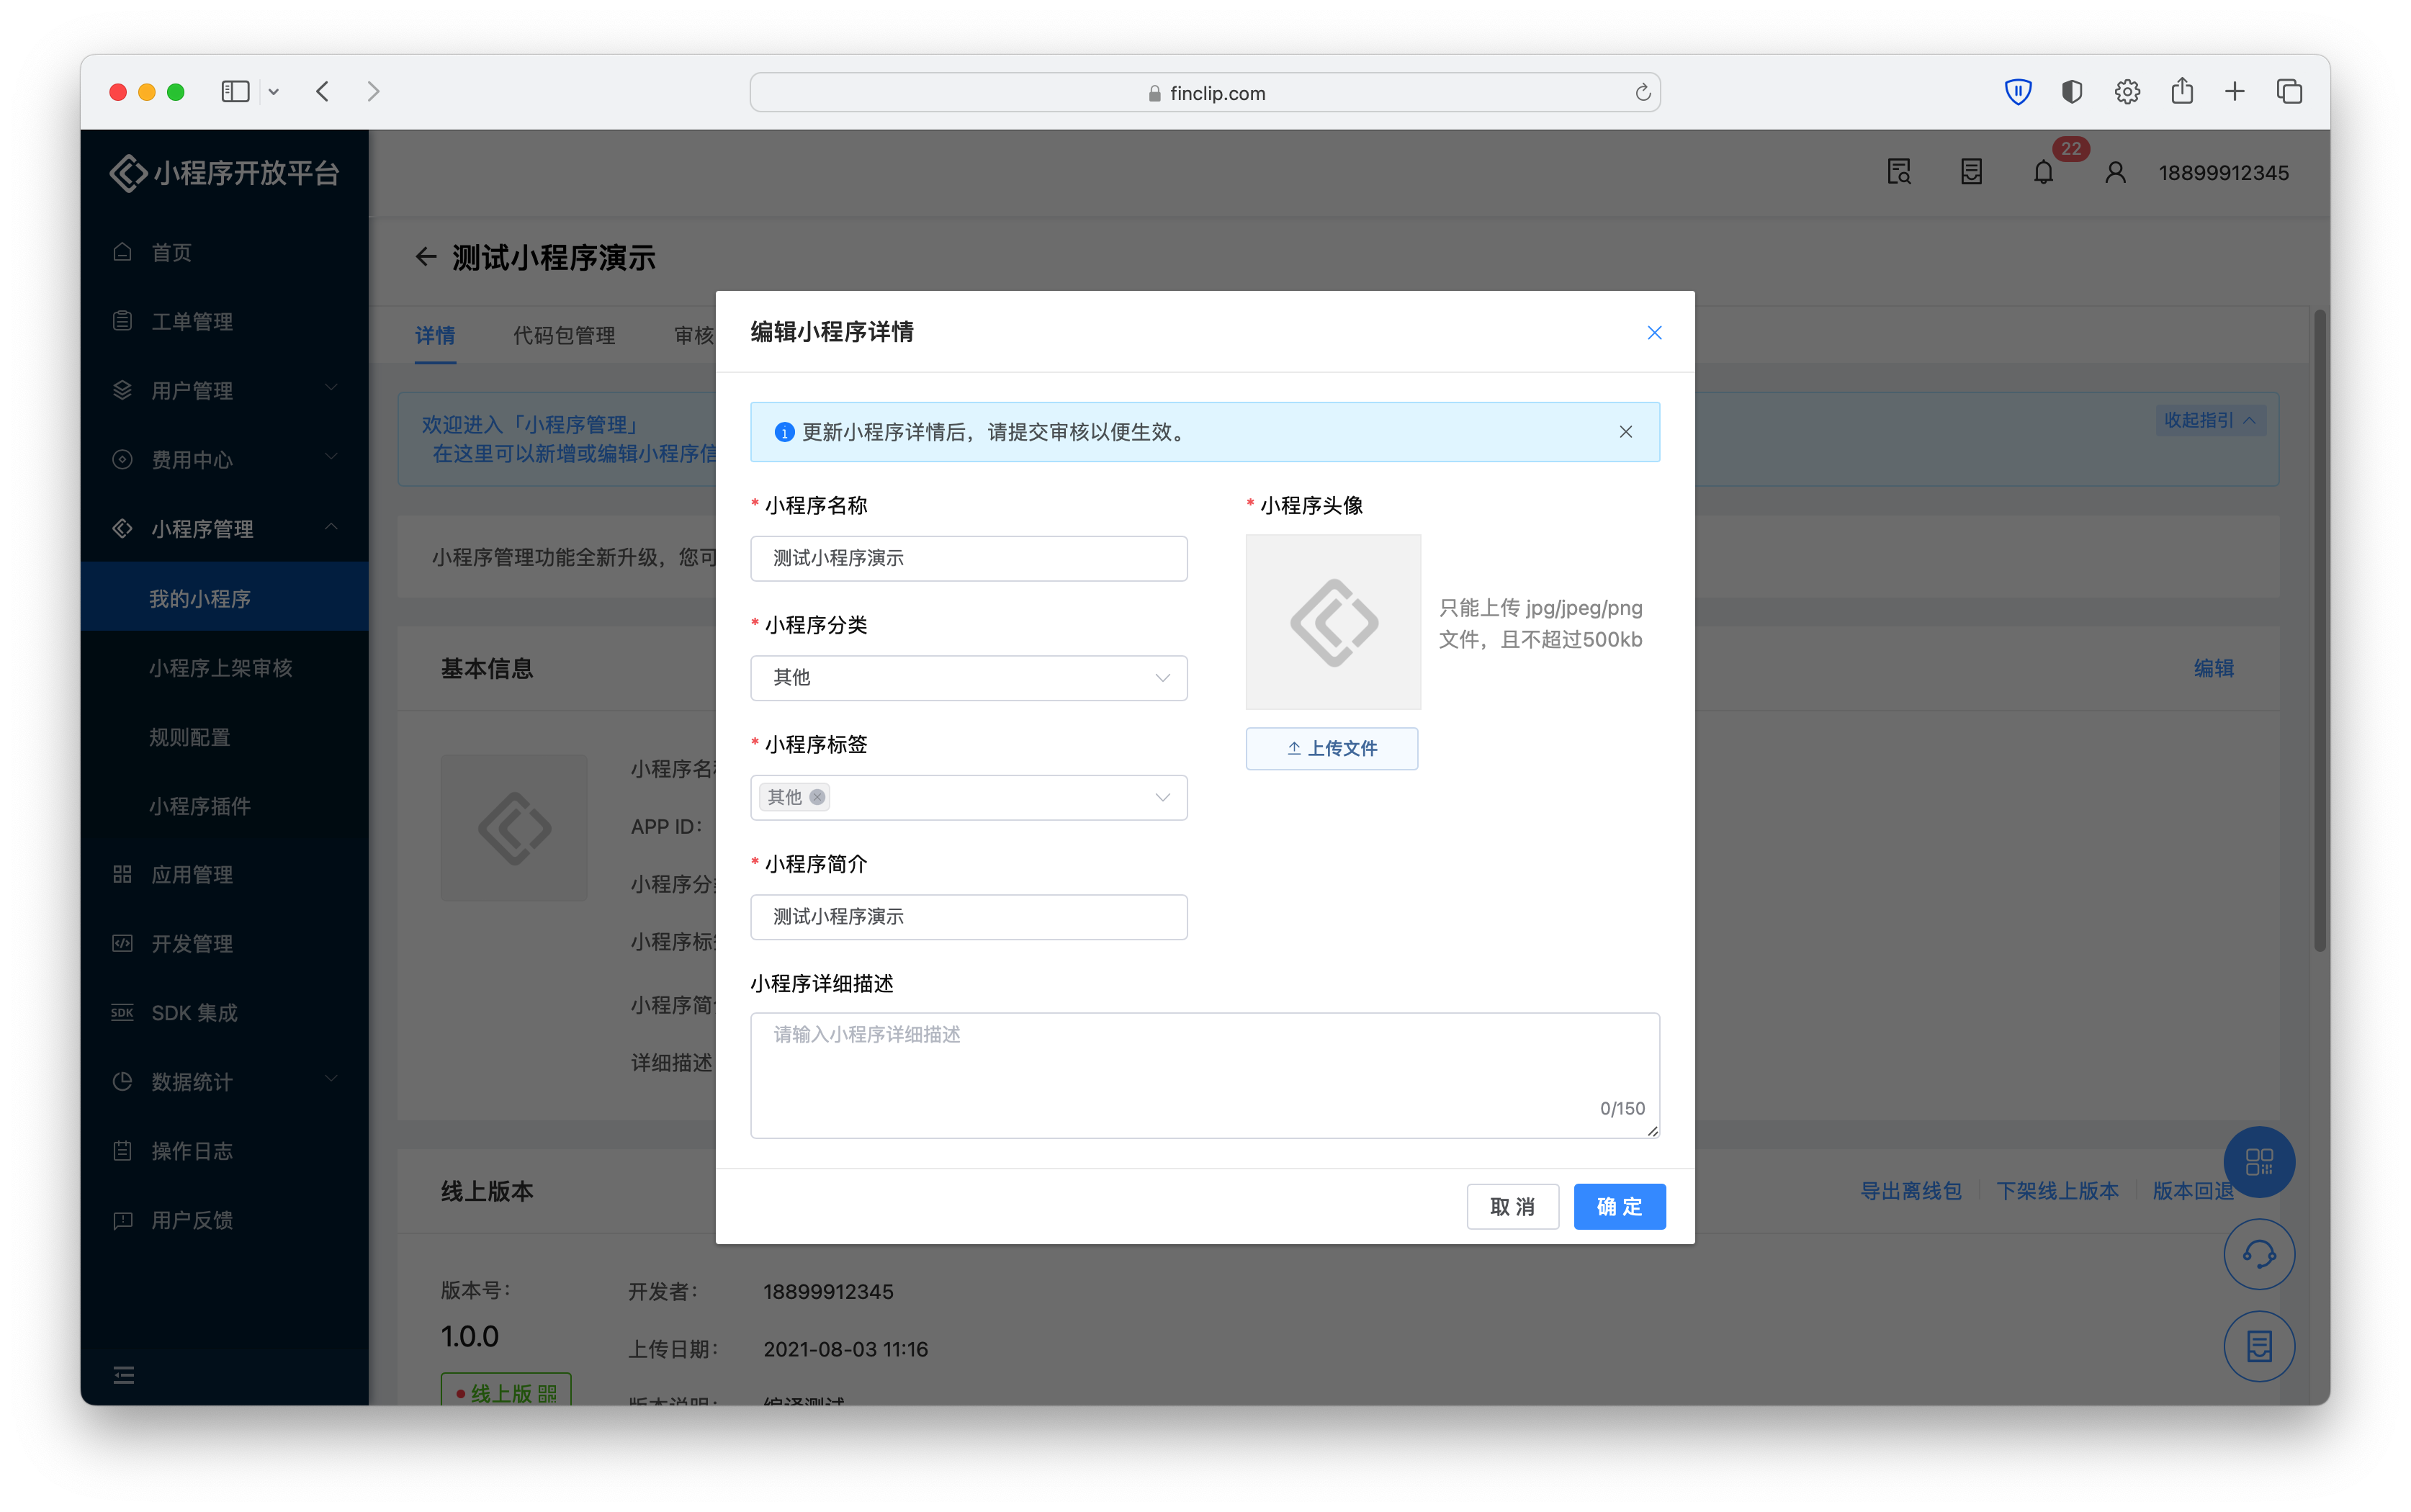
Subsequently, you can obtain the Mini-Program's AppID from the Mini-Program list or details page.

You can also click here to view detailed instructions for creating a Mini-Program.
# Step 3: Develop and Preview the Mini-Program
Download and open FinClip Studio, and log in to the Developer Tools using the account registered in Step 1.

After entering the Developer Tools, you can create a new Mini-Program based on a template (to ensure development effectiveness, it is recommended that you select the Mini-Program Example Template).
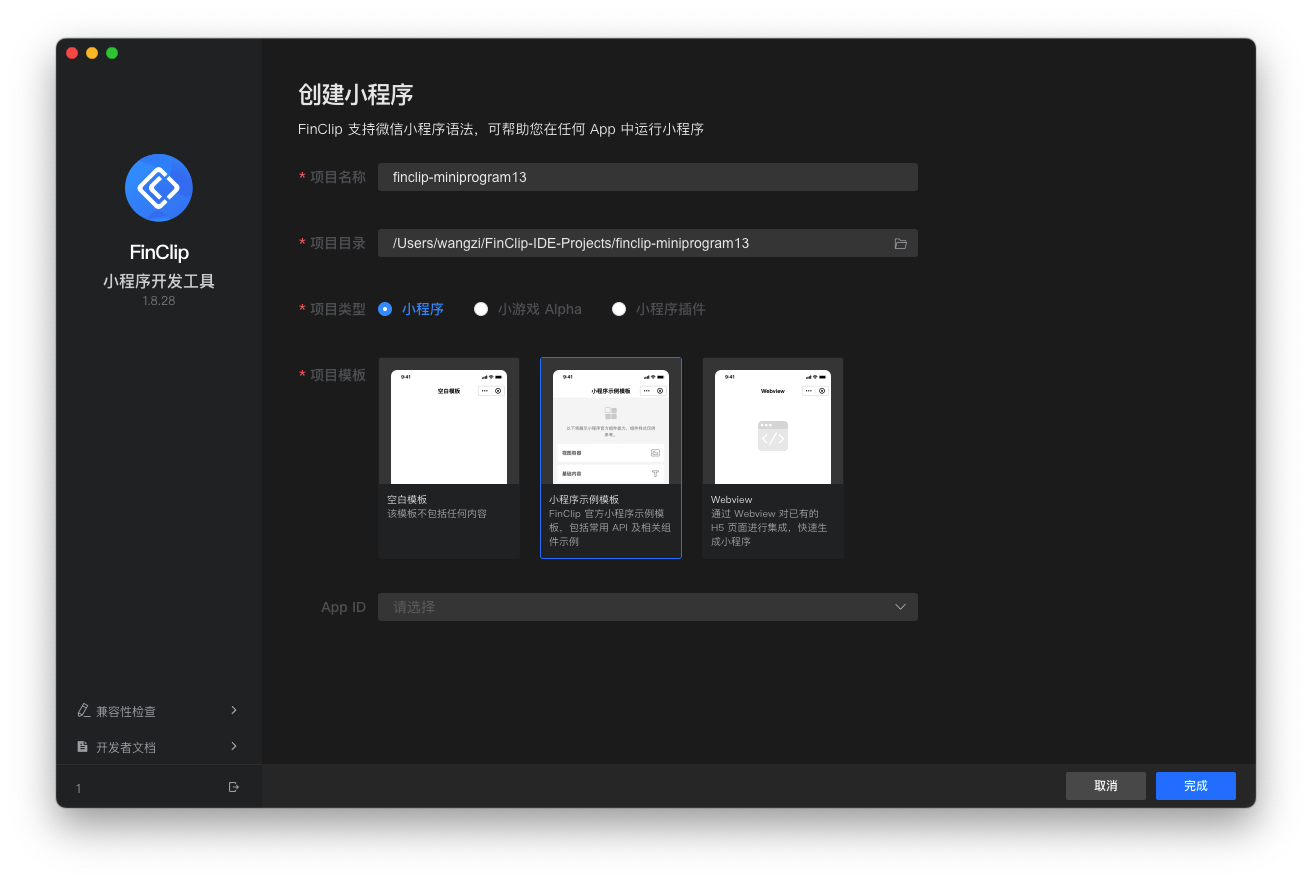
When selecting an existing Mini-Program, it is recommended that you use the compatibility tool to check the availability of the current code.

You can edit and debug the code using the Developer Tools until your Mini-Program's UI display and business logic perform correctly.
For development and debugging references, please see the Mini-Program Development Documentation: Mini-Program Development To open HTML5 format applications, you can use WebView embedding. See: How to Convert HTML5 Projects to Mini-Programs
After completing the Mini-Program code development, you can click the "Preview" button at the top of the Developer Tools to view the effect.
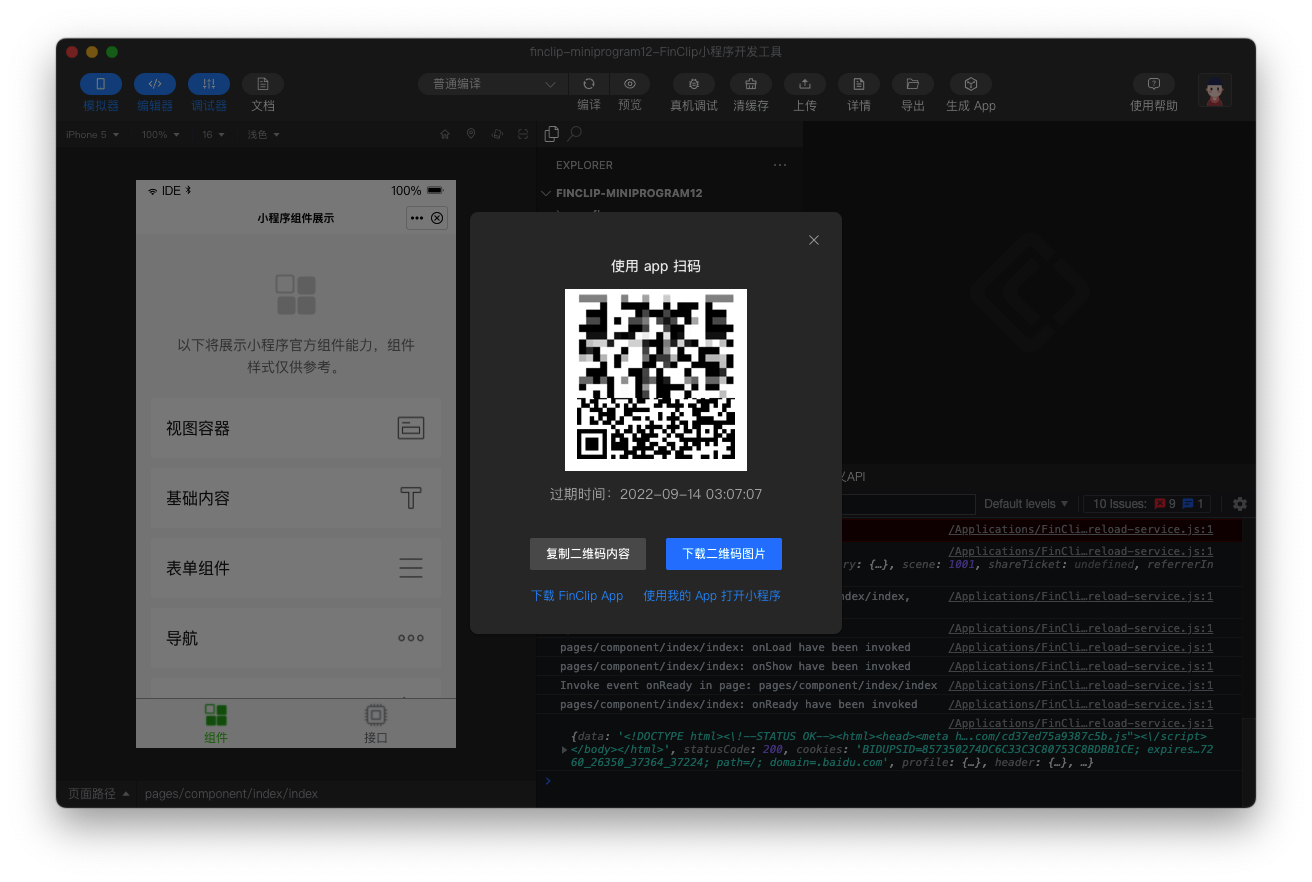
Scanning the QR code to preview the Mini-Program requires using the FinClip App. You can search for "FinClip" in the App Store, log in with your registered account, click the "Scan" button in the top right corner of the App, and scan the QR code above.
For more information about the Developer Tools, see: Developer Tools Operation Guide For instructions on how to use the FinClip App, see: FinClip App Introduction
# Step 4: Release and Publish the Mini-Program
After completing Mini-Program development and debugging, you can directly click the "Upload" button at the top of the Developer Tools, select the Mini-Program that has been created, fill in the Mini-Program version and version description, and then upload the Mini-Program to the FinClip Management Console.
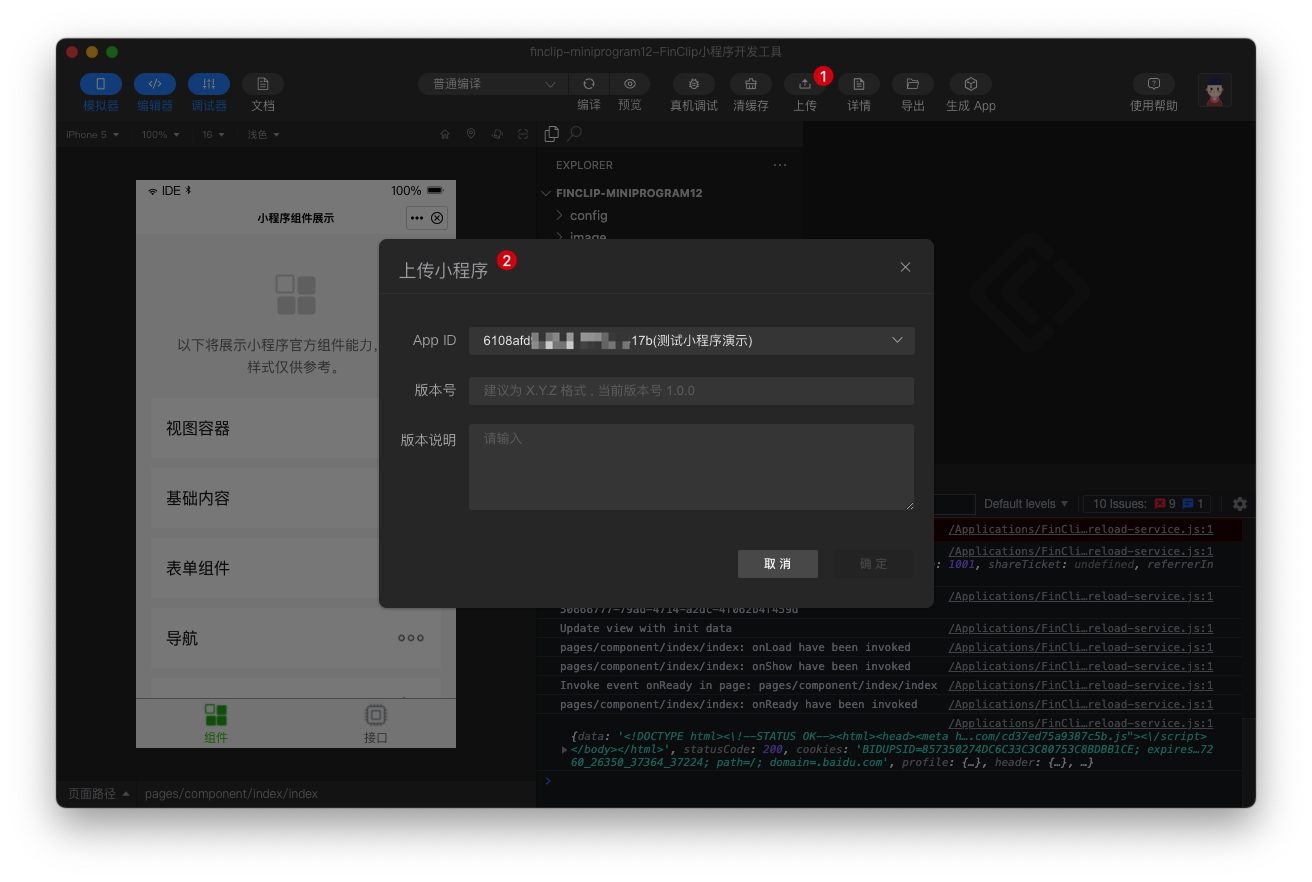
Log in to the Mini-Program Management Console, click the "Code Package Management" page in the Mini-Program details, and you will see the uploaded Mini-Program code package.
Please Note
The Mini-Program uploaded via the Developer Tools has undergone obfuscation and encryption operations. When using the "Private Cloud" environment, manual uploading of compiled Mini-Program code packages is also supported, so there is no need to worry about Mini-Program security or code leakage issues.
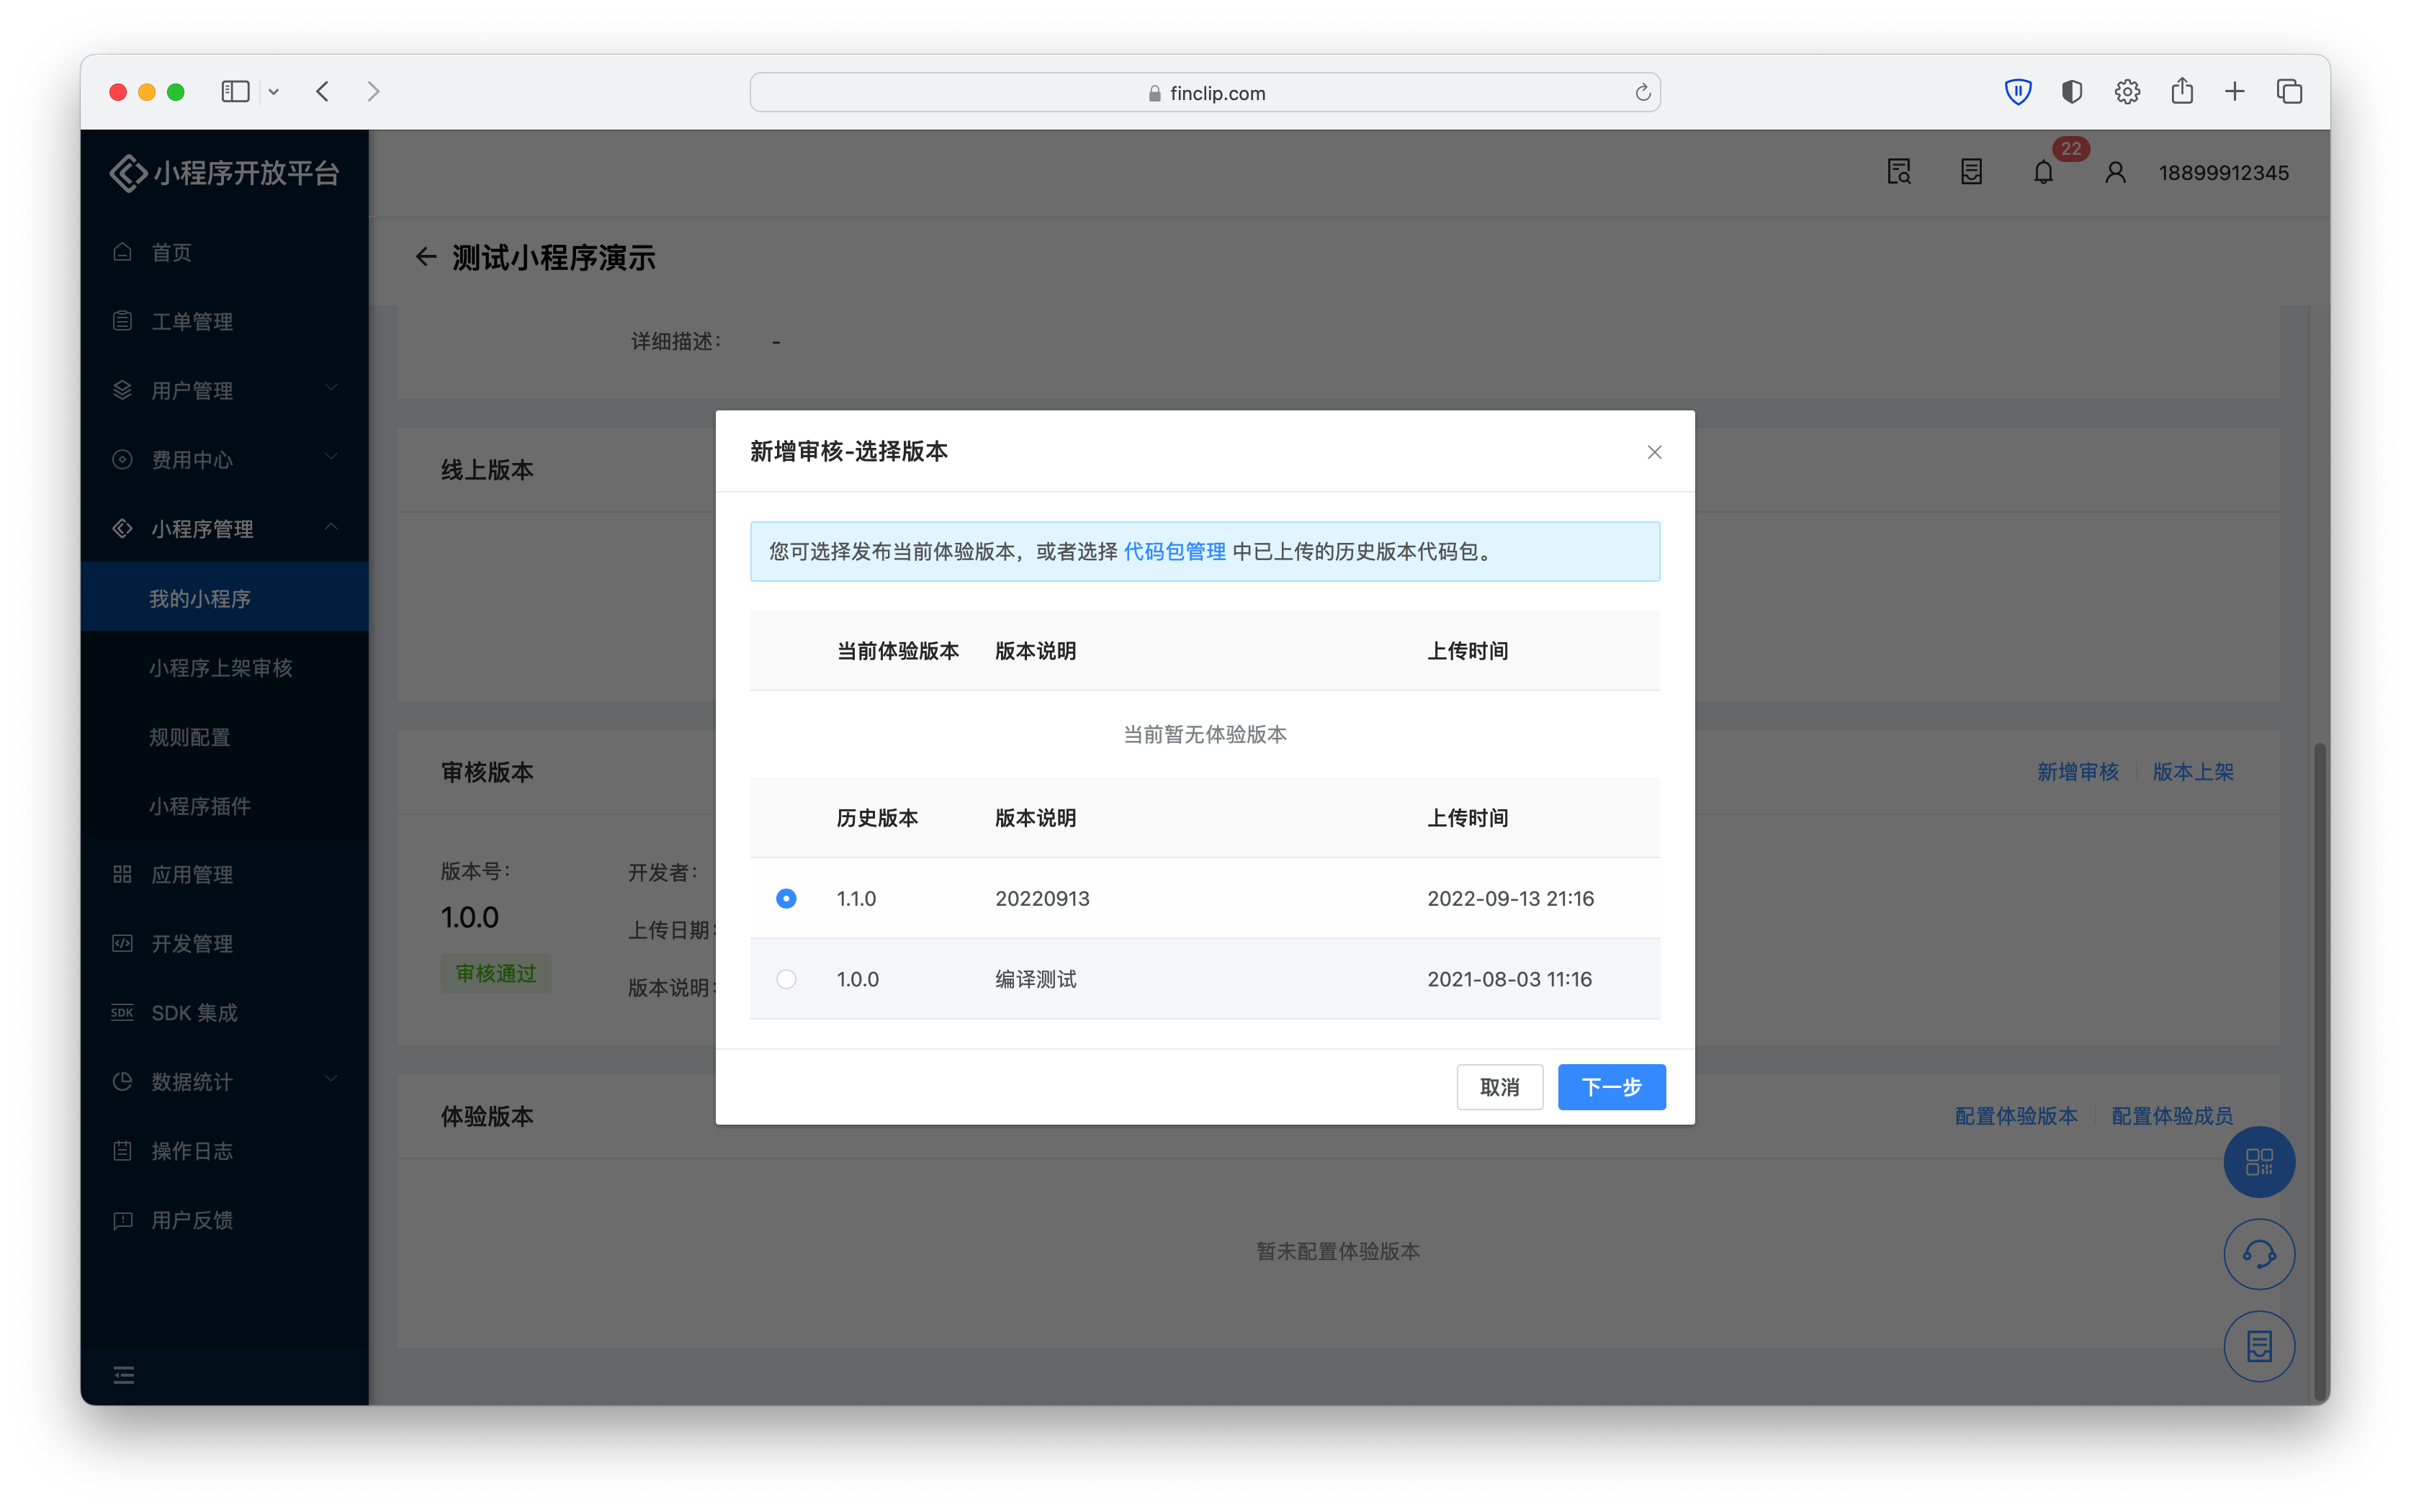
Click the "Add Review" button on the right side of the "Review Version" card on the Mini-Program details page, select the corresponding Mini-Program version, and complete the subsequent steps to submit the Mini-Program as a review version.
In the "Public Cloud (SaaS)" environment, you need to switch to the "Mini-Program Management - Mini-Program Release Review" page yourself to complete the Mini-Program review. In the private cloud environment, you need to switch to the operation side, click "Mini-Program Management - Mini-Program Release Review", and complete the Mini-Program review there.
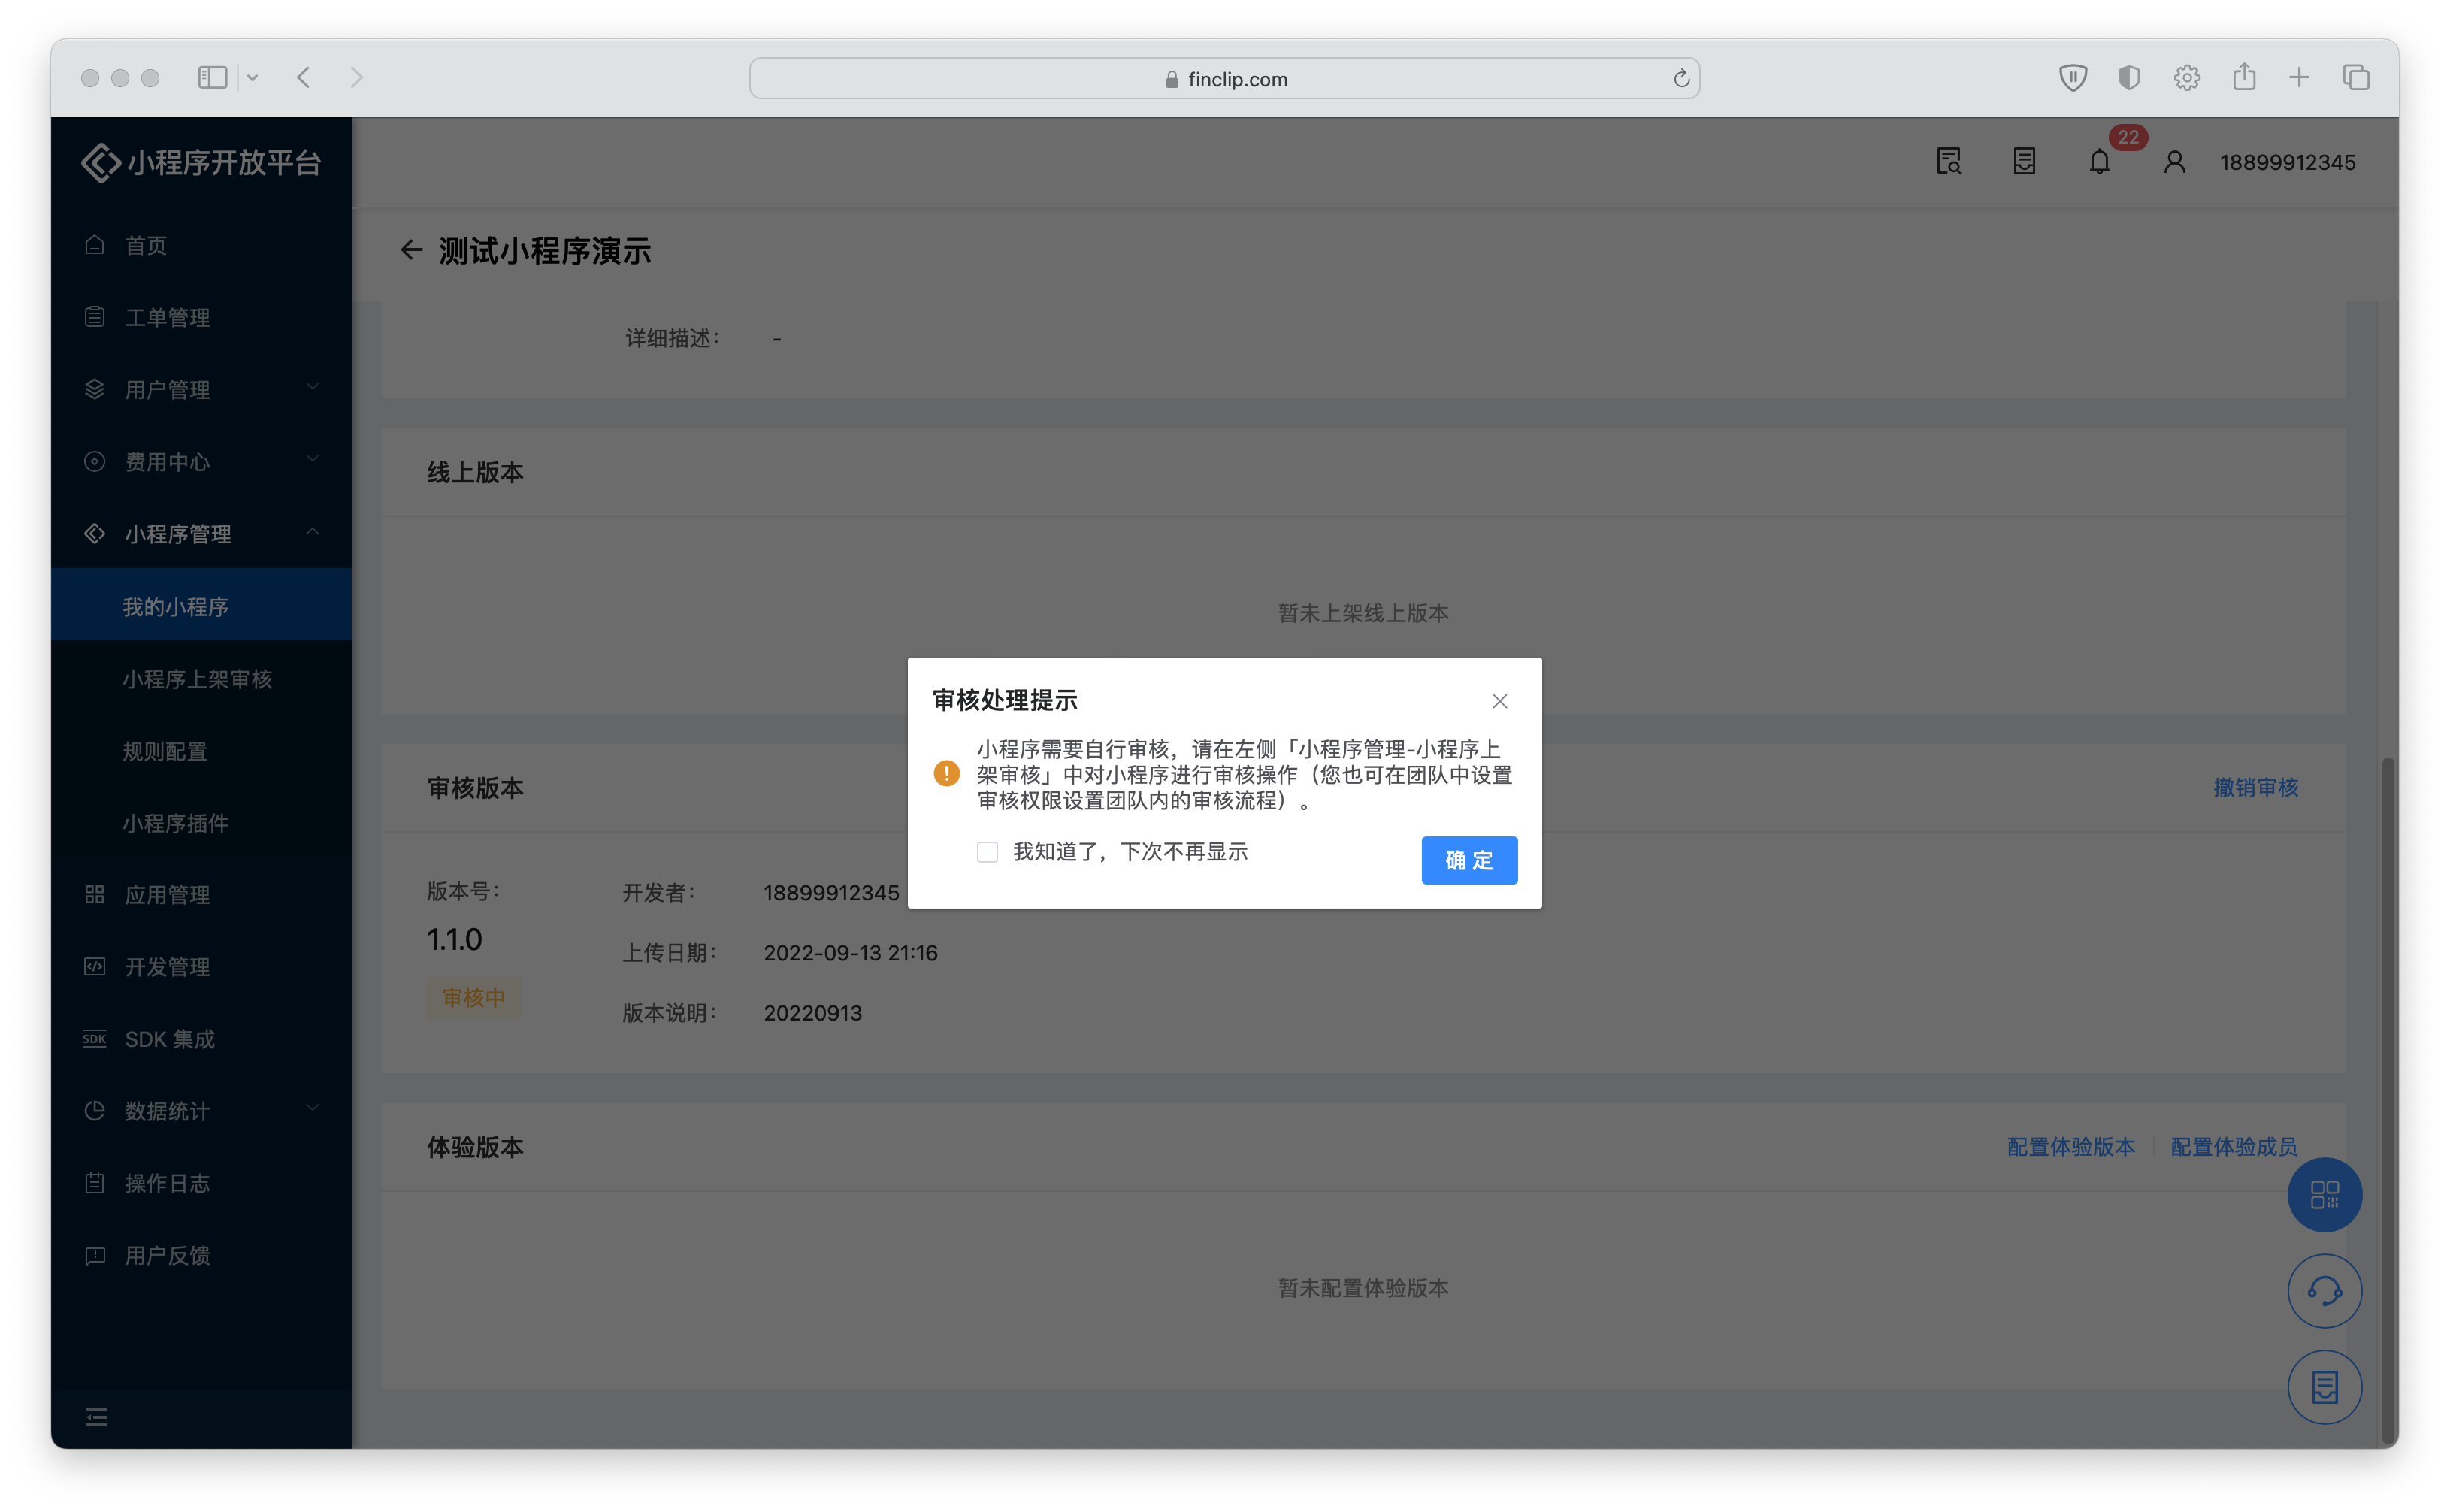
After the review is completed, you can return to this page, click the "Release Version" button on the right side of the "Review Version" card, and complete the corresponding Mini-Program release operation. Before performing the release operation, please ensure that all domains requested by the Mini-Program have been correctly configured in "Development Management - Domain Management".
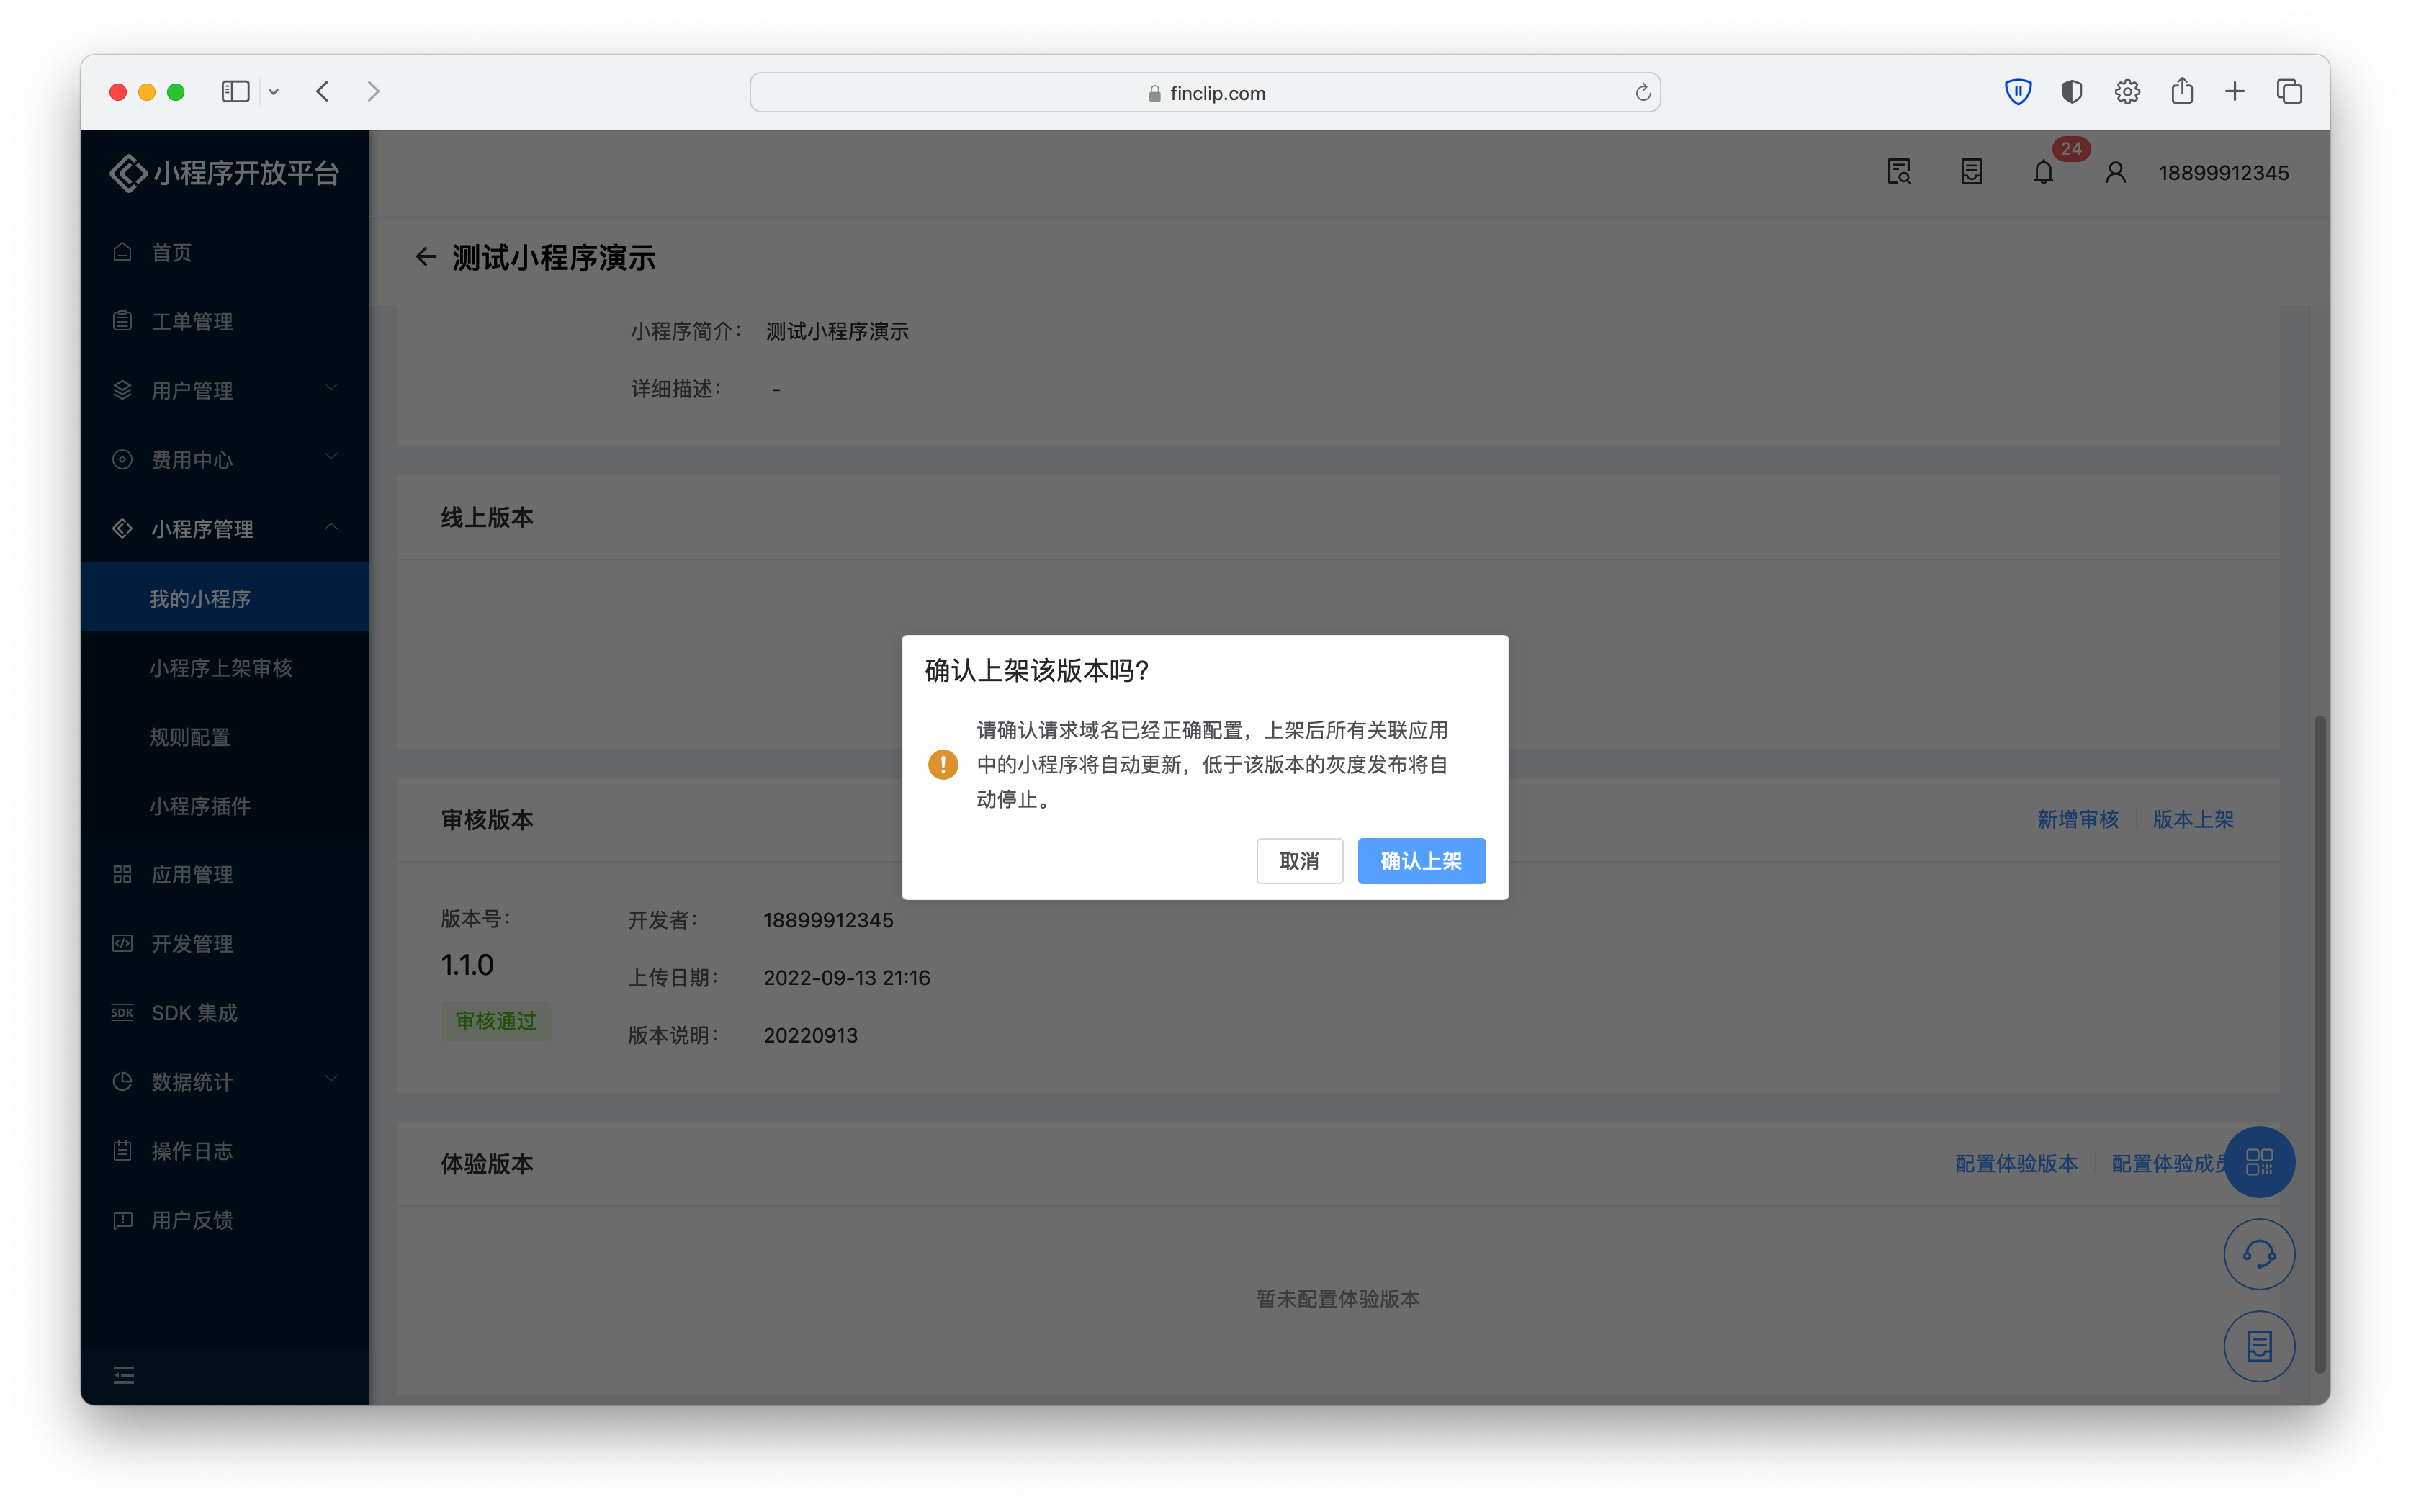
To view the Mini-Program release and takedown guide in the "Public Cloud (SaaS)" environment, please click here To view the Mini-Program release and takedown guide in the "Private Cloud" environment, please click here
After completing this step, it means you have successfully completed the process of Mini-Program compilation, debugging, release, and publishing. The next step is to associate the Mini-Program with your own App.
# Step 5: Associate the Mini-Program with Your Own App
Associating the Mini-Program with your own App requires the following steps:
- Obtain the App's BundleID using mobile development tools (Xcode or Android Studio) (How to obtain?);
- Enter the FinClip Management Console, go to the "Application Management" page, click the "Add Partner Application" button, and fill in the application name and affiliated enterprise;
- Expand the newly created application, click the "Add BundleID" button below, and fill in the application BundleID and platform;
- Click the "Associate Mini-Program" button to the right of the application name, and select the Mini-Program released in the previous step.
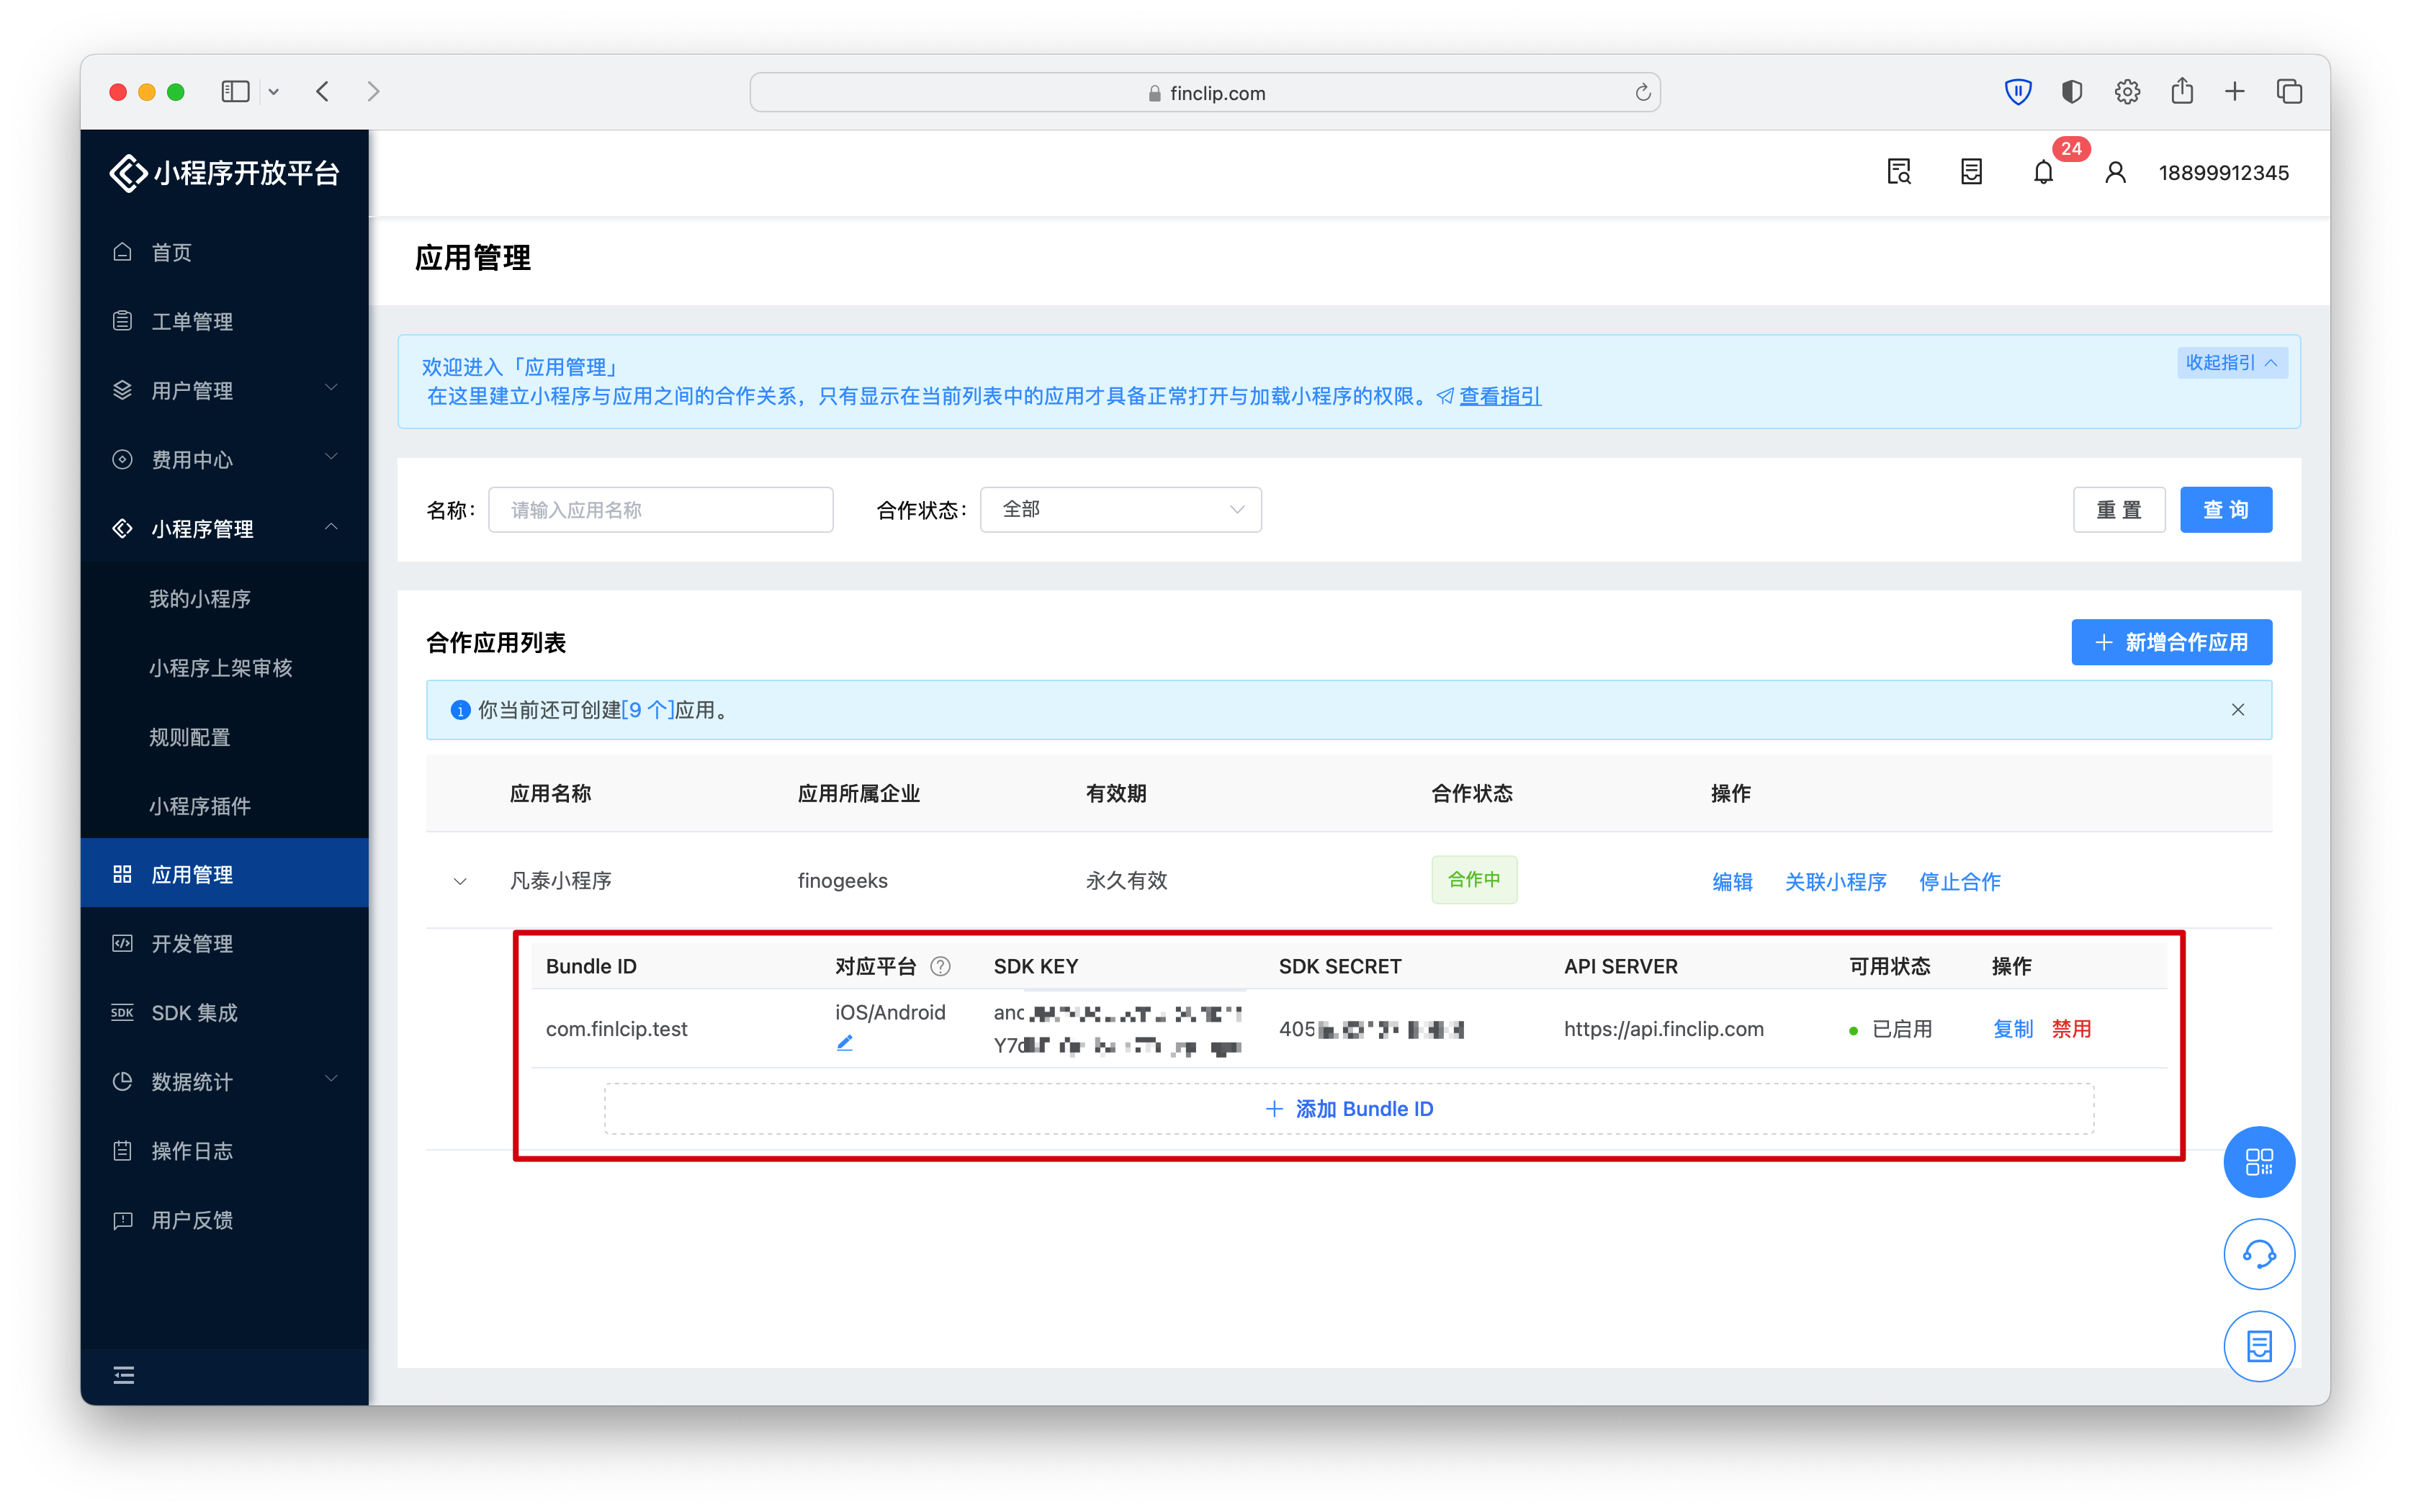
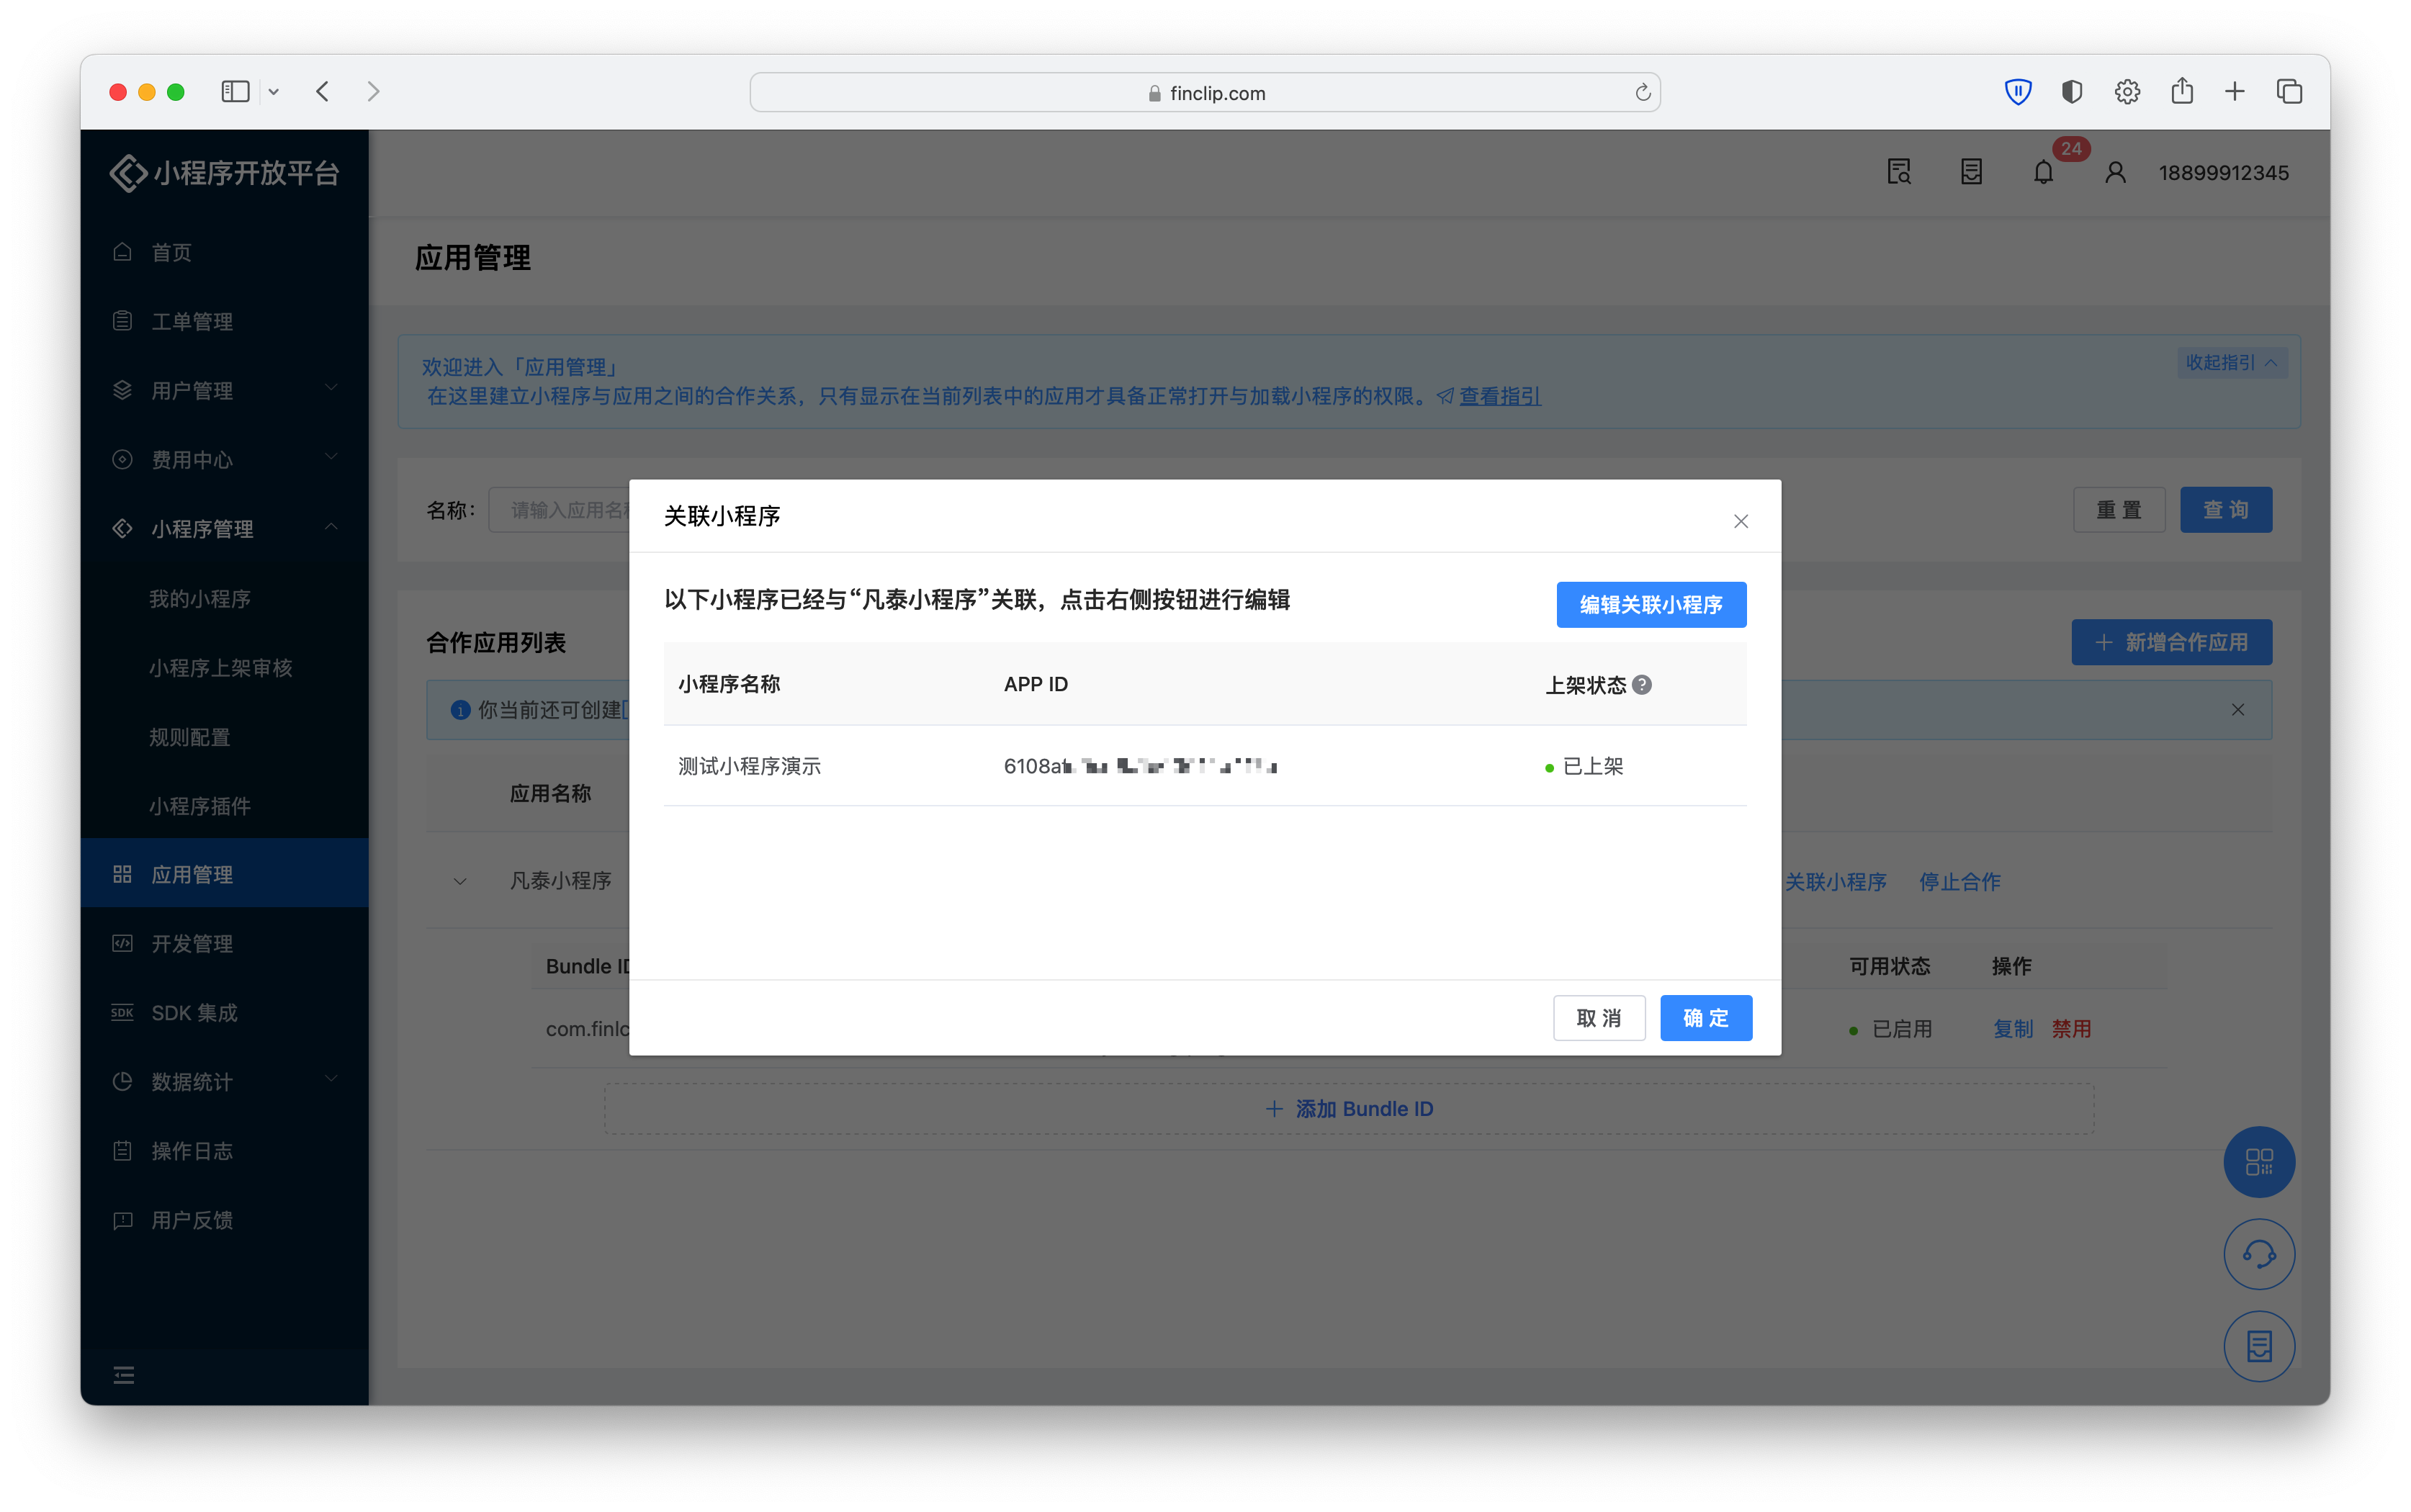
Through this step, we obtain the parameters for initializing the SDK in your own App. These parameters specifically include SDK KEY, SDK SECRET, API SERVER, etc.
To view the partner application association guide in the "Public Cloud (SaaS)" environment, please click here To view the partner application association guide in the "Private Cloud" environment, please click here
# Step 6: Integrate the FinClip Mini-Program SDK into Your Own App
FinClip currently supports integrating the Mini-Program SDK in iOS, Android, Flutter, React Native, uni-app, and Desktop environments. Please refer to the following documentation:
- iOS Integration Documentation: /runtime-sdk/ios/ios-integrate.html
- Android Integration Documentation: /runtime-sdk/android/android-integrate.html
- Flutter Integration Documentation: /runtime-sdk/flutter/flutter-integrate.html
- React Native Integration Documentation: /runtime-sdk/reactNative/rn-integrate.html
- uni-app Integration Documentation: /runtime-sdk/uniapp/uni-integrate.html
- Desktop Integration Documentation: /runtime-sdk/windows/windows-integrate.html
After integrating the SDK, you need to verify and initialize the FinClip Mini-Program SDK using the parameters from the above steps. After the Mini-Program is initialized, there will be a success or failure callback. You can determine whether the SDK initialization was successful based on the callback information.
# Step 7: Open the Mini-Program in Your Own App
To open a Mini-Program in the App, you need to pass the Mini-Program AppID to the API in the FinClip Mini-Program SDK. You can refer to the following:
- How to open a Mini-Program on iOS: Open Mini-Program
- How to open a Mini-Program on Android: Open Mini-Program
Congratulations! The PoC Process is Complete!
At this point, the Mini-Program can run completely within your App, and you can also verify other functions of interest.