
# Mini-Program to App Generation
Feature Background
The Mini-Program to App generation feature is an additional function within the Developer Tools, designed to help Mini-Program developers quickly convert existing Mini-Programs into mobile Apps that can be published to app stores or run locally. This significantly reduces development costs and improves development efficiency.
# 1. Feature Introduction
The Mini-Program to App generation feature assists developers in exporting existing Mini-Program code into installable files (or project files) usable on iOS and Android. Developers no longer need comprehensive mobile application development and packaging skills. By focusing their main efforts on product design and feature implementation within the Mini-Program, they can obtain Apps that are ready for app store submission or direct installation on smartphones and other smart devices.
Here, the exported iOS and Android applications serve merely as "shell apps" hosting the Mini-Program. The actual business logic and related requests are handled by the Mini-Program. Updates and upgrades for the App can also be managed through the Mini-Program.
Furthermore, users can customize the App's icon, launch splash screen, URL Scheme, permissions, and other elements to meet more diverse usage requirements.
# 2. Operation Instructions
Users can generate an App from a Mini-Program by following these steps:
- Configure App-related settings
- Generate the App package
# 2.1 Configure App-Related Settings
You can access the relevant functions via the "Generate App" menu in the upper right corner of the interface.
Please Note
Due to packaging and compilation constraints, all items configured in the "App Configuration" section can only be generated in "Cloud Packaging" projects. If you ultimately use the "Local Compilation" type, you will need to configure these settings yourself.
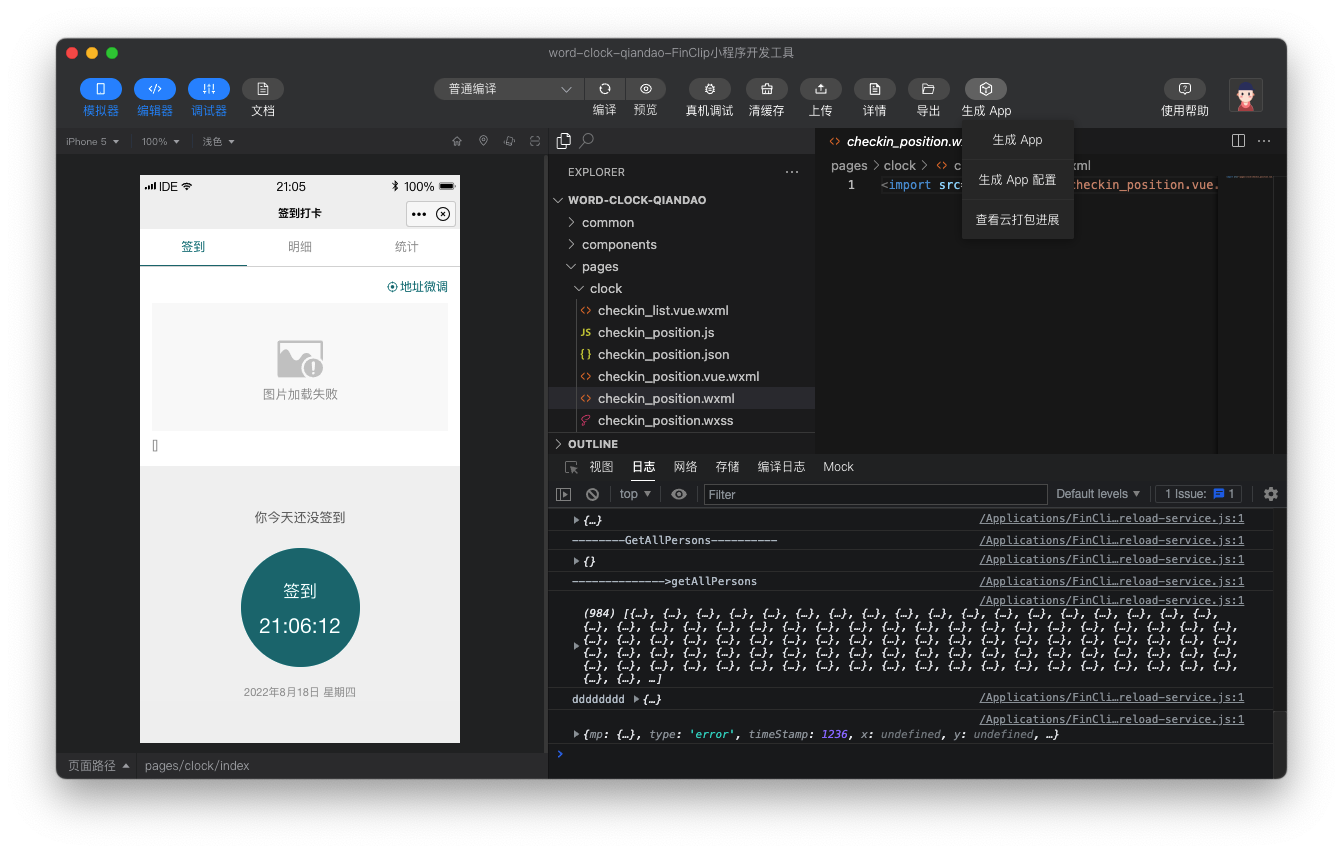 Click Developer Tools Menu Bar -> Generate App -> Generate App Configuration to configure the relevant content.
# 2.1.1 App Basic Configuration
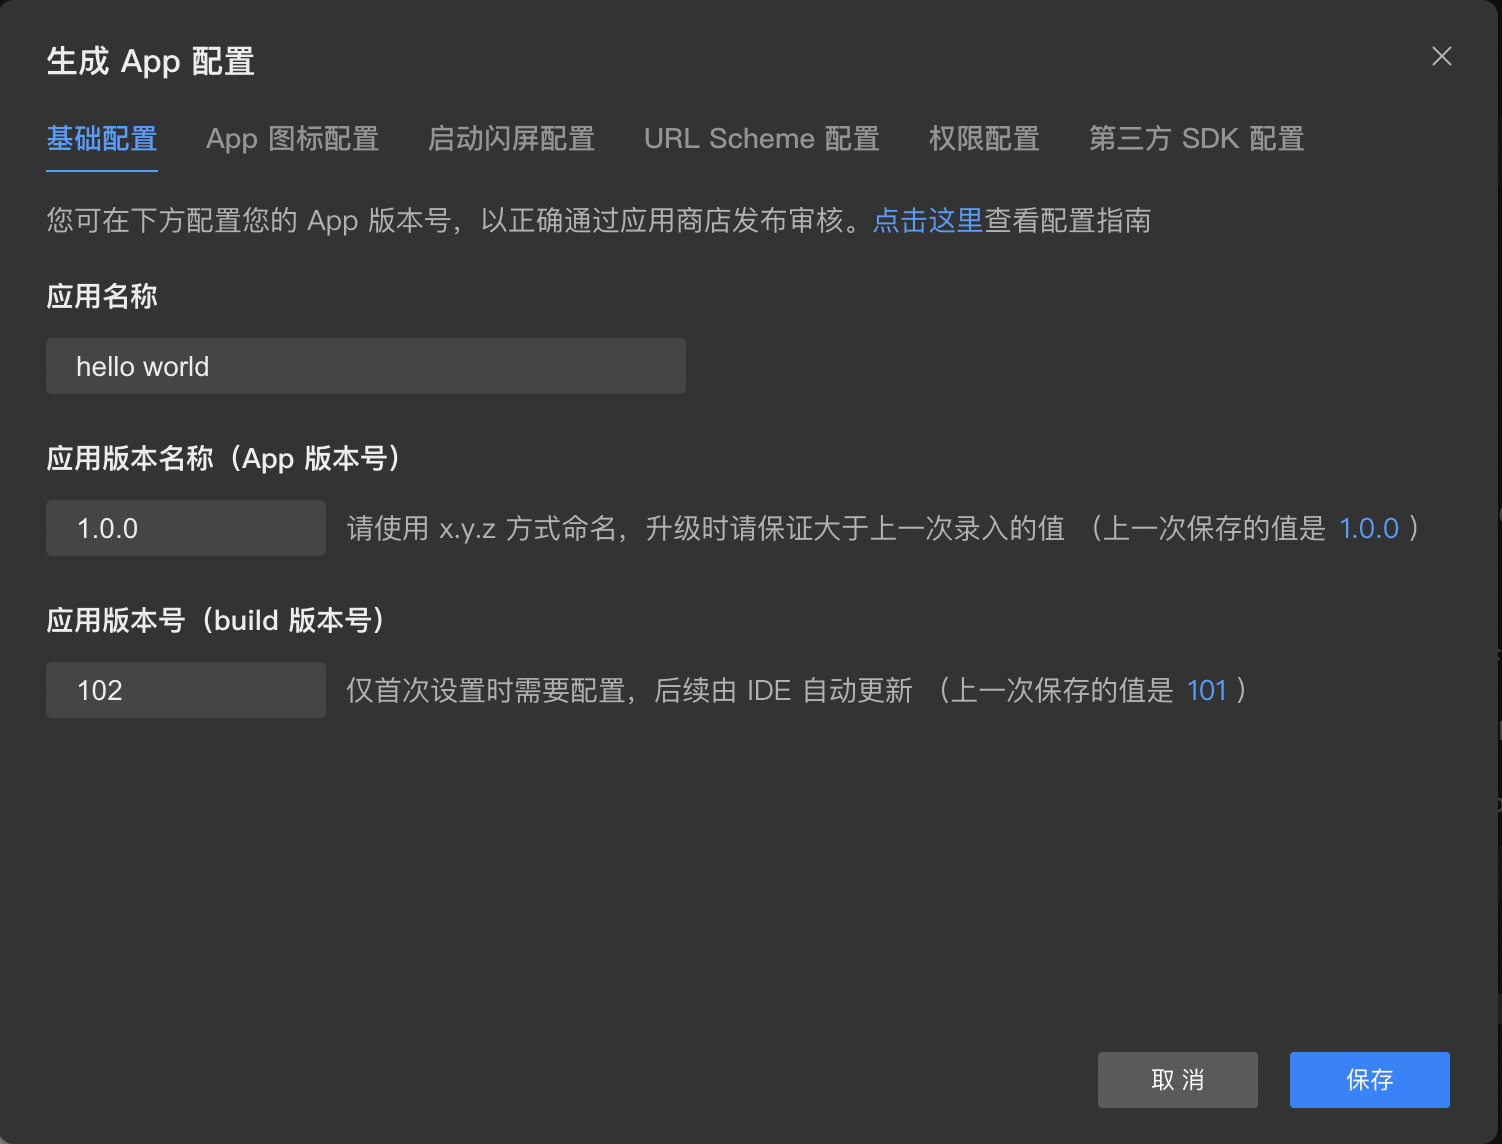
App Basic Configuration: Configure the application name, application App version number, and application build version number for the app to be packaged.
The App version number should follow the x.y.z format.
The application build version number is generated automatically.
# 2.1.2 App Icon Configuration
App Icon Configuration is divided into two modes: Simple Mode and Custom Mode.
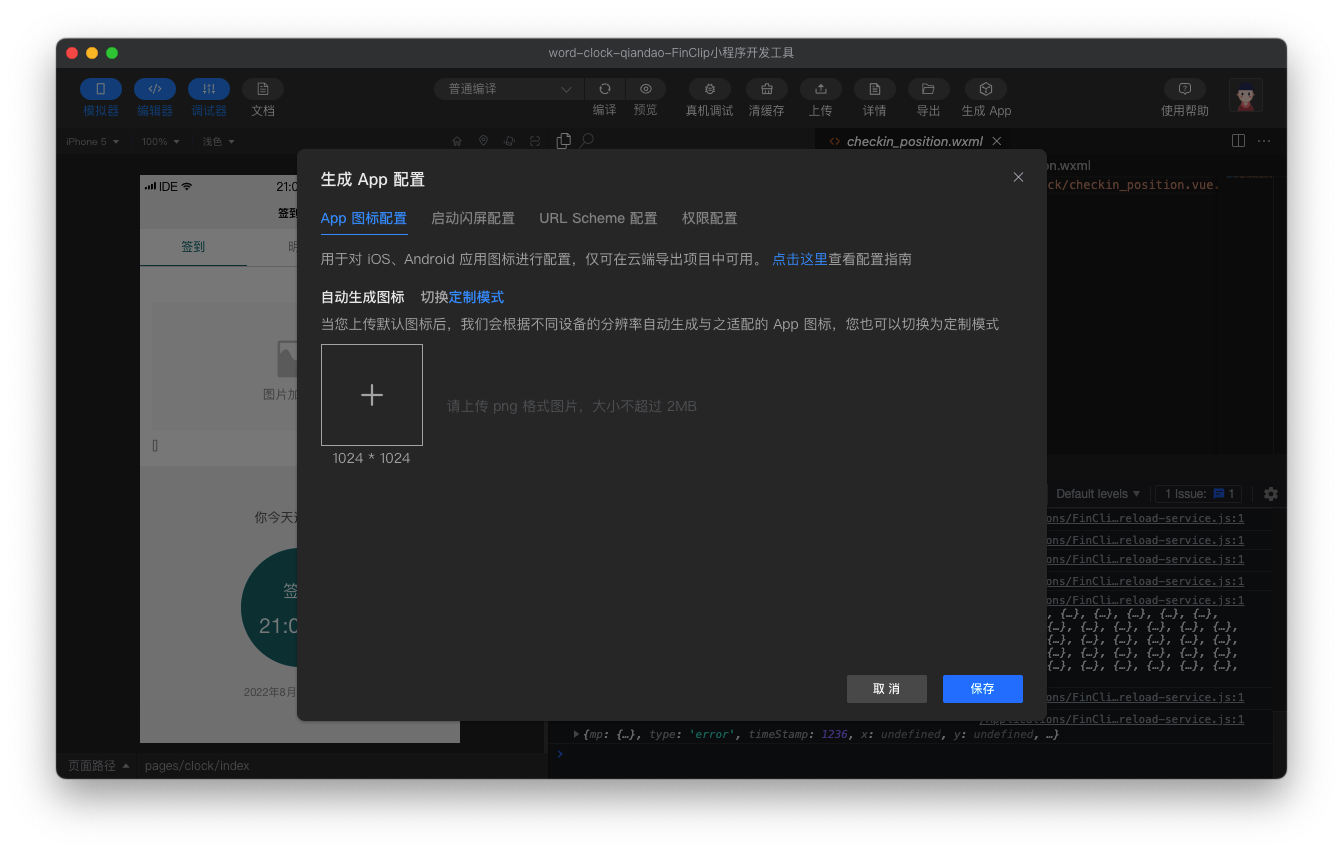
- Simple Mode, as shown above, requires the developer to configure only one icon image (1024 * 1024, PNG format). The Developer Tools will automatically generate the required images for both iOS and Android platforms.
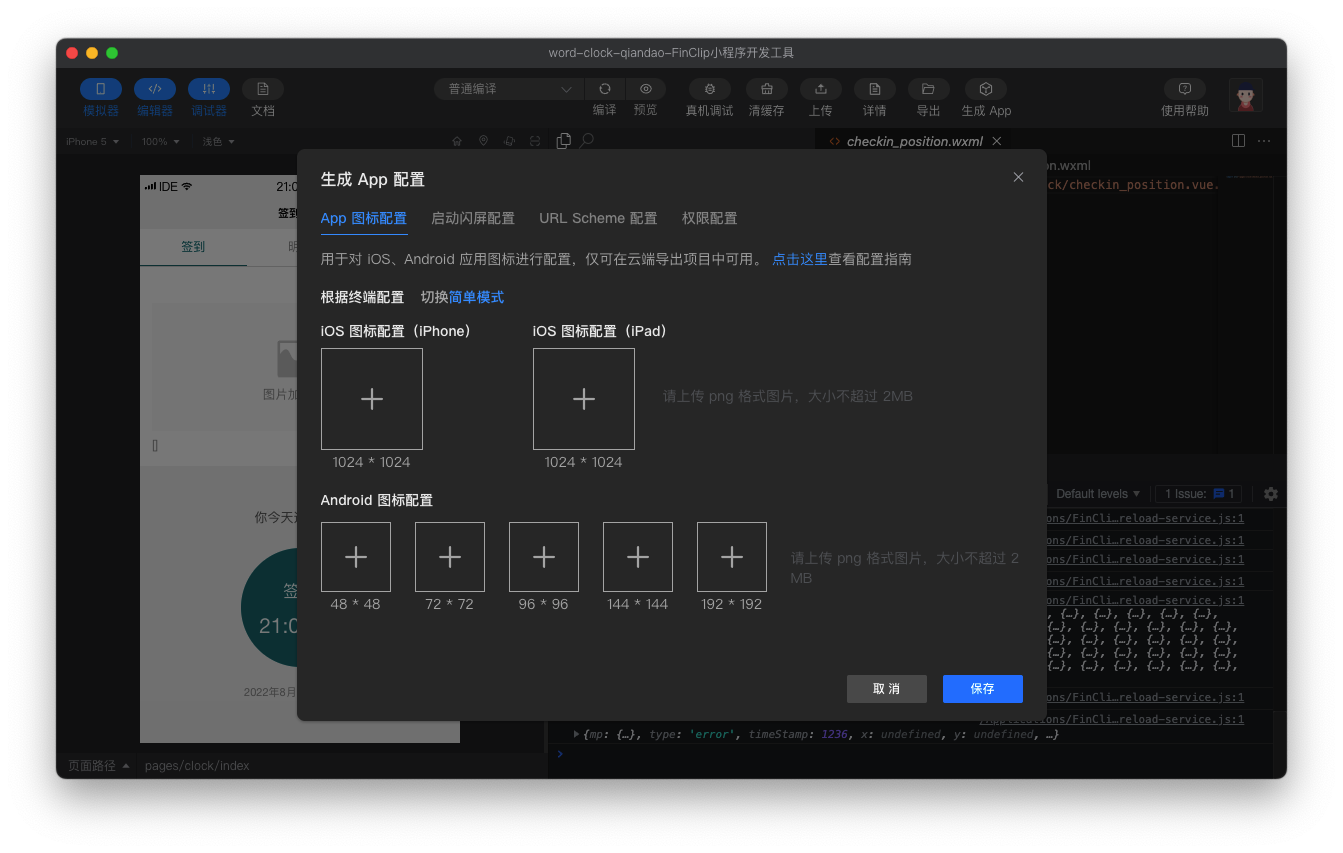
- Custom Mode, as shown above, requires the developer to configure multiple images according to their needs:
- iOS requires configuring icon images for both iPhone and iPad (1024×1024, PNG format).
- Android requires configuring icon images of sizes 48×48, 72×72, 96×96, 144×144, and 192×192 (PNG format).
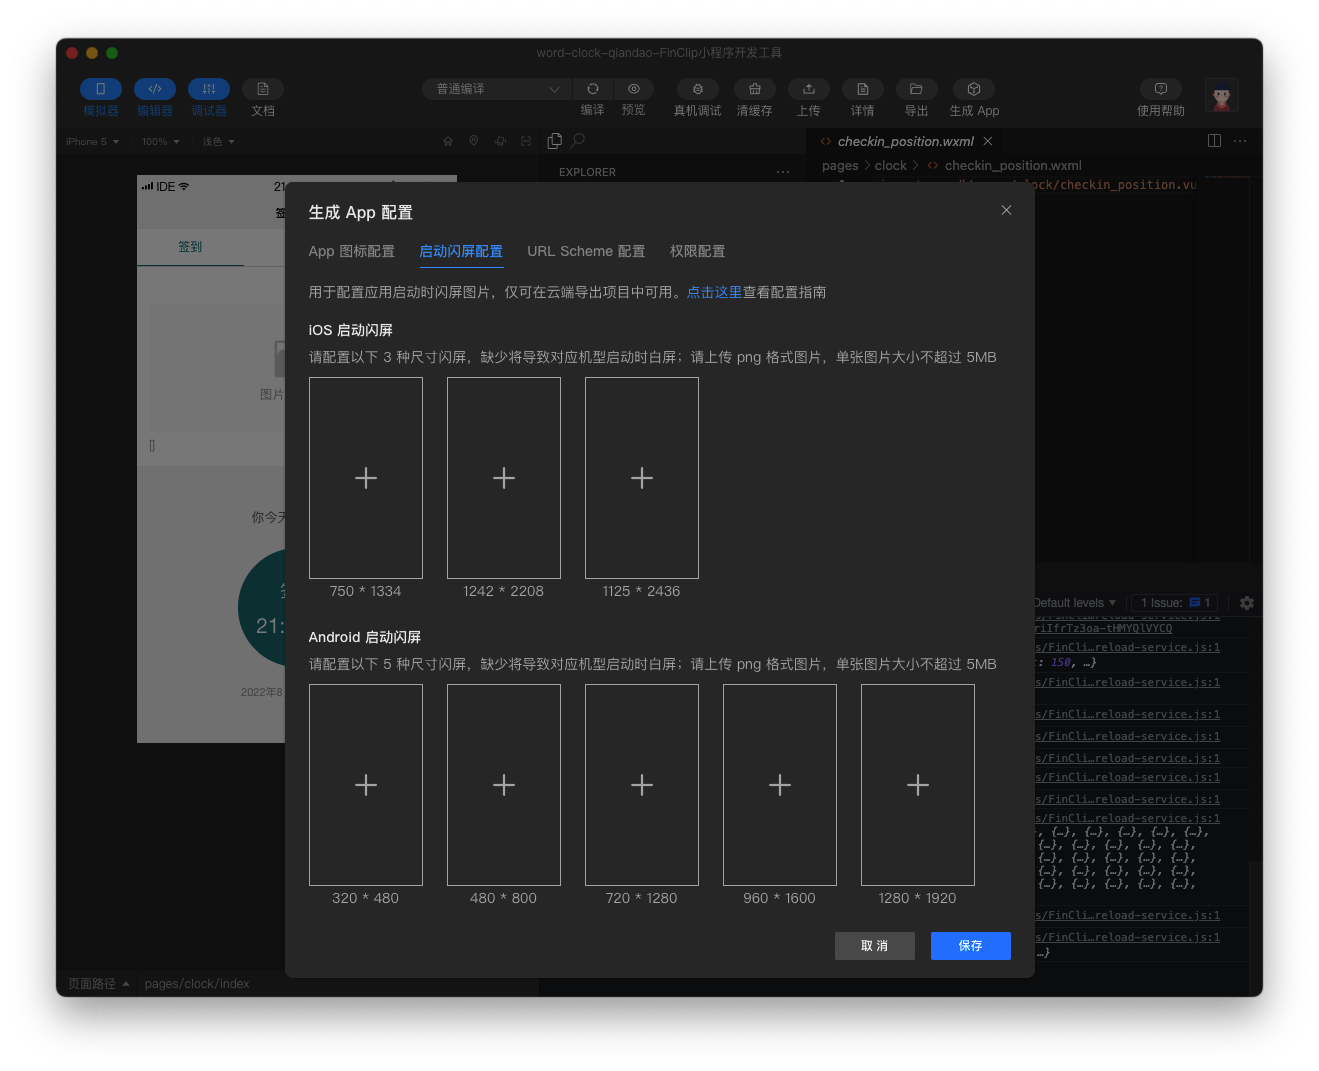
# 2.1.3 Launch Splash Screen Configuration
The launch splash screen is the loading image displayed when opening the App. Developers need to upload images of the appropriate dimensions for the iOS and Android platforms.
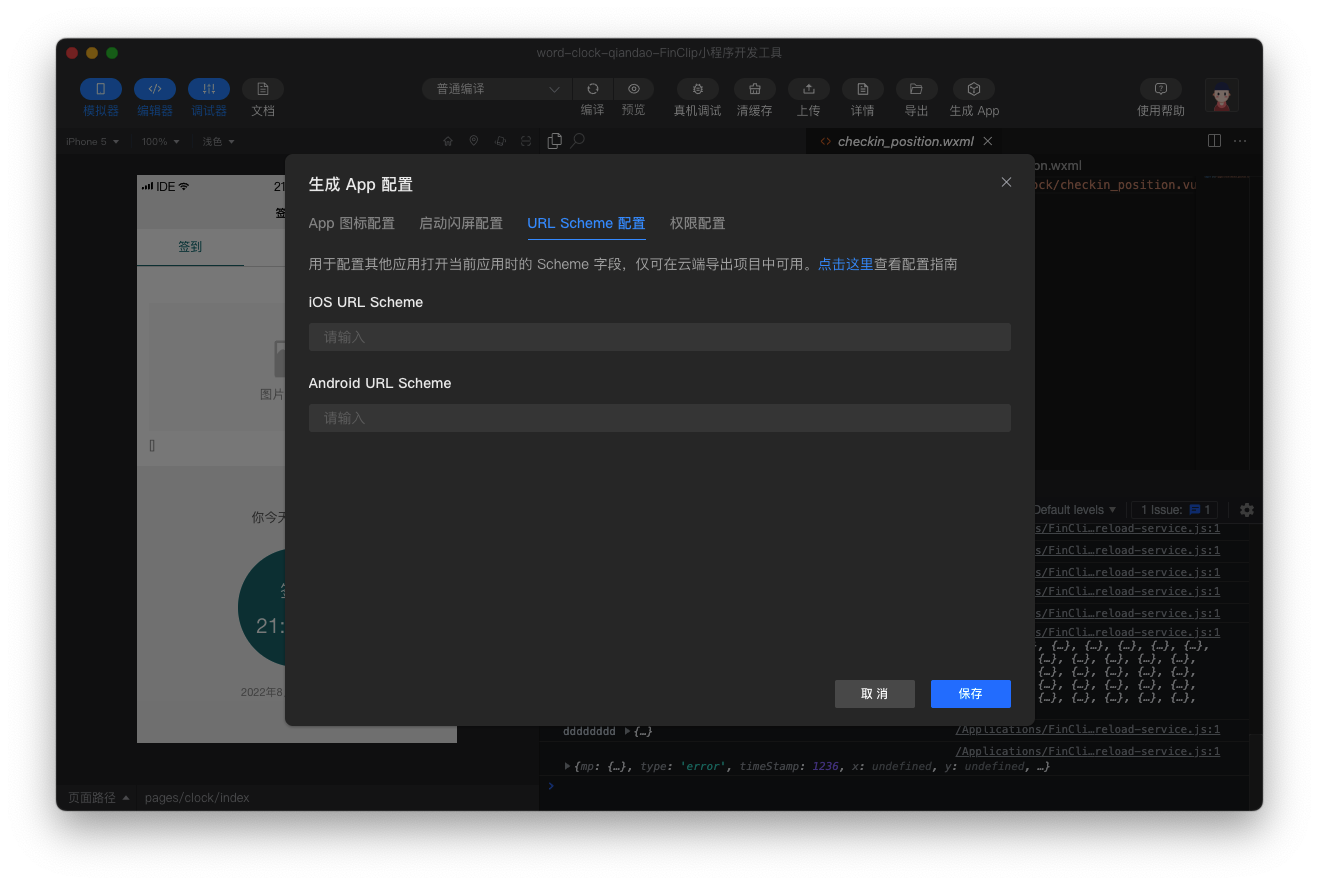
# 2.1.4 URL Scheme Configuration
The App URL Scheme serves as identification information for inter-app invocation, allowing you to open the App via channels like push notifications. Currently, both iOS and Android support configuration of only one URL Scheme.
# 2.1.5 Permission Configuration
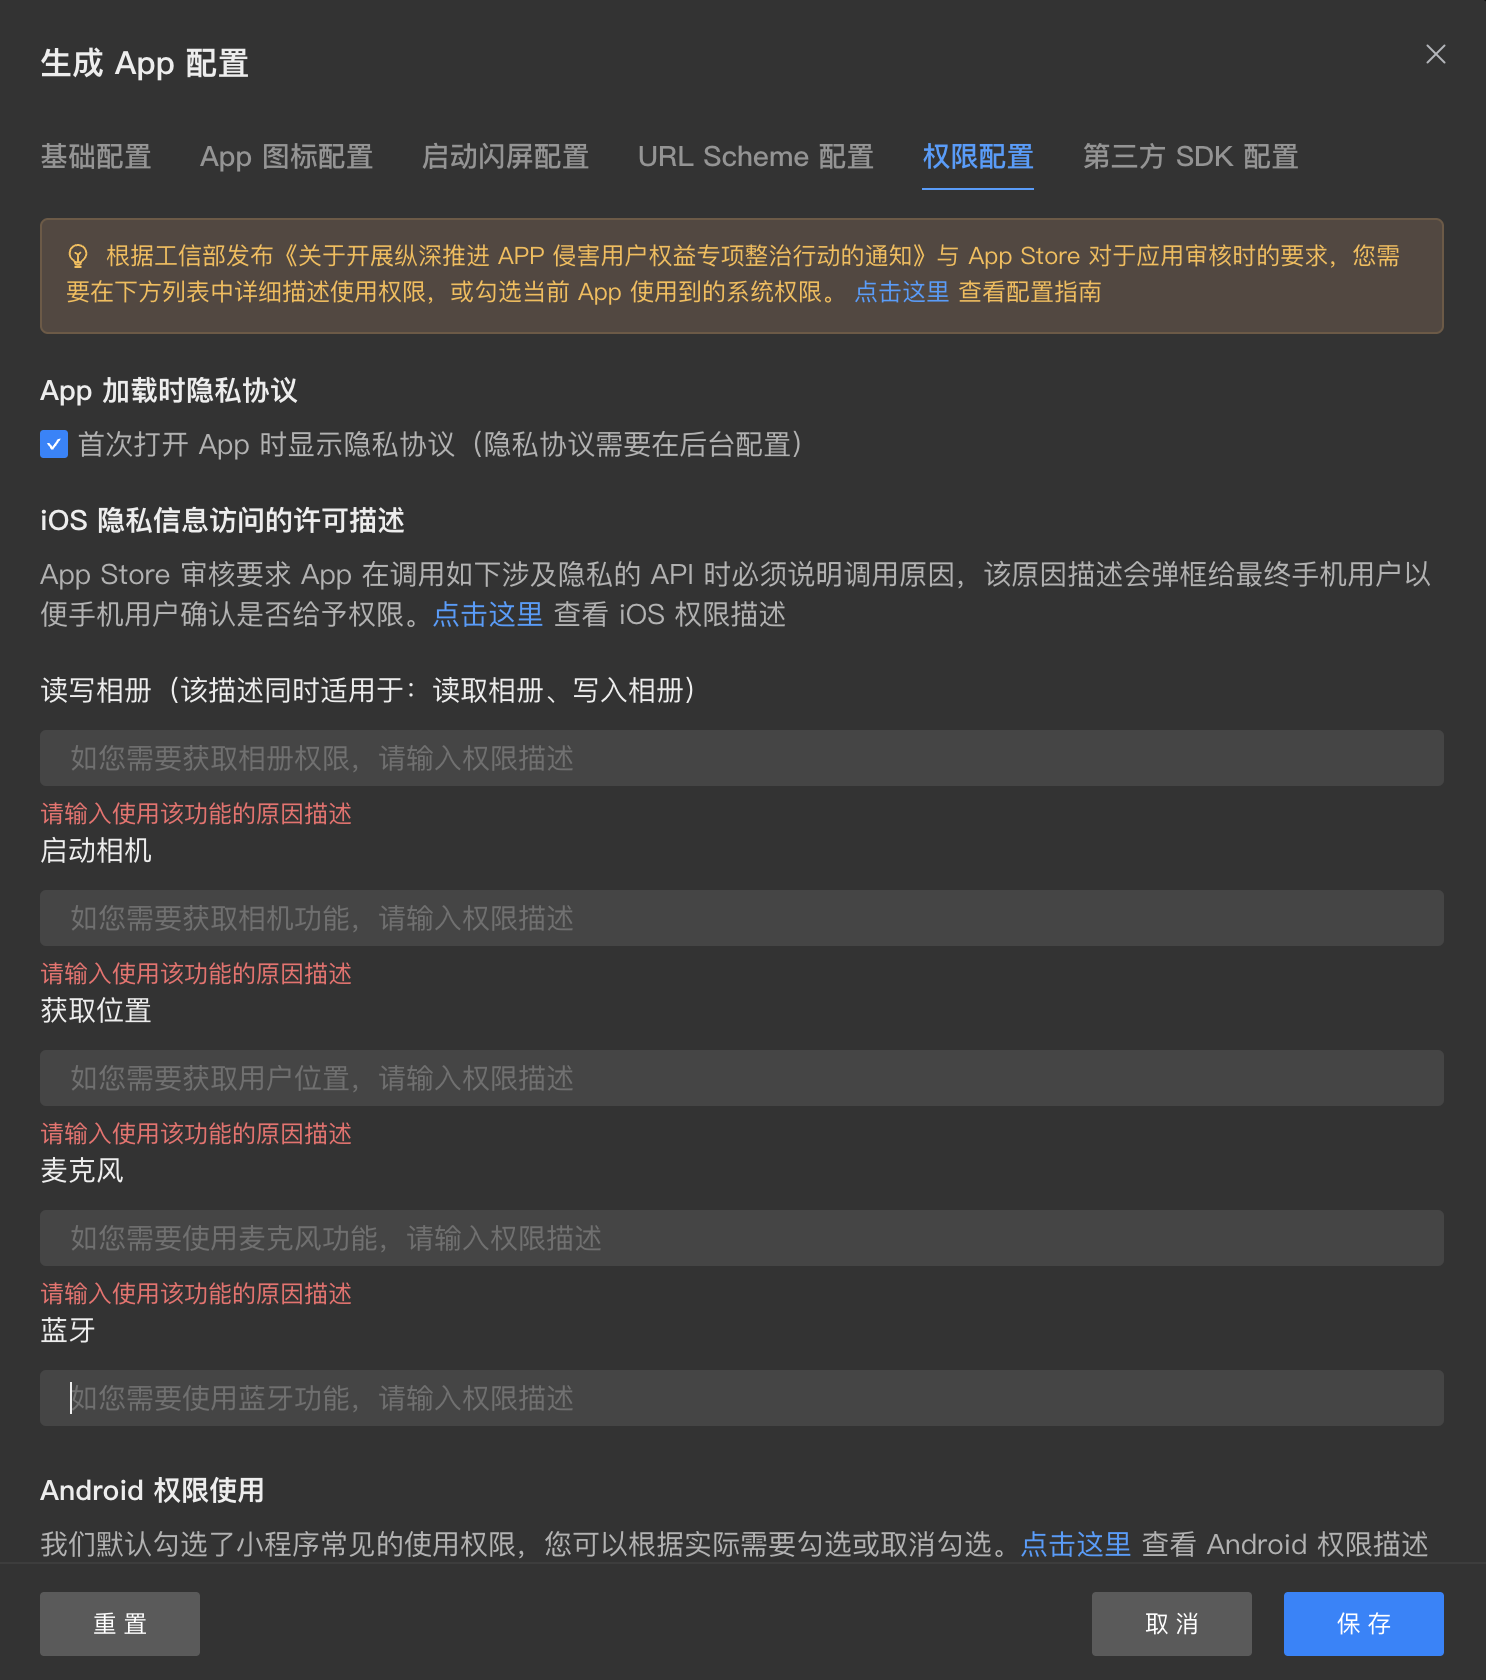
This section includes two parts: User Privacy Agreement Configuration and Permission Configuration:
User Privacy Configuration:
When checked, the privacy configuration will be displayed upon the first launch of the App. The corresponding settings need to be configured in "Management Console - Mini-Program Details - Privacy Settings".
Permission Configuration:
When publishing the App to an app store, it is necessary to configure the required usage permissions beforehand. The currently supported configurable permissions are as follows:
TIP
For the iOS side, users need to fill in descriptions explaining the purpose/usage of each permission. Due to review requirements, descriptions are mandatory for Photo Library Access, Camera Usage, Location Access, and Microphone Usage. Descriptions for other non-mandatory items are optional; if left blank, the permission will not be enabled by default.
- iOS Side:
- Photo Library Access
- Camera Usage
- Location Access
- Microphone Usage
- Bluetooth Usage (This permission is only required when using the extended Bluetooth SDK)
- Android Side:
- Location-related permissions:
- ACCESS_COARSE_LOCATION
- ACCESS_FINE_LOCATION
- Camera-related permissions:
- CAMERA
- I/O related permissions:
- READ_EXTERNAL_STORAGE
- WRITE_EXTERNAL_STORAGE
- Microphone-related permissions:
- RECORD_AUDIO
- Location-related permissions:
# 2.1.6 Third-party SDK Configuration
Refer to Extension SDK Parameter Configuration
# 2.2 Generate App Package
The Developer Tools currently provide two methods for generating Apps:
- Cloud Packaging (Recommended option, uses FinClip service to convert Mini-Program to App, no local compilation required)
- Local Compilation (Recommended for users with development experience, requires local compilation)
If you do not have experience in mobile App development, please select the "Cloud Packaging" option. This feature requires logging in to use.
# 2.2.1 Preparation
Before packaging the App, some preparatory work is needed, as detailed below:
- The user needs to have a Mini-Program package ready for packaging and a FinClip SaaS account. If not, refer to: Platform Registration.
- Create a Mini-Program on the SaaS platform and upload the Mini-Program via the Developer Tools. Refer to: Creating a Mini-Program.
- After uploading the Mini-Program code package, submit the Mini-Program for review and publishing. Refer to: Mini-Program Review and Publishing. At this point, you have a published Mini-Program. Remember the AppId of this Mini-Program, as it will be used later.
- Configure the associated application, add a bundleId, and associate the Mini-Program. Refer to Associating Applications and bundleId. In the step for associating the Mini-Program, associate the published Mini-Program mentioned above. Remember the newly added bundleId, as it will be useful later.
With this, the preparation work is complete. Now proceed with App packaging.
# 2.2.2 Cloud Packaging
Cloud Packaging requires completing the following steps sequentially:
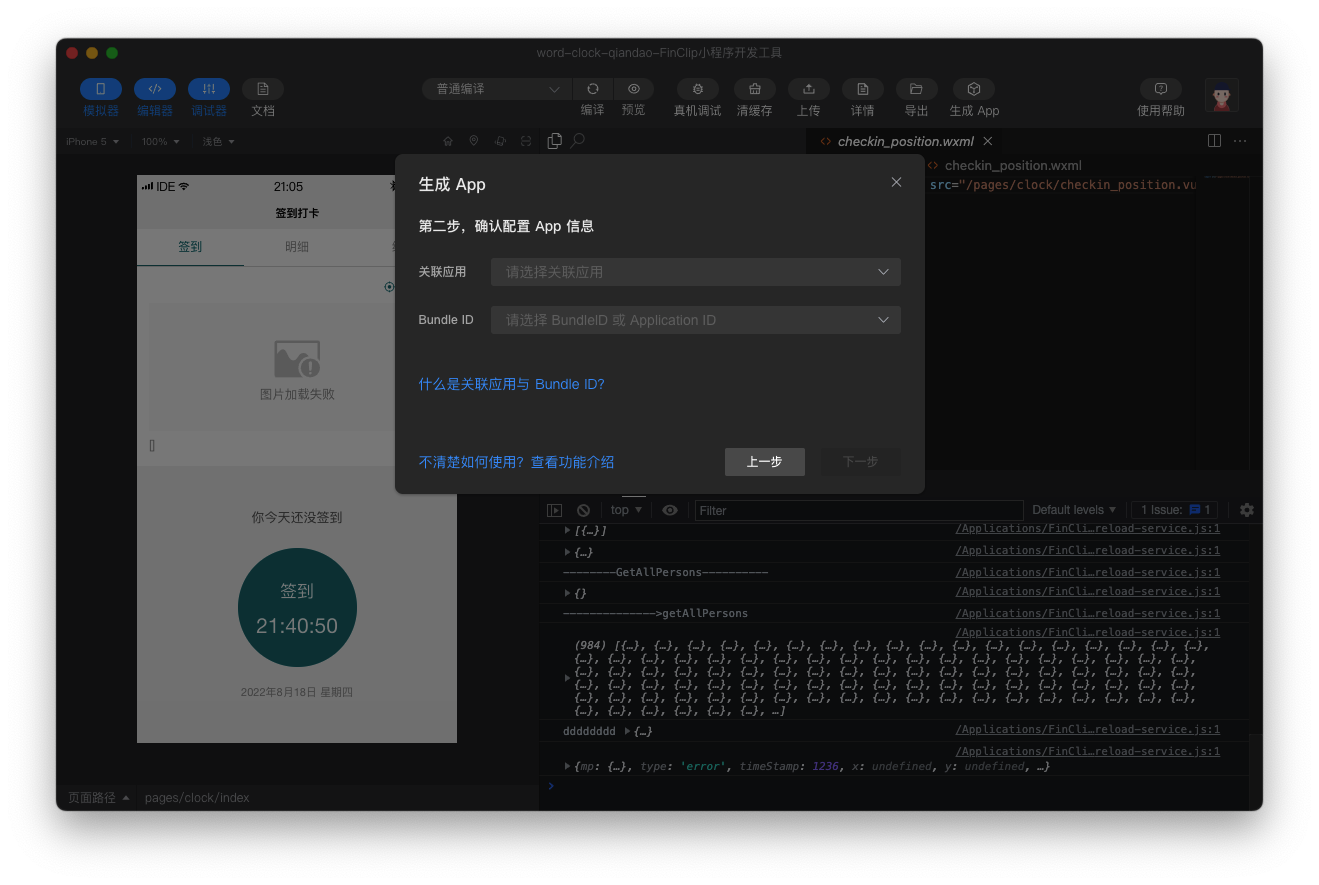
Step 1: Configure Mini-Program Information 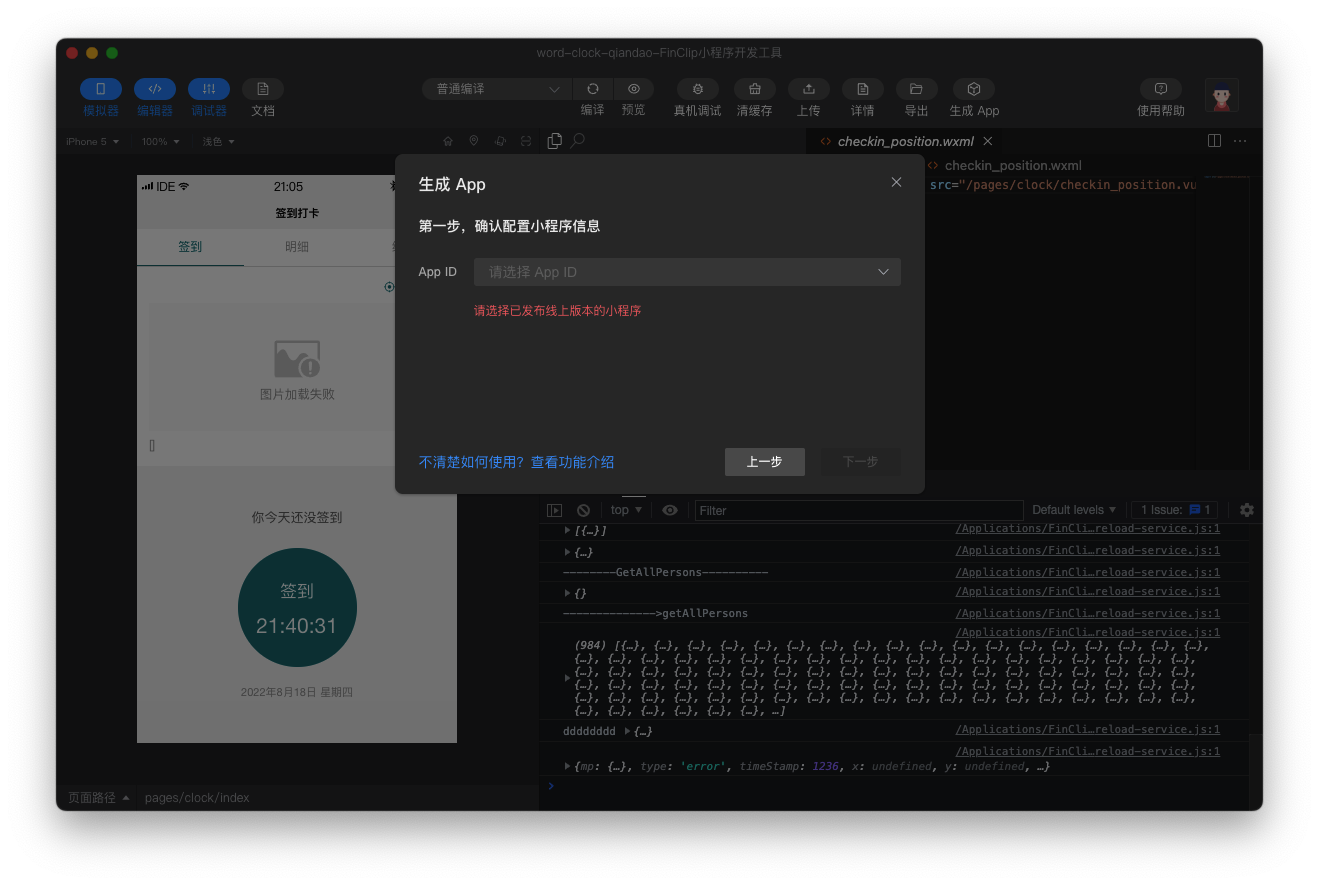 Step 2: Select Associated Application and BundleID
 Step 3: Upload Packaging Certificates
Since there is a one-to-one correspondence between certificates and BundleIDs, the required certificates need to be uploaded.
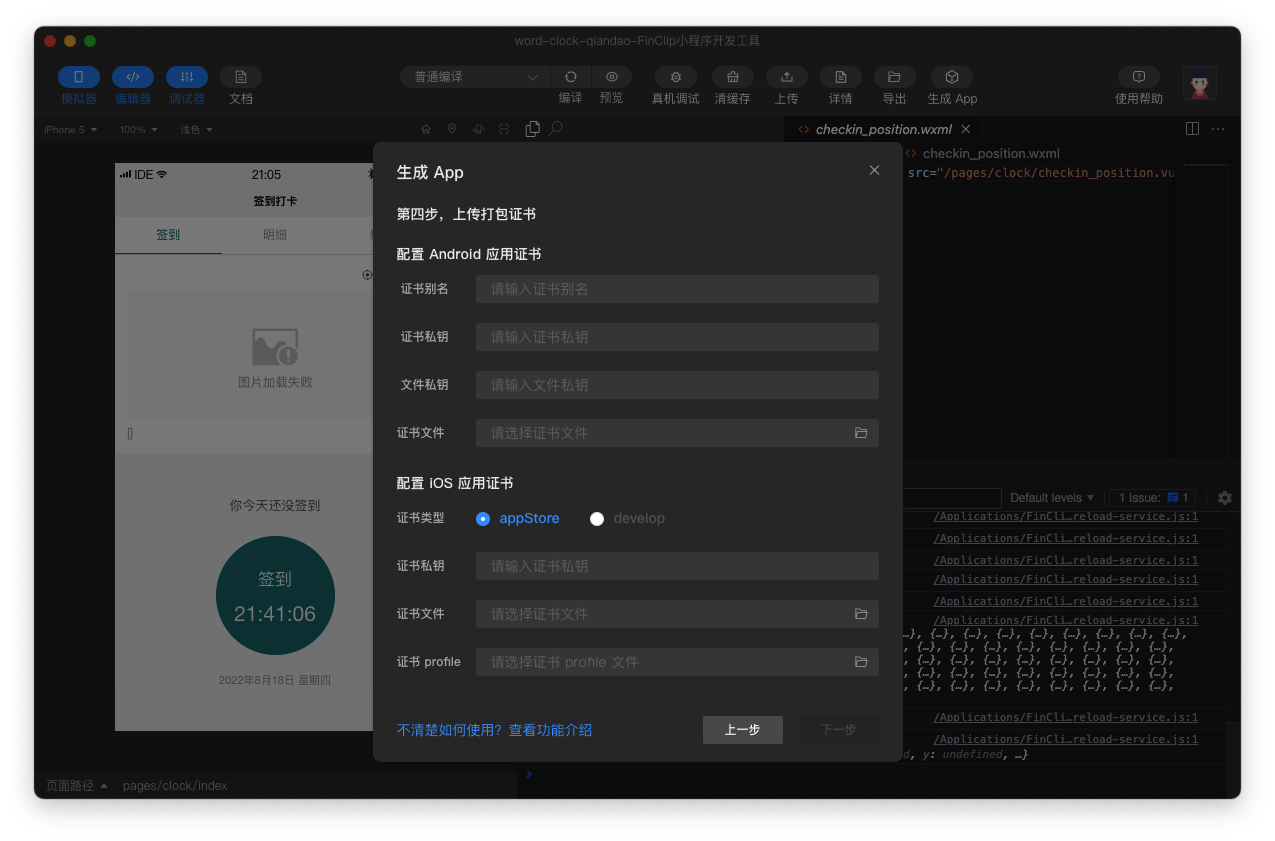
| iOS Certificates | Android Certificates |
|---|---|
| Refer to iOS Certificate Configuration to configure, export, and upload certificates for Production and Development environments, along with certificate passwords and provisioning profiles. | Refer to Building Android Applications, certificate private key (Key password), and file private key (Key store password). |
Note
If errors like Algorithm HmacPBESHA256 not available occur when packaging an Android application, it is usually due to a high JDK version used to generate the certificate. Please use OpenJDK8 or OpenJDK11 to generate the certificates used for building the Android application.
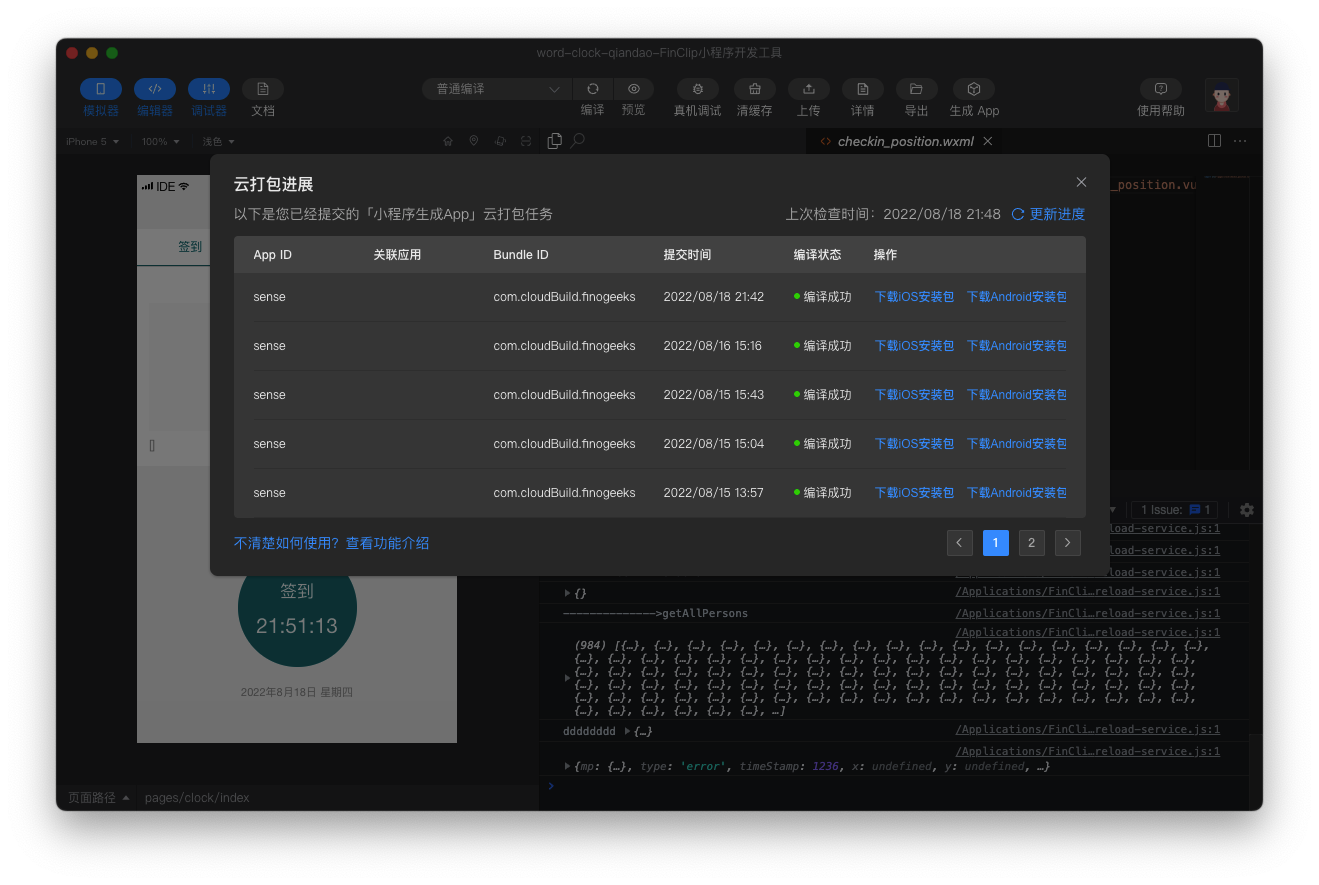
Step 4: Submit Cloud Packaging Task 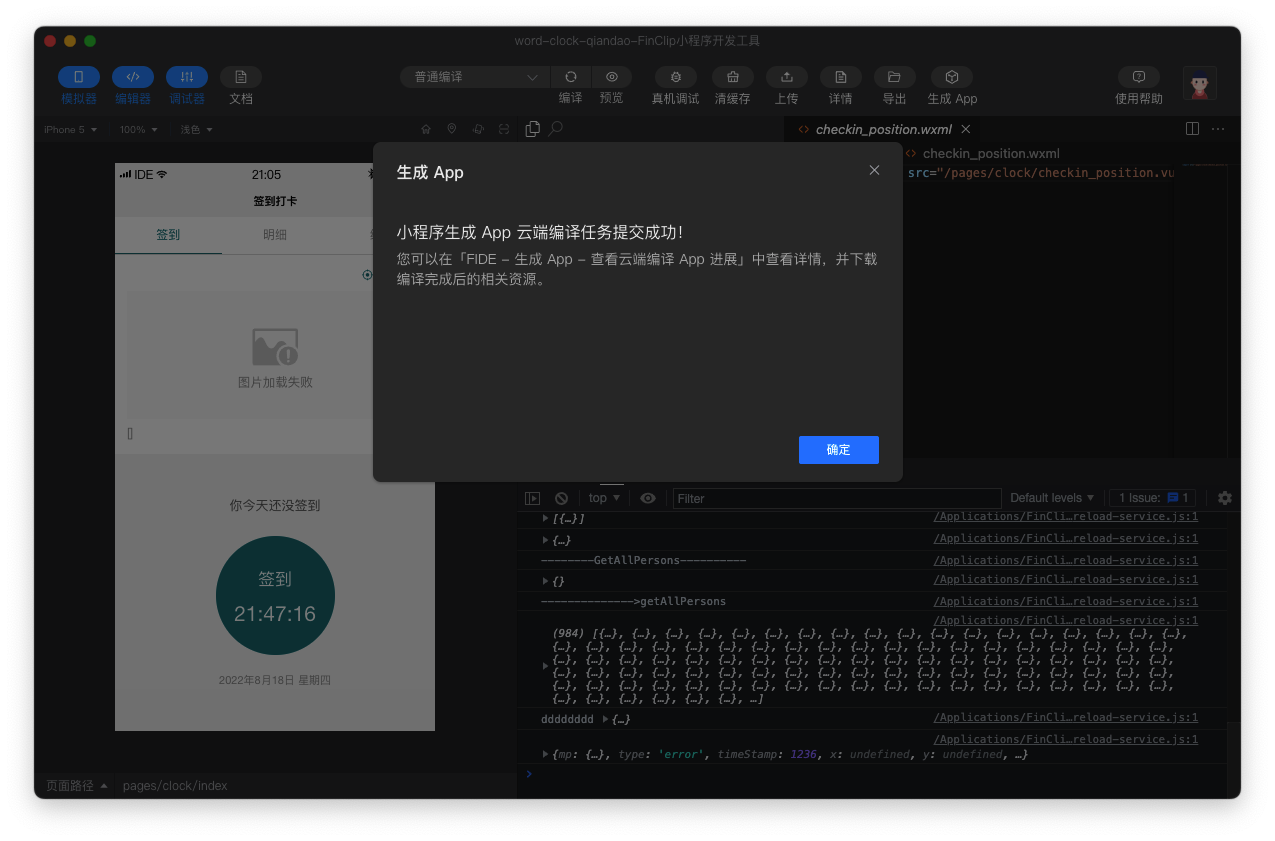 Step 5: Check Packaging Task Progress and Download Installation Package
Click "Download Installation Package" on the right to obtain the corresponding installation file.
# 2.2.3 Local Compilation (Export Project Files)
Step 1: Configure Mini-Program Information 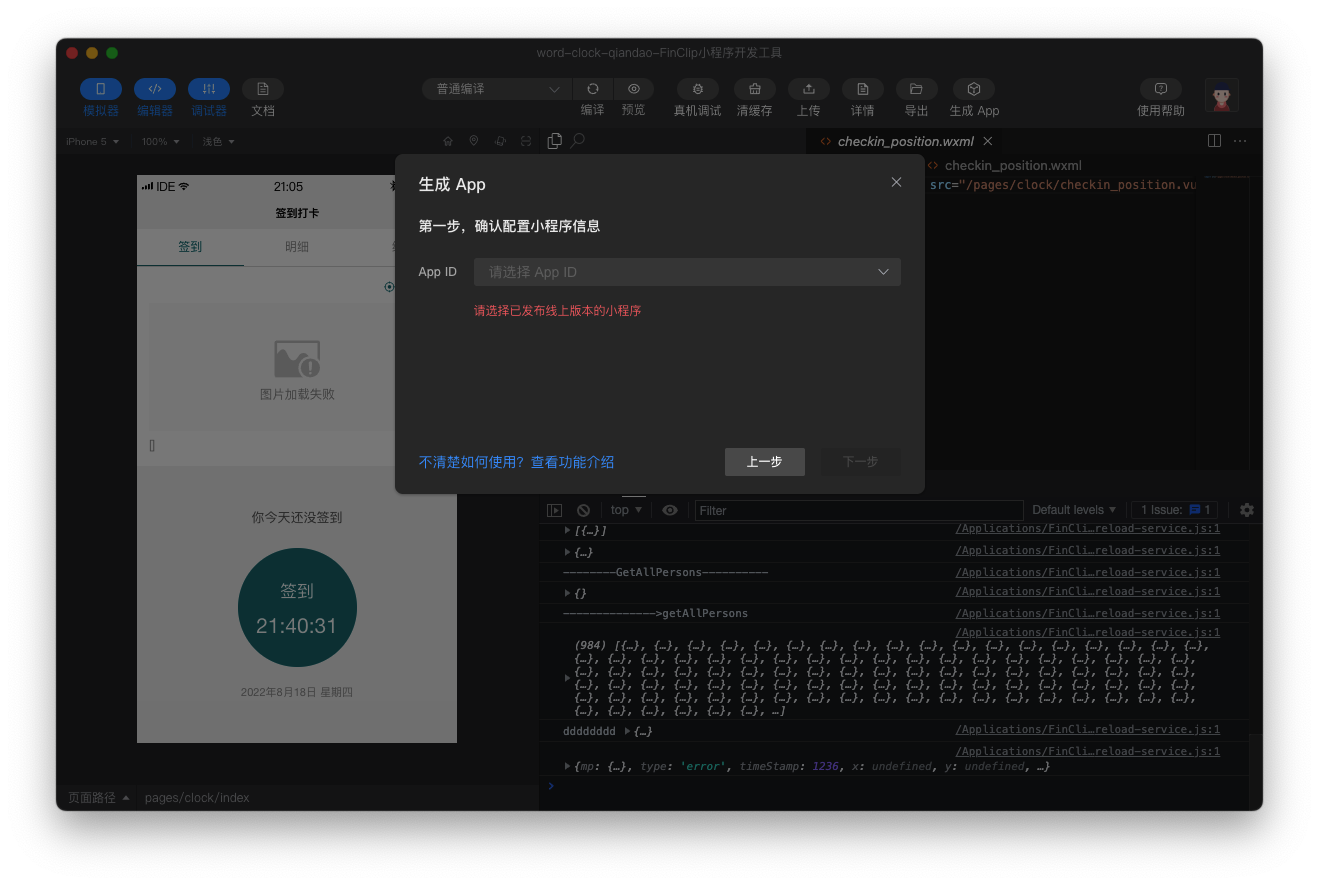
Step 2: Select Associated Application and BundleID 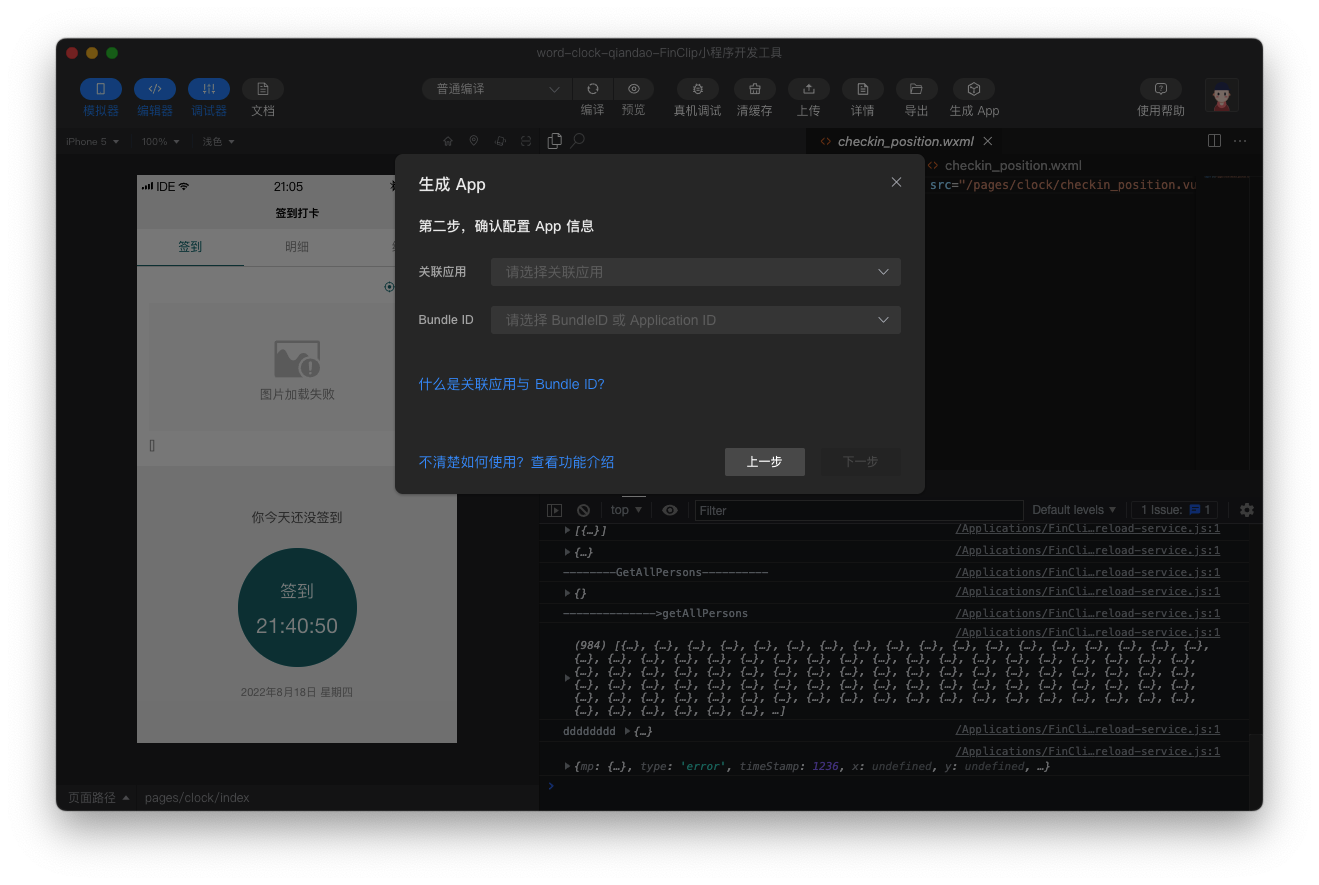
Step 3: Configure Export Directory 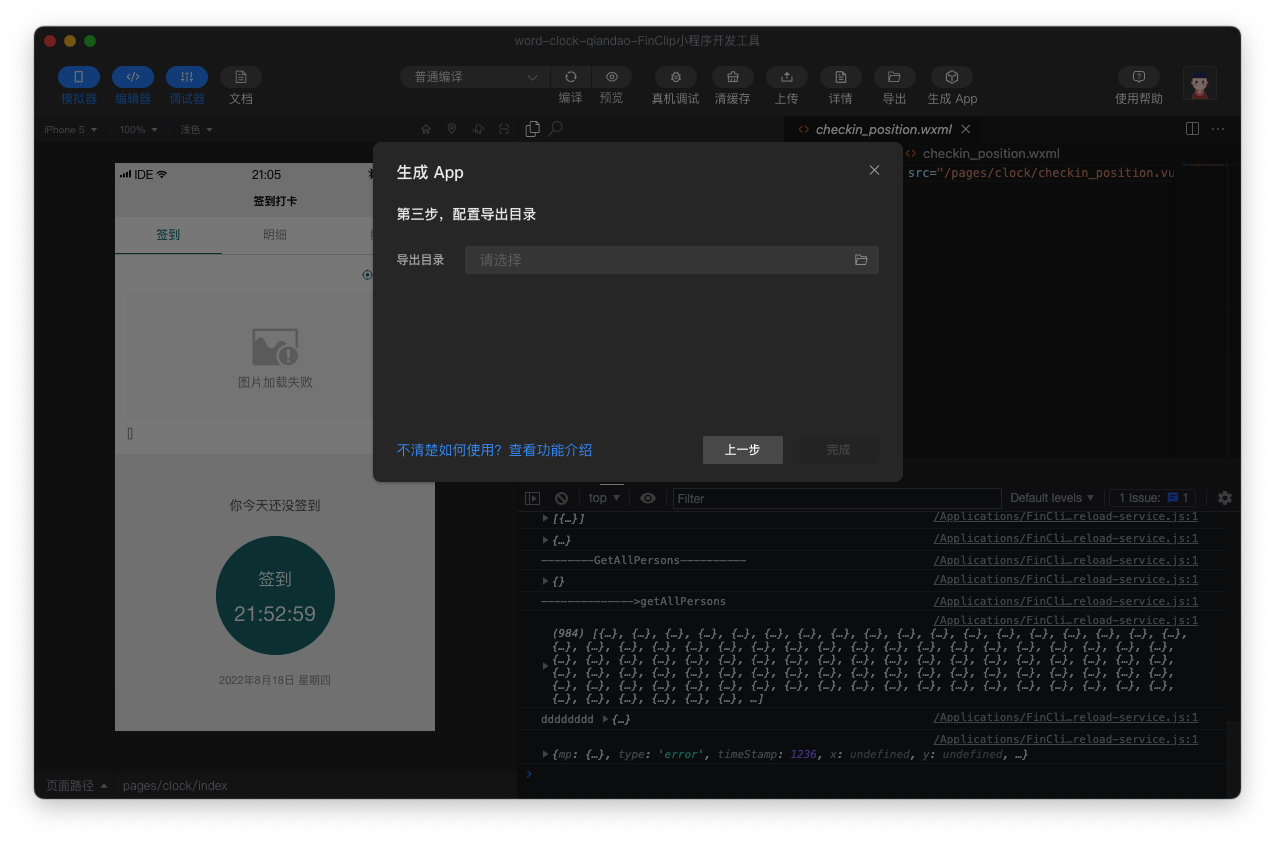
Step 4: Export Successful 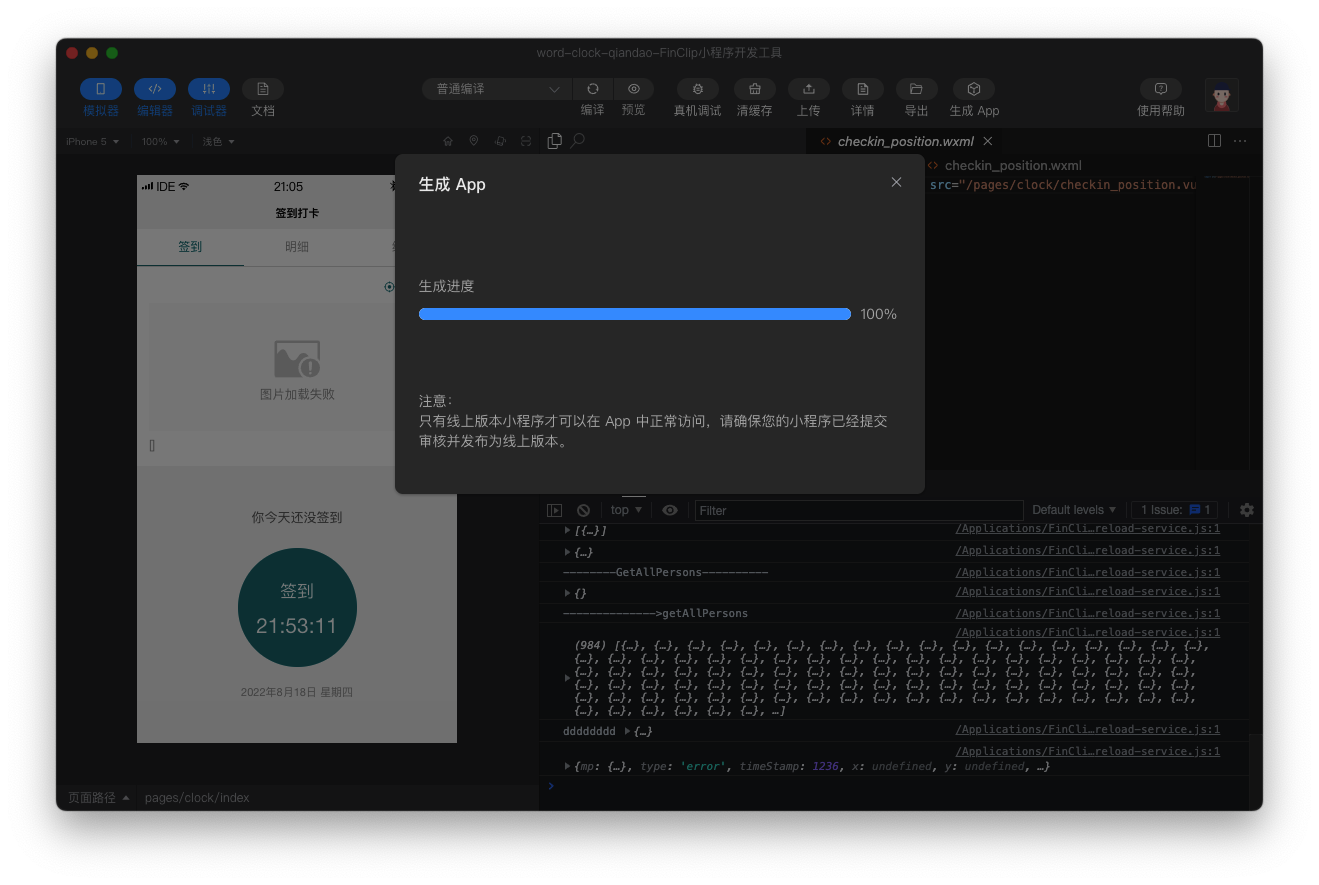
# 2.3 Local Project Configuration
For local project file configuration, see Local Project File Configuration