
# Local Project File Configuration
# 1. iOS Project Configuration
# 1.1 Prepare Project
- Install Xcode 12.1 or later
- Install the latest version of FinClip Studio (opens new window)
- If you need to run and debug on a real device, you need an Apple Developer Account. If you don't have one temporarily, you can use the simulator for debugging
# 1.2 Configure Project
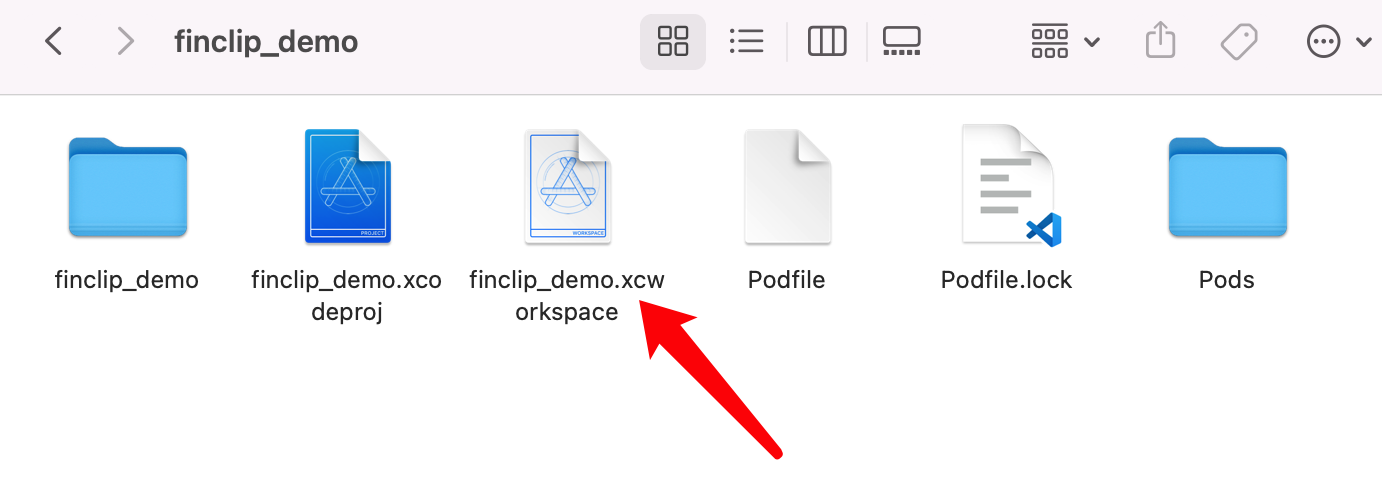
Open the exported folder from FinClip Studio - ios - project name - project name.xcworkspace, double-click to open
# 1.2.1 Basic App Configuration
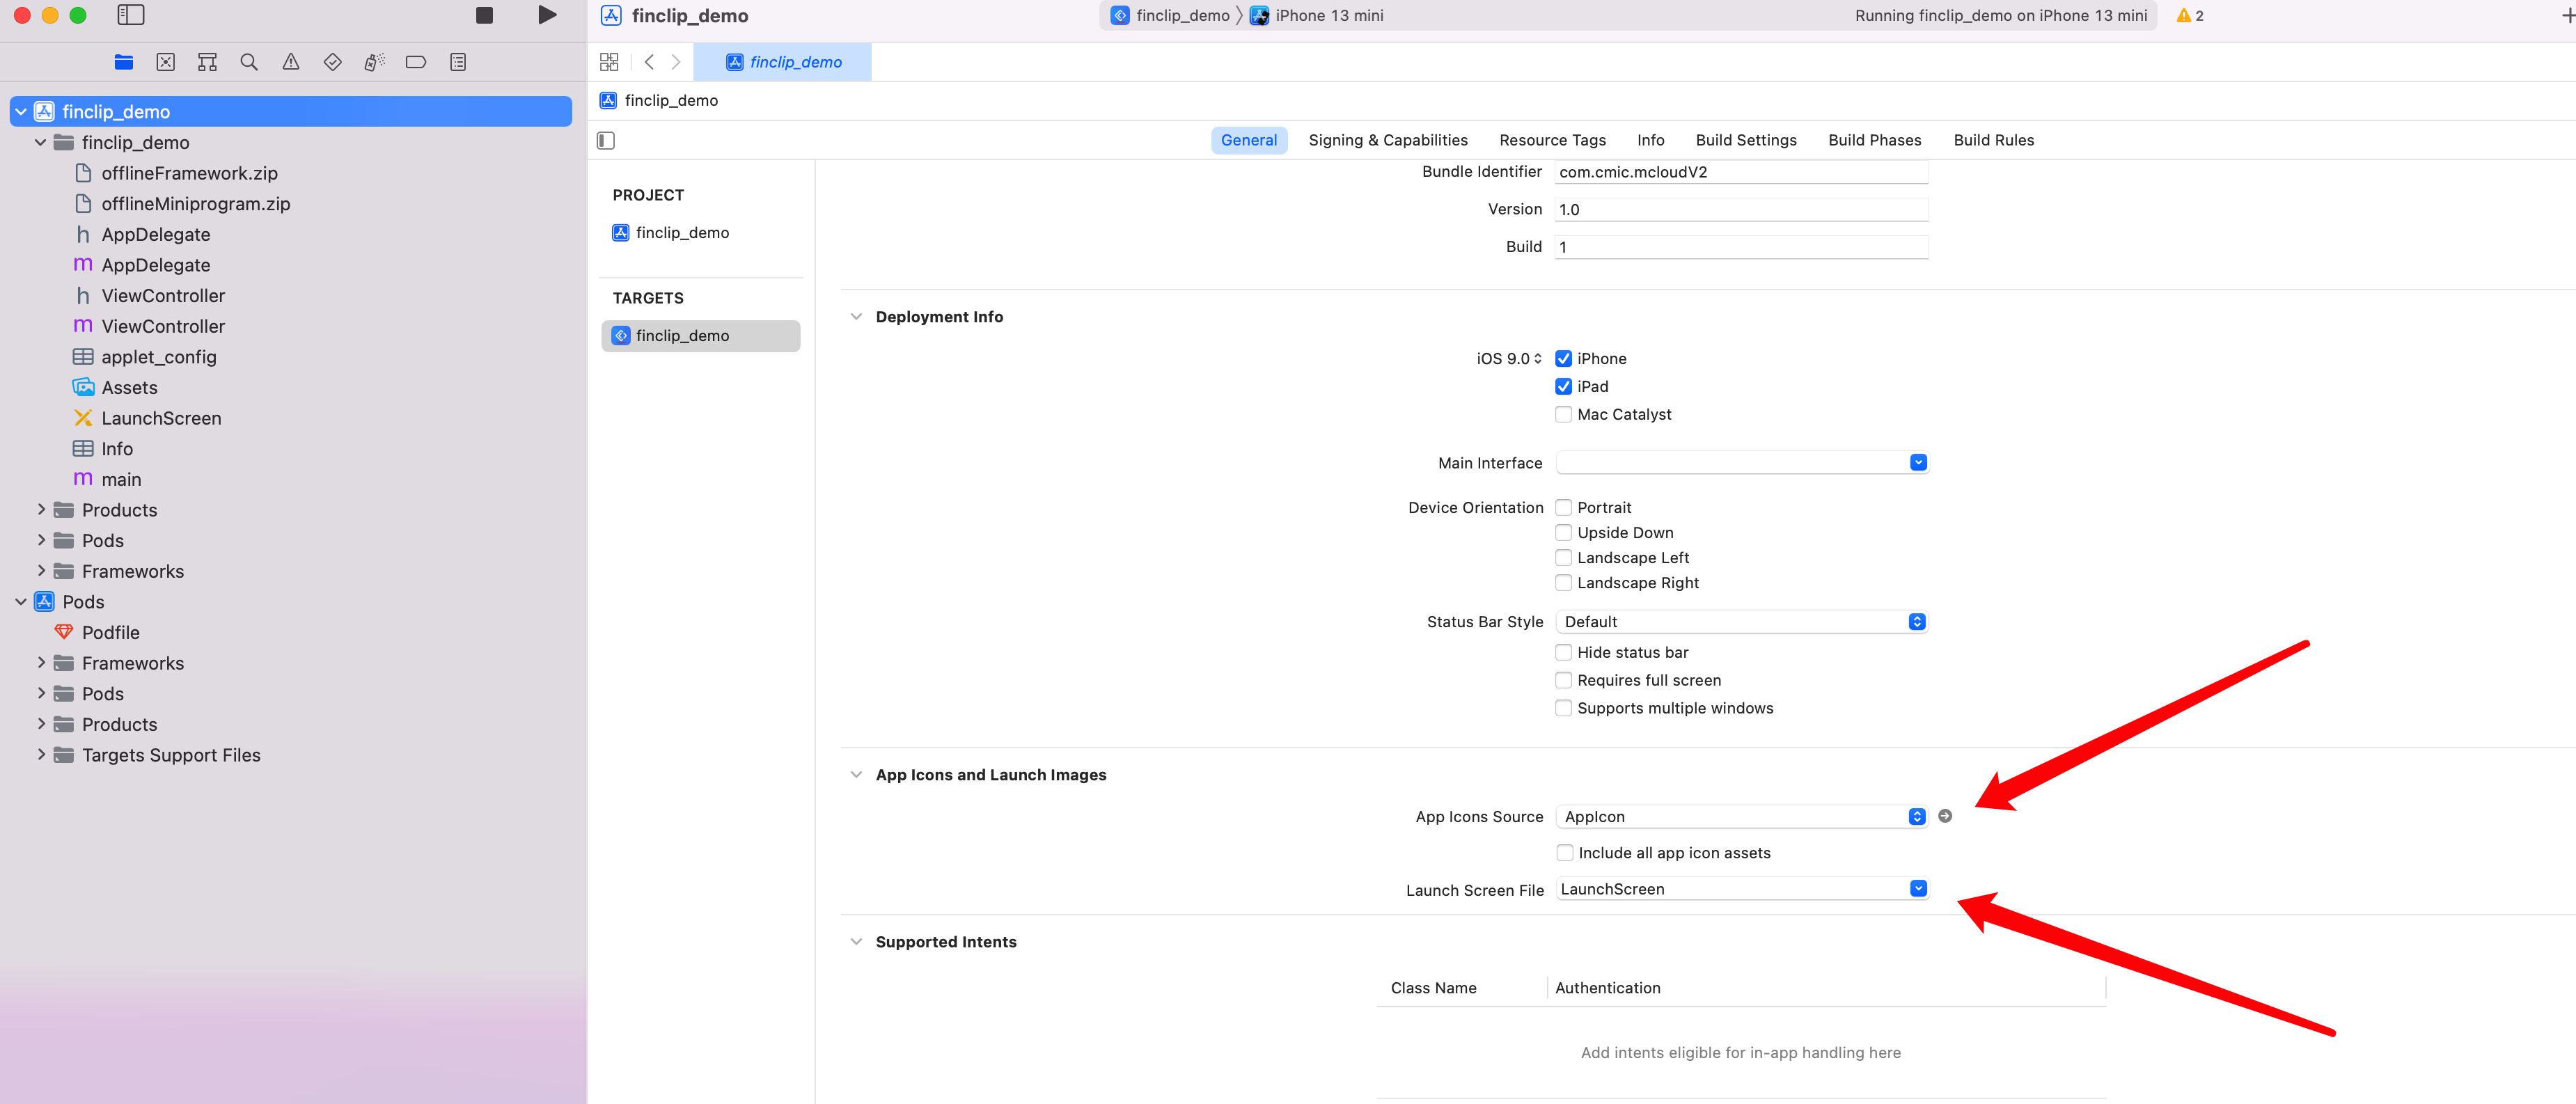
Configure the App's project name, version number, minimum supported Apple OS version, and supported device types.

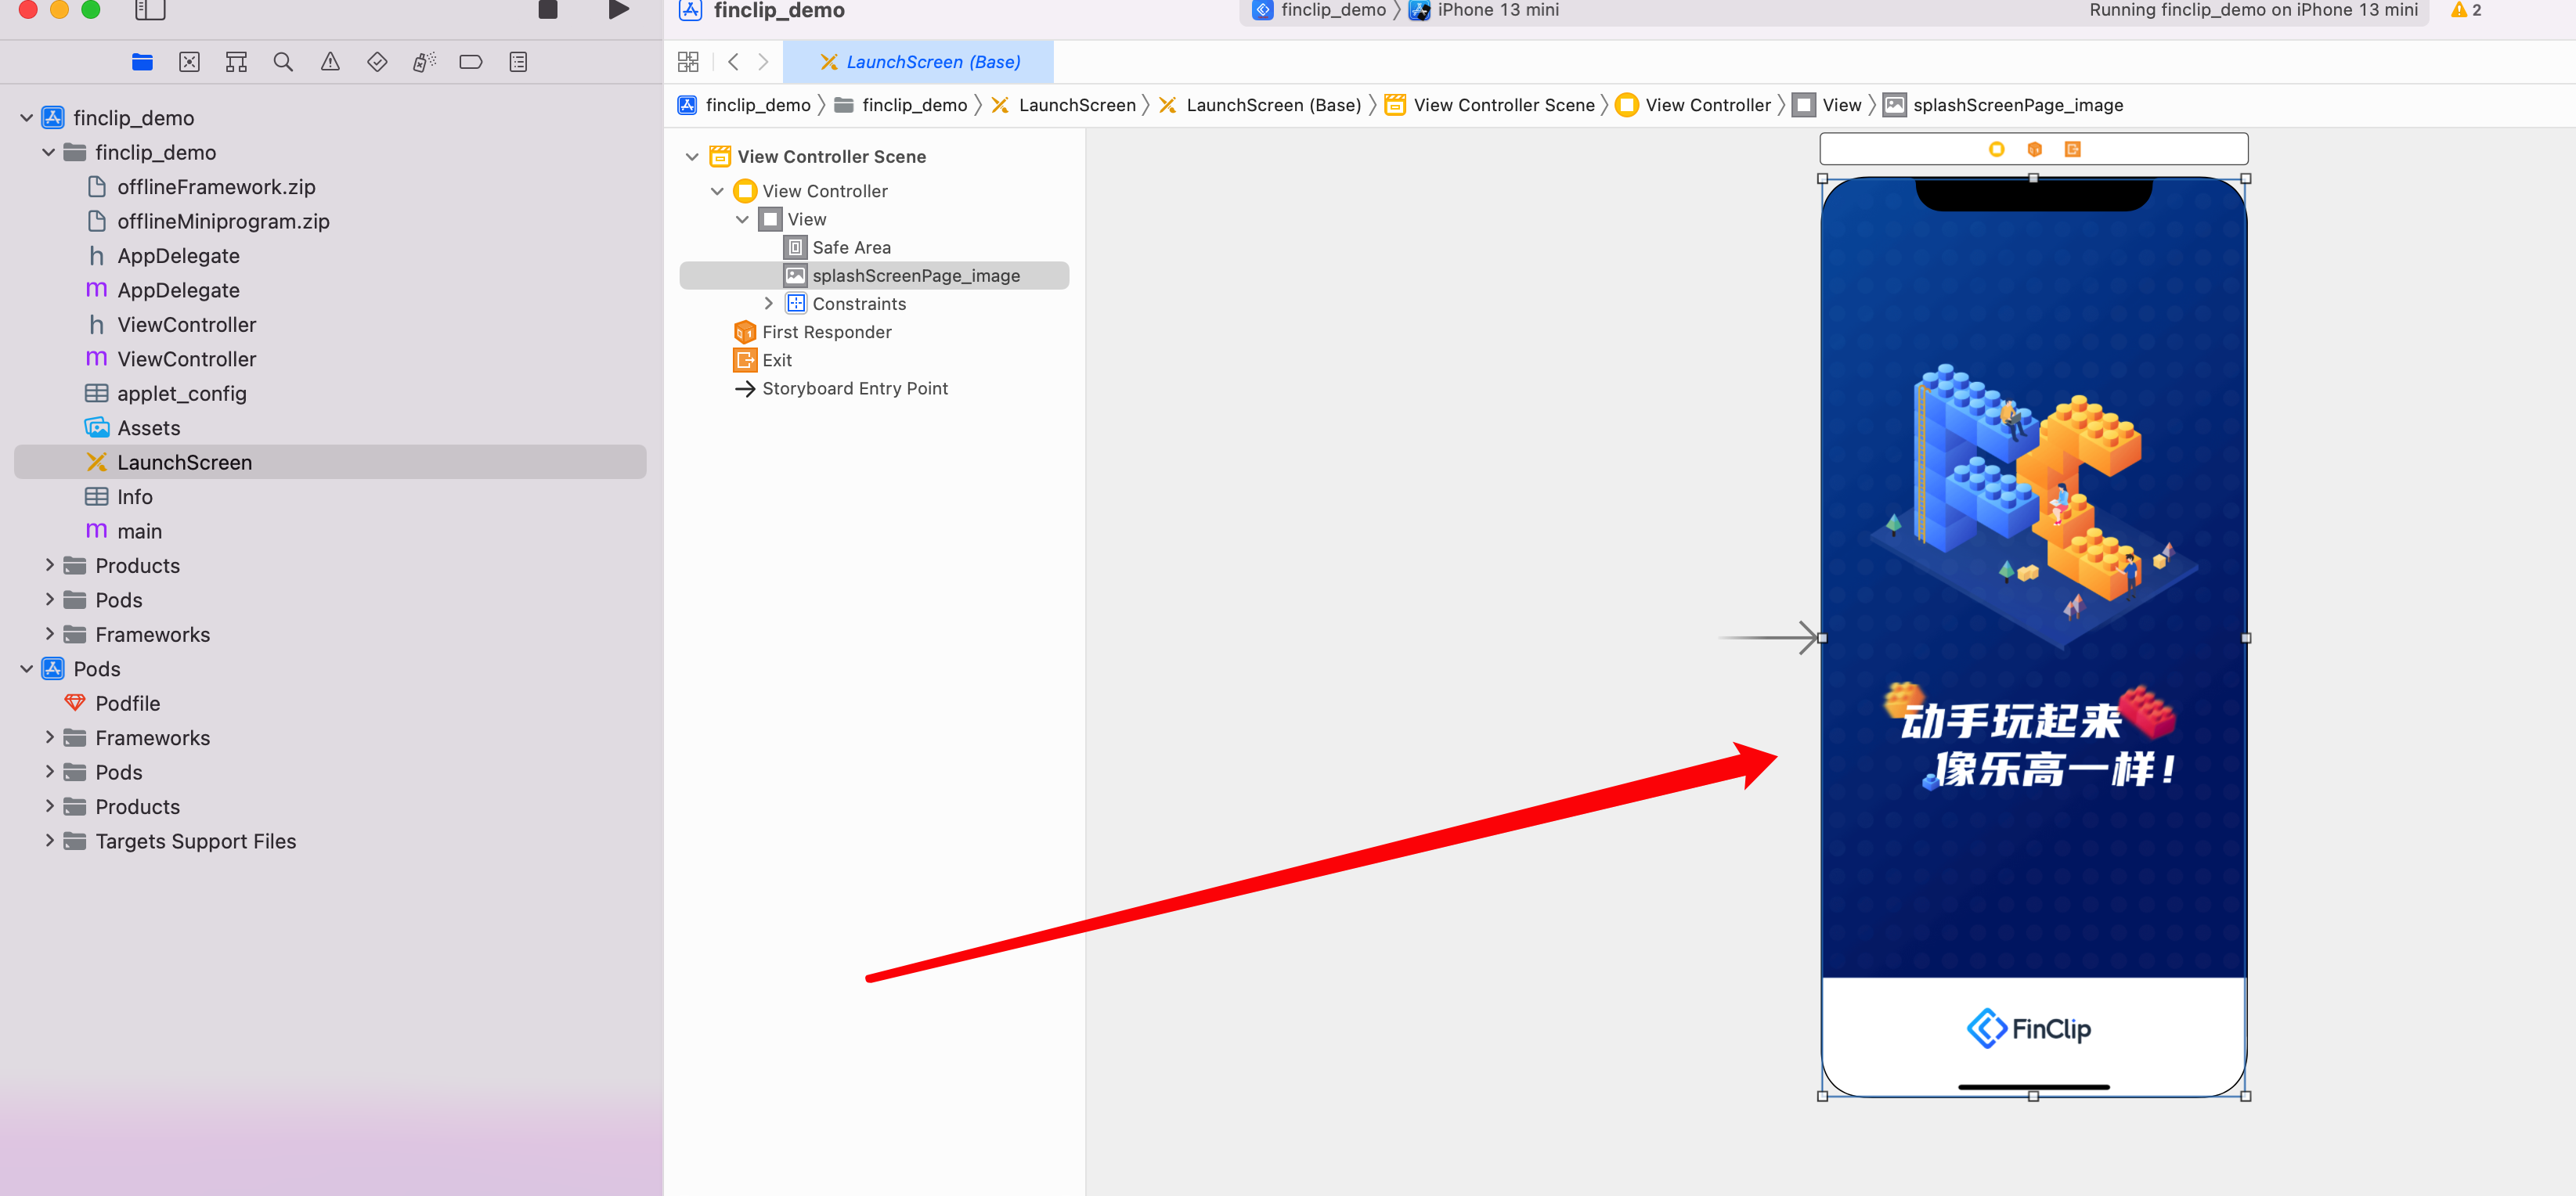
# 1.2.2 App Icon and Splash Screen
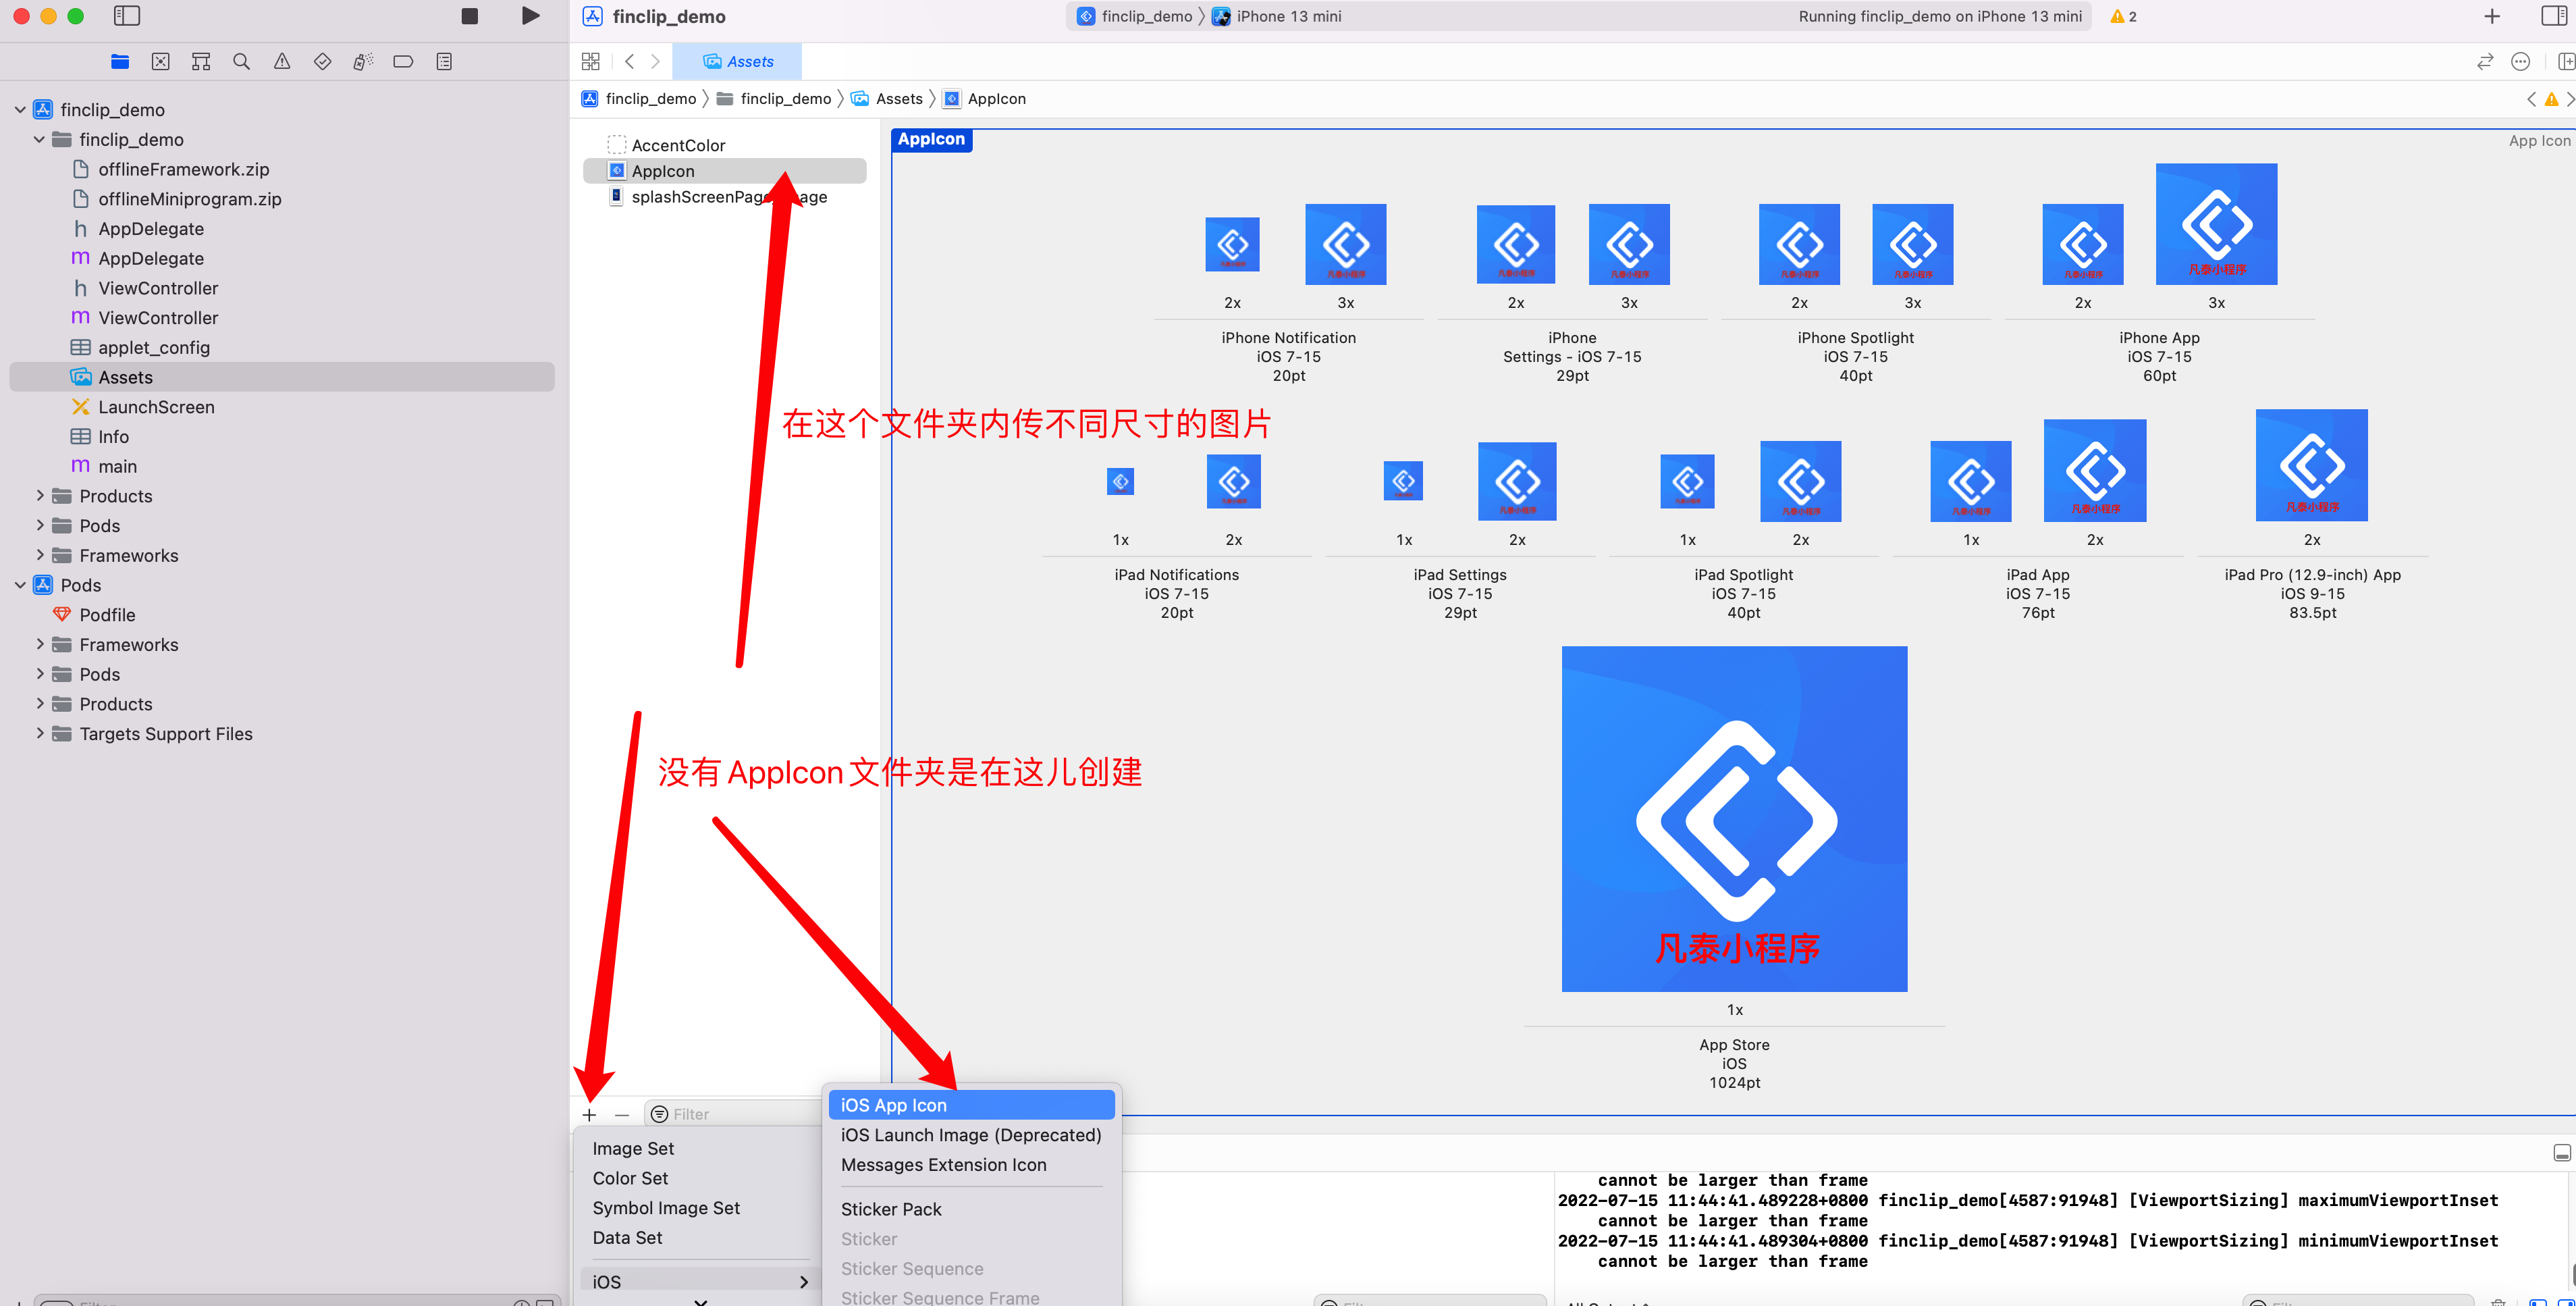
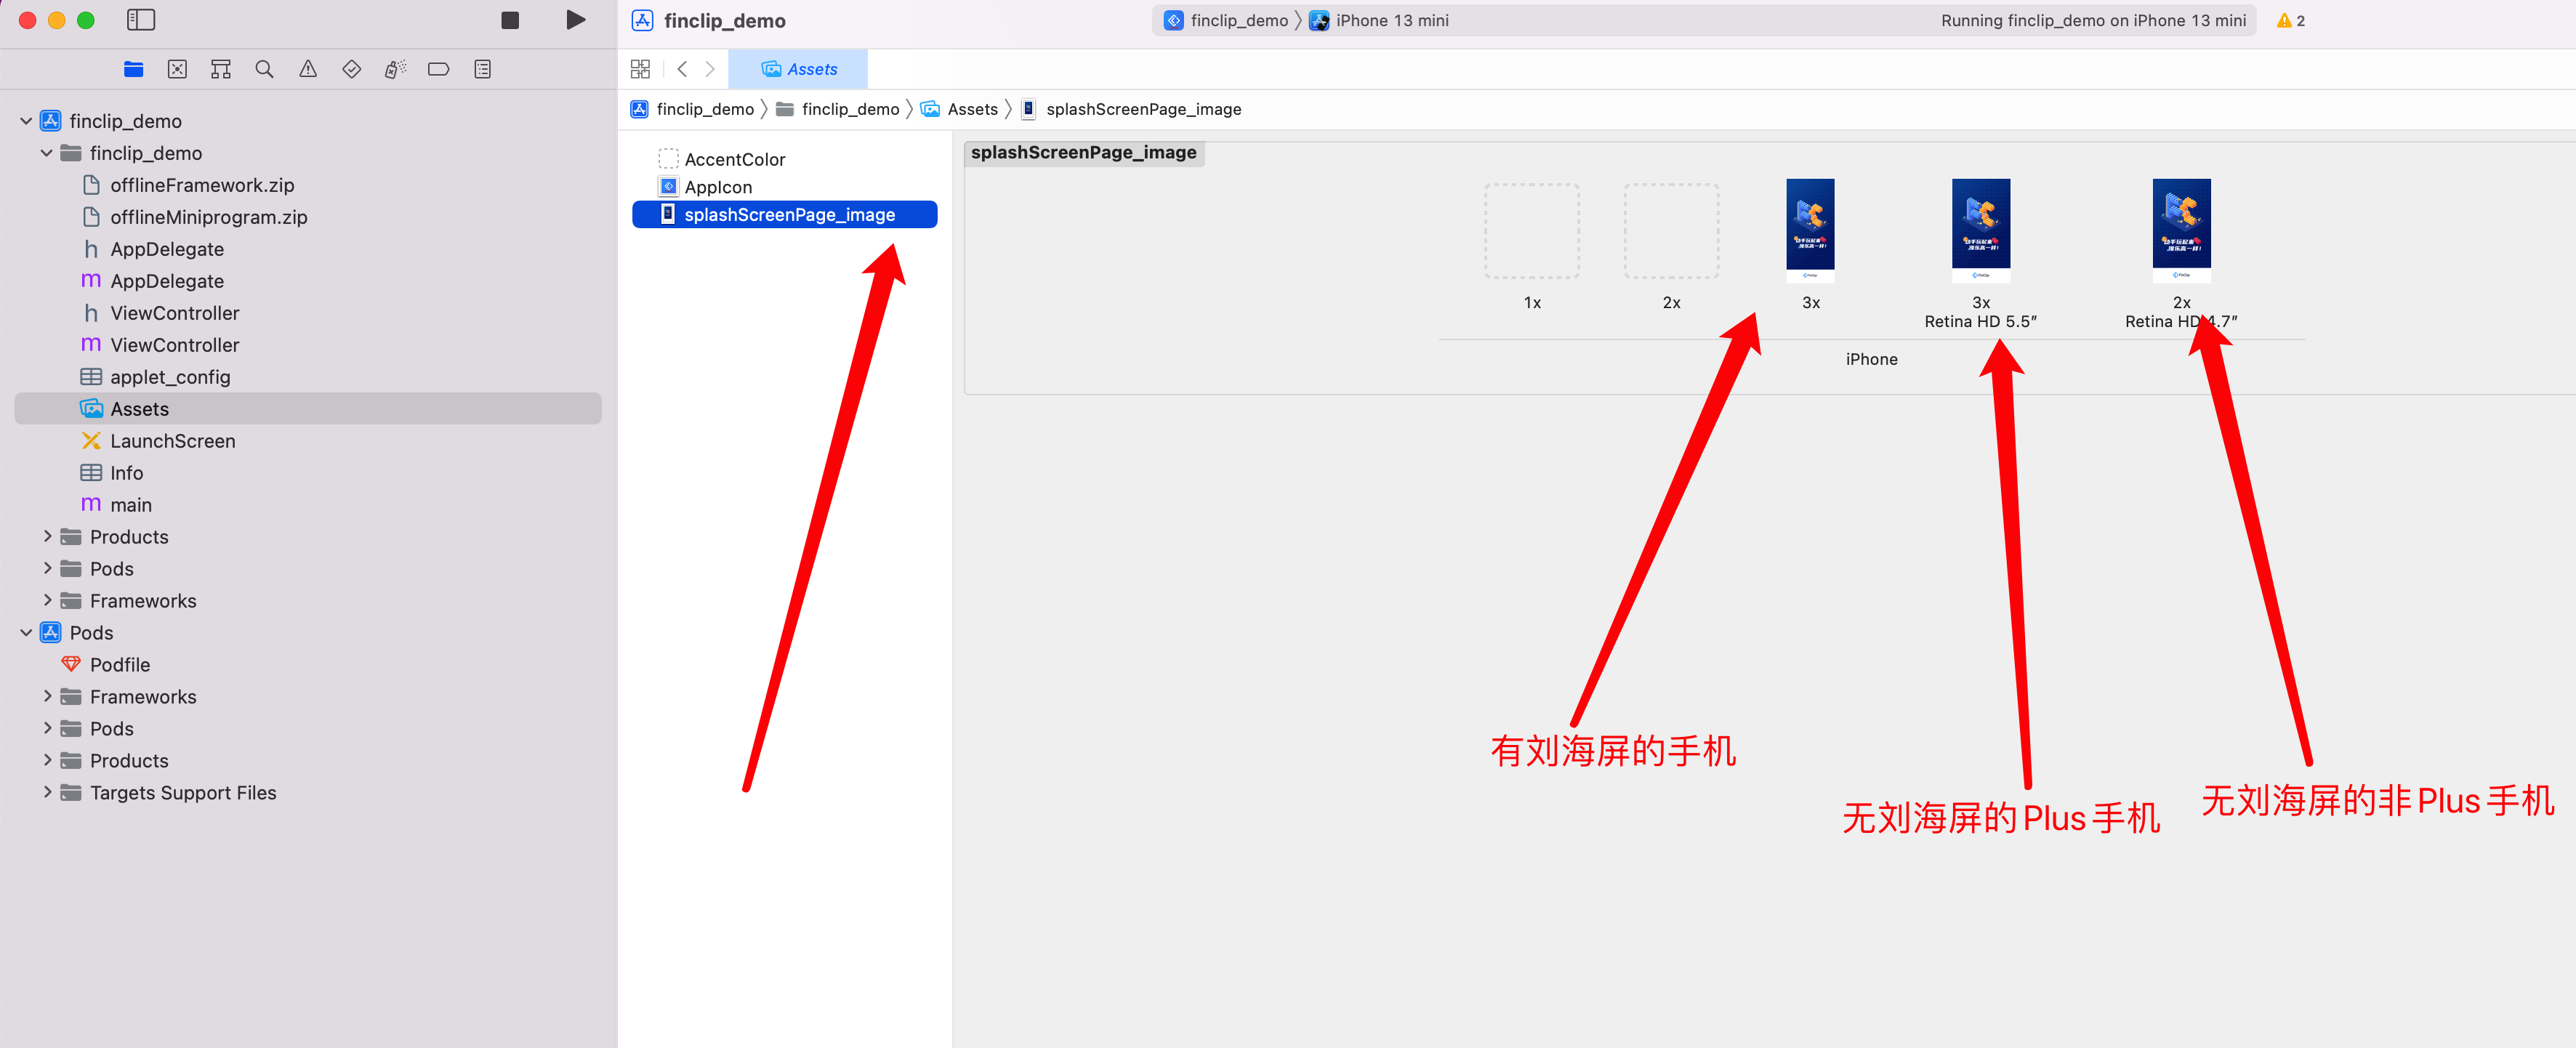
Configure the App's icon and splash screen images (can be ignored if configured when exporting the App from FinClip Studio. If not configured, the icon will be the system default white icon, and there will be no splash screen).
# 1.2.3 App Permissions
Configure App permissions. Based on the functions used, you can configure the required permissions yourself. For API permissions correspondence, refer to our documentation FinClip Permission Description
# 1.2.4 Generate Certificates
- iOS Development: iOS development certificate (for real device debugging and testing)
- iOS Distribution: iOS distribution certificate (for App Store submission)
Prerequisites:
- Must have Apple Developer Program membership to apply for, download, and use Apple-issued signing certificates.
- Apple computer with macOS installed
# 1.2.4.1 Generate Certificate Signing Request File
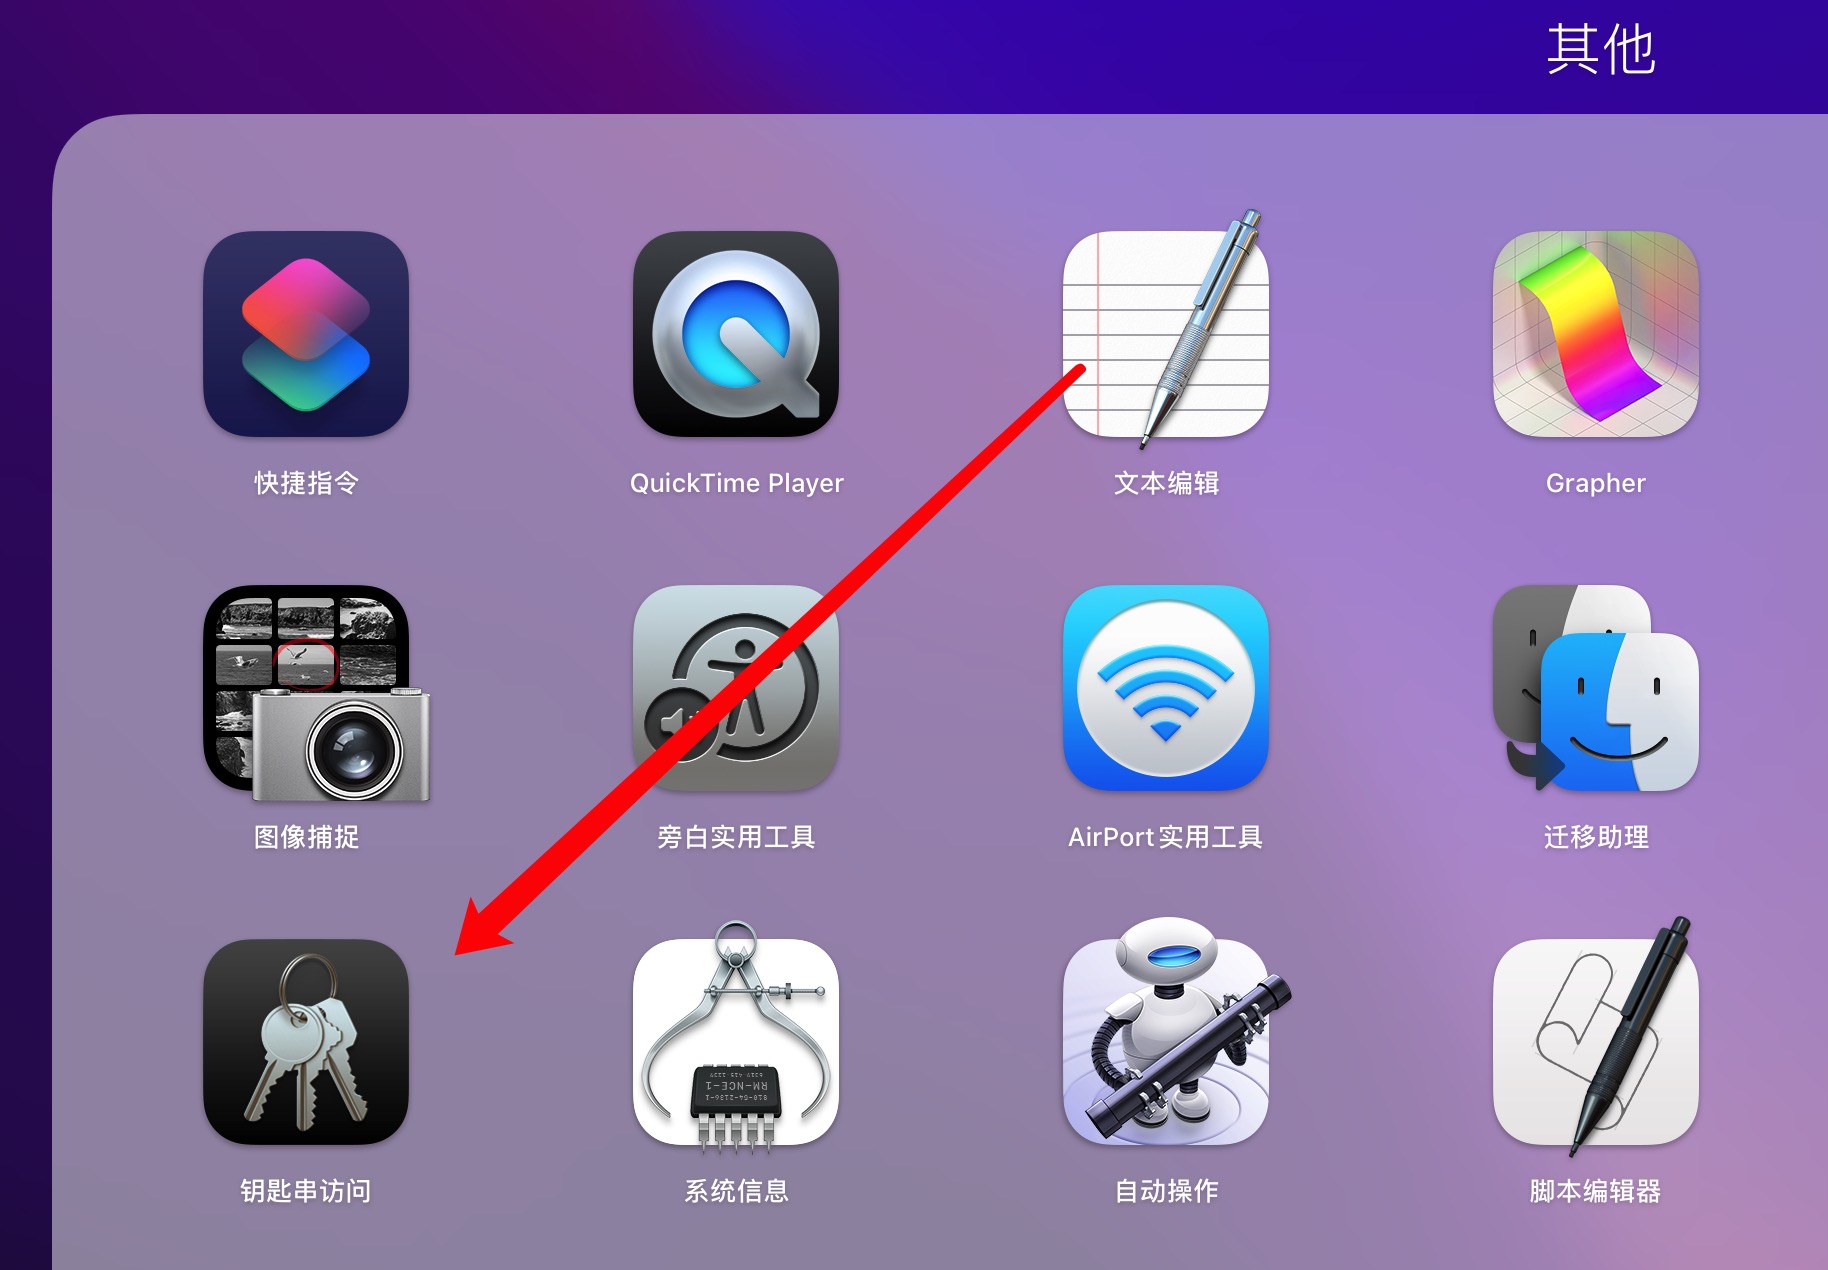
- Open "Keychain Access" tool
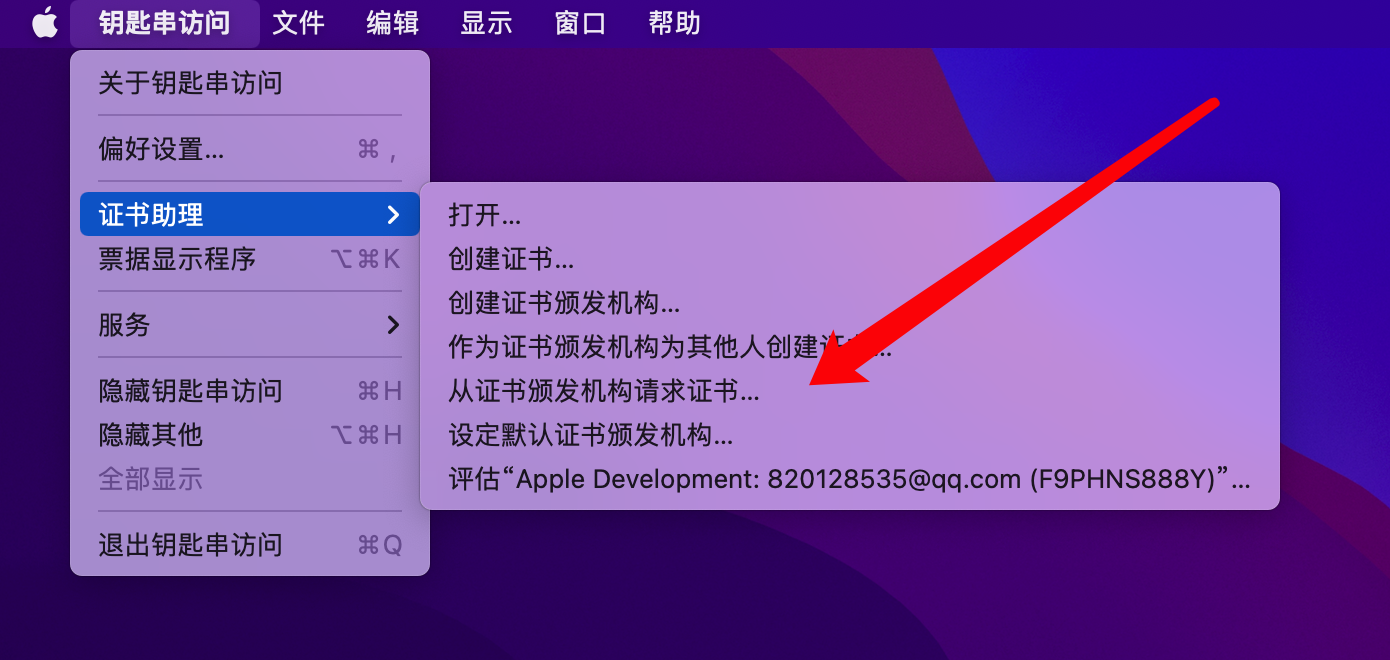
- Open menu "Keychain Access"->"Certificate Assistant", select "Request a Certificate from a Certificate Authority...":
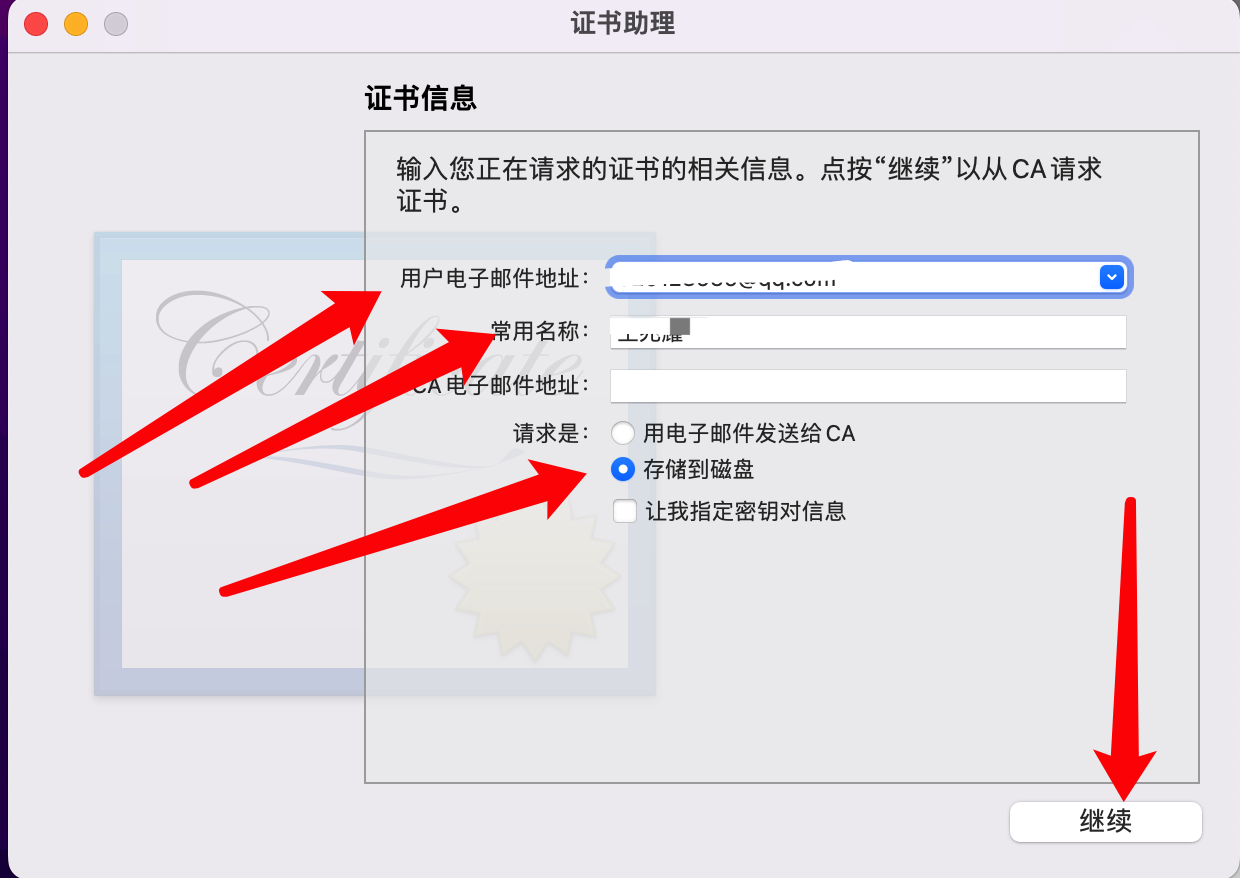
- Open certificate request creation page, enter user email address, common name, select "Saved to disk", click "Continue":
- File name is "CertificateSigningRequest.certSigningRequest", select save location, click "Save" to save the certificate request file to specified path, which will be needed later when applying for Development certificate and Production certificate
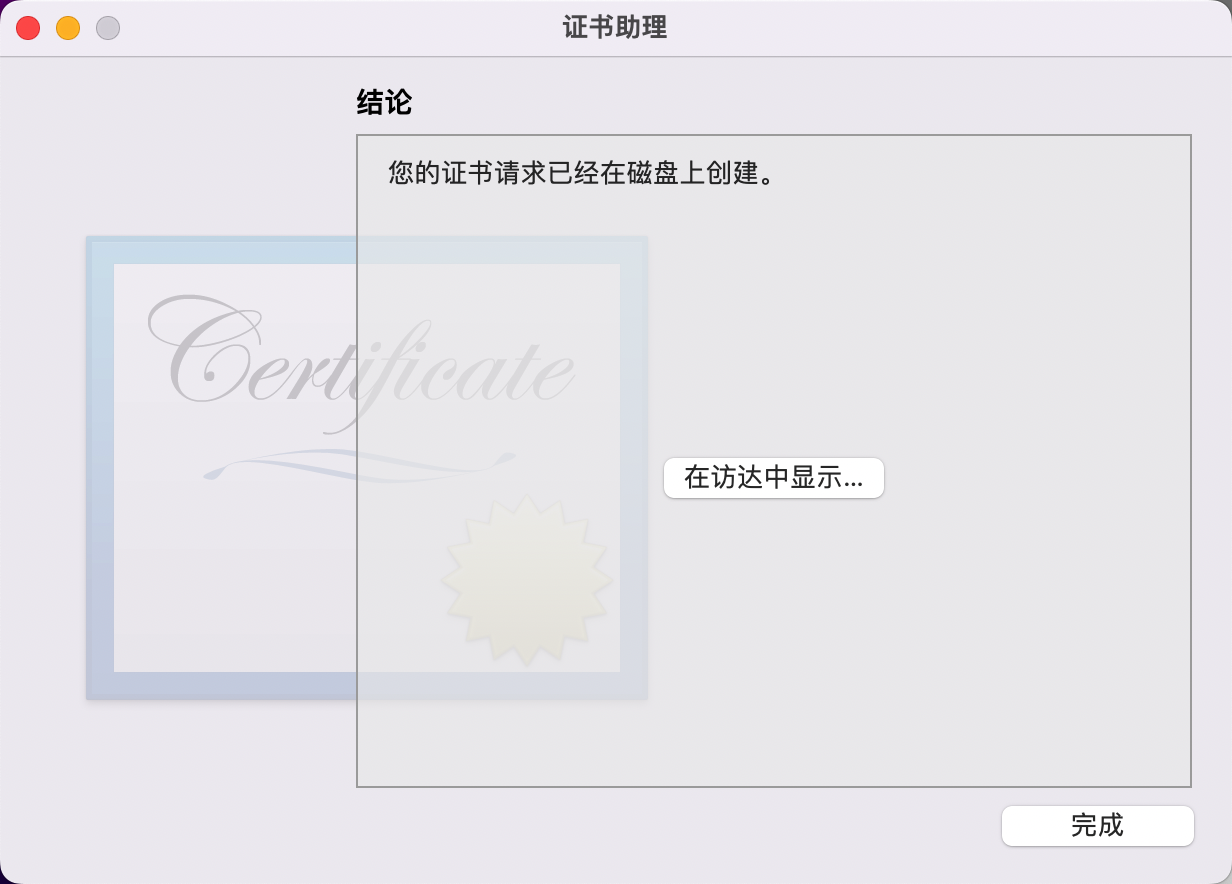
- You can see the generated request certificate (CertificateSigningRequest.certSigningRequest) at the save location.
# 1.2.4.2 Log in to Apple Developer Account
- Open website Apple Developer Portal (opens new window)
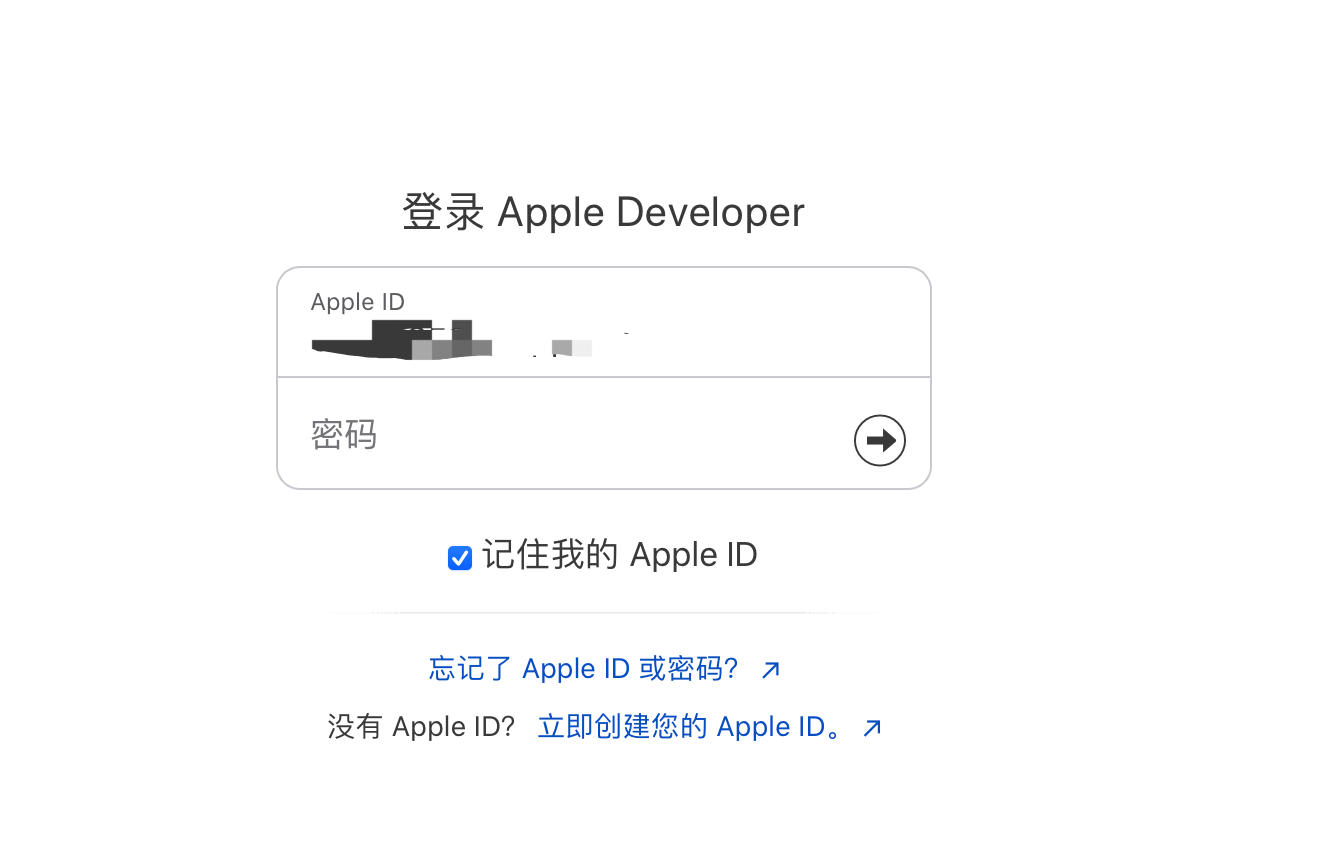
- Log in to Apple Developer using Apple Developer account
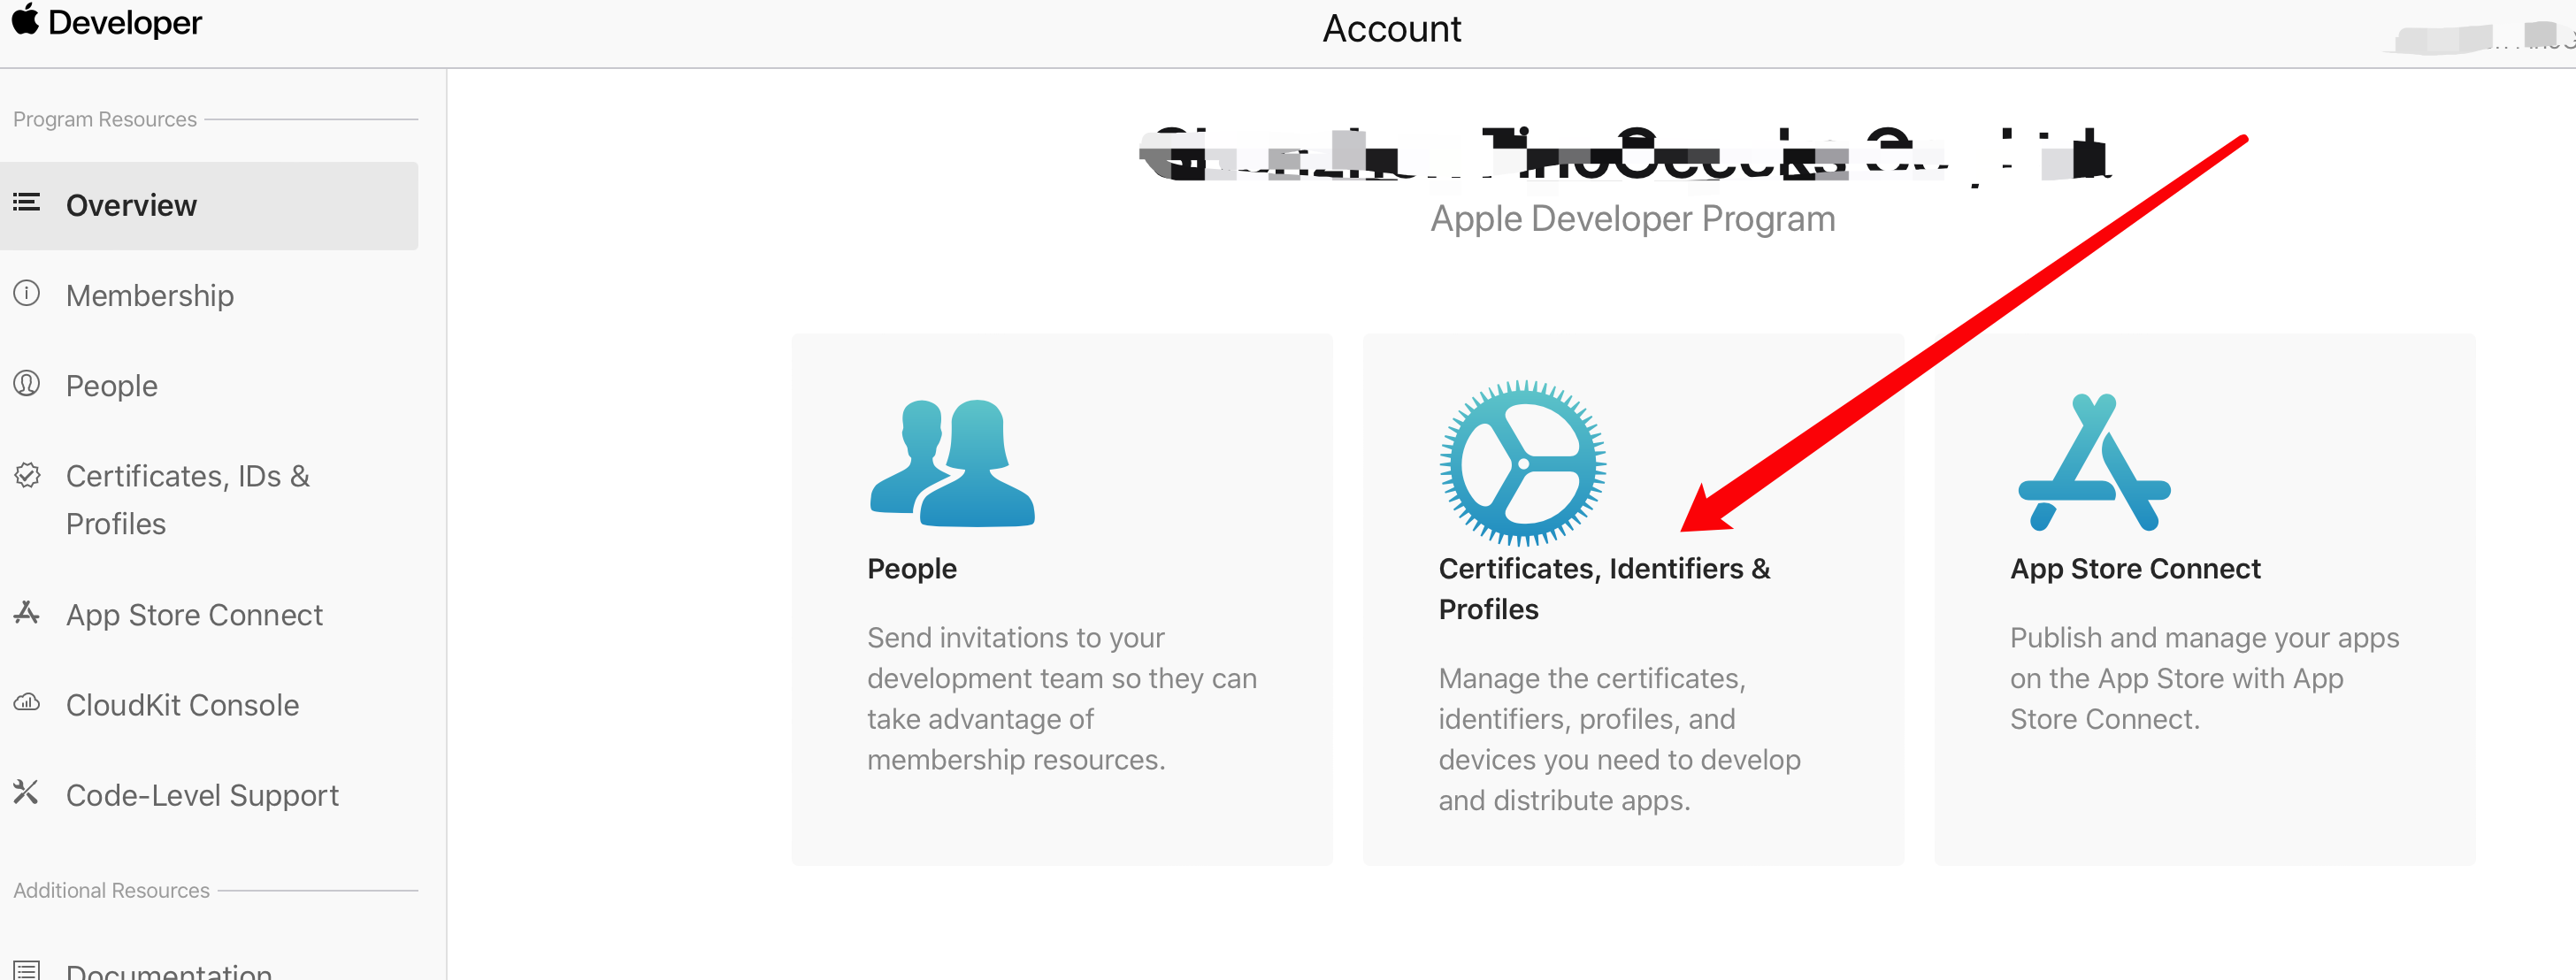
- After successful login, select "Certificates,IDs & Profiles" on the page to enter certificate management page
# 1.2.4.3 Apply for Apple App ID (App's Unique Identifier)
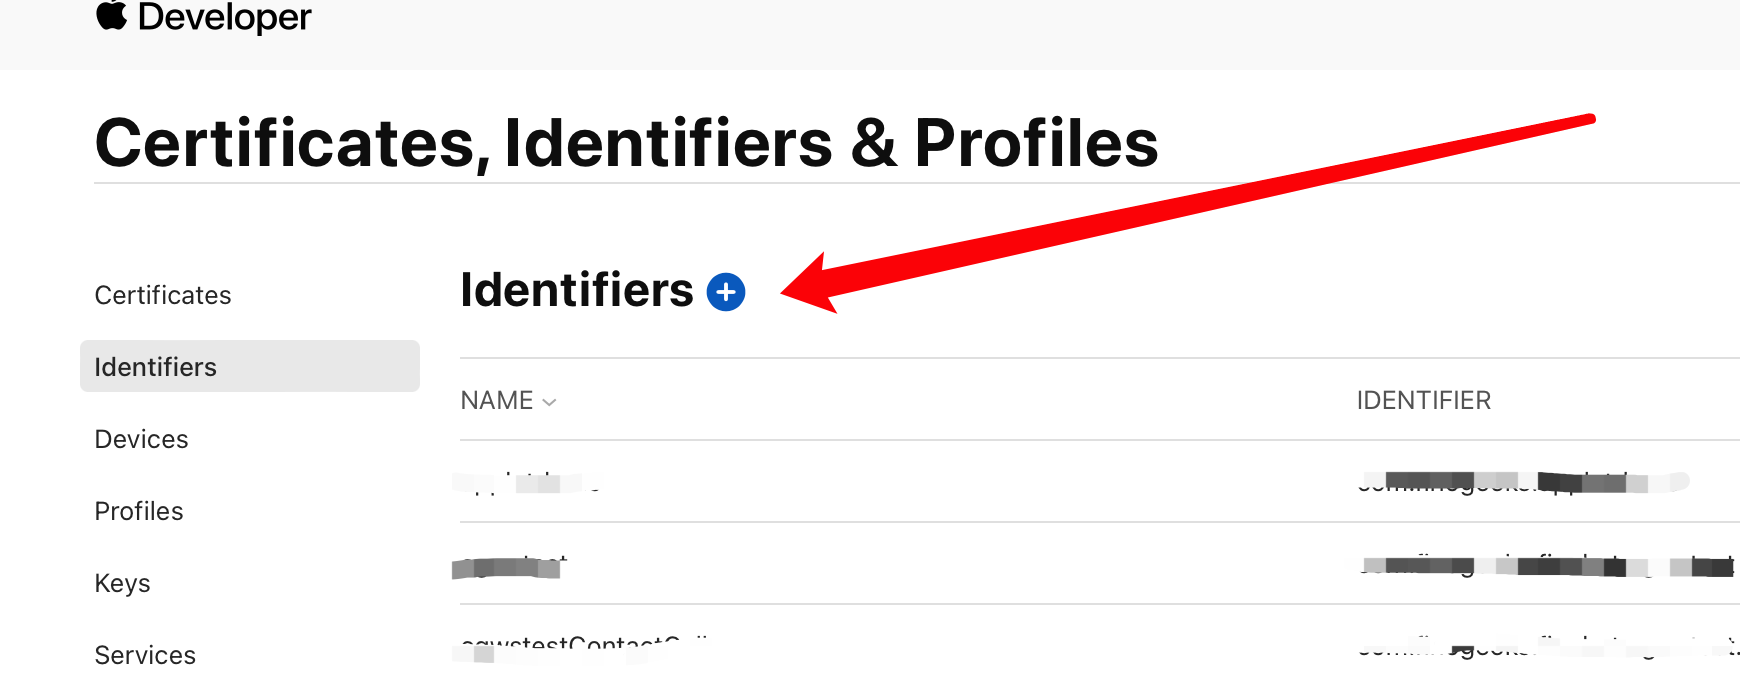
- Select "Identifiers" on the page to view all applied App identifiers, click the plus sign to create a new app identifier
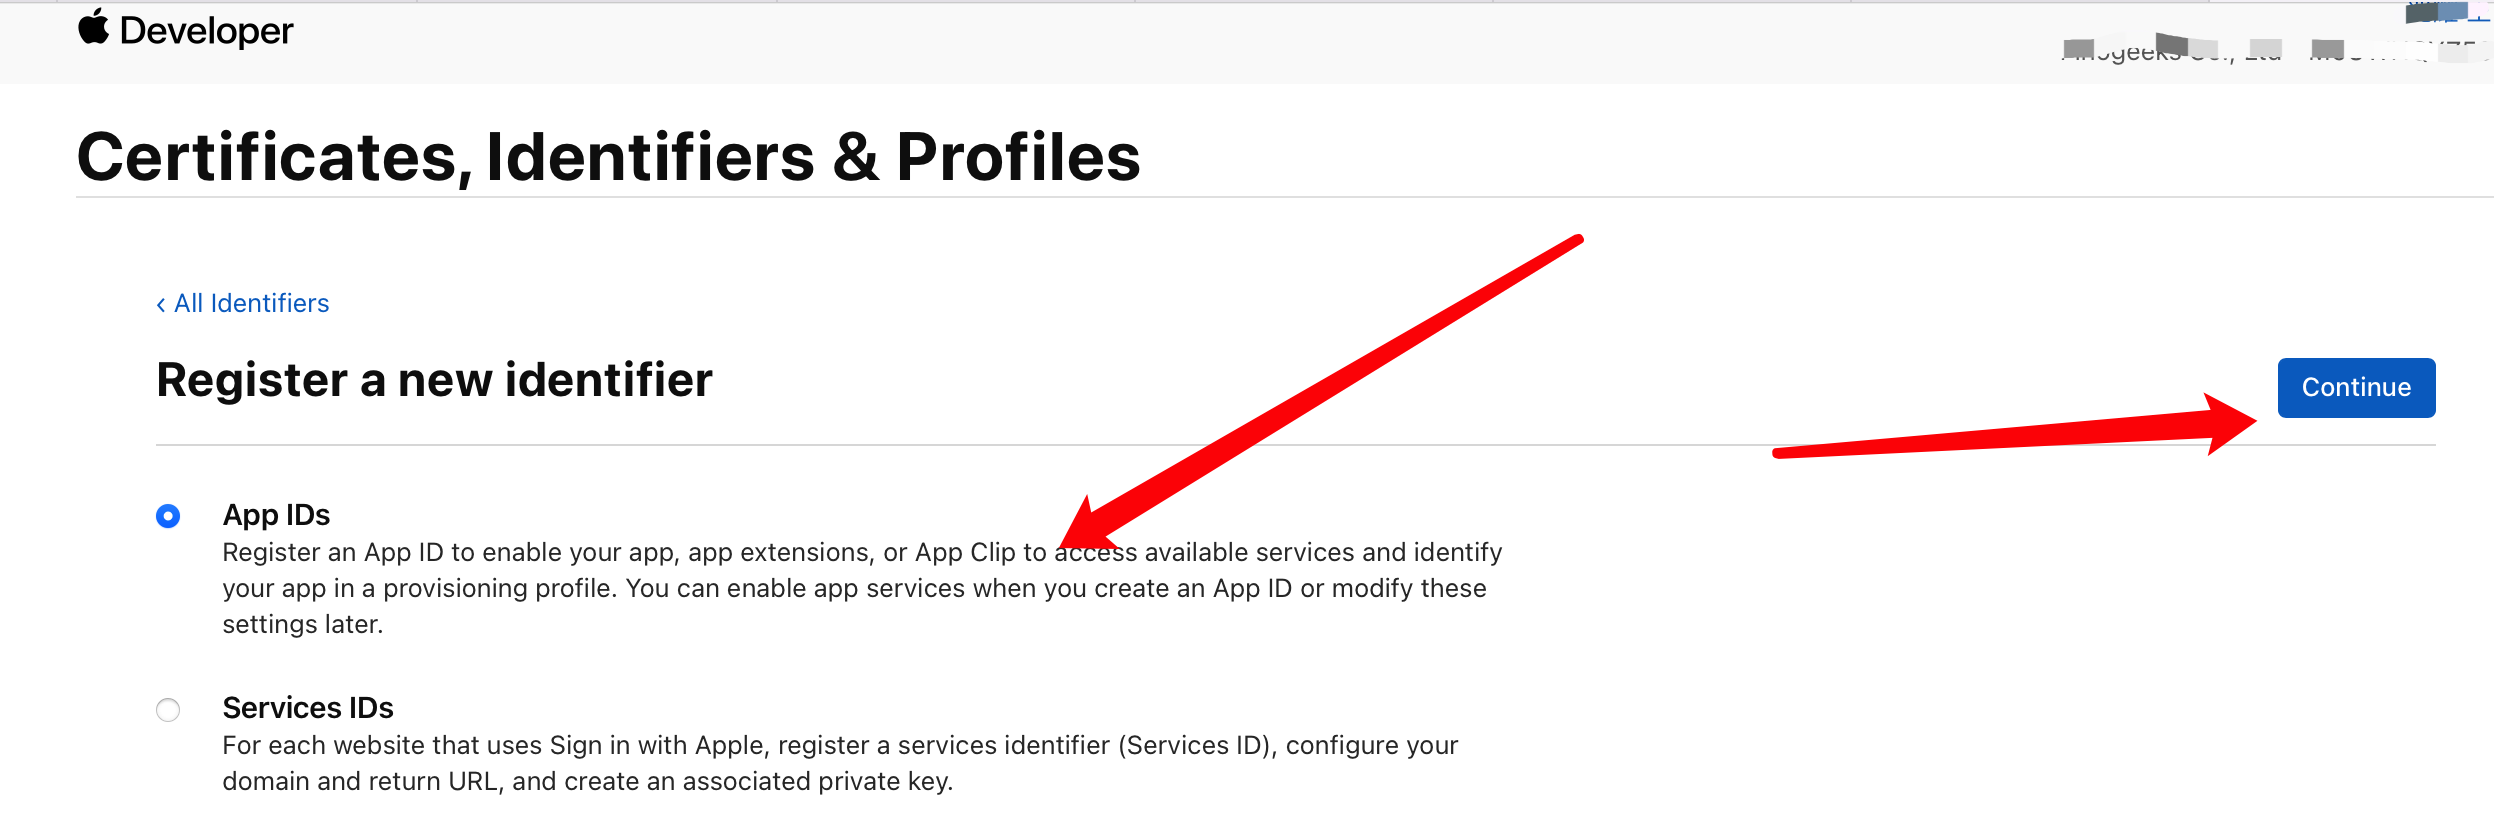
- Select identifier type as "App IDs", then click "Continue"
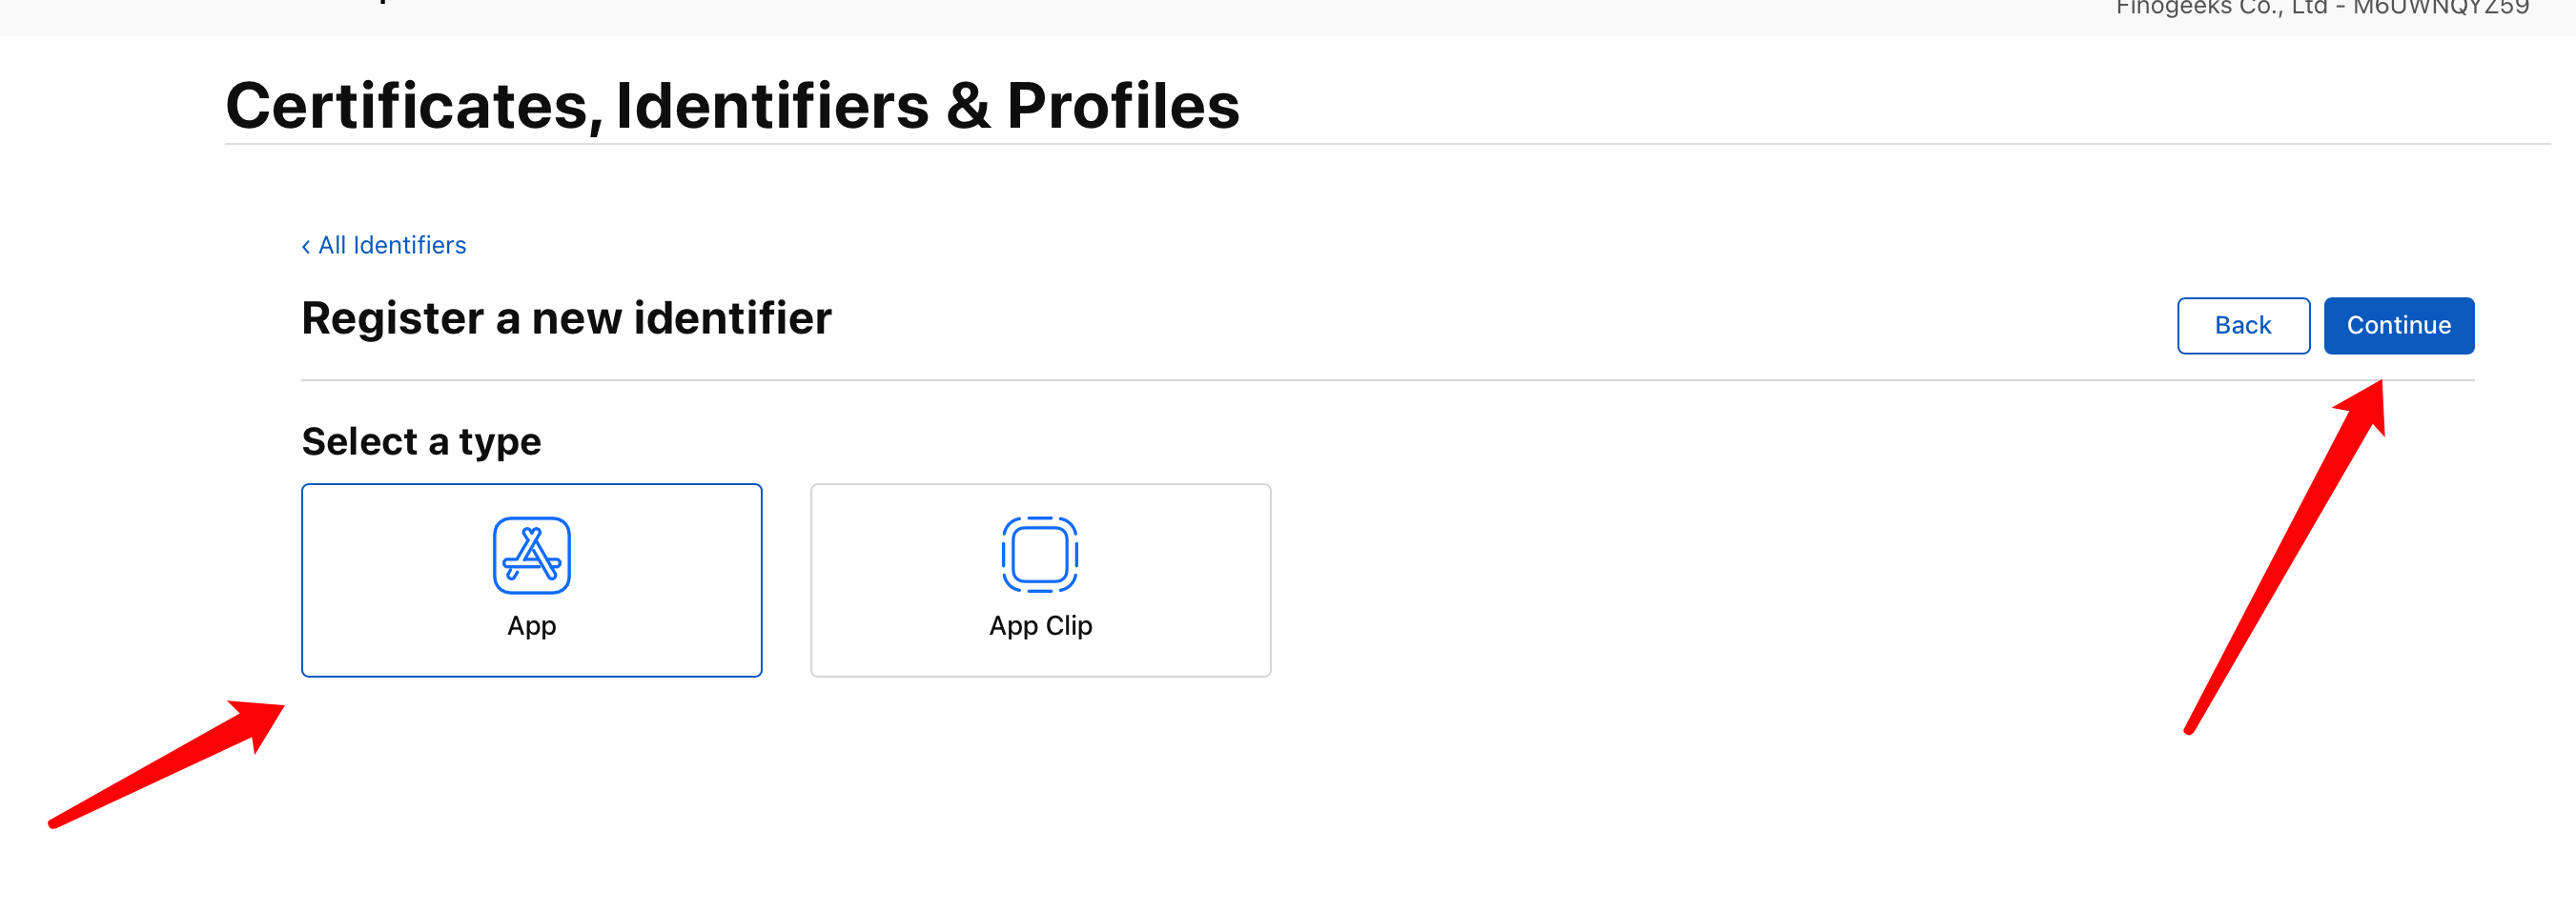
- Select identifier type as "App", then click "Continue"
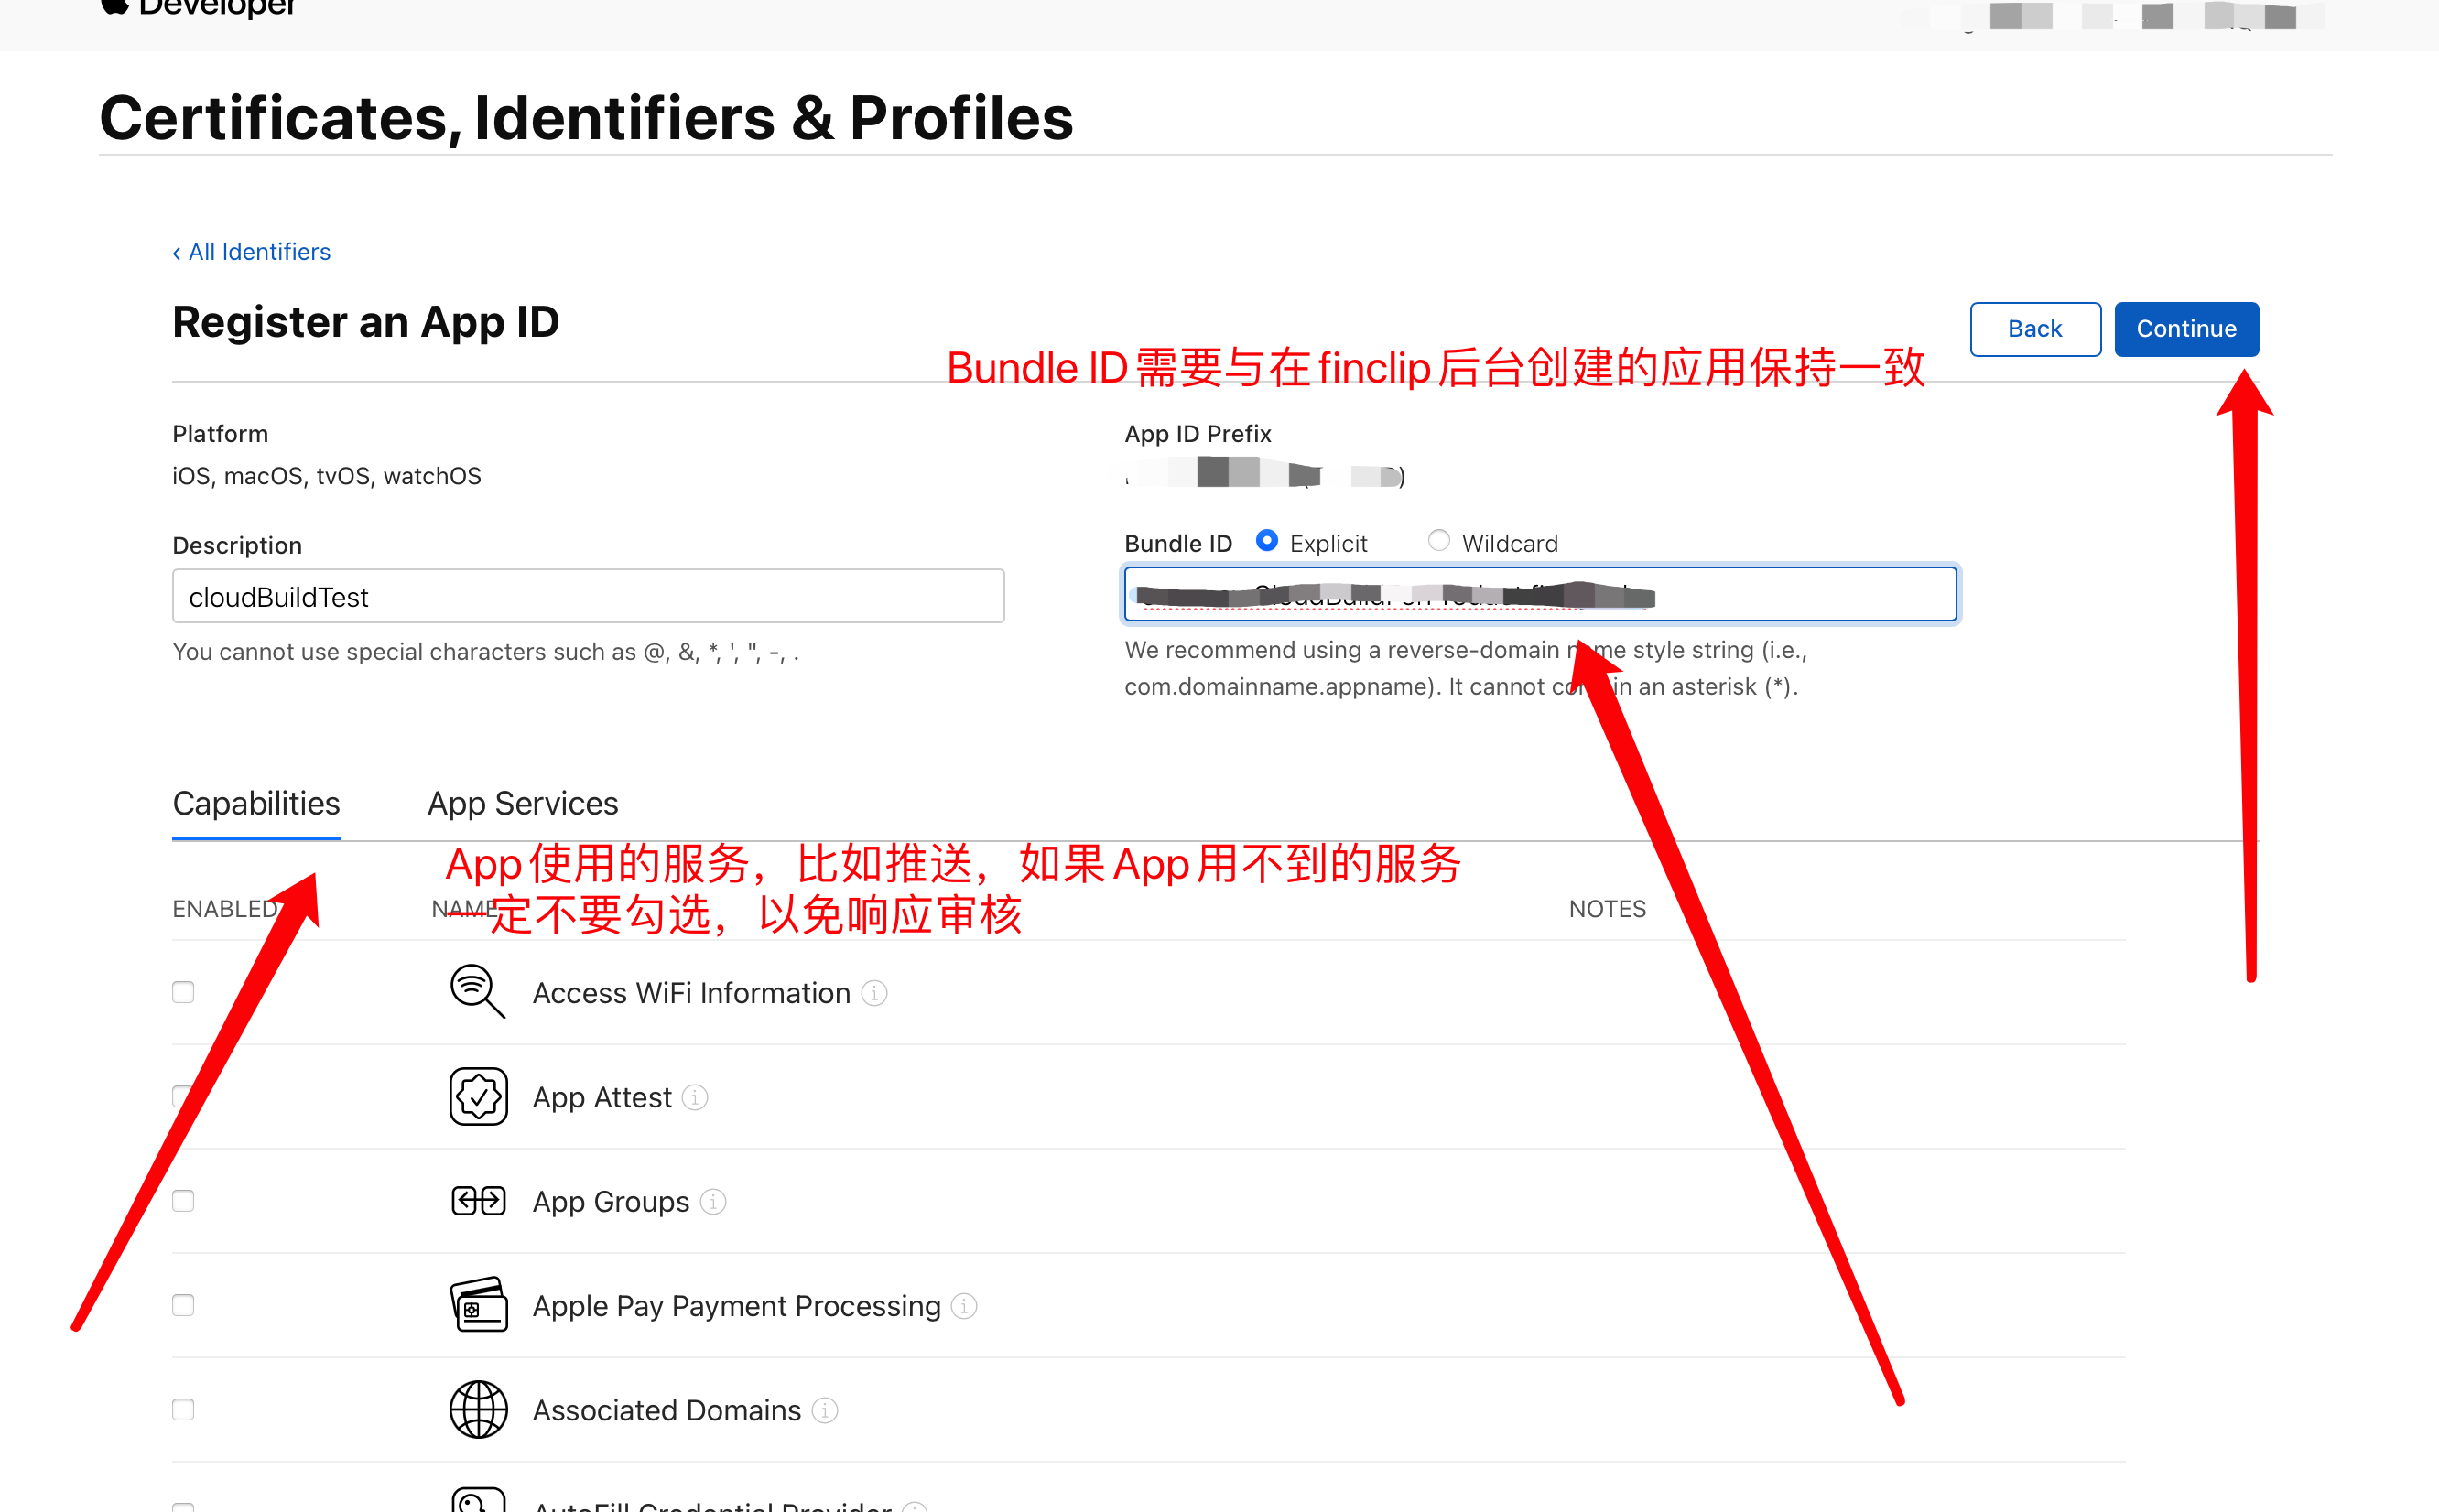
- Platform select "iOS, tvOS, watchOS", Bundle ID select "Explicit", fill in description in Description, then fill in Bundle ID. Bundle ID must be consistent with the Bundle id of the application applied for in the FinClip backend, otherwise opening Mini-Programs will fail, e.g.: "com.xxxxxxxxx.xxxx", then click "Continue"
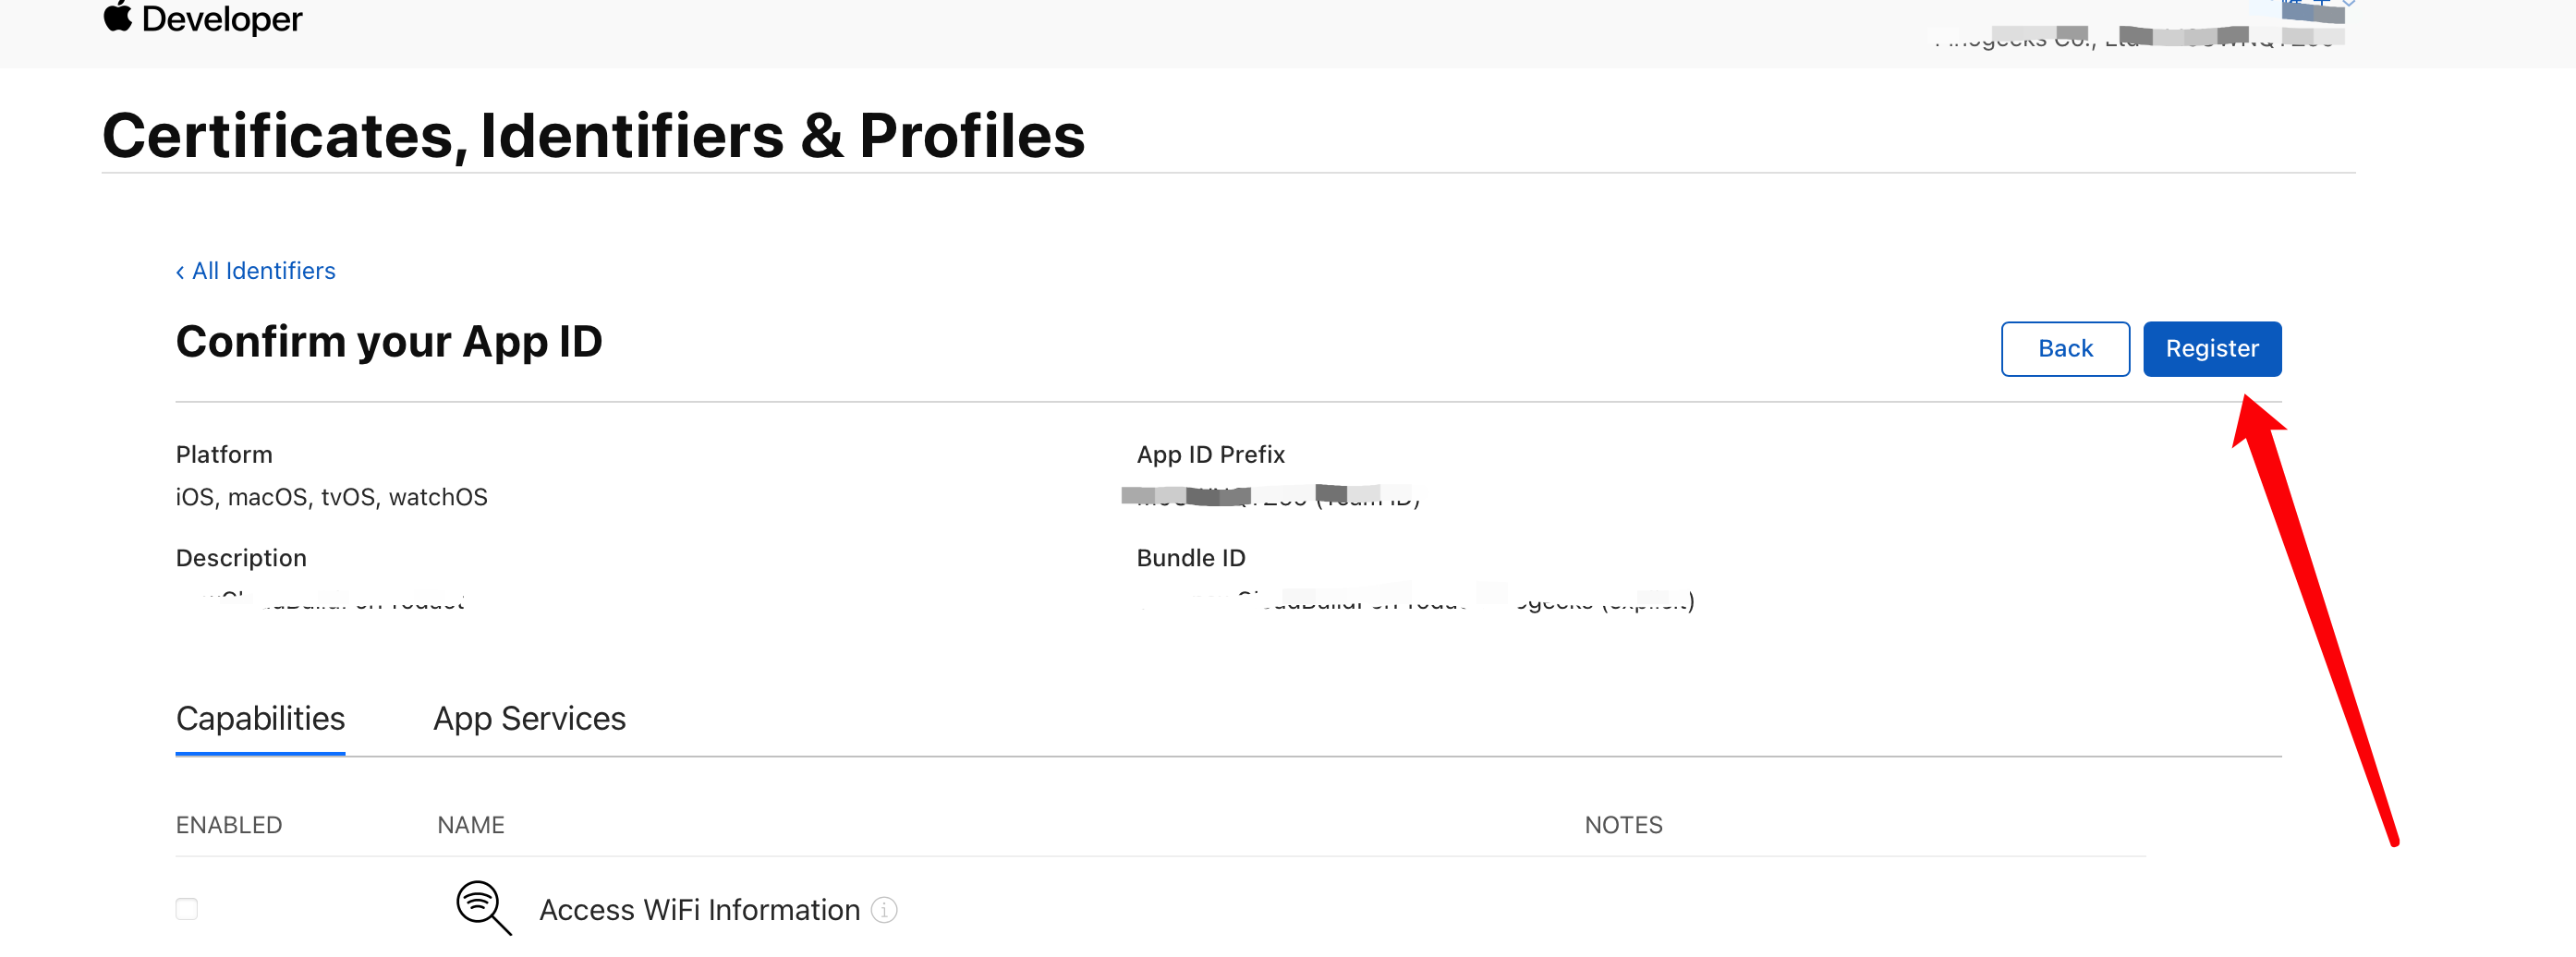
- After confirmation, select submit, return to identifiers page to see the newly created App ID:
# 1.2.4.3 Generate Development Certificate
Development certificate and corresponding provisioning profile are used during development phase, allowing direct App installation to phones. One provisioning profile can bind up to 100 test devices (development certificate cannot be used for App Store submission).
# 1.2.4.3.1 Apply for Certificate
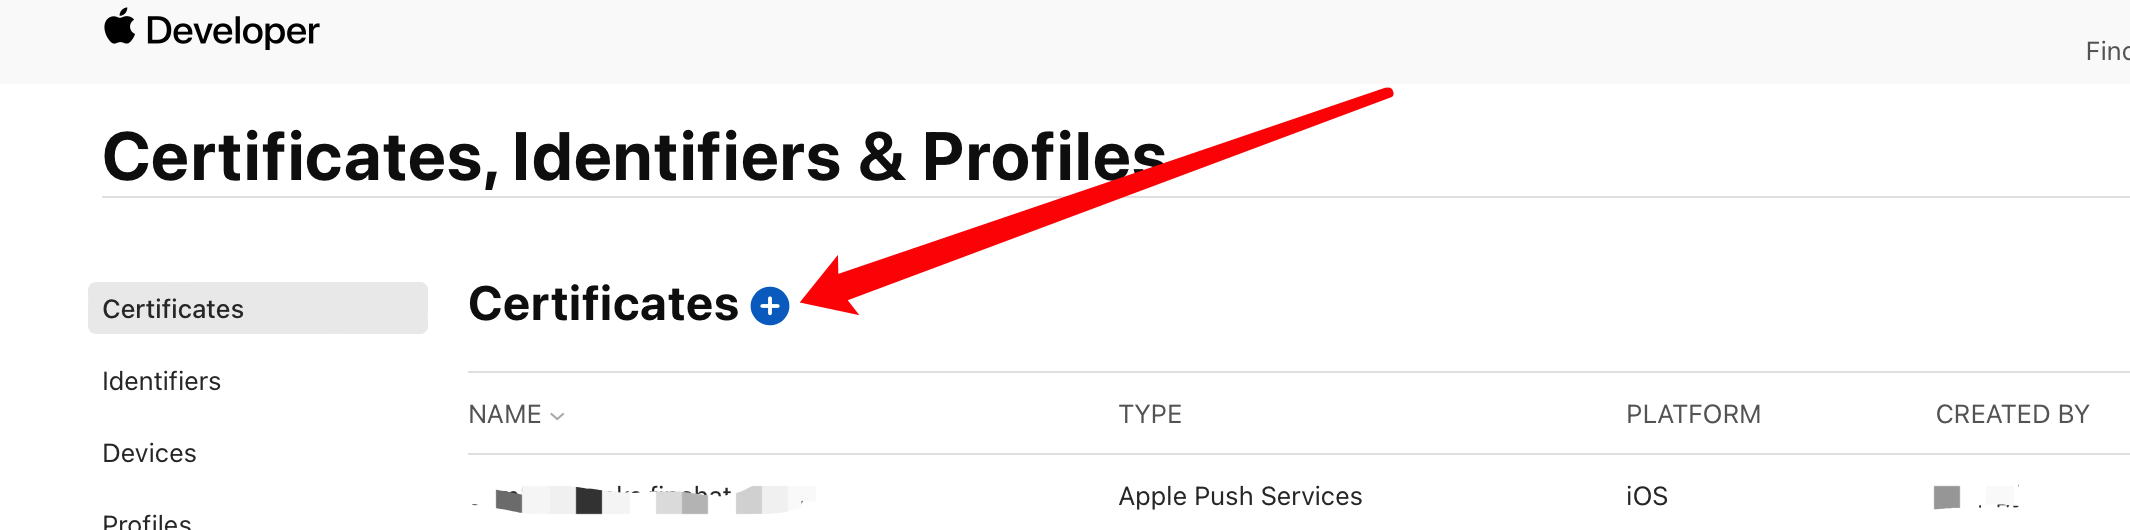
- Select "Certificates" in certificate management page to view all applied certificates (TYPE: Development for development certificate, Distribution for distribution certificate), click plus sign to create new certificate:
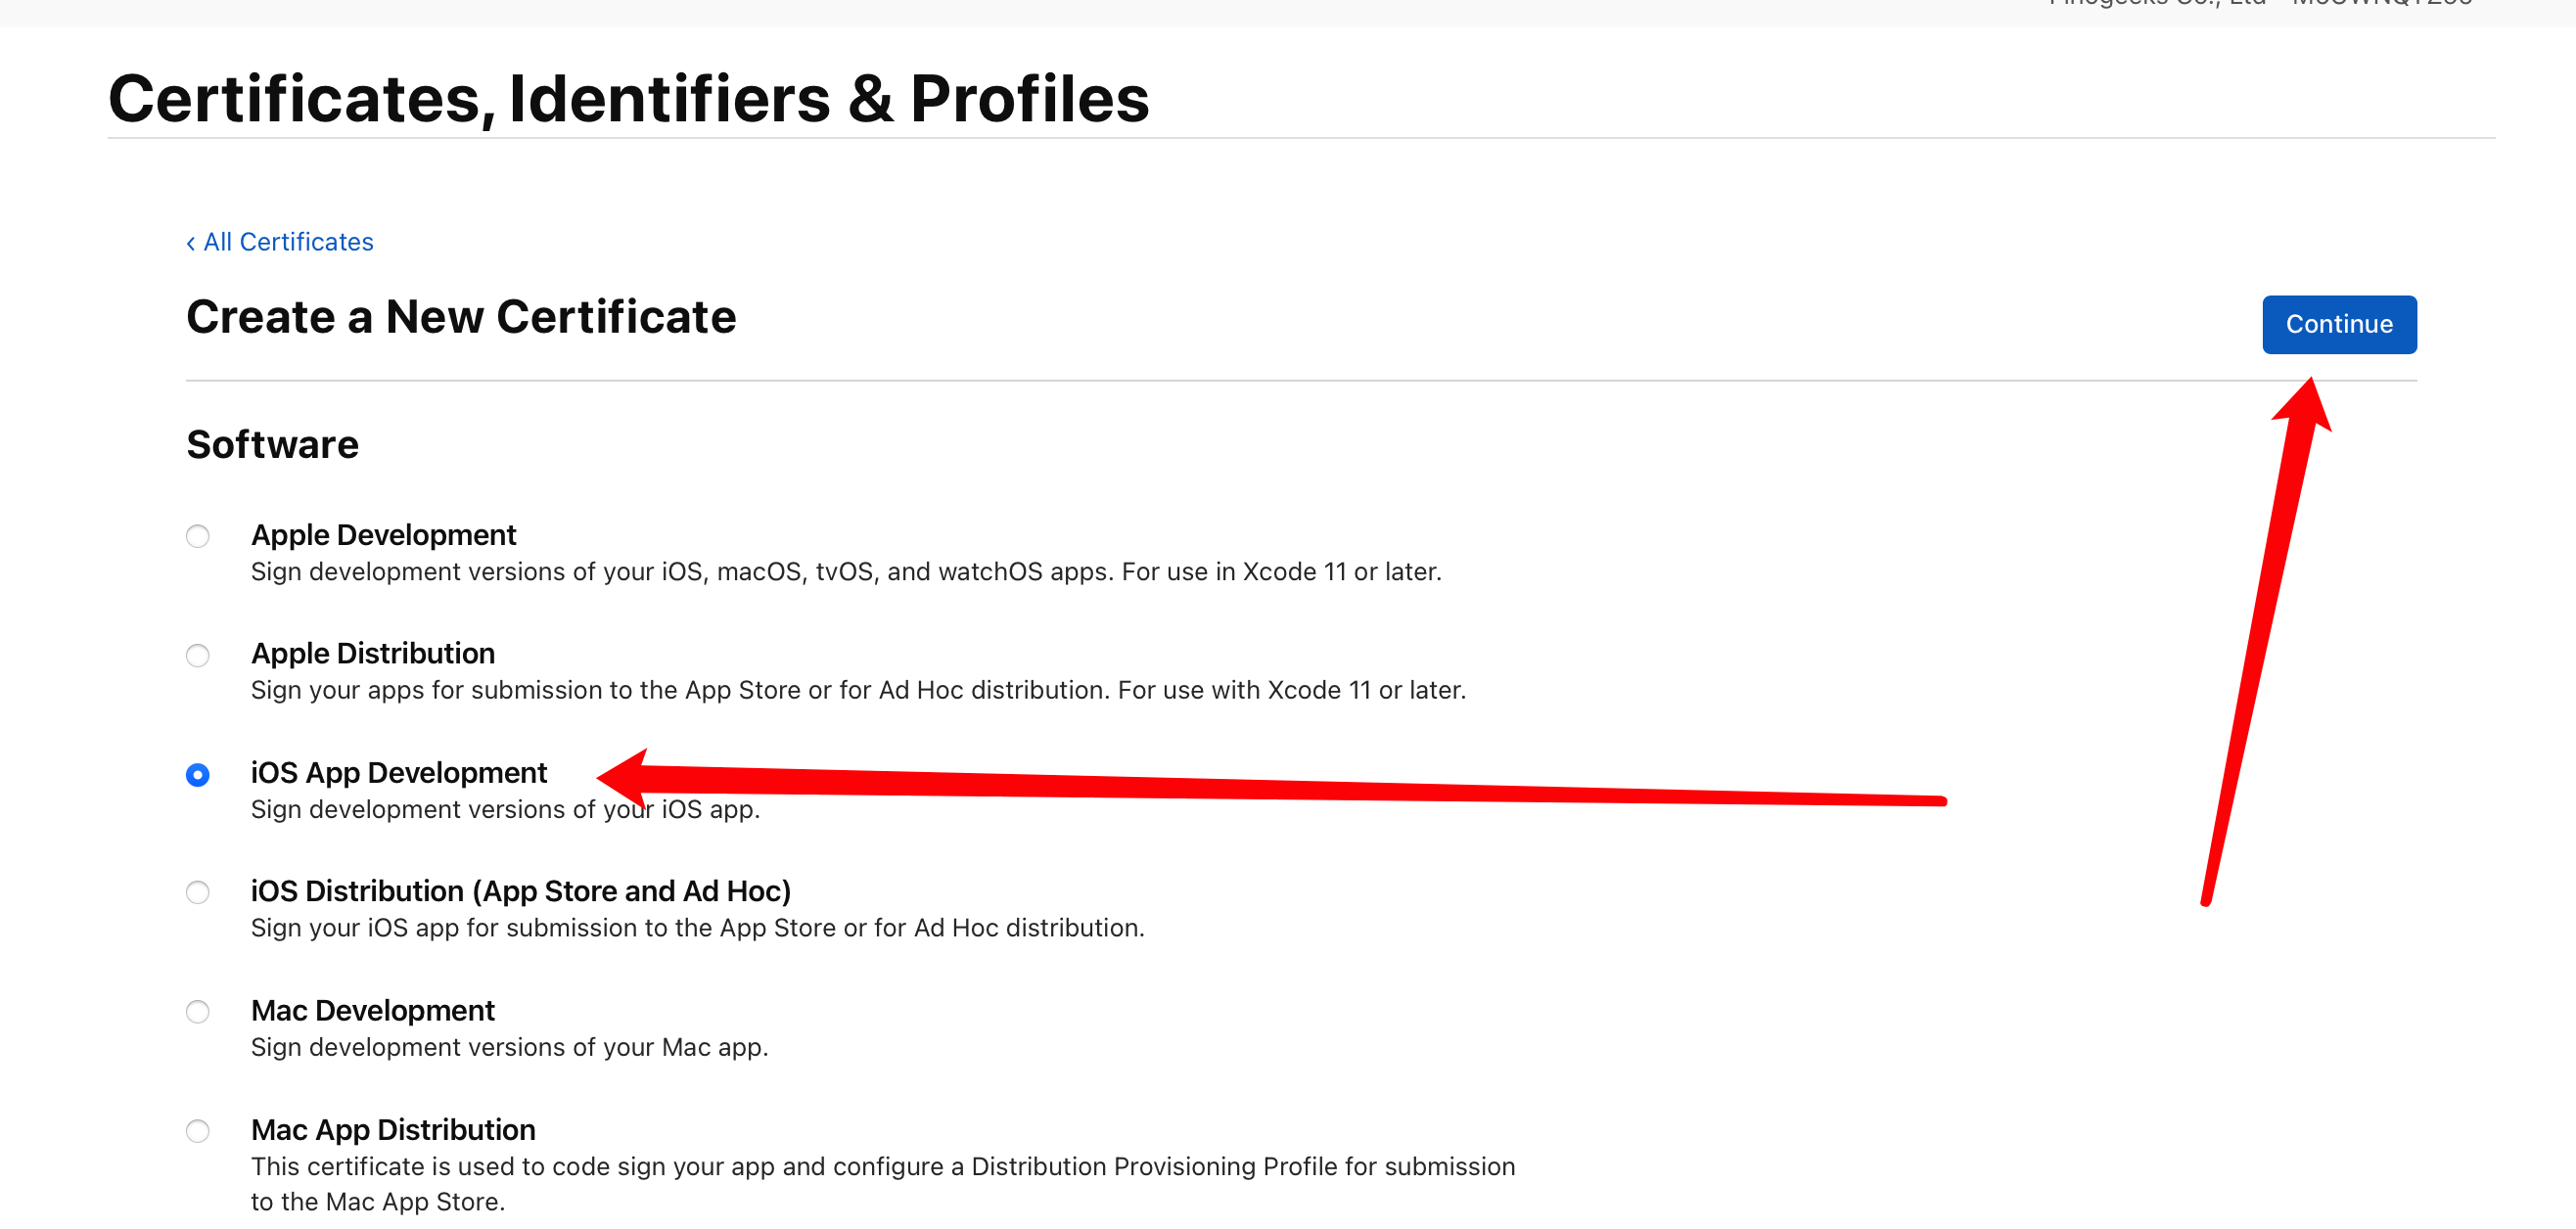
- Under "Software" section, select "iOS App Development" then click "Continue":
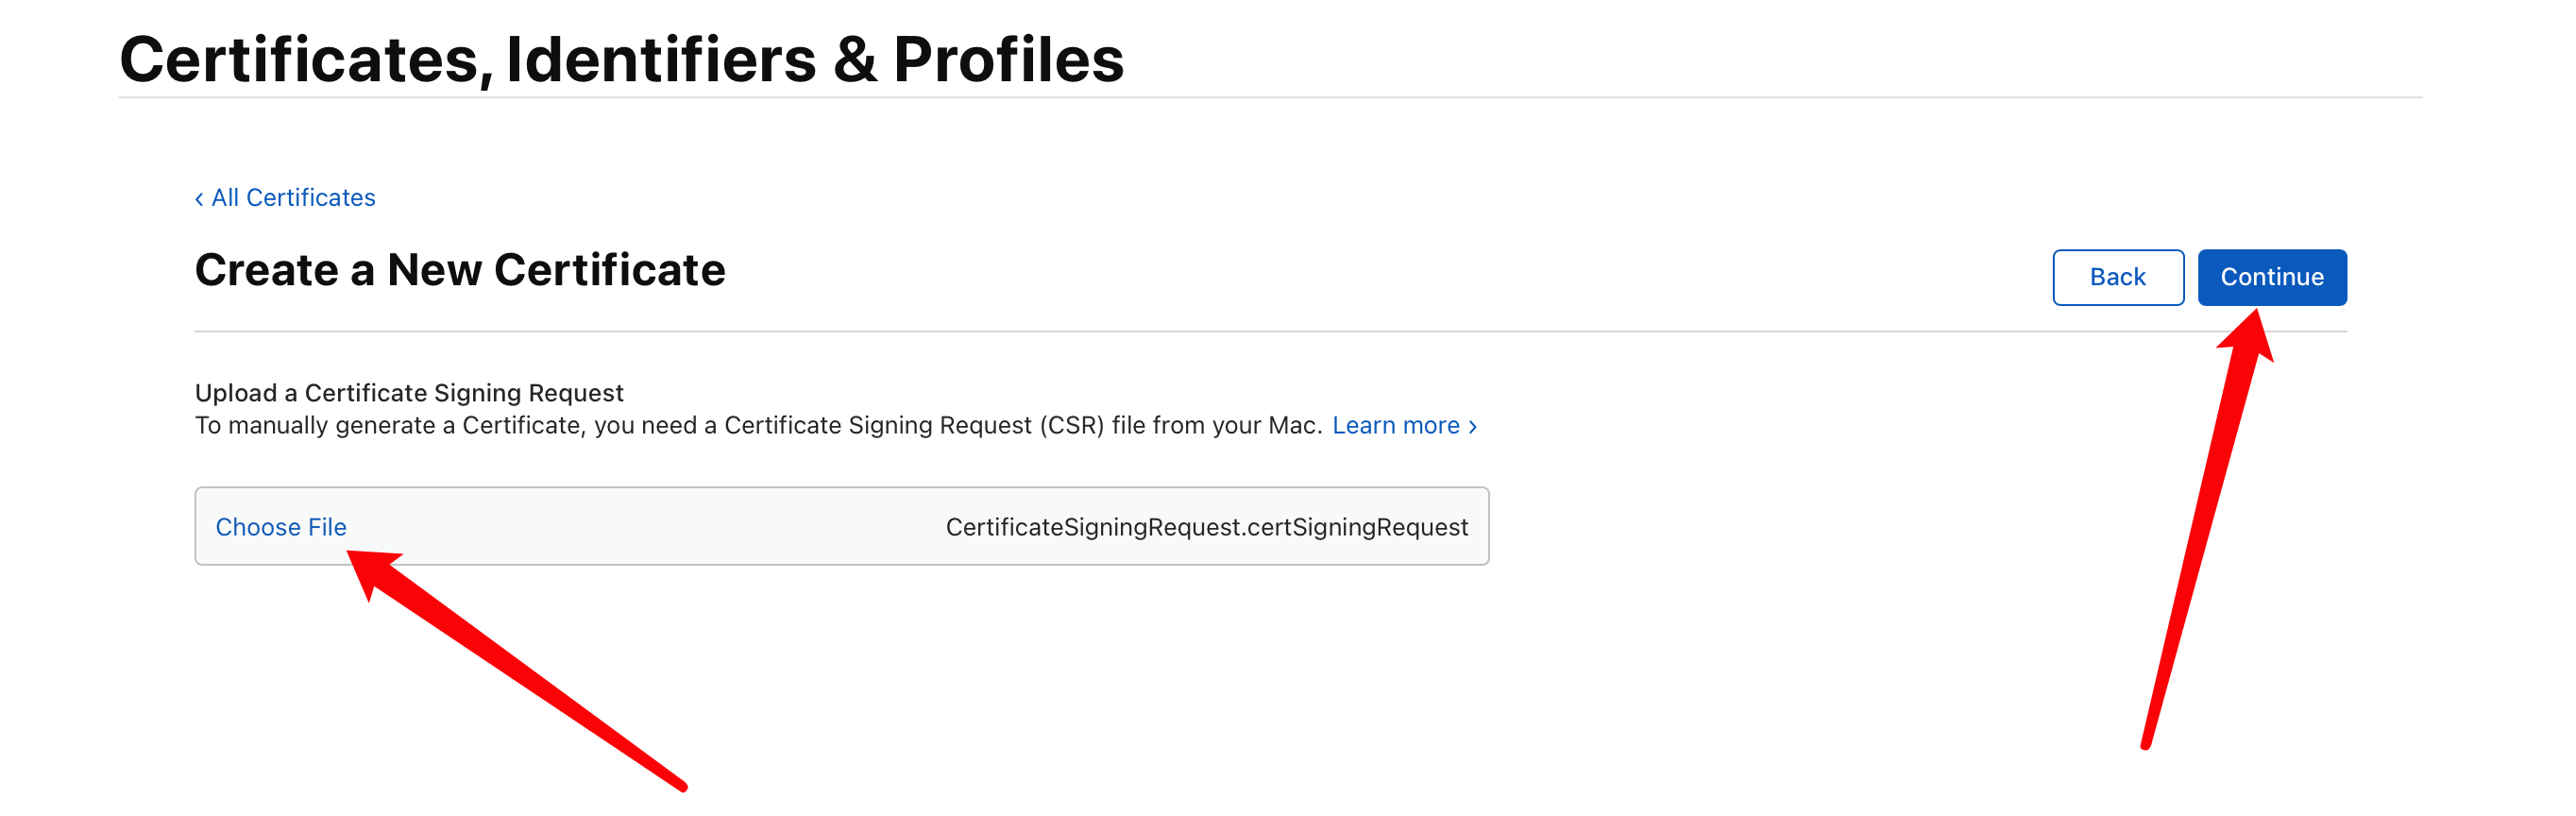
- Use the certificate request file generated earlier, click "Choose File...", select the locally saved "CertificateSigningRequest.certSigningRequest" file, click "Continue" to generate certificate file:
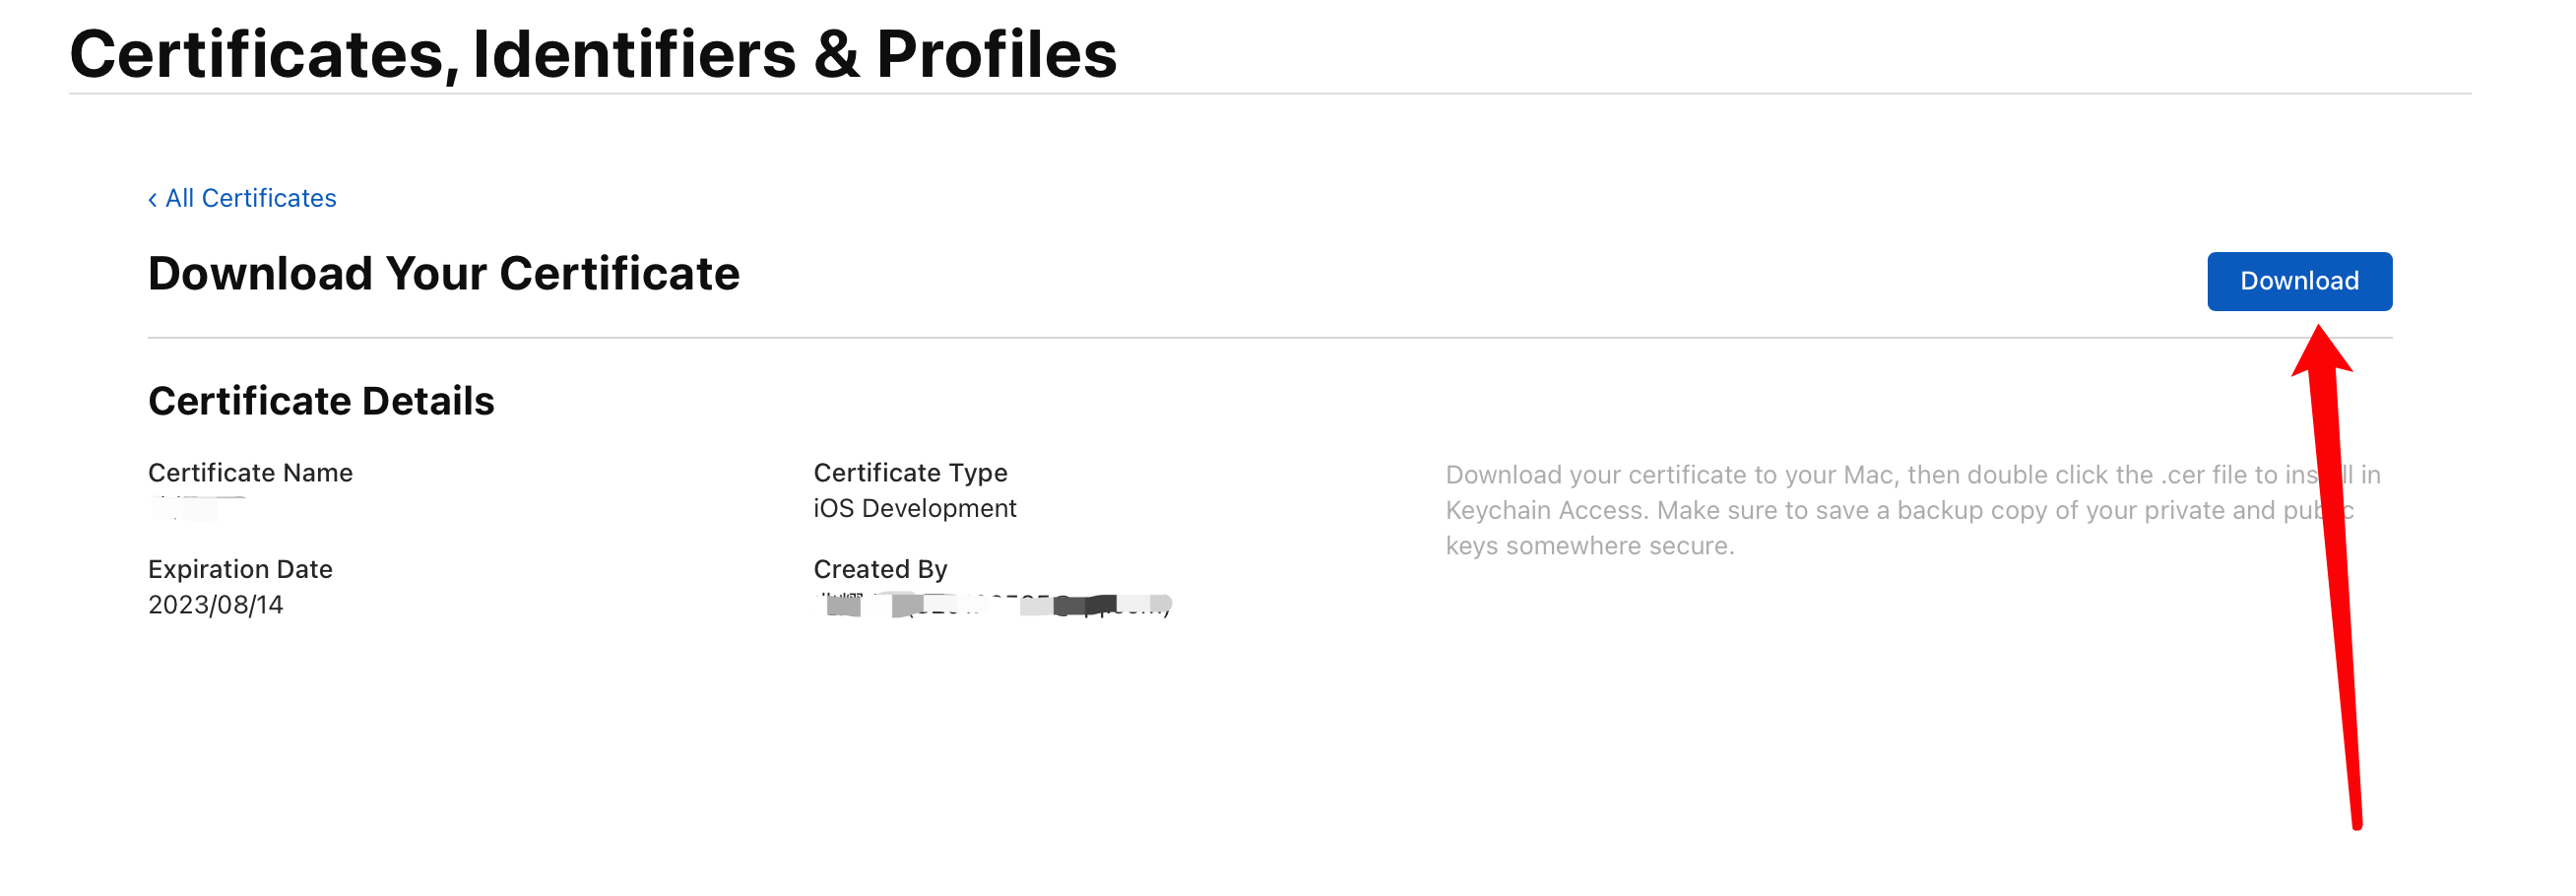
- After certificate generation, select "Download" to download certificate locally (development.cer):
- Double-click the locally saved development.cer file, will automatically open "Keychain Access" tool indicating successful certificate import. You can see the imported certificate in certificate list. Next need to export .p12 certificate file. Select imported certificate, right-click select "Export xxxxxx":
- Enter file name, select path, click "Save", enter password and confirm password, click "OK":
- At this point, we have completed development certificate creation (obtained xxx.p12 certificate file).
# 1.2.4.3.2 Add Debug Device
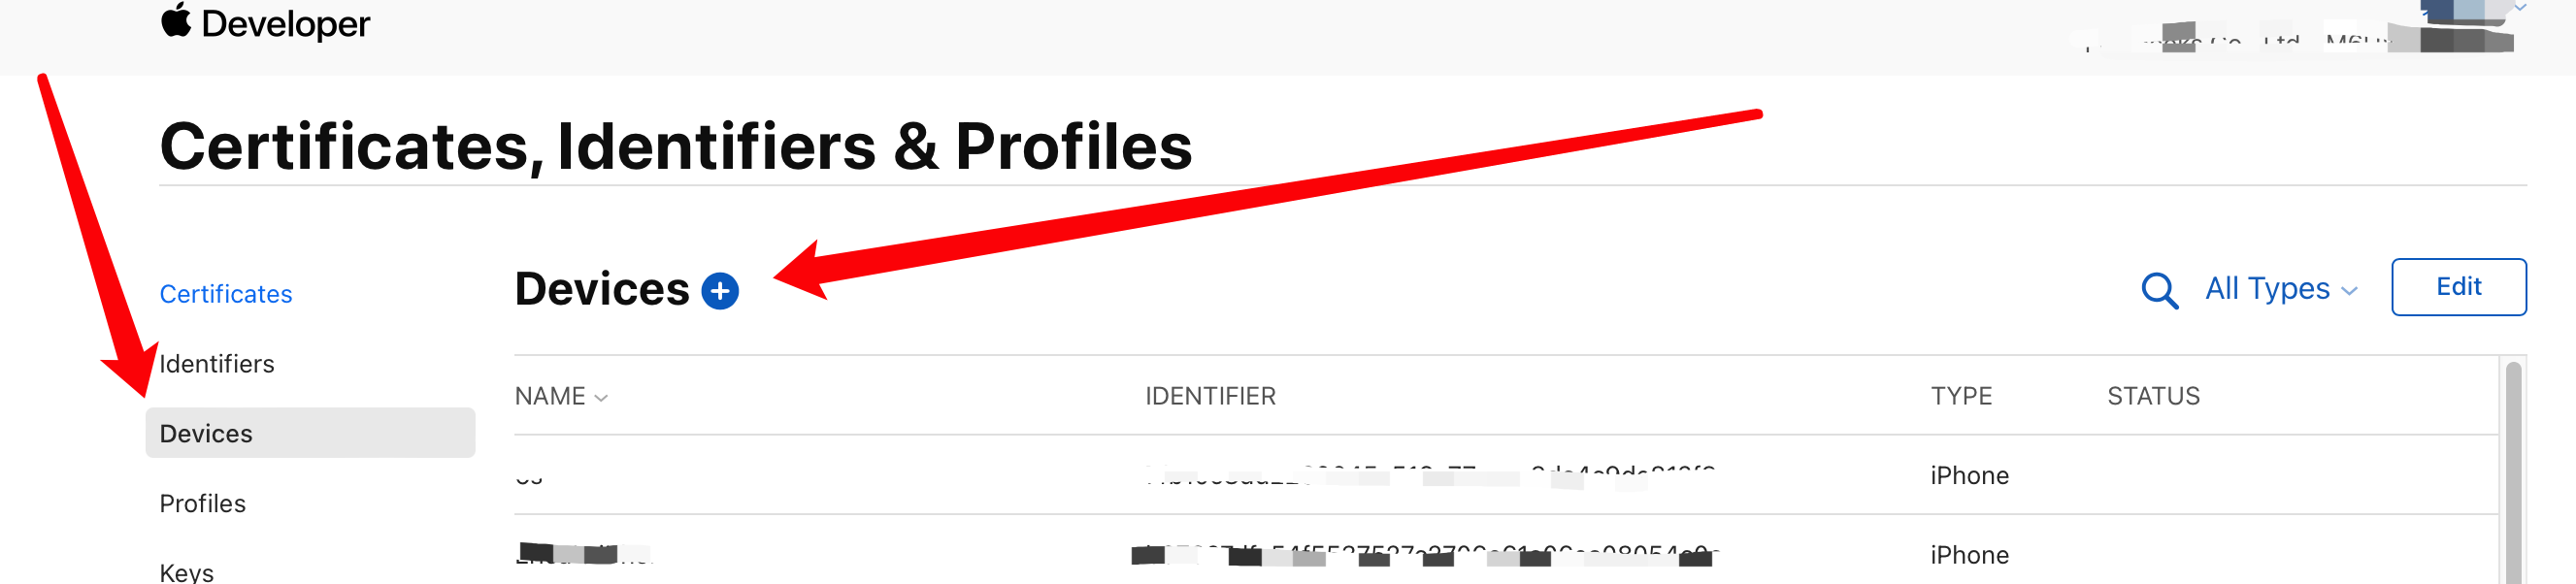
Development provisioning profile must bind debug devices. Only authorized devices can directly install App. So before applying for development provisioning profile, first add debug devices. To get UUID, click link Get Device UDID (opens new window), scan QR code, will prompt to install a profile. After clicking install, device information will display in browser. Long press to copy value under "Device Information UDID", which is the UDID.
- Select "Devices" in certificate management page to view all added device information, click plus sign to add new device:
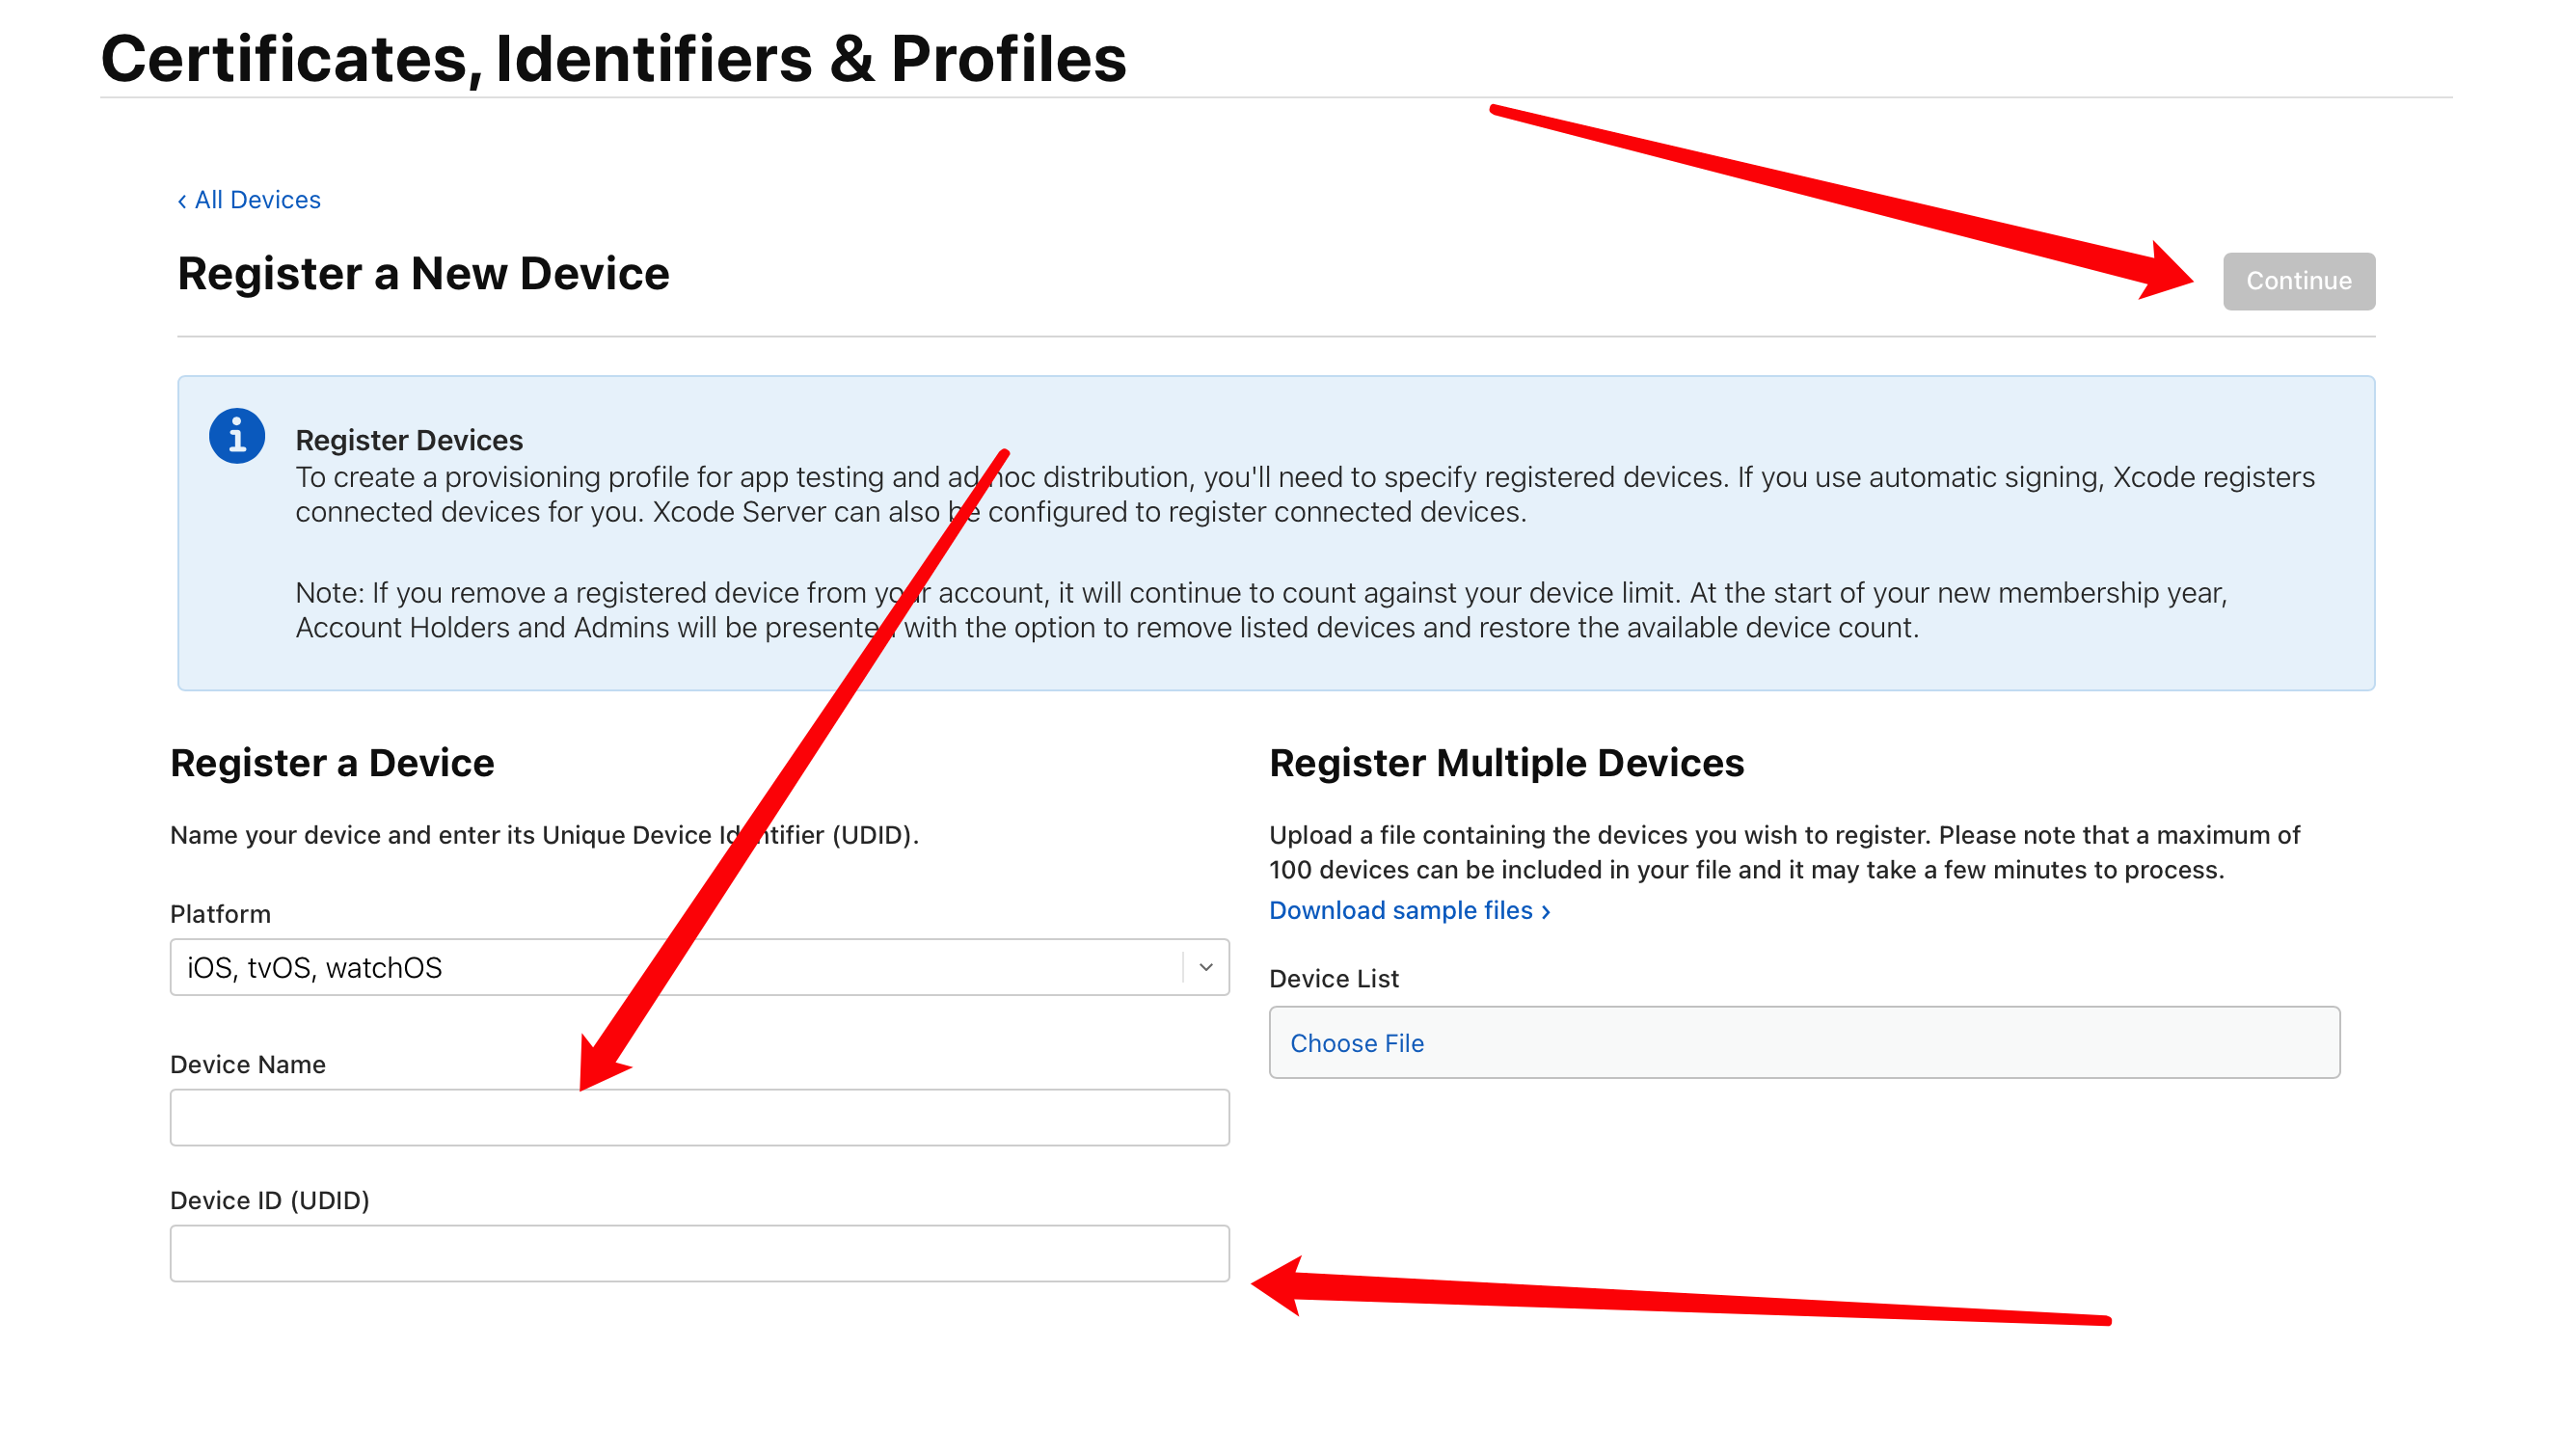
- Fill in device name and UDID (device identifier):
# 1.2.4.3.3 Apply for Development Provisioning Profile
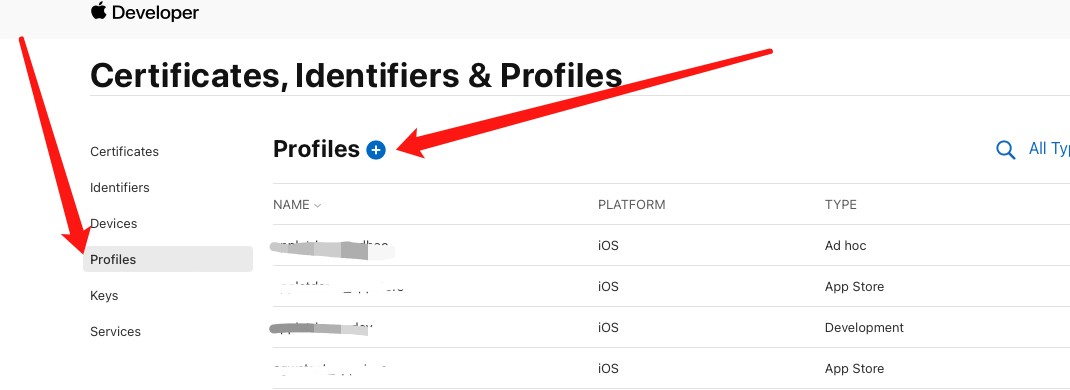
- Select "Profiles" in certificate management page to view all applied provisioning profiles, click plus sign to add new provisioning profile:
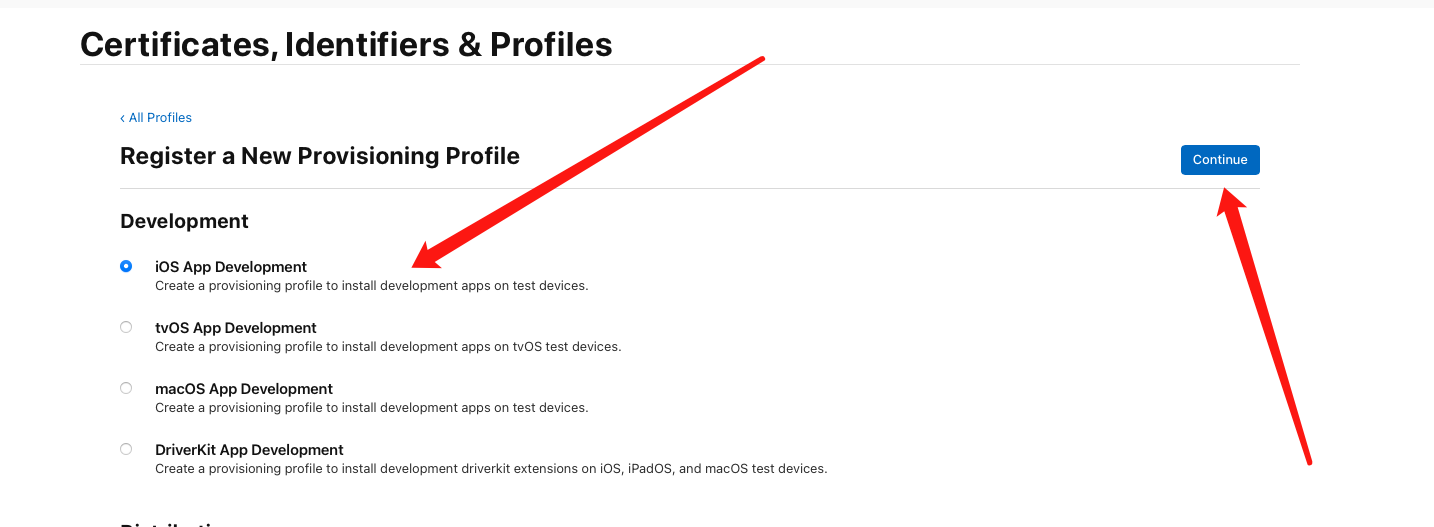
- Under "Development" section, select "iOS App Development", click "Continue" button:
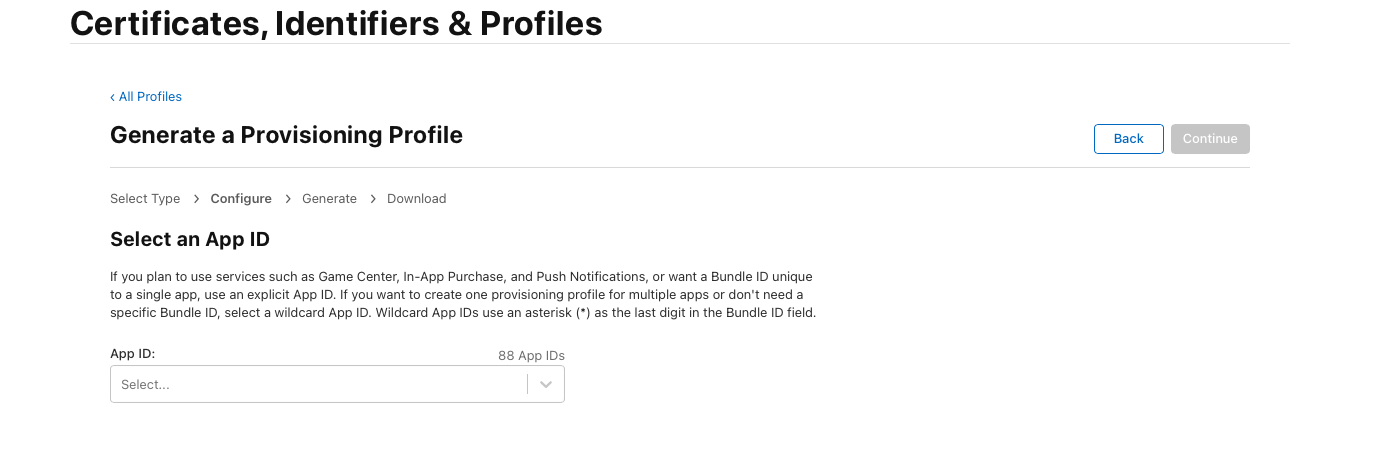
- Select previously created "App ID", click "Continue":
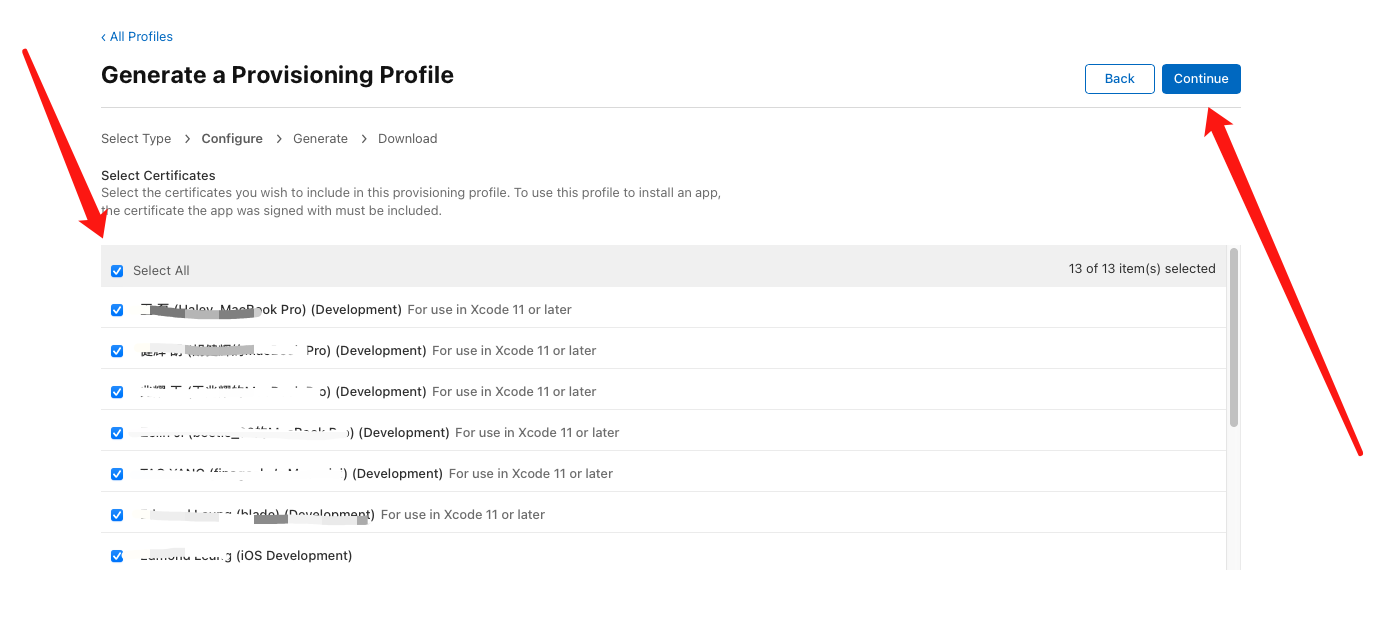
- Next select certificates to bind, click "Continue":
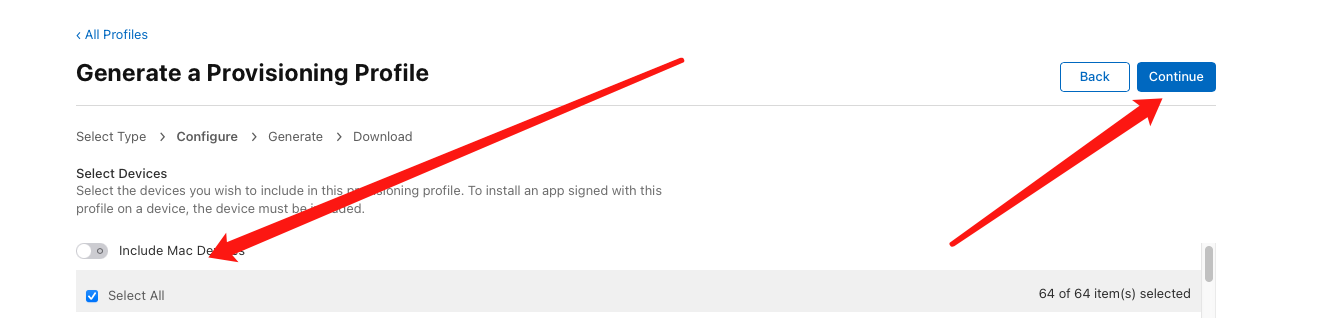
- Select authorized debug devices, recommended to directly check "Select All", click "Continue":
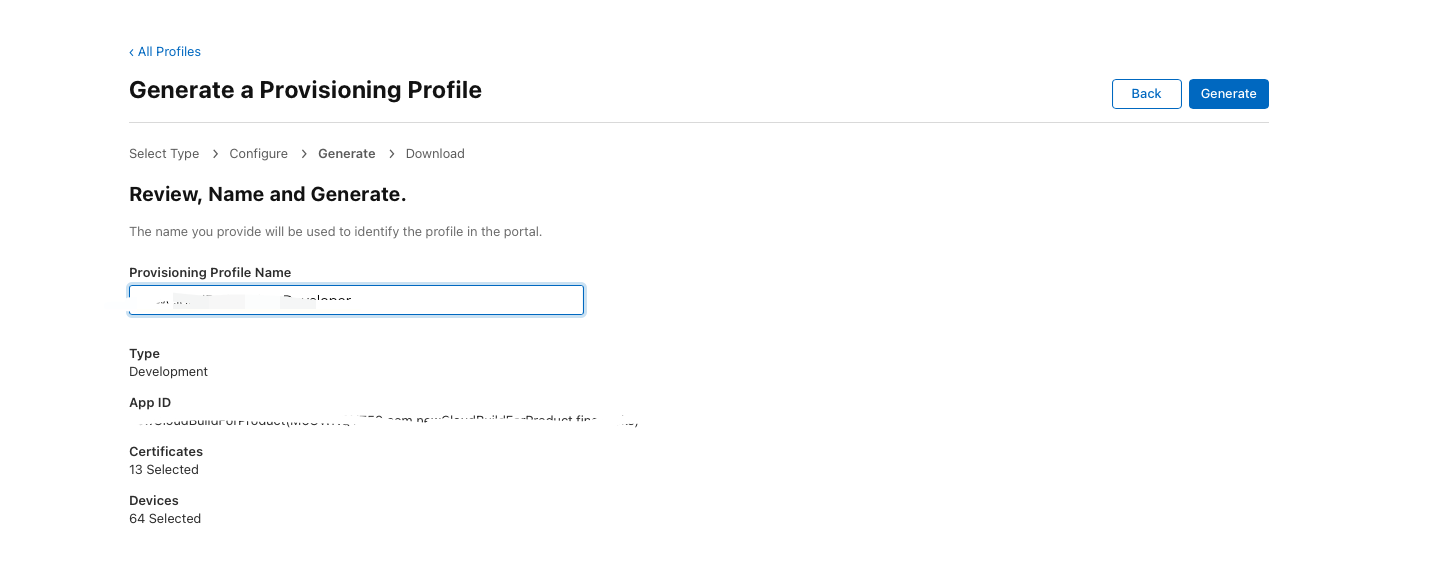
- Enter provisioning profile name (e.g., "xxxxProfile"), click "Generate" to generate provisioning profile:
- Click "Download" to download and save development provisioning profile (file extension .mobileprovision)
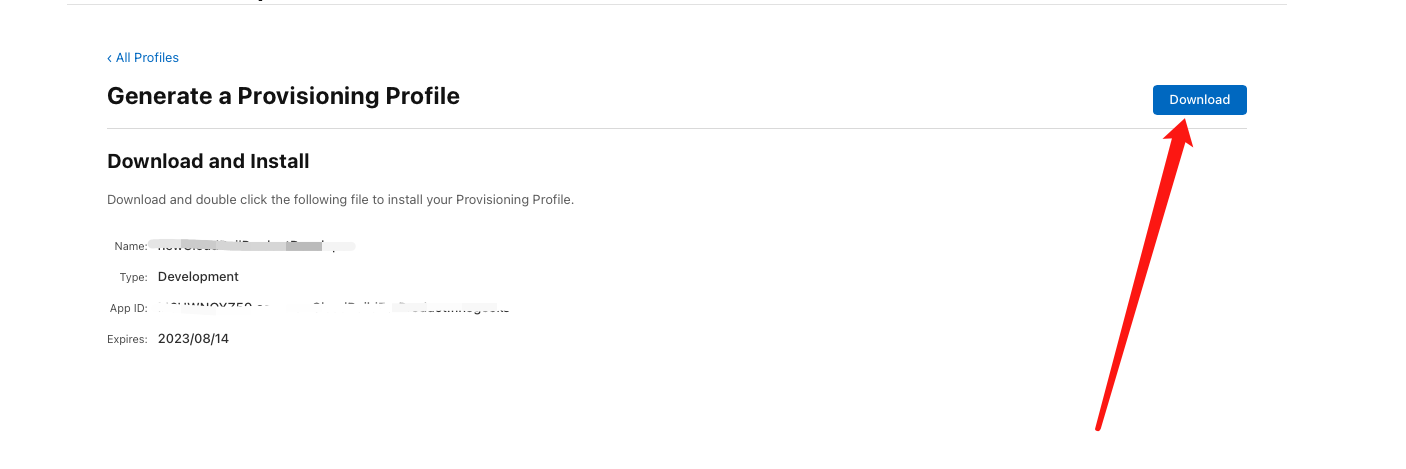
- At this point, we have obtained development certificate (.p12) and corresponding provisioning profile (.mobileprovision)
# 1.2.4.4 Generate Distribution Certificate
Production certificate is used in official release environment, for App Store submission and review. IPA packaged with distribution certificate cannot be directly installed on phones.
# 1.2.4.4.1 Apply for Distribution Certificate
- Select "Certificates" in certificate management page to view all applied certificates (TYPE: Development for development certificate, Distribution for distribution certificate), click plus sign to create new certificate:
- Under "Software" section, select "iOS Distribution(App Store and Ad Hoc)", click "Continue":
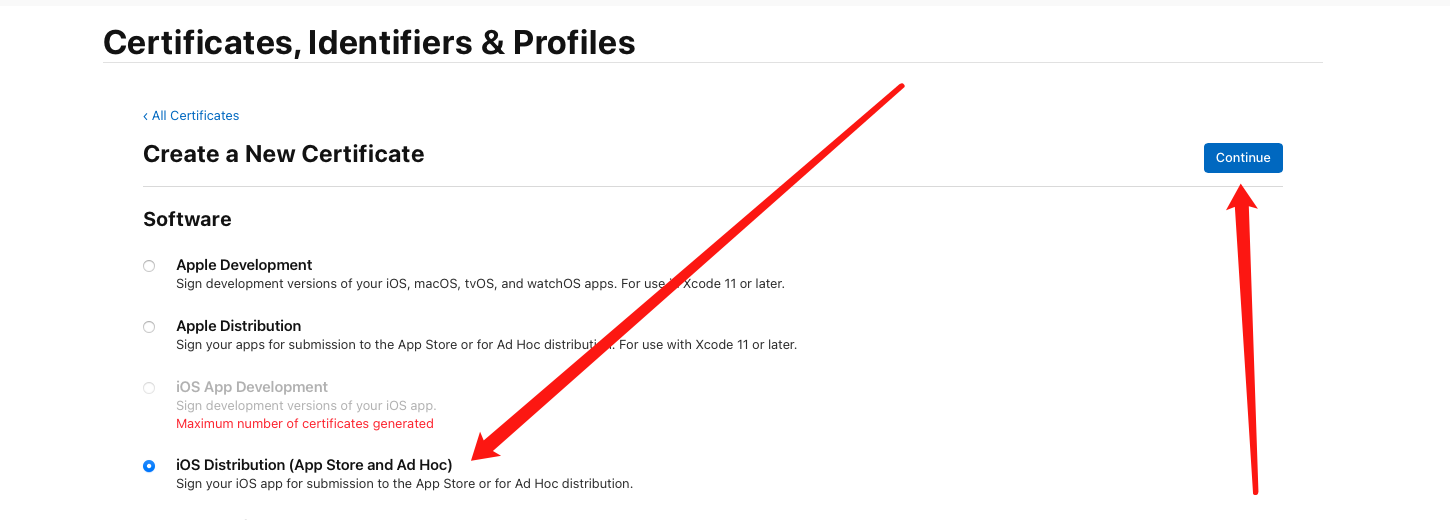
- Next also need to use previously generated certificate request file, click "Choose File..." to select locally saved "CertificateSigningRequest.certSigningRequest" file, click "Continue" to generate certificate file:
- Certificate generation successful, select "Download" to download certificate locally
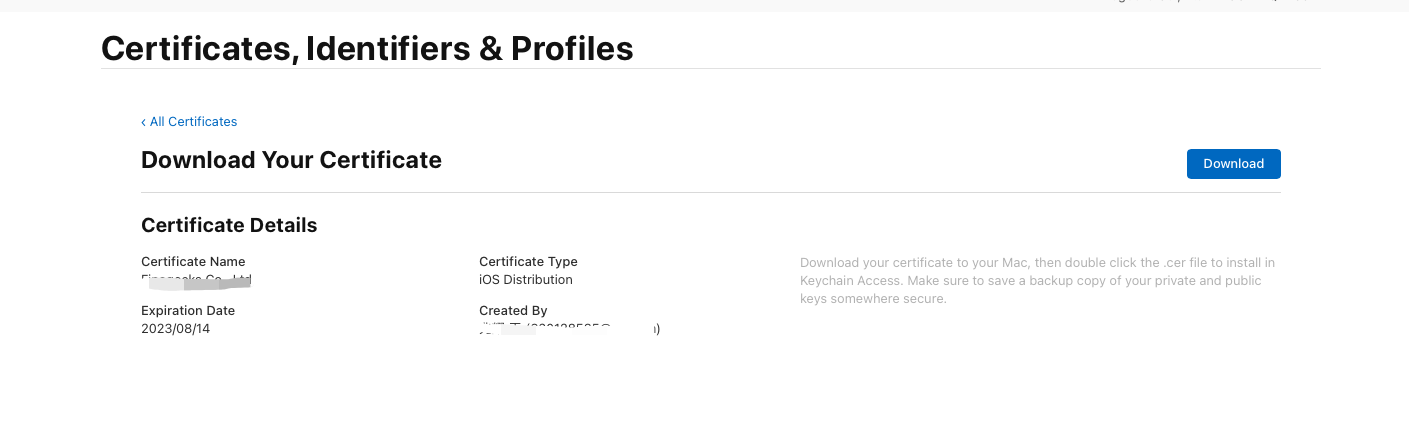
- Similarly double-click locally saved ios_production.cer file to import certificate into "Keychain Access" tool. You can see imported certificate in certificate list. Next need to export .p12 certificate file. Select imported certificate, right-click select "Export
- Enter file name, select path, click "Save":
- Enter password and confirm password, click "OK":
- If prompted for keychain login password, enter current device account password.
- At this point, we have completed distribution certificate creation (obtained xxx.p12 certificate file). Next, continue to generate distribution provisioning profile.
# 1.2.4.4.2 Apply for Distribution Provisioning Profile
- Select "Profiles" in certificate management page to view all applied provisioning profiles, click plus sign to add new provisioning profile:
- Under "Distribution" section, select "App Store", click "Continue" button:
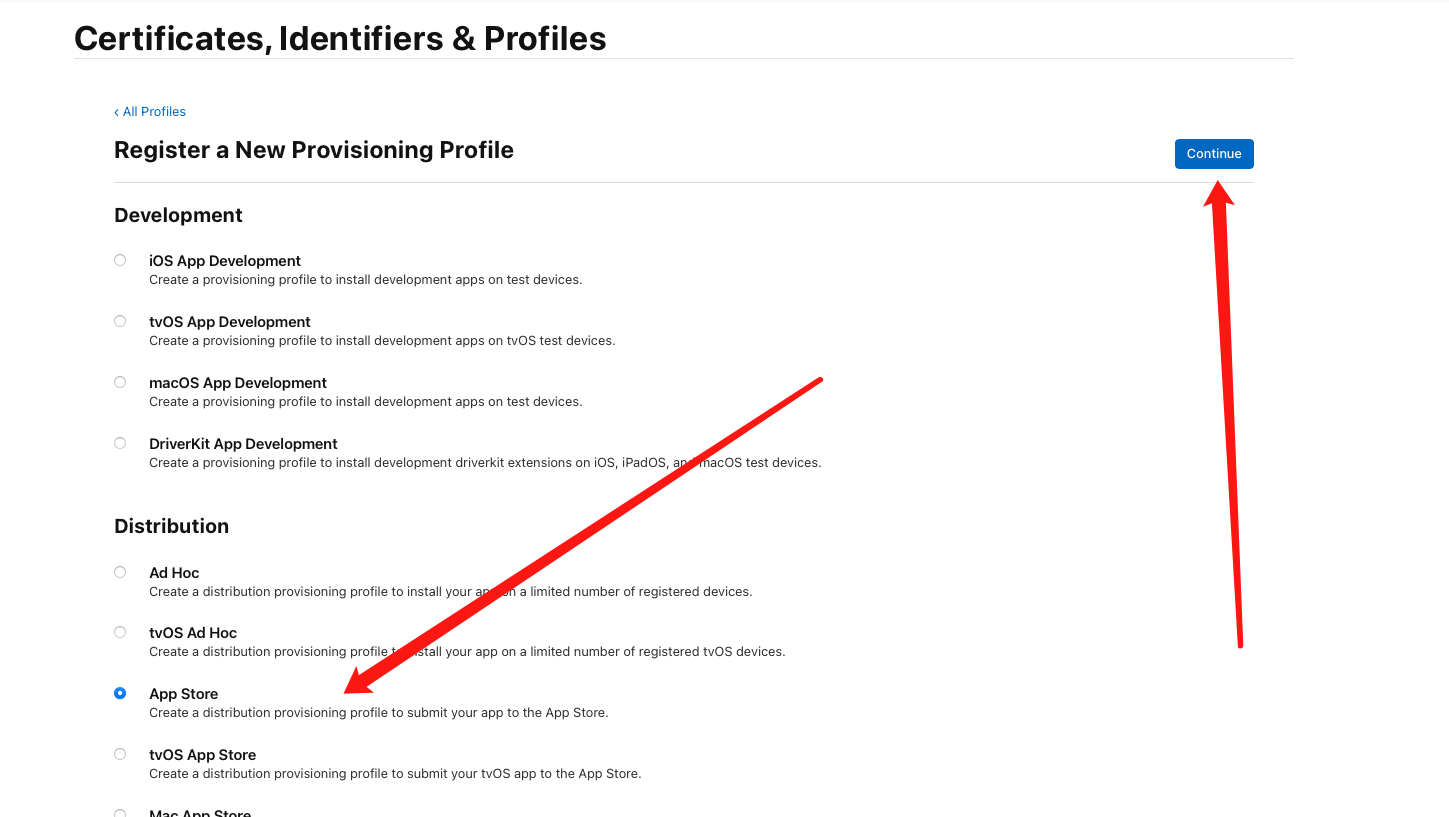
- Select previously created "App ID", click "Continue":
- Next select distribution certificate to bind (iOS Distribution), check the newly generated distribution certificate, click "Continue":
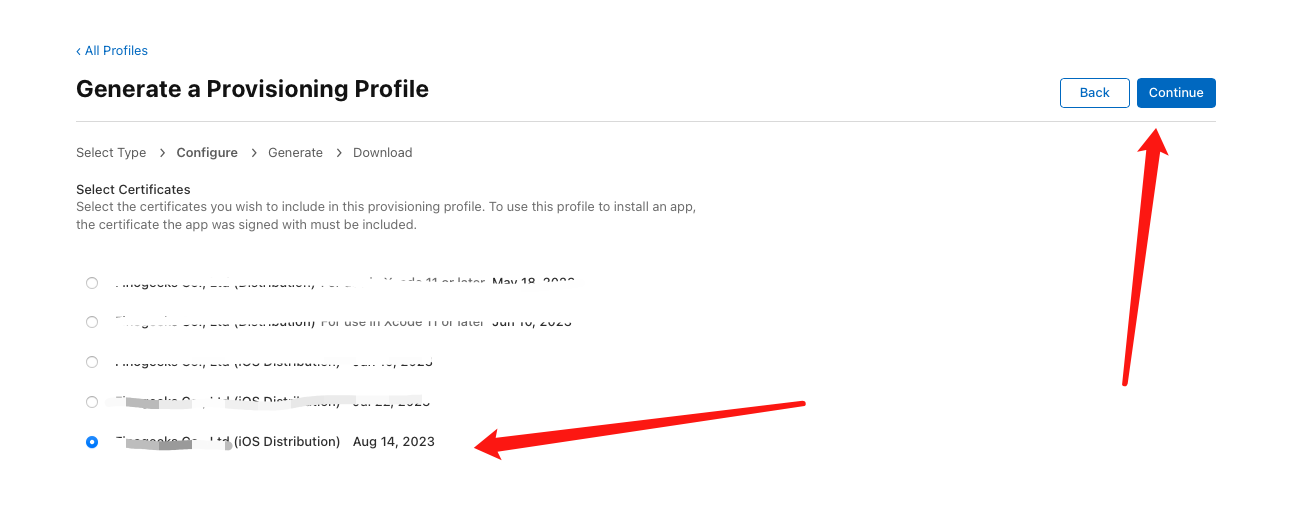
- Next enter provisioning profile name (e.g., "AppProfileDistribution"), click "Generate" to generate provisioning profile:
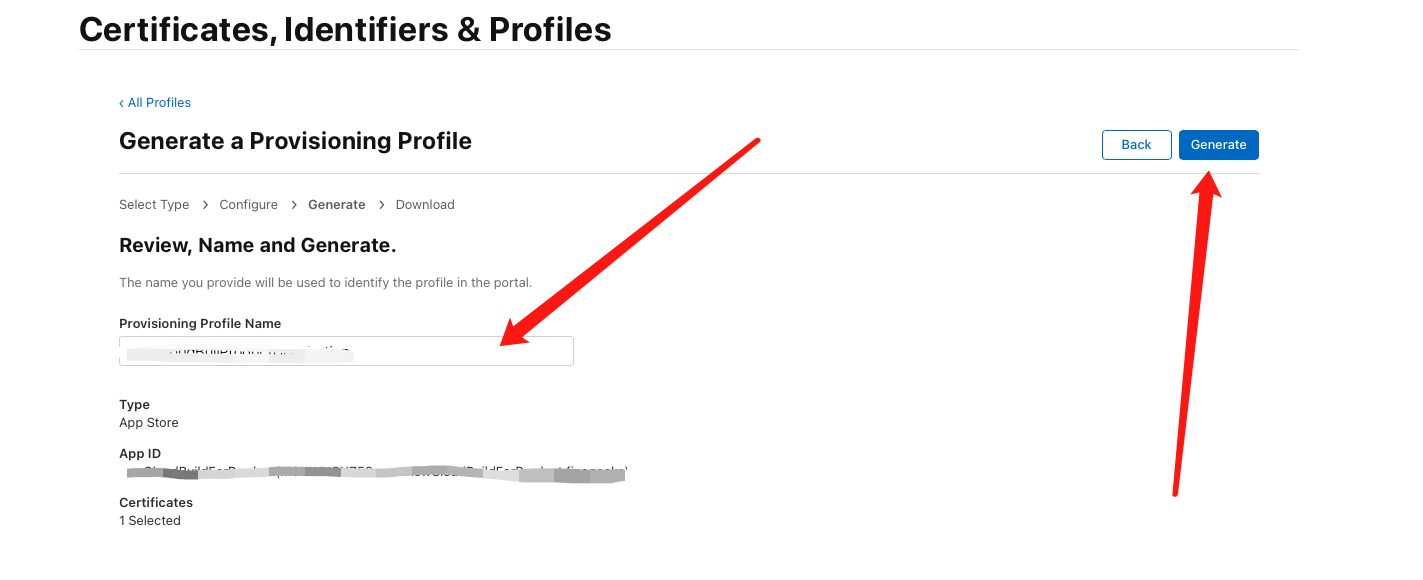
- Then click "Download" to download provisioning profile locally (file extension .mobileprovision)
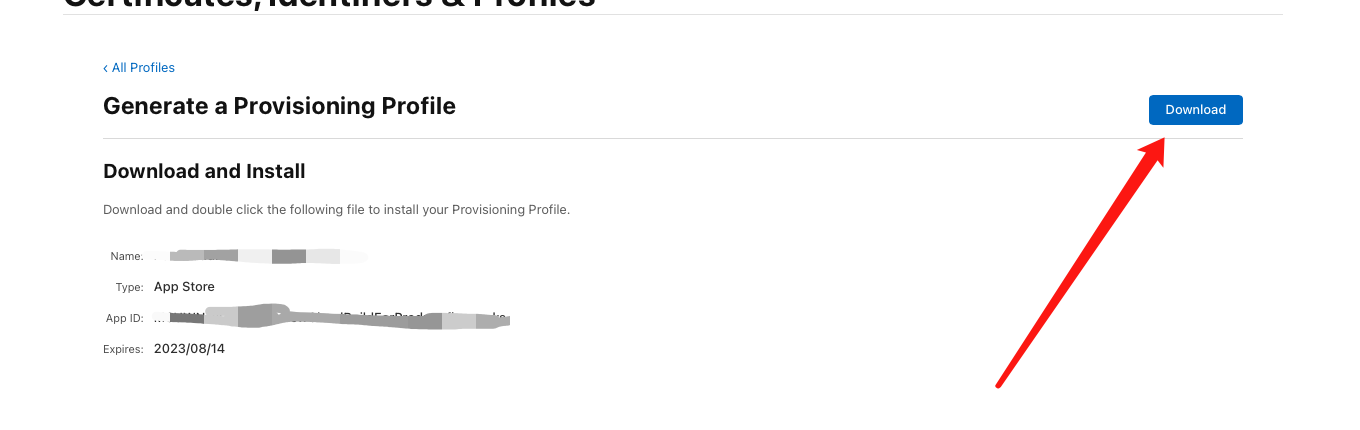
- At this point, we have obtained distribution certificate (.p12) and corresponding distribution provisioning profile (.mobileprovision).
# 1.3 Run Project
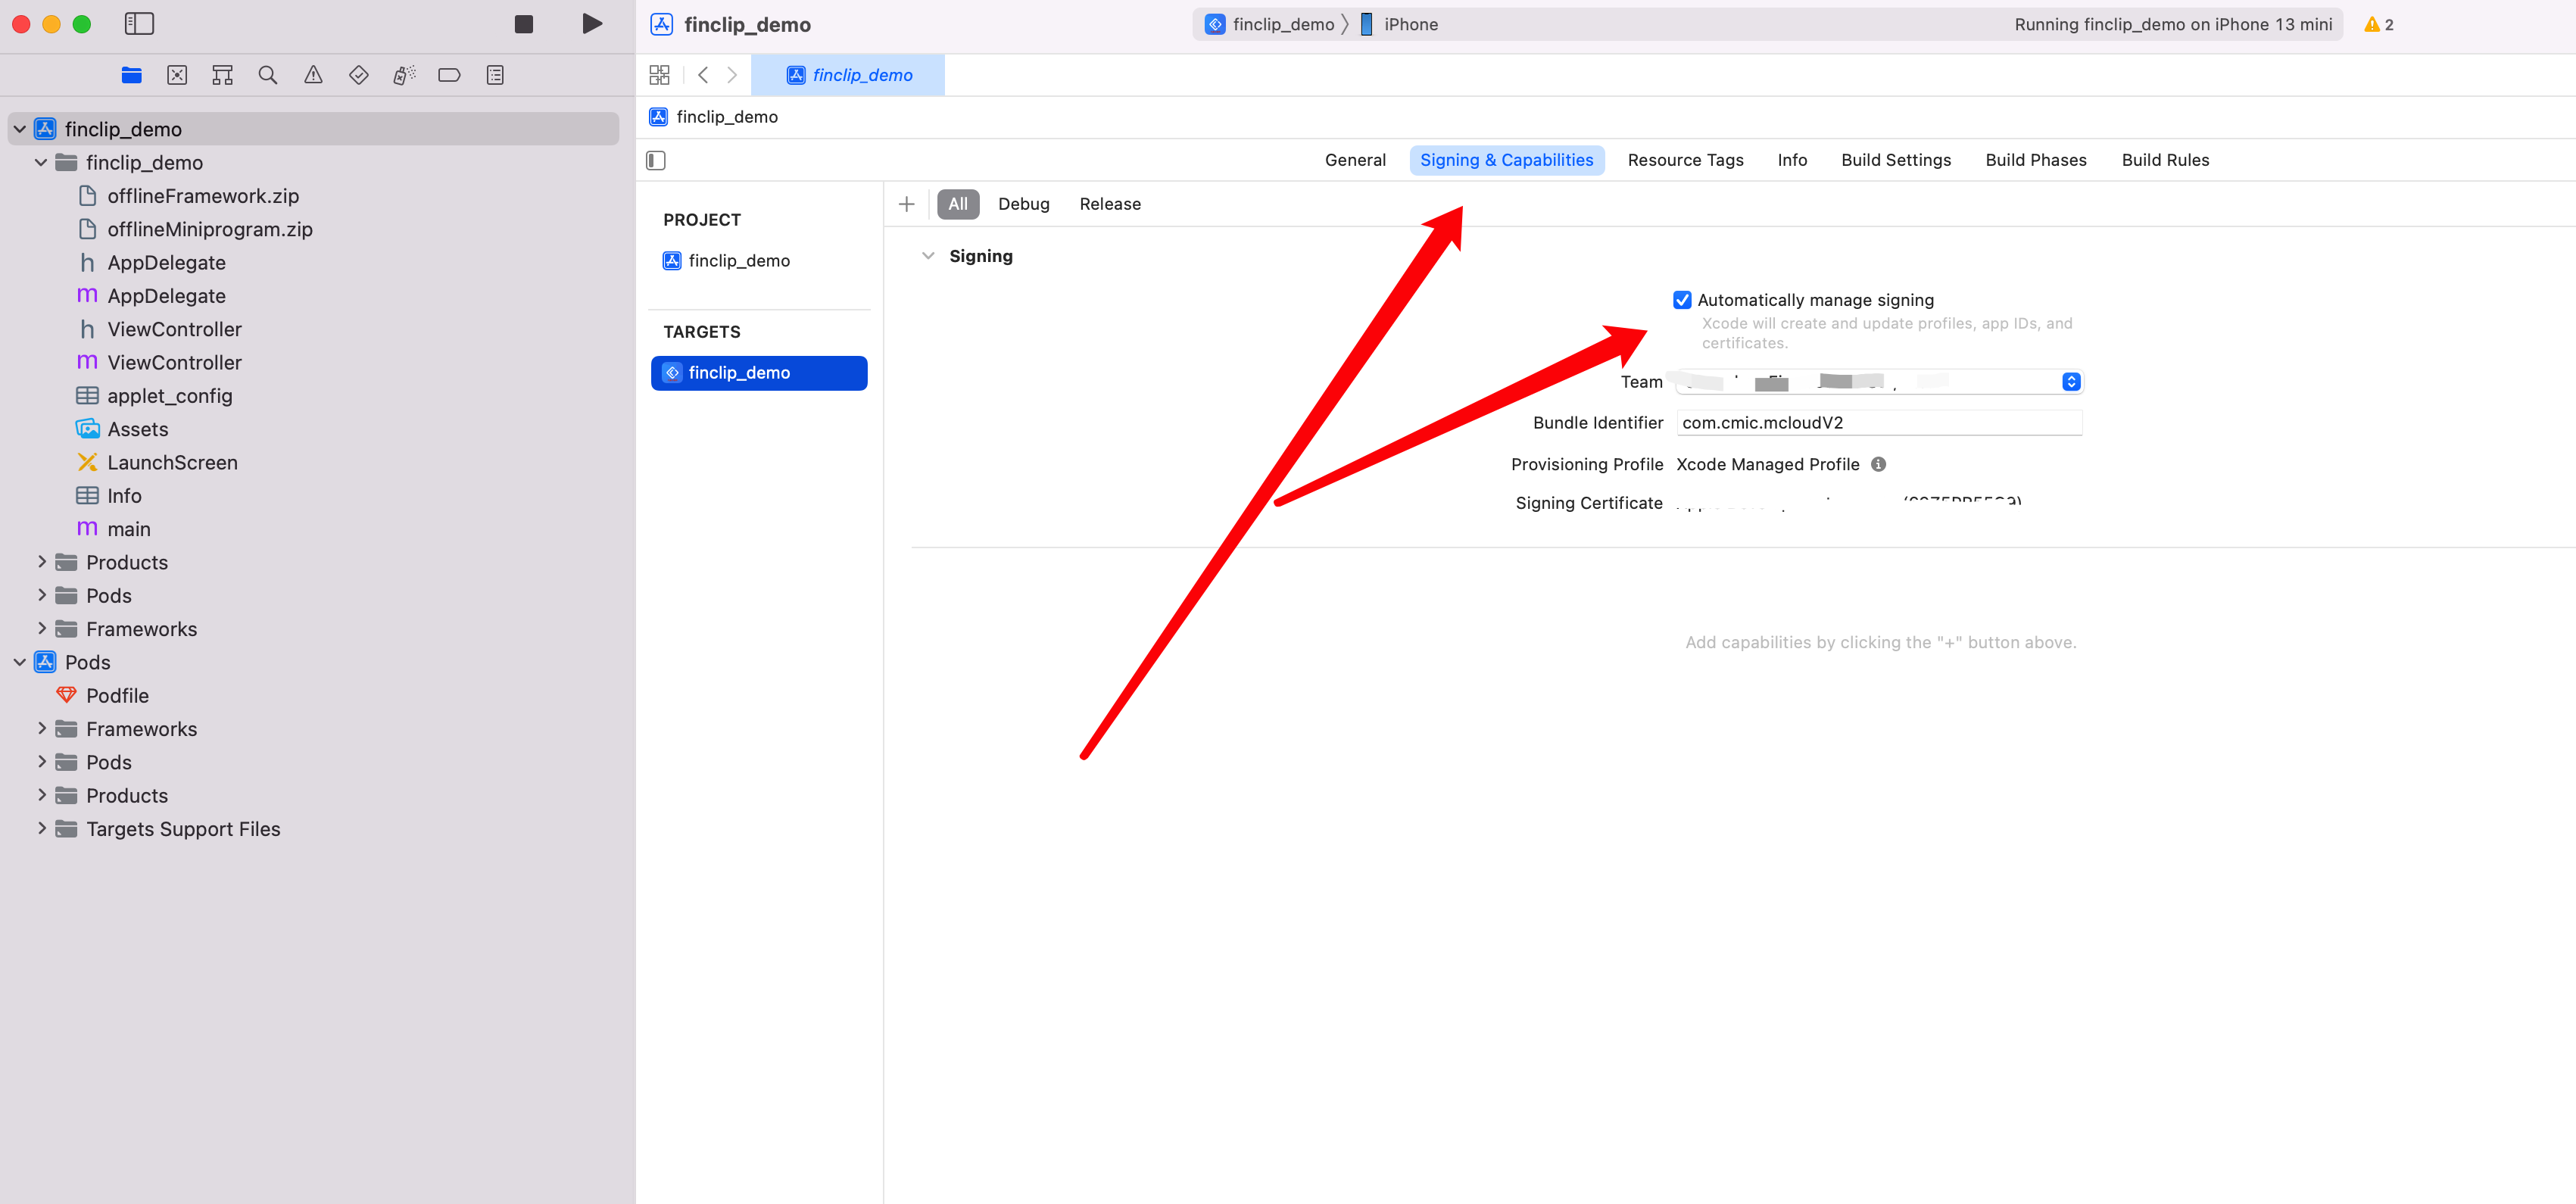
Open the exported folder from FinClip Studio - ios - project name - project name.xcworkspace, double-click to open. You can choose to run on simulator or real device.
For simulator run, directly select a simulator and press command+R to run.
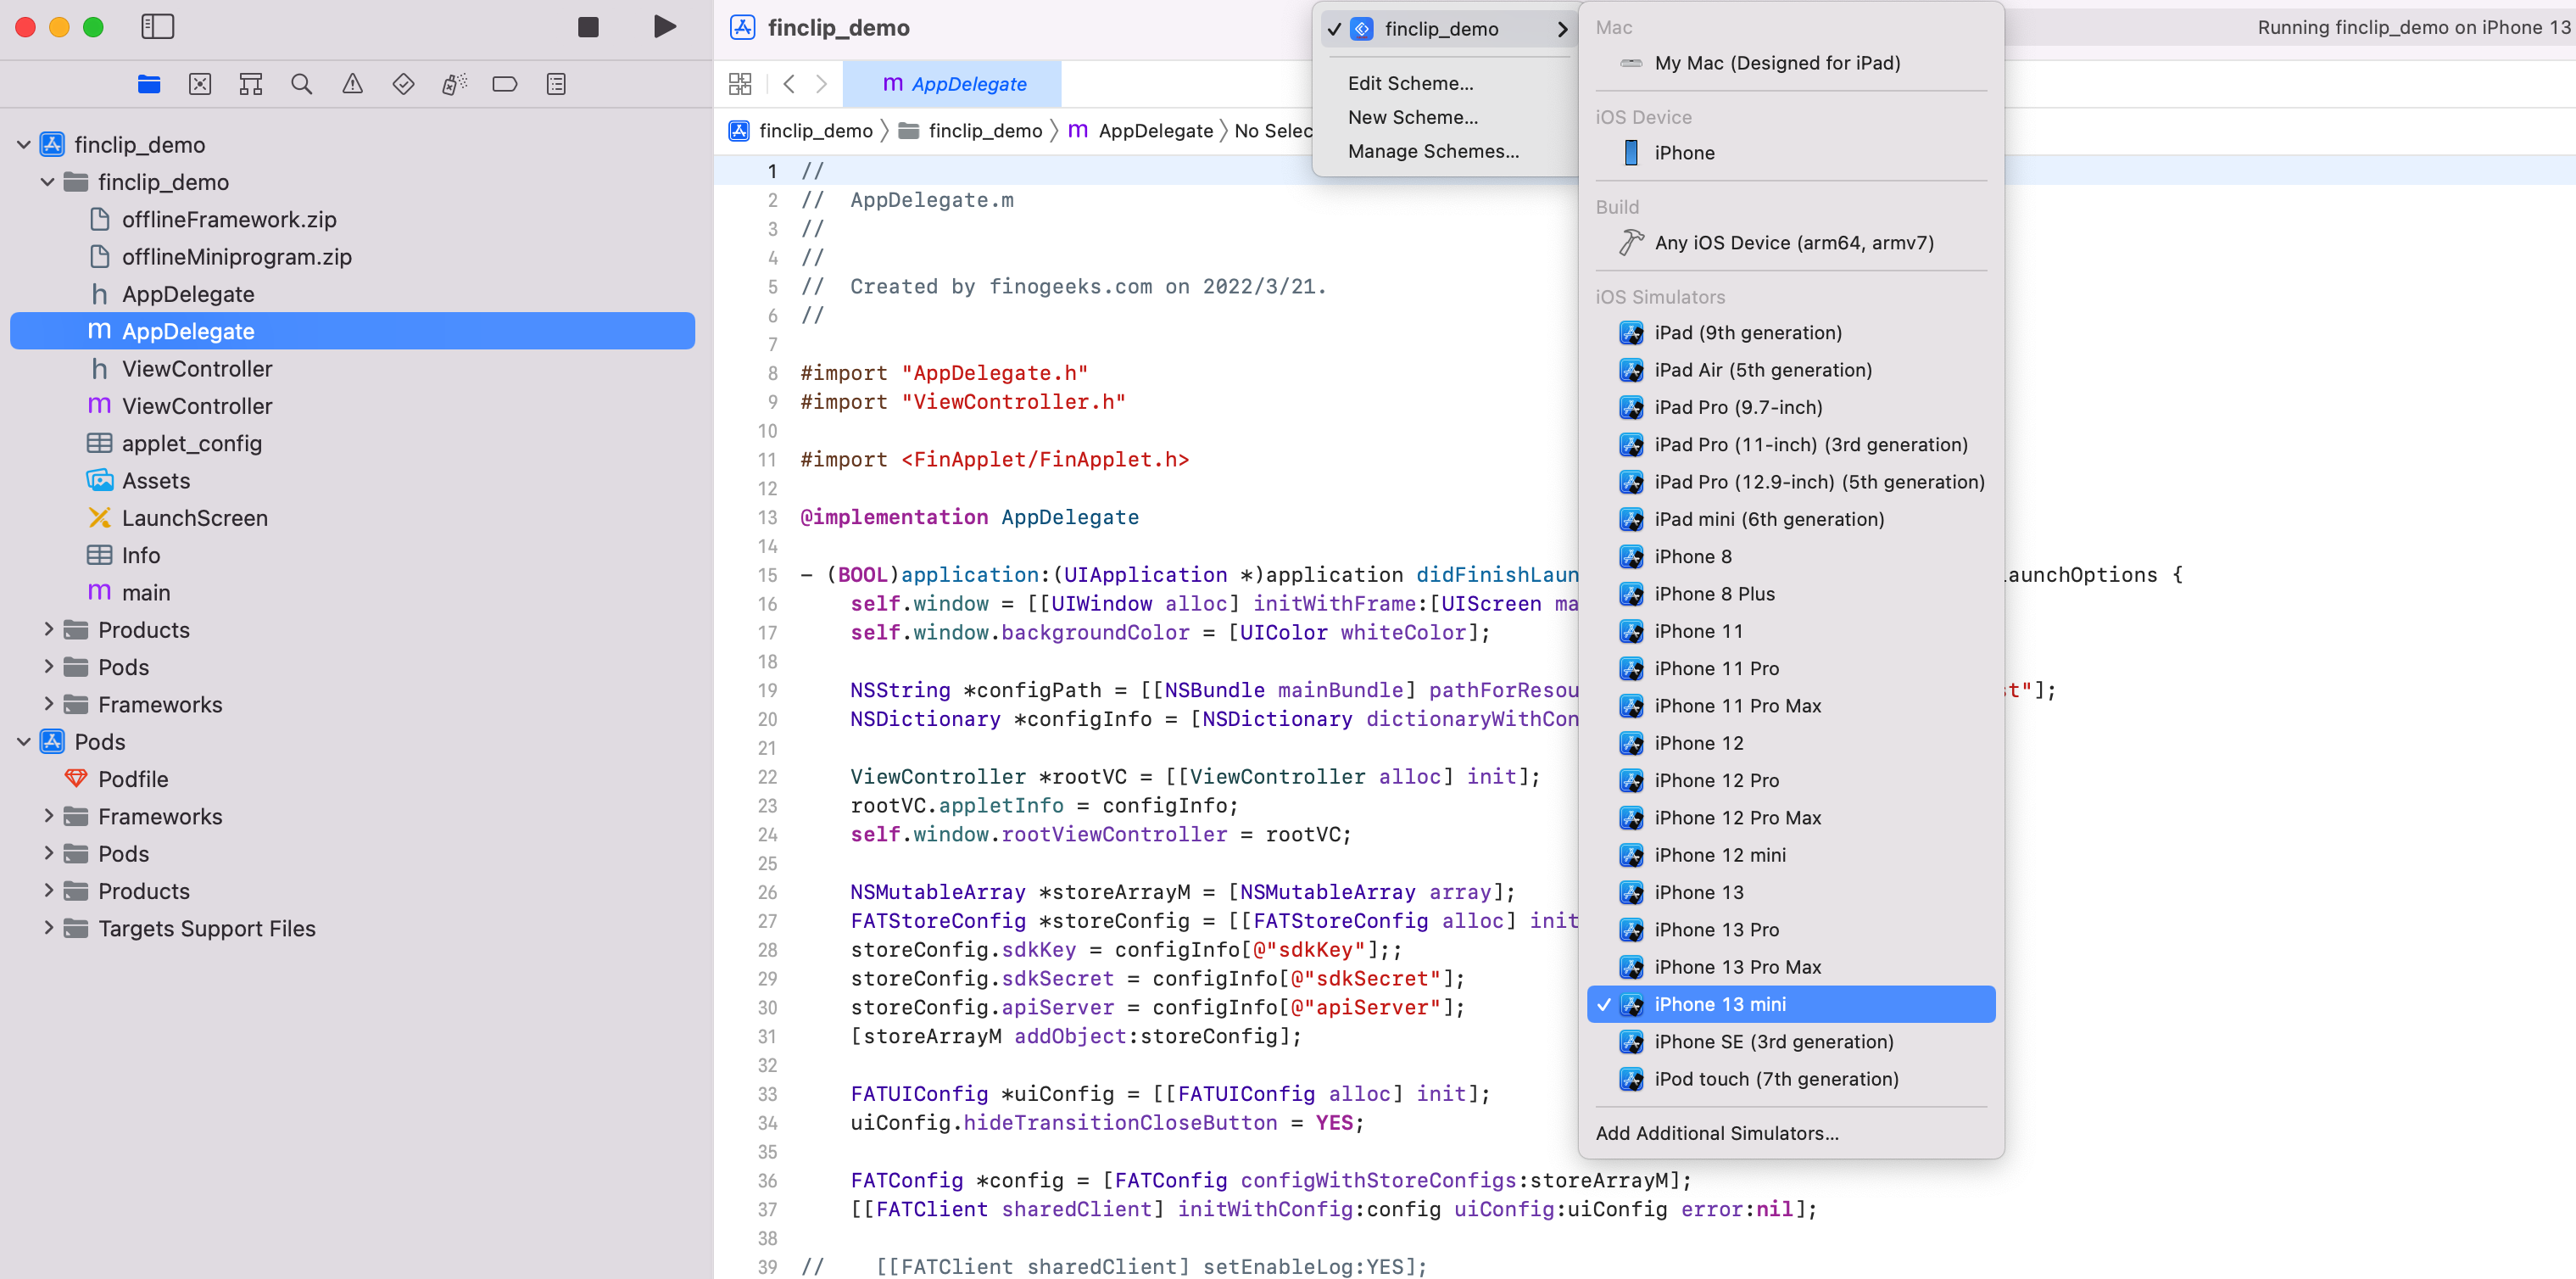
For real device run, configure certificate first then press command+R to run.
# 1.4 Package and Upload
# 1.4.1 Local IPA Build and Upload Using Xcode
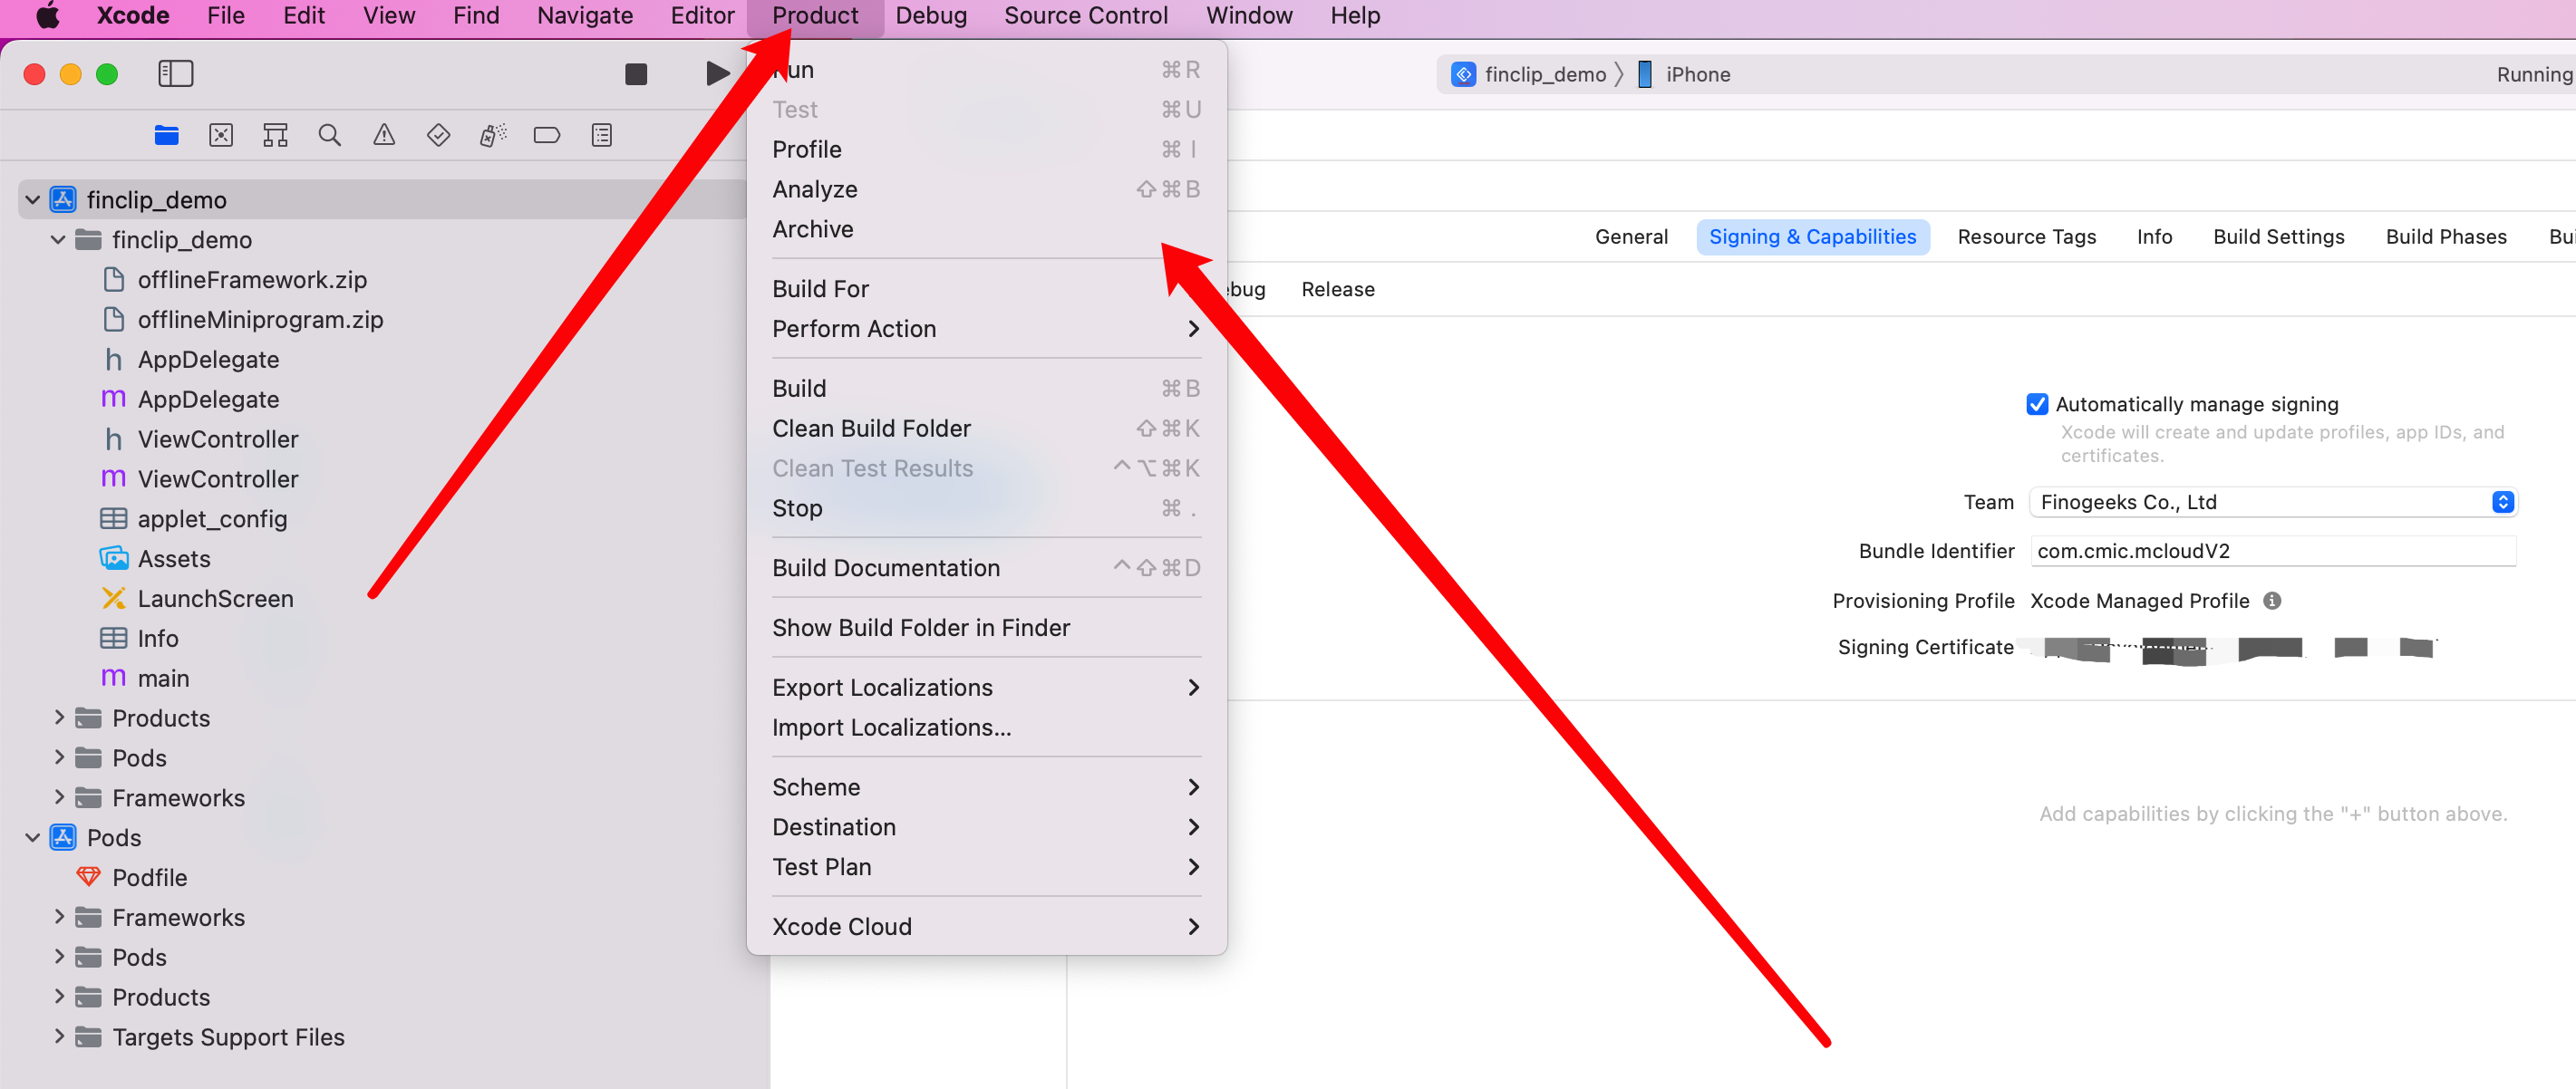
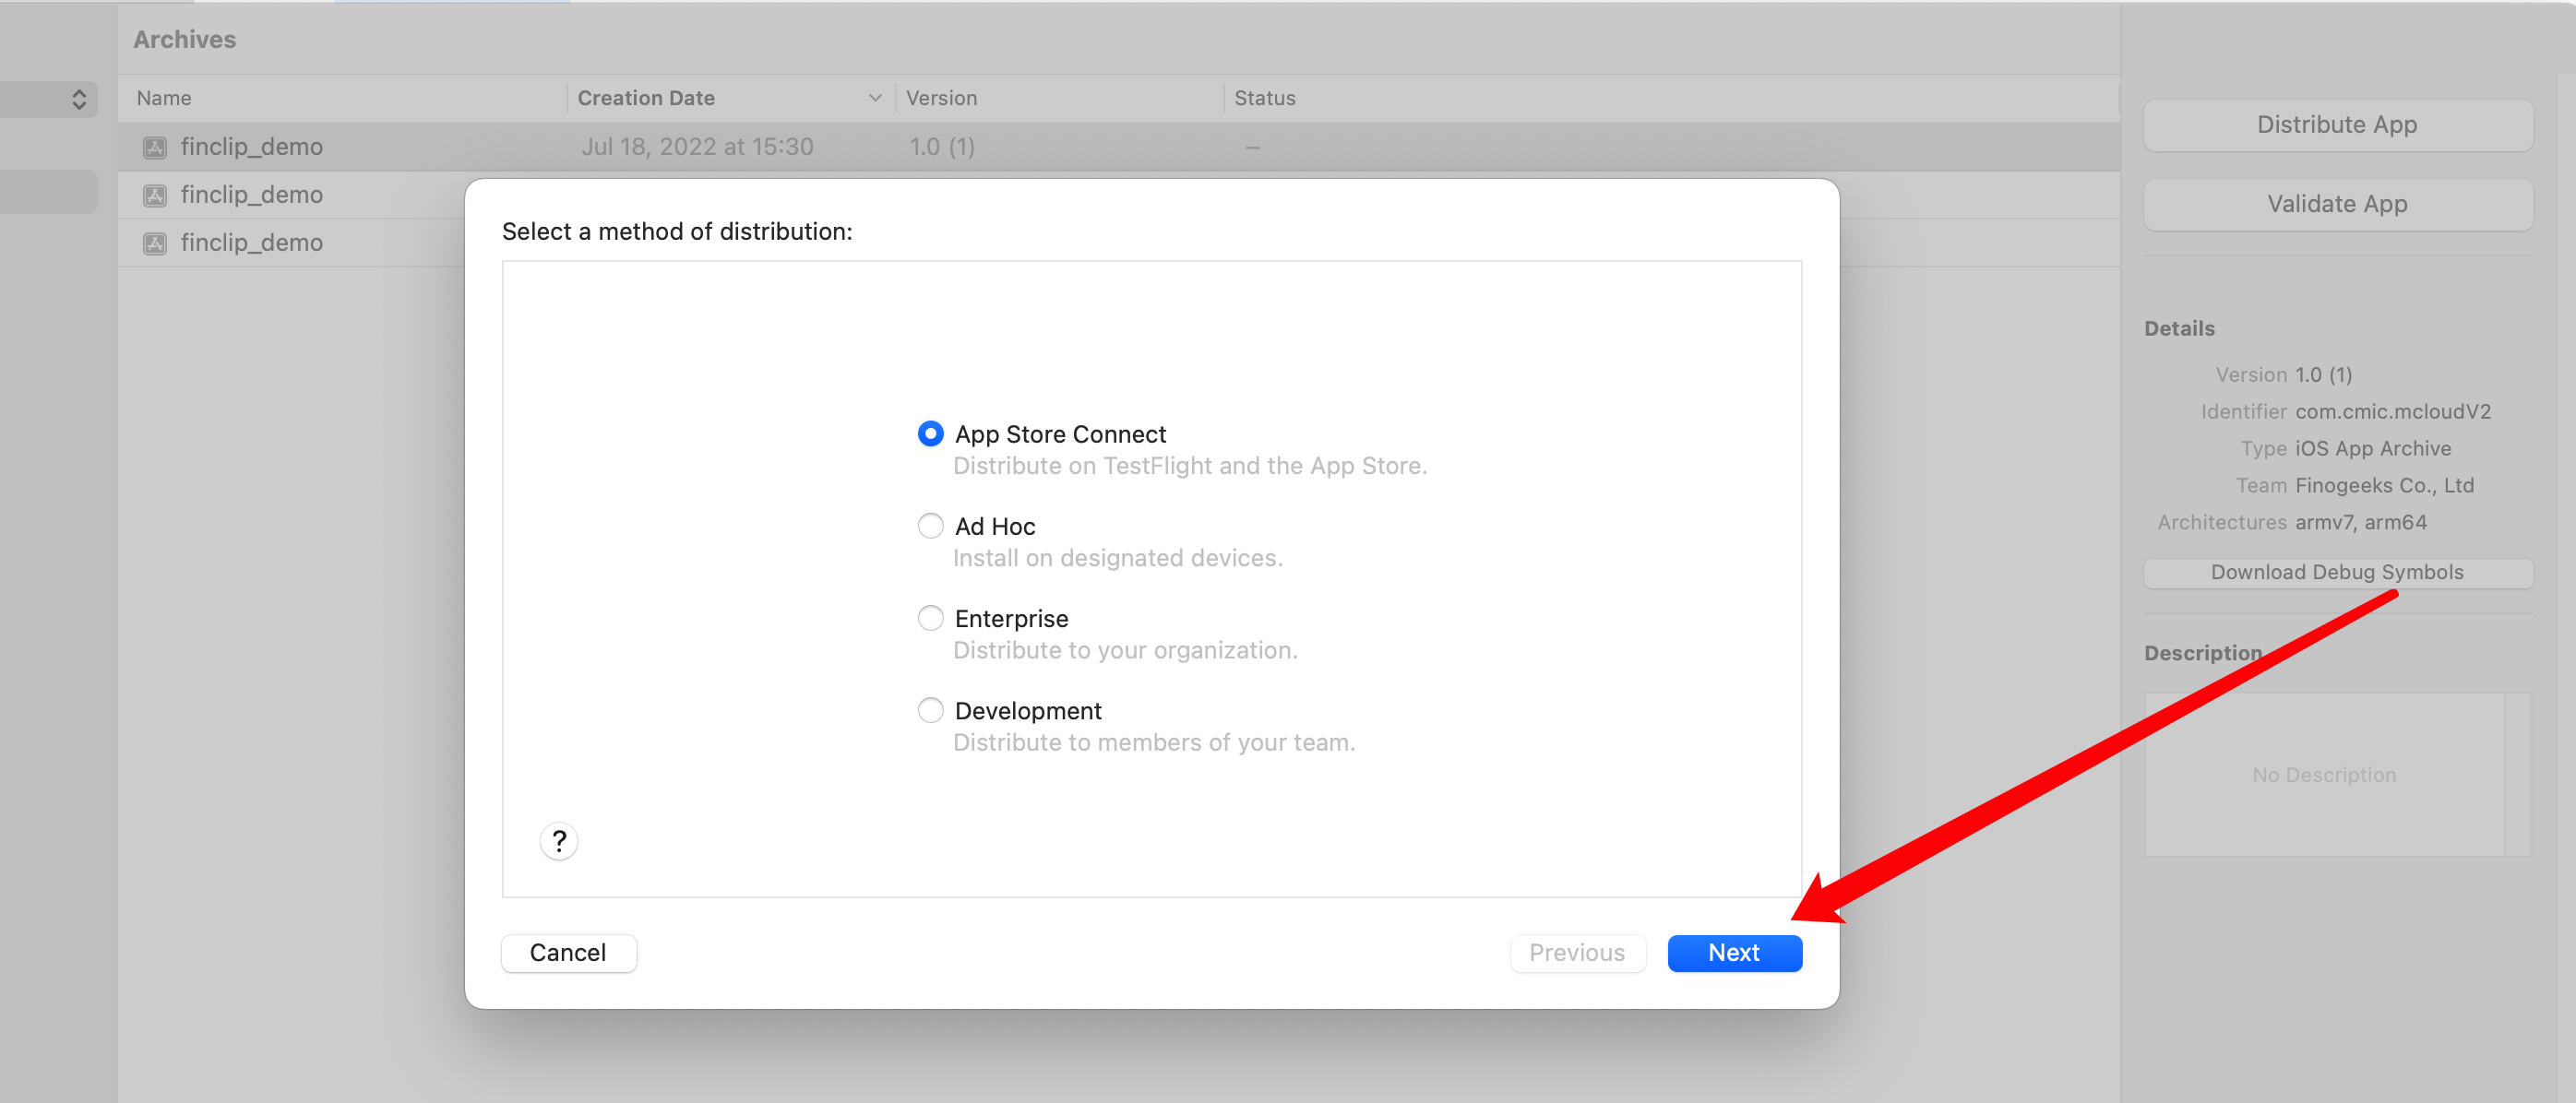
After configuring application bundle id, Version, Build, AppIcon, splash screen, permissions, certificates, etc., you can package and upload. In Xcode top menu, click Product-Archive, wait for IPA package export or use Xcode to directly upload IPA package to App Store Connect. If IPA package is exported, need to use Transporter tool for upload.
# 1.4.3 Build and Upload Using Cloud Packaging
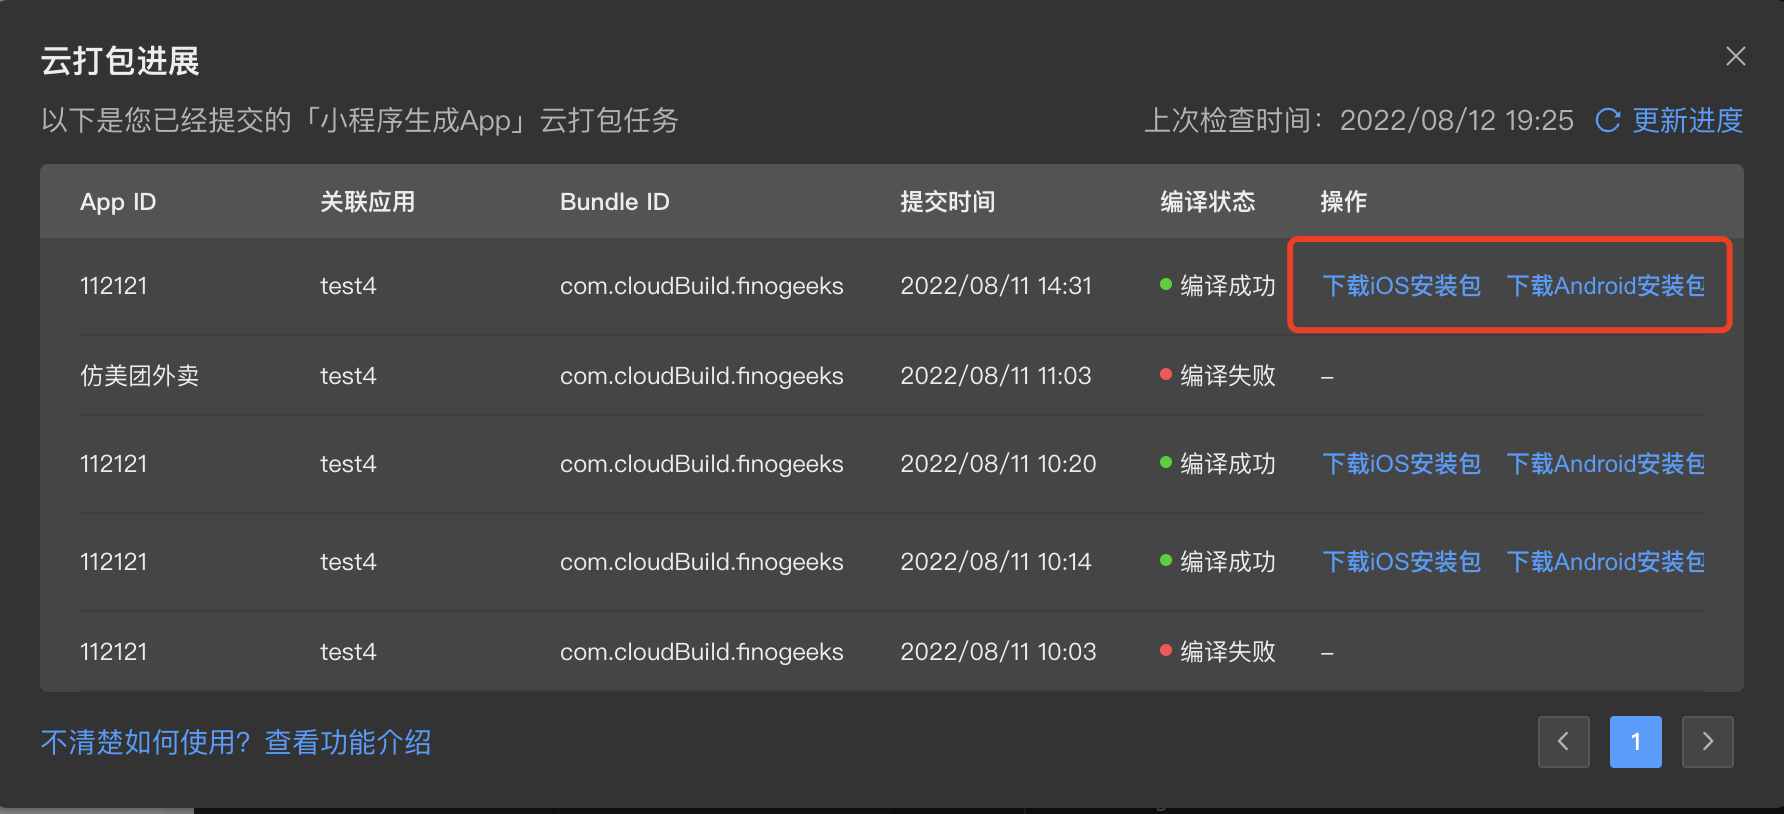
When using cloud compilation function to build IPA package, after generating app -> view cloud packaging progress -> build successful, you can download the built IPA file and use Transporter tool for upload. Simply drag the generated IPA file to Transporter tool logged in with developer account.
# 2. Android Project Configuration
# 2.1 Prepare Project
- Install Android Studio, download address: Android Studio Official Website (opens new window)
# 2.2 Configure Project
Open exported Android project using Android Studio:
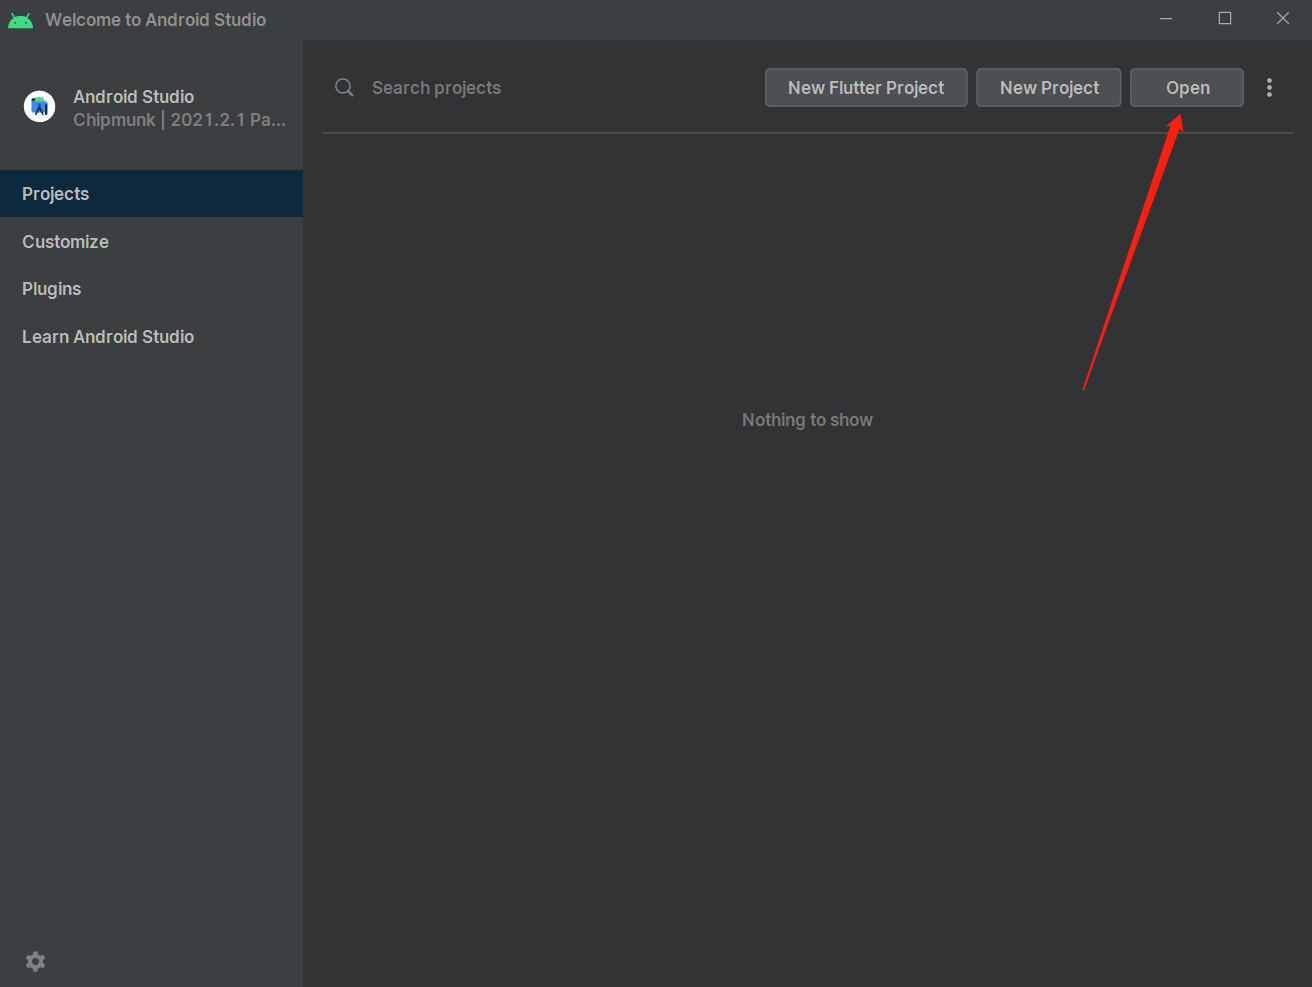
Select open path as: finclip_demo\android\finclip_demo

First time opening project may take longer, need to wait for Android Studio to automatically download various Android libraries and dependency libraries.
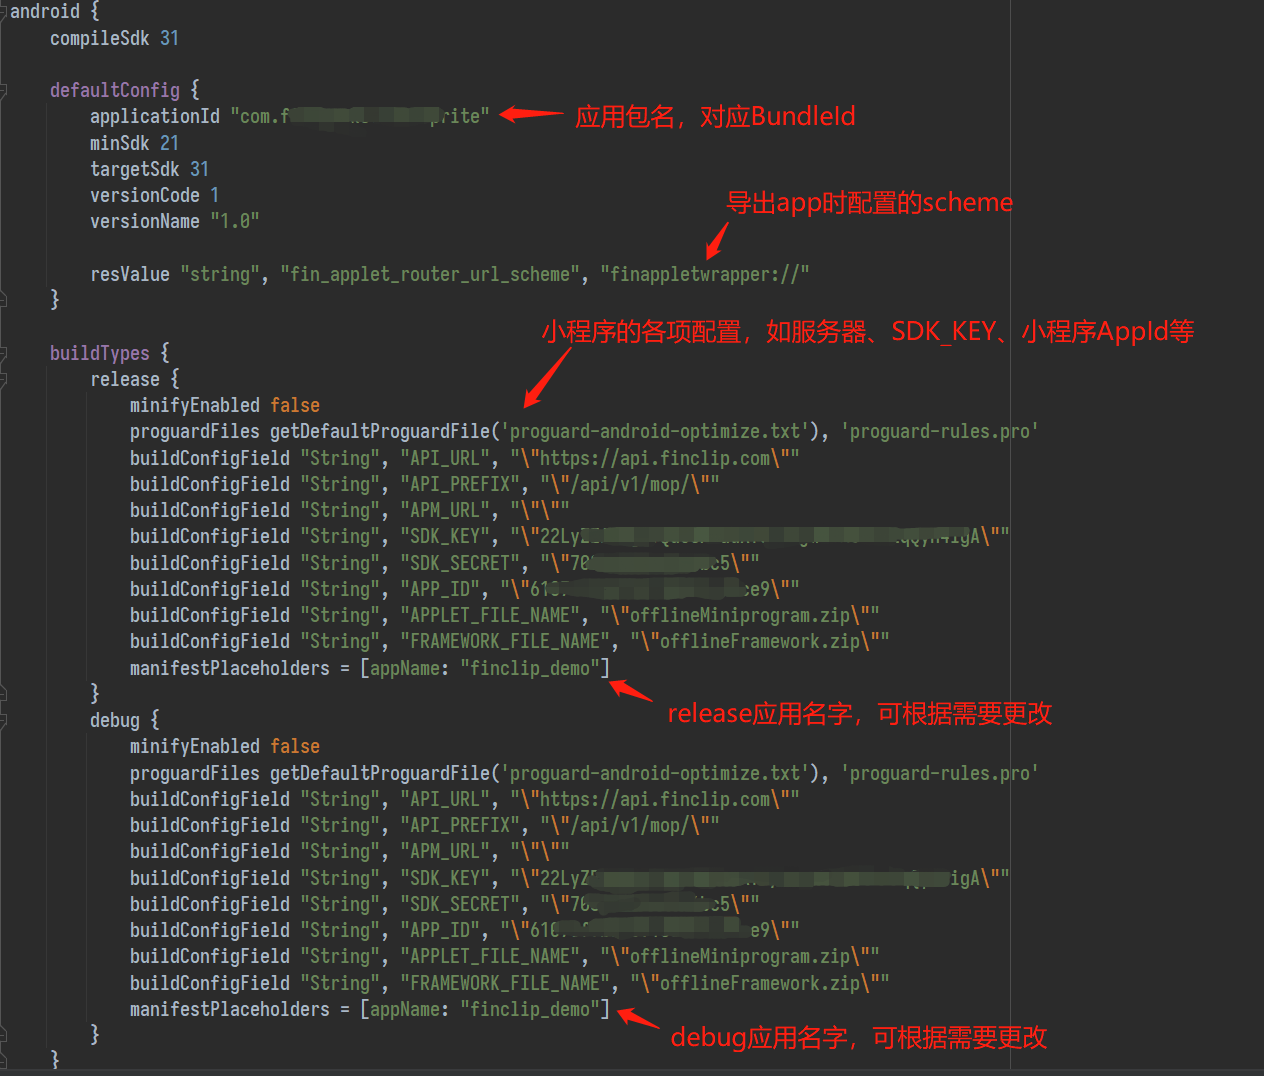
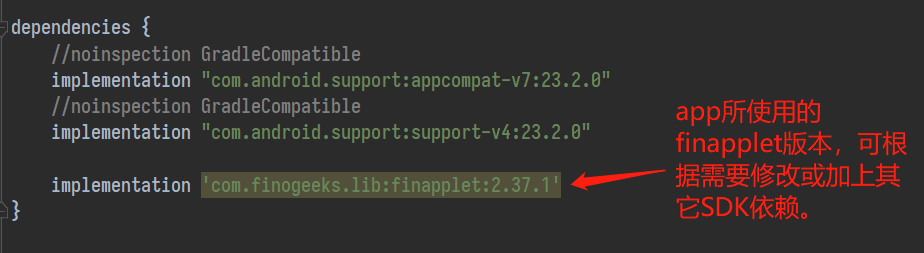
# 2.2.1 app/build.gradle
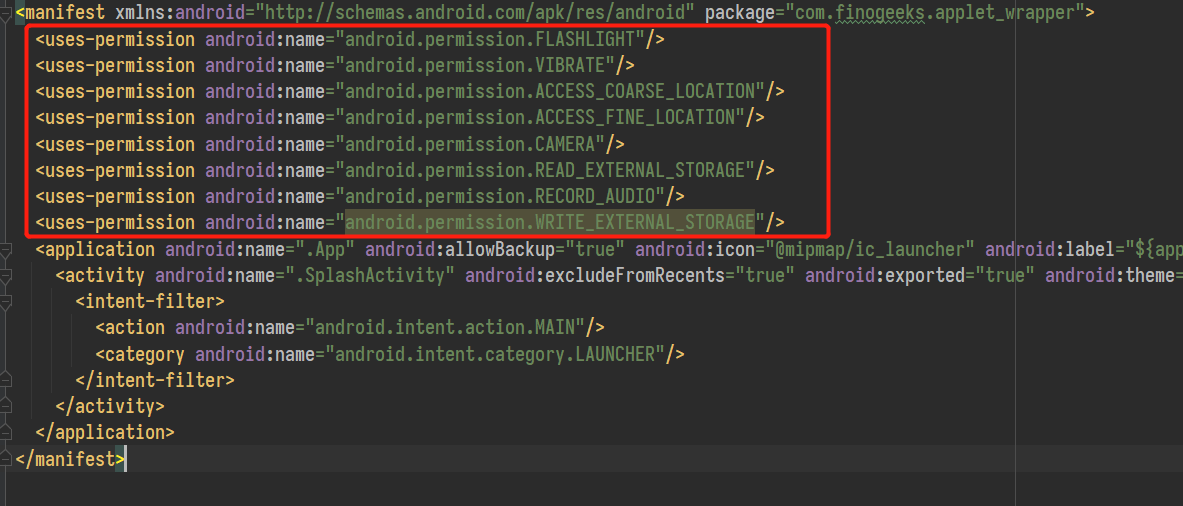
# 2.2.2 app\src\main\AndroidManifest.xml
You can view the permissions declared by the app, and add or remove as needed.
# 2.2.3 Splash Screen
Splash screen configuration images can be replaced with corresponding resolution images as needed.
Note: If replacing, need to replace all resolution corresponding images.

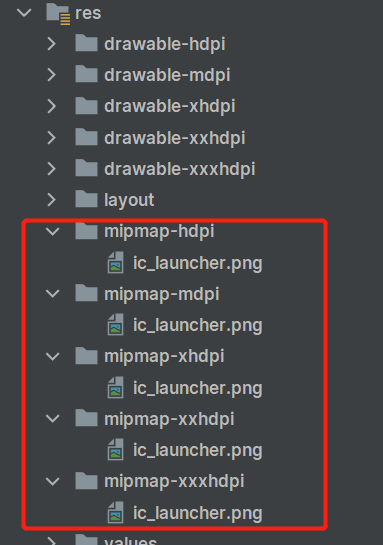
# 2.2.4 App Icon
App icon files, replace with corresponding resolutions as needed.
Note: If replacing, need to replace all resolution corresponding images.
# 2.3 Run Project
# 2.3.1 Enable Developer Mode on Phone
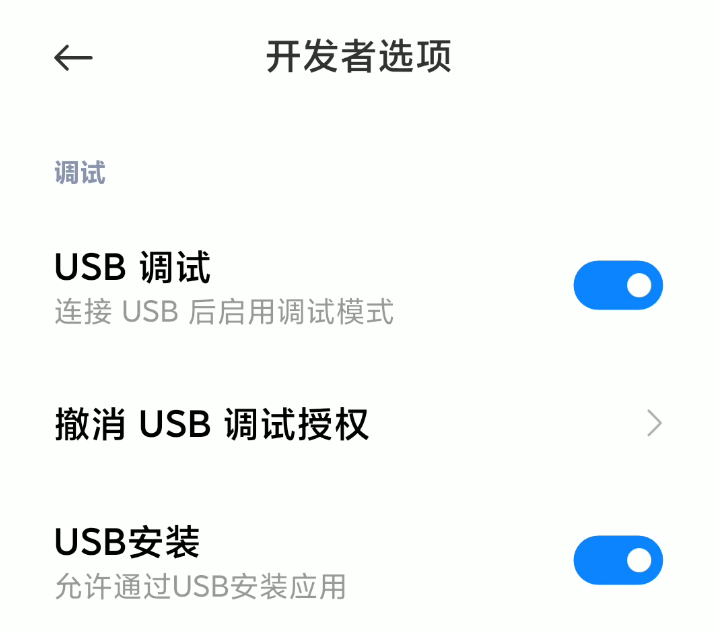
Different phone brands may have different methods, most require clicking version number 5 times consecutively in device details interface.
Then enter Developer Options interface, enable USB debugging. (If USB installation exists, also enable it)
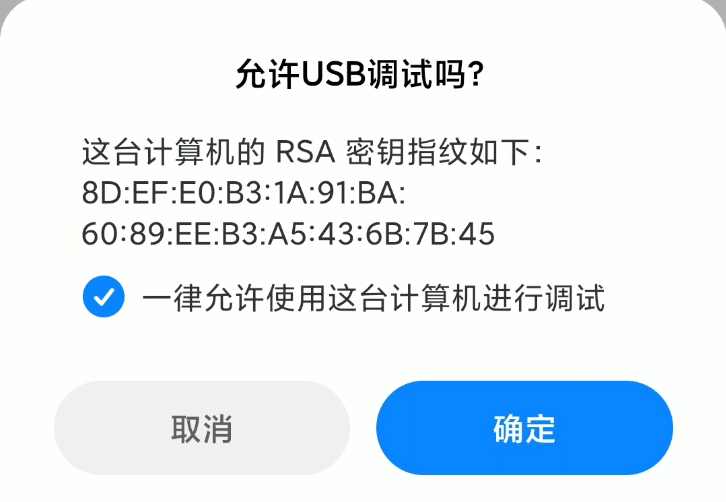
Connect phone to computer using USB, phone will pop up debugging authorization window, click Allow.
# 2.3.2 Run Application
Finally return to Android Studio, click run icon on top right to directly run debug version application on phone.

# 2.4 Build Release Application
# 2.4.1 Build -> Generate Signed Bundle/APK
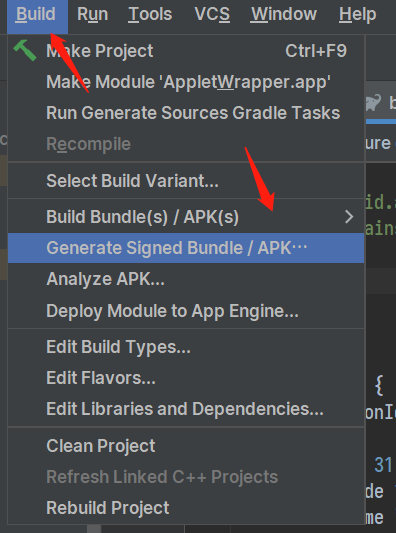
# 2.4.2 Select Build APK
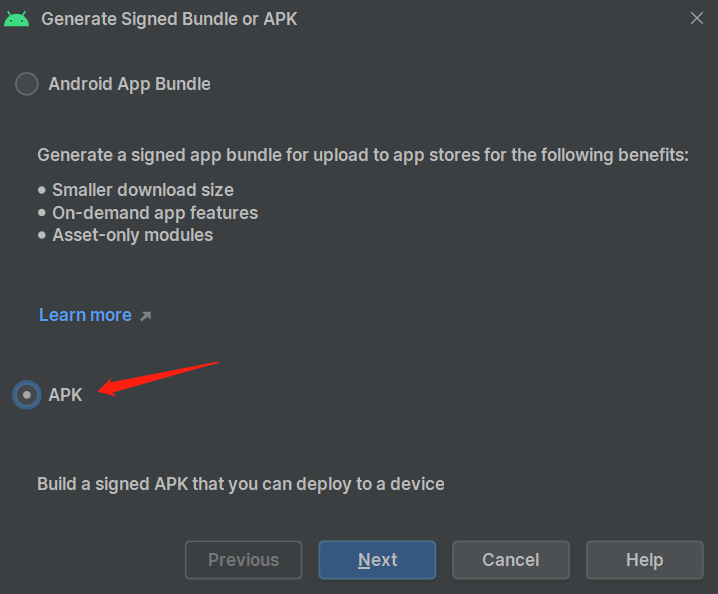
# 2.4.3 Generate Certificate
Can use AndroidStudio or JDK toolkit to generate certificate, choose one method as needed.
# 2.4.3.1 Generate Certificate Using AndroidStudio
In step 2.4.2 click Next, come to following interface, click Create new:
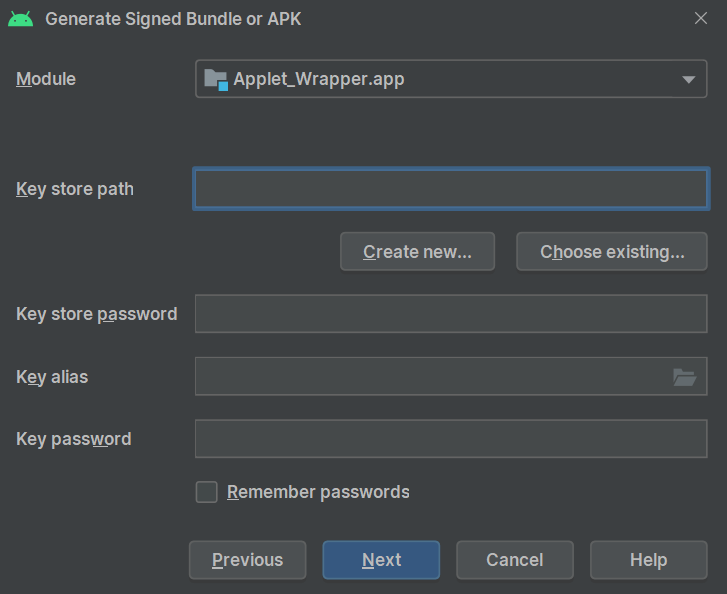
Fill in certificate related information:
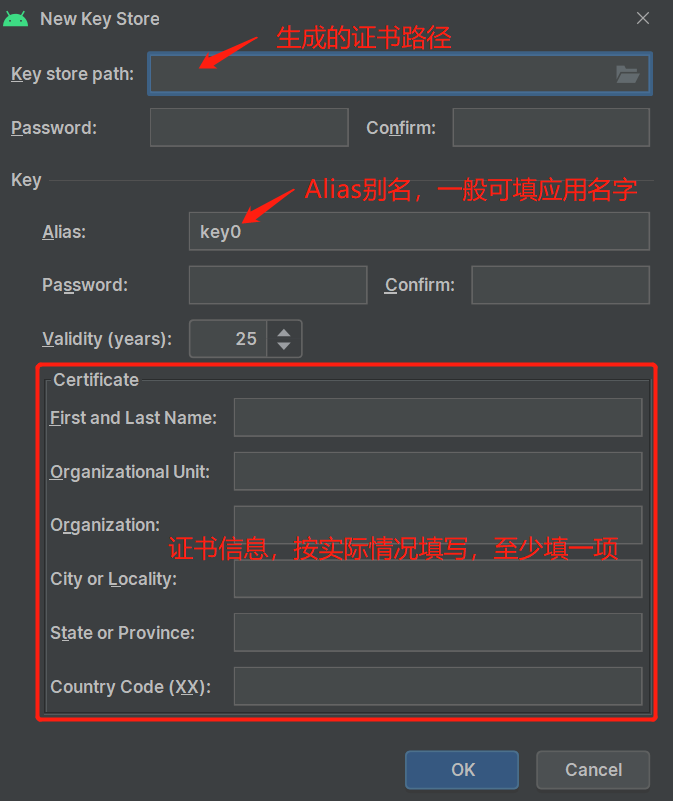
Note: The PKCS12 keystore we need to generate currently does not support different alias password and certificate password (the two sets of passwords in above screenshot), so please set these two passwords the same, otherwise will receive error warning.
After filling in, click OK button to generate certificate.
# 2.4.3.2 Generate Certificate Using JDK Toolkit
Install JDK environment according to your operating system.
Please choose OpenJDK8 or OpenJDK11, otherwise may cause build failure.
Generate certificate using keytool tool, located in bin directory of your JDK installation directory, e.g.: D:\jdk-11\bin.
Following is example generation command:
D:\jdk-11\bin\keytool -genkey -keyalg RSA -keysize 2048 -dname "cn=名字与姓氏,ou=组织单位名称,o=组织名称,l=城市或区域名称,st=州或省份名称,c=两字母国家代码" -alias 证书别名 -keypass 别名密码 -storepass 证书密码 -validity 36500 -keystore 证书文件路径及名字
The certificate information segment cn=名字与姓氏,ou=组织单位名称,o=组织名称,l=城市或区域名称,st=州或省份名称,c=两字母国家代码 please try to fill at least one, remaining can leave values empty.
Note: The PKCS12 keystore we need to generate currently does not support different alias password and certificate password, so please set these two passwords the same, otherwise will receive keytool error warning.
Following is complete generation example:
D:\jdk-11\bin\keytool -genkey -keyalg RSA -keysize 2048 -dname "cn=,ou=,o=finogeeks,l=,st=,c=" -alias finogeeks -keypass 123456 -storepass 123456 -validity 36500 -keystore D:\keystore.jks
Note
Please keep the generated certificate file safe and remember the password.
If you cannot install AndroidStudio or JDK toolkit, consider using other third-party online certificate generation websites like Banana Cloud Compile (opens new window). We do not provide security guarantee for certificates generated by above third-party websites.
# 2.4.4 Build Application
Return to build window, select certificate and fill in password.
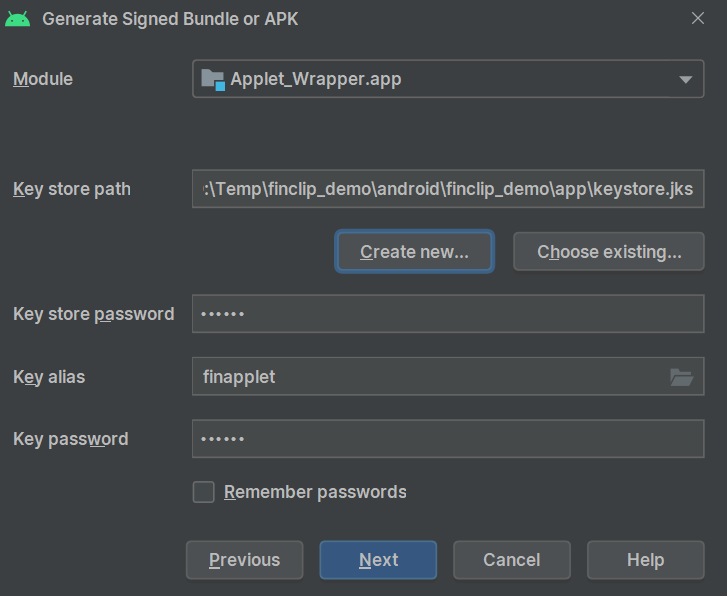
Click Next, select specified APK file output path, select release version, finally click Finish, start building APK.
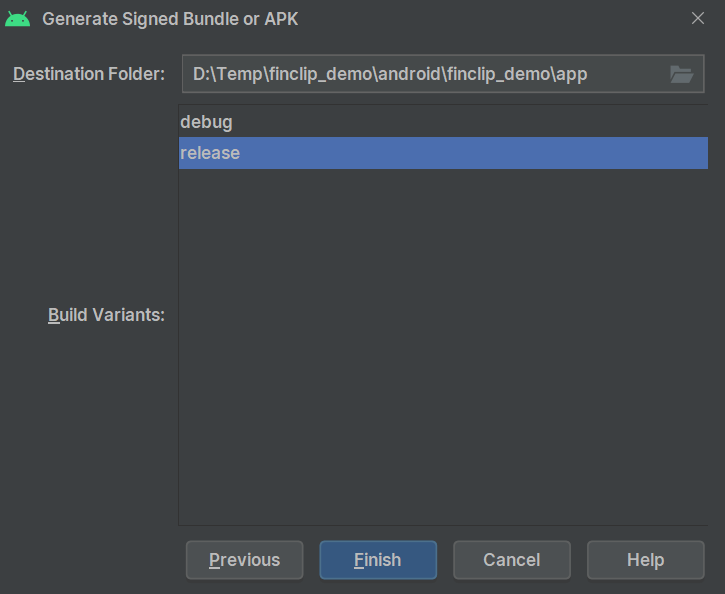
After Android Studio prompts build successful, you can find APK file at location specified in previous step.

Note: The debug application directly run by clicking Android Studio uses default built-in certificate file, which is different from release application, so cannot overwrite install. Need to manually uninstall debug application before installing release application.