
# Developer Center - Application Management
# 1. Function Overview
On the "Application Management" page, you can perform the following operations:
- Add Application: Create a new Host-App and configure related basic information (name, icon, application visibility, etc.)
- View Applications: View applications created by the Operation Center or other teams
- Associate Mini-Programs: Associate Mini-Programs with your own applications or third-party applications (from other teams or the Operation Center)
- API Management: Configure custom APIs and manage their basic information and invocation review status
- Menu Management: Configure custom menus and manage their basic information and invocation review status
- View Operation Logs: View operation logs for the application module

# 2. Terminology Definitions
None
# 3. Usage Instructions
# 3.1 Add Application
Navigate to the "Application Management" page, click the "Add" button on the left side of the list, and fill in the corresponding basic application information. The fields include:
- Application Name: Used to identify the name of the application to be created, avoiding discrepancies when adding the BundleID.
- Owning Organization: Used to identify the organization to which the new application belongs, serving as a mnemonic for subsequent usage management.
- Description: A brief one-sentence introduction of the application.
- Icon: Used to identify the application, serving as a mnemonic for subsequent usage management.
- Application Visibility to Other Teams: If set to "Yes", this application will be displayed in the application lists of other teams.
- Bundle ID Visibility to Other Teams: If set to "Yes", the Bundle ID of this application will be displayed to other teams.
Note: The settings for these two visibility options are controlled by the Digital Center. If the Digital Center does not allow the Developer Center to set application visibility, both options can only be set to "No" and cannot be changed.
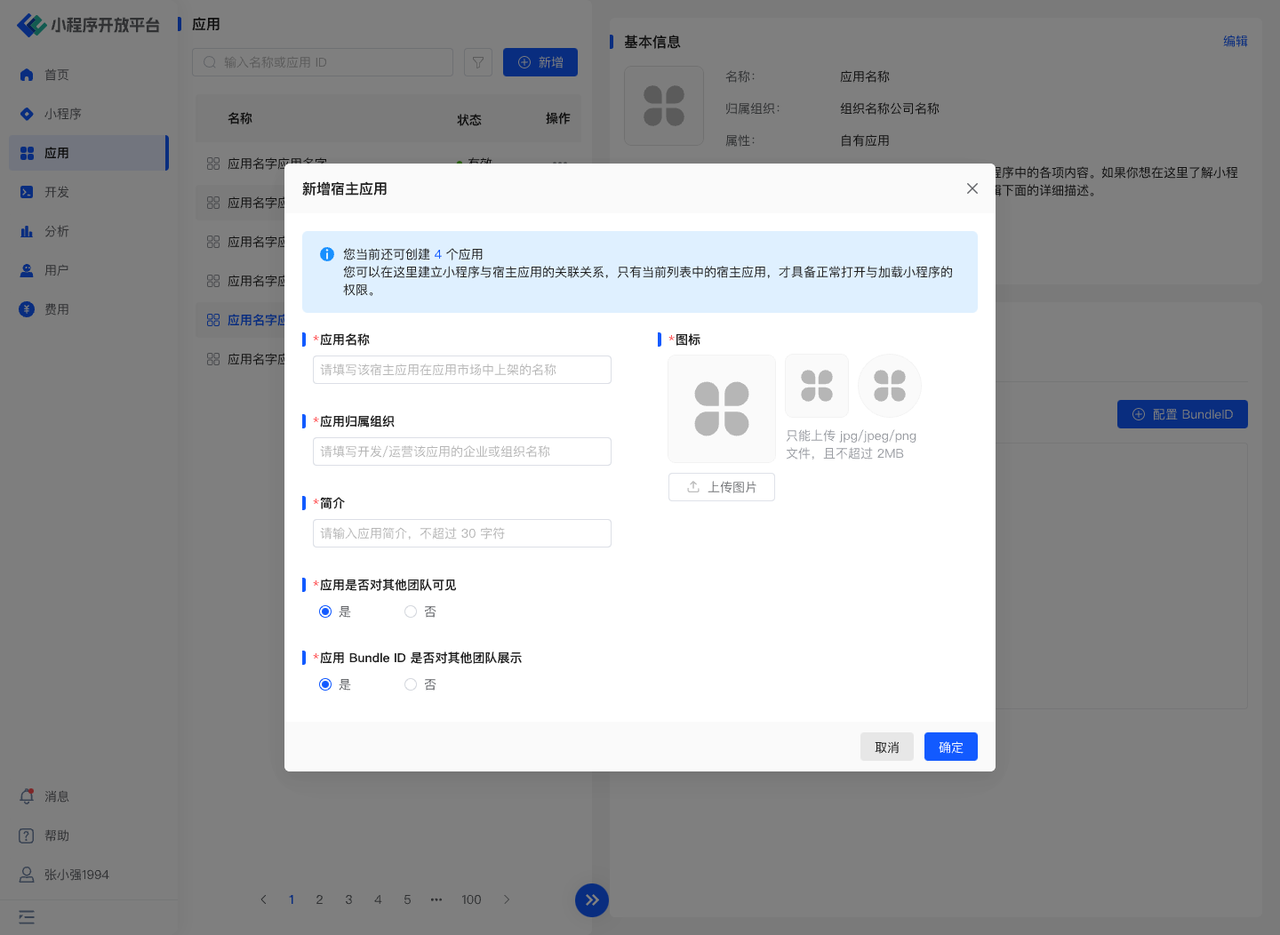
After successfully adding the application, it will be displayed in the list on the left. If you wish to disable the capabilities within a specific application, you can click the "Disable" button in the operation column.
# 3.2 Add Bundle ID
After adding an application, click "Add BundleID" in the list below. In the pop-up window, enter the BundleID that needs to be bound to the application. If you are unsure how to obtain the BundleID, please click here (opens new window).
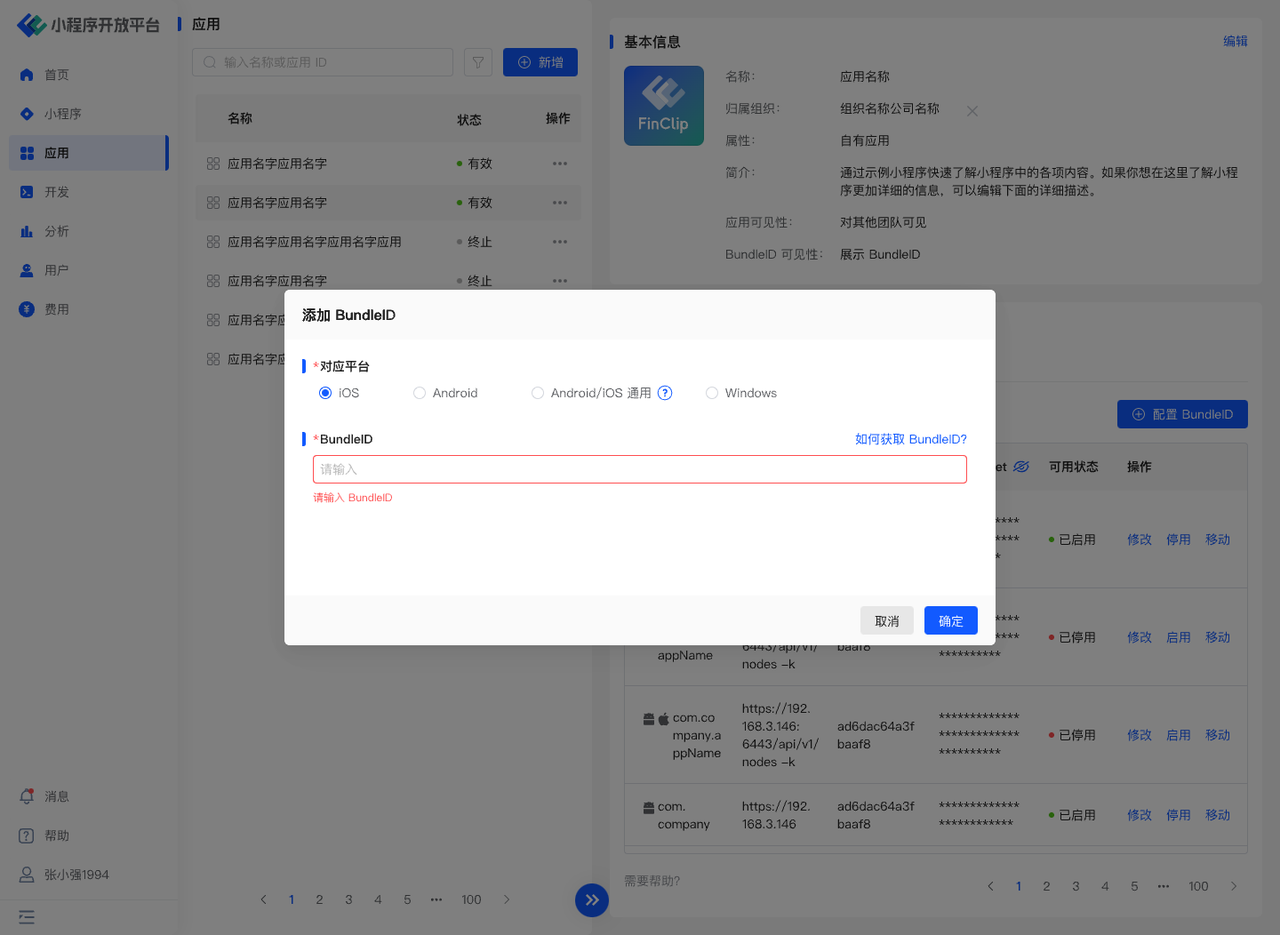
Please Note During SDK initialization, the current application's BundleID will be verified for consistency. Please ensure the BundleID you enter matches the actual one.
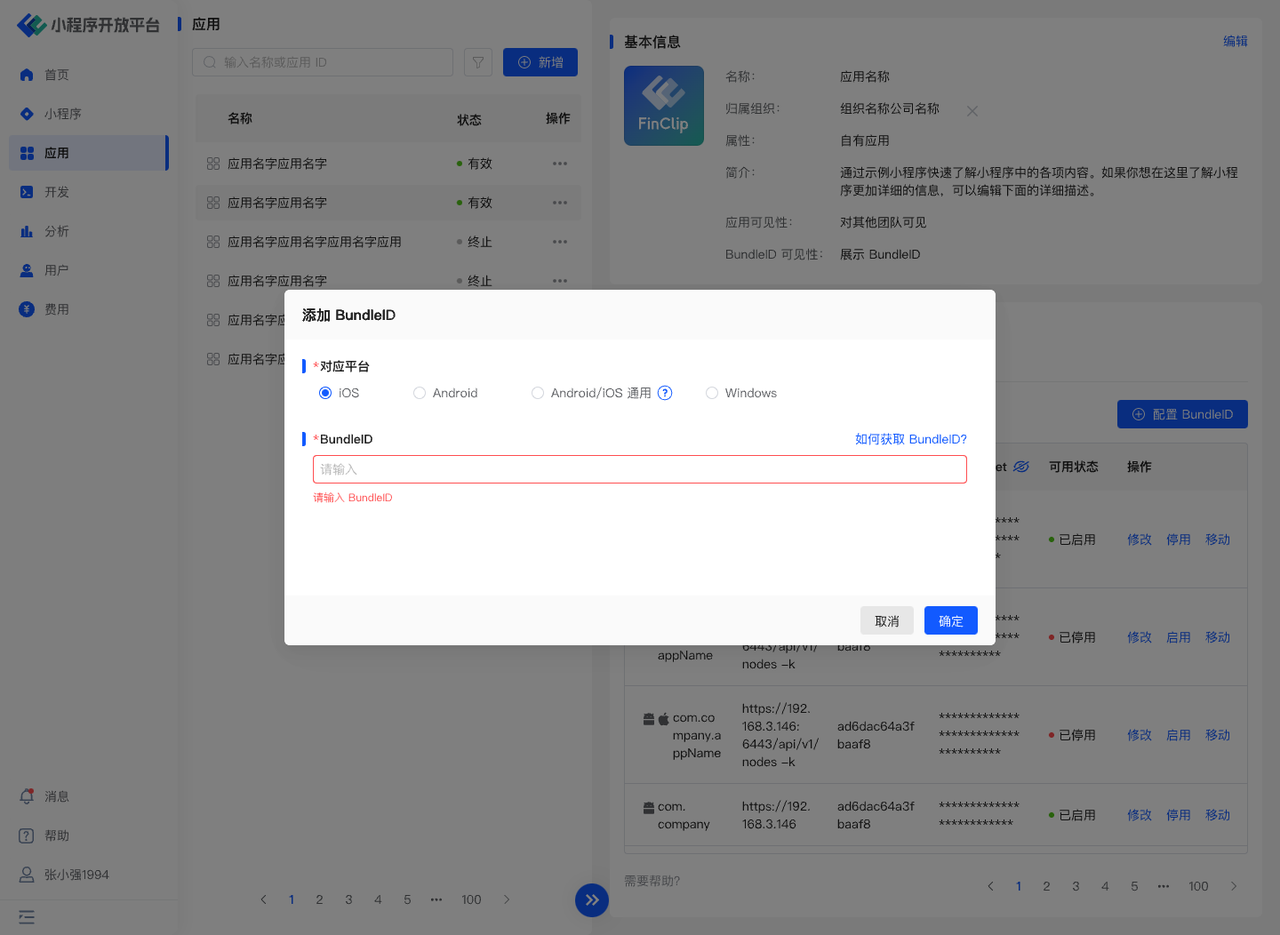
After completing the BundleID entry and clicking the "Confirm" button, you will see the interface as shown in the figure above. The SDK KEY, SDK SECRET, and API SERVER displayed are the credentials you need when integrating the Mini-Program SDK.
# 3.3 Associate Mini-Programs
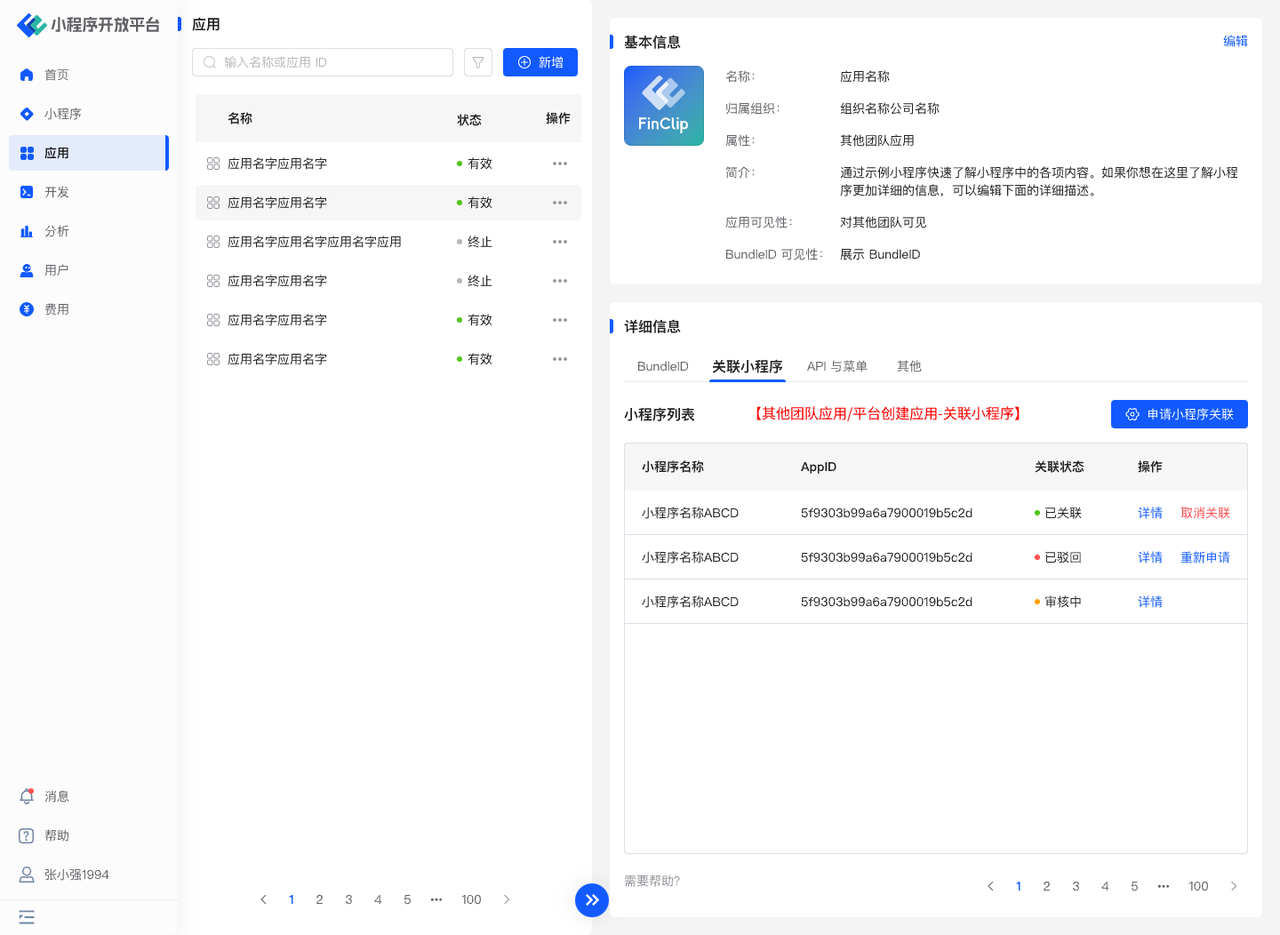
Click "Associate Mini-Programs" to view the Mini-Programs already associated with the application. Click "Edit Mini-Programs" to perform batch operations for associating or disassociating Mini-Programs.
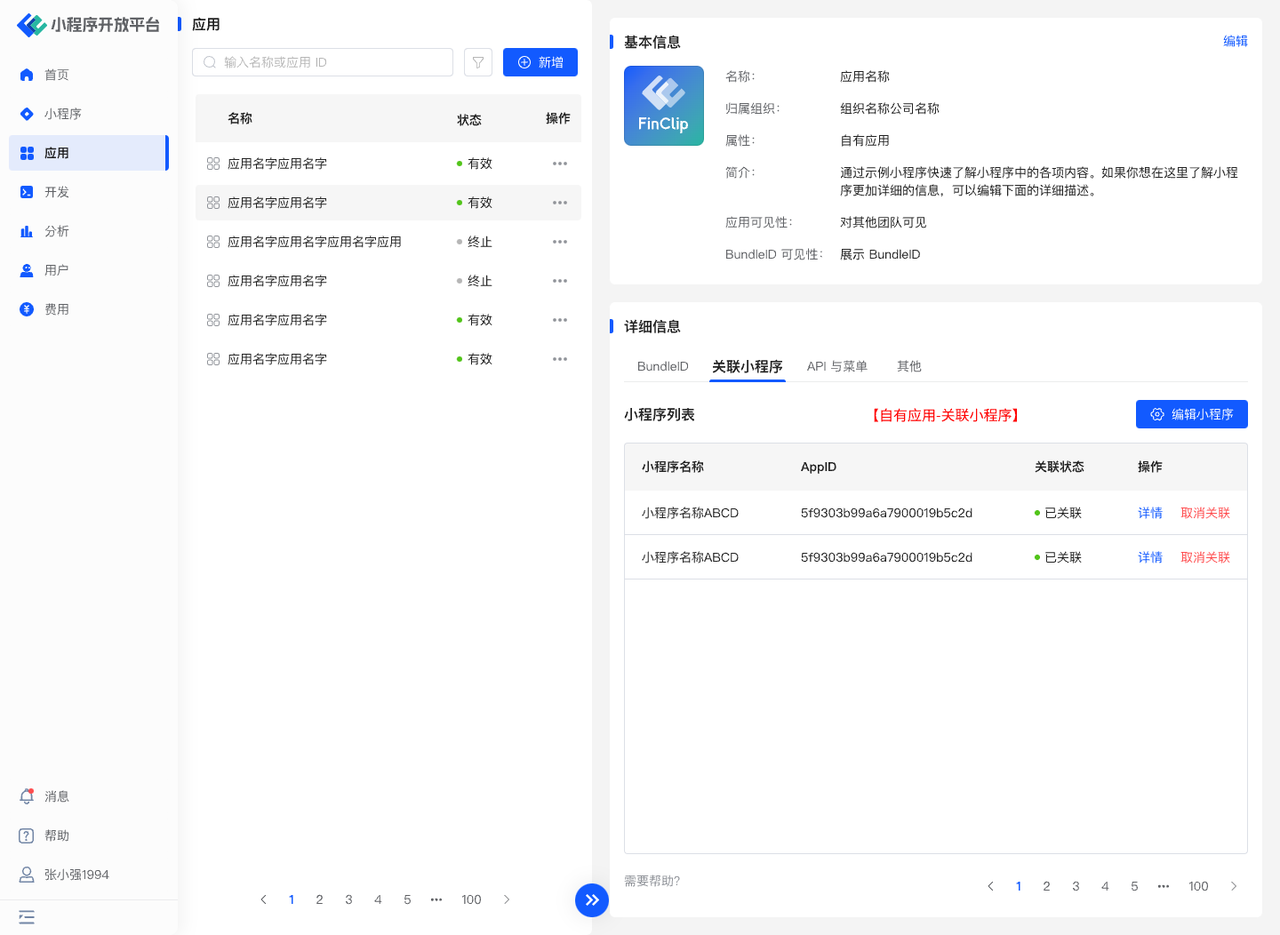
If you want to associate your own Mini-Programs with applications created by other teams or the platform, you need to find the target application, click "Associate Mini-Programs", and then click "Apply to Associate Mini-Program" in its list to submit an association request. You can also view your own Mini-Programs that are under application or already associated with that application in this list, and perform operations like reassociating or disassociating.
# 3.4 API and Menu Management
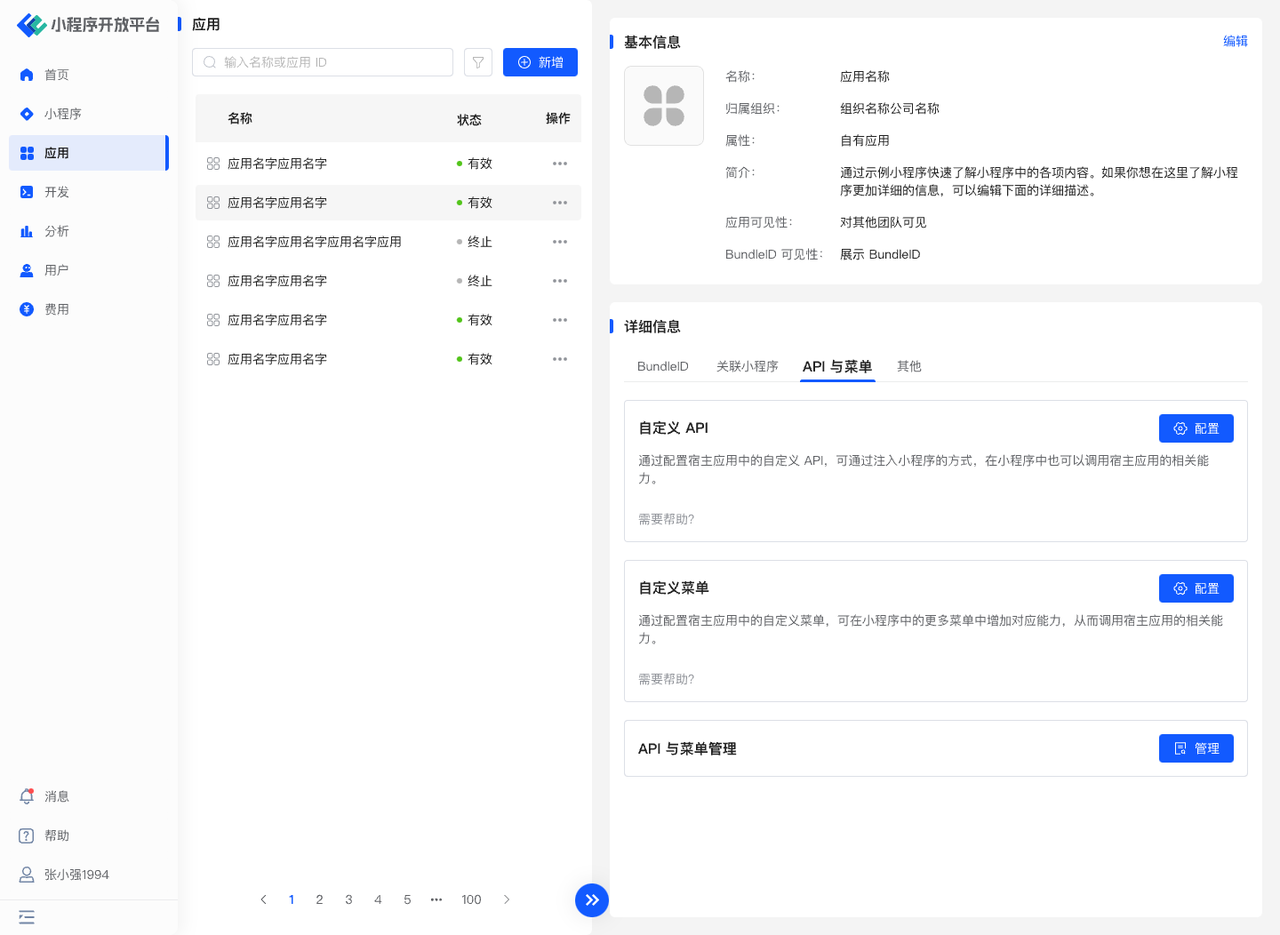
When integrating Mini-Programs into a Host-App, there might be scenarios requiring different permissions for Mini-Programs from different sources (e.g., granting advanced permissions like transaction payment and private information management to your own Mini-Programs, while granting regular permissions like user authorization login to third-party Mini-Programs). To centrally manage the permissions available to different Mini-Programs, you can use the API and Menu Management features.
# API Configuration
Click "Configure" from the "Custom API" operation column to enter the API Management page. Here you can add, disable, or modify APIs.
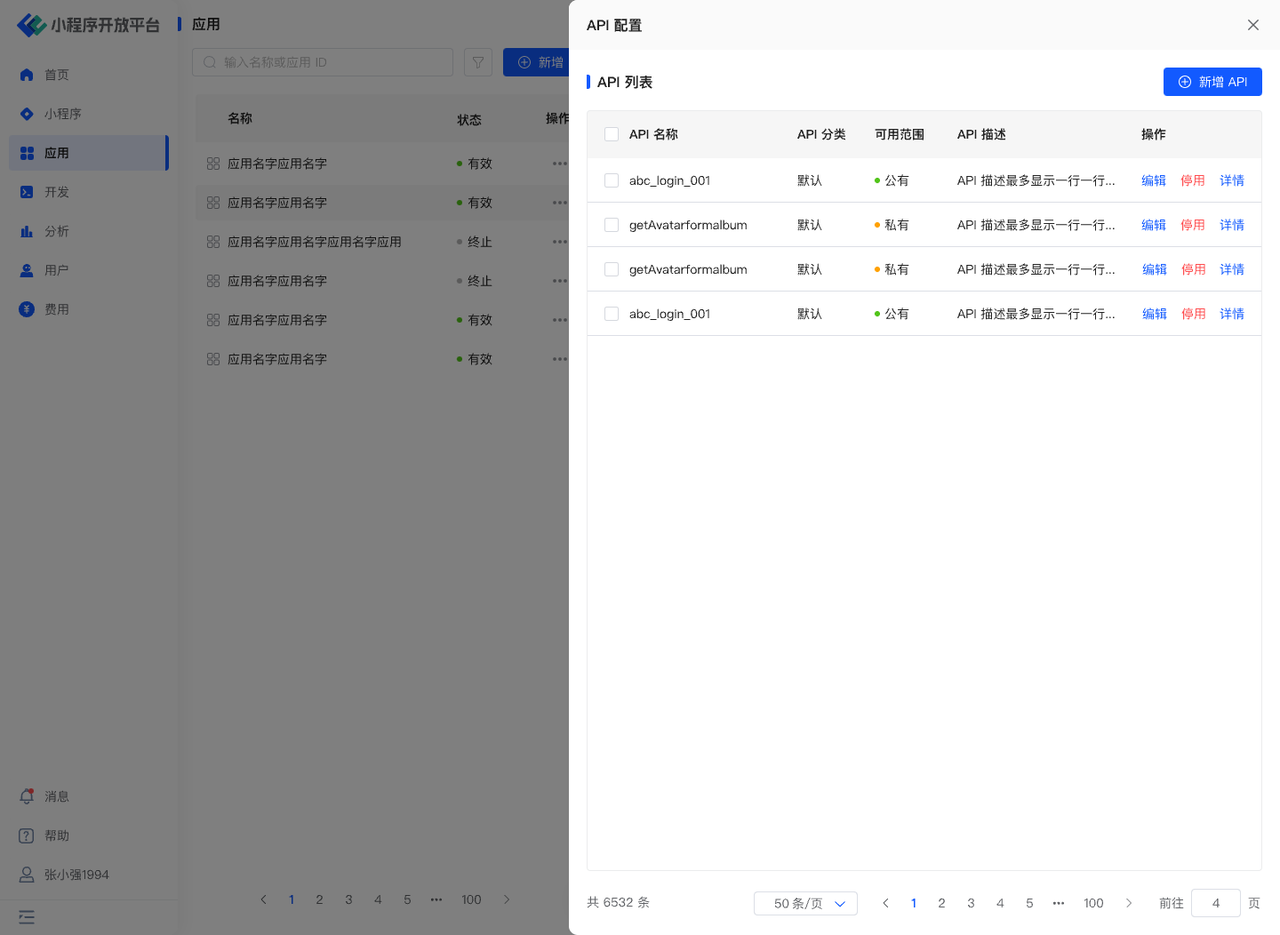
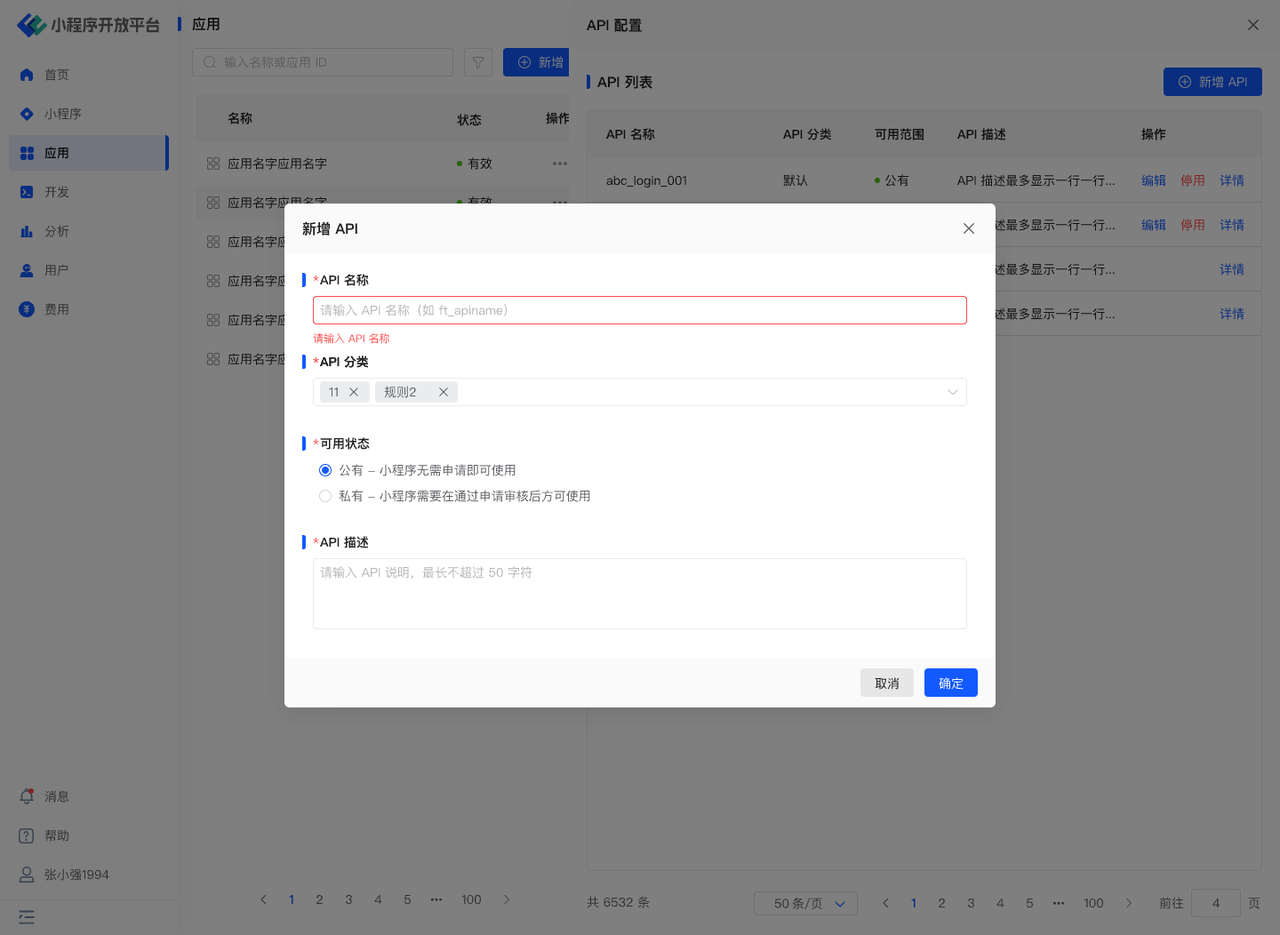
Click "Add API" in the list to register the relevant APIs injected via custom methods in the Host-App. The required information includes:
- API Name: The specific name of the API.
- API Category: A category tag for the API, helping developers manage and filter the available scope.
- Availability Status: Divided into "Public" and "Private". Public types can be used by Mini-Program developers without application; Private types require application and approval before use.
- Description: Supplementary description information for the API.
# Menu Configuration
Click "Configure" from the "Custom Menu" operation column to enter the Menu Management page. Here you can add, disable, or modify custom menus, as well as modify the names and categories of the SDK's built-in menu icons.

Click "Add Menu" in the list to register the relevant menus injected via custom methods in the Host-App. The required information includes:
- Icon Name: The specific name of the menu icon.
- Icon Image: The image content of the icon, including images for both Light Mode and Dark Mode.
- Icon ID: The ID information used for calling within the Mini-Program.
- Availability Status: Divided into "Public" and "Private". Public types can be used by Mini-Program developers without application; Private types require application and approval before use.
Please Note To call menu icons within a Mini-Program, they must be used through self-injection. For the guide, please click UI Customization / Setting Mini-Program More Menu / 12. Self-injecting Menu Items in the More Panel (opens new window)
# API and Menu Management
Click "Manage" from the "API and Menu Management" operation column to enter the list page. Here you can perform review operations for APIs and menus, and you can also disable APIs or menus that have already been approved. Disabling here means revoking the Mini-Program's permission to use the API or menu.
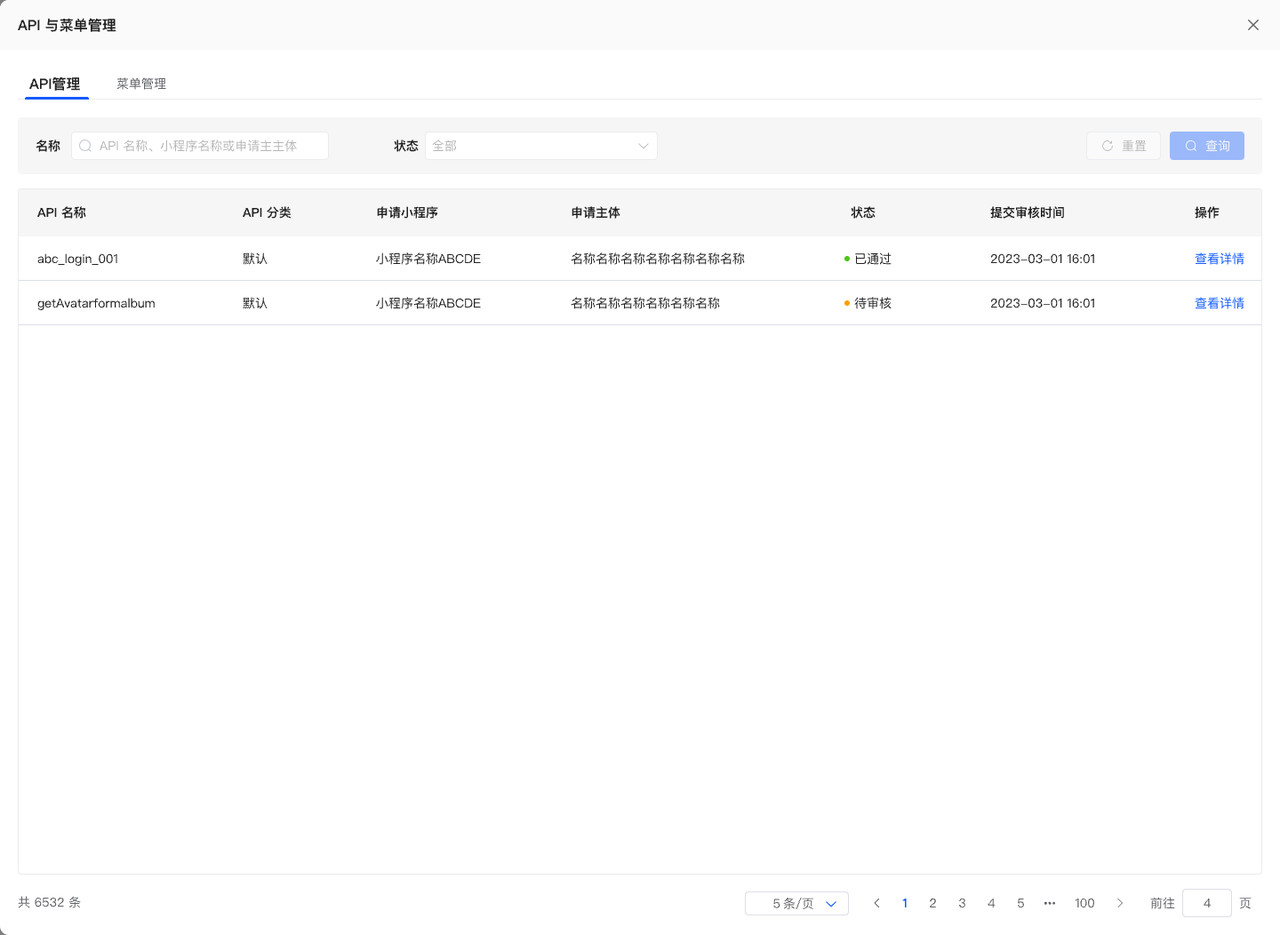
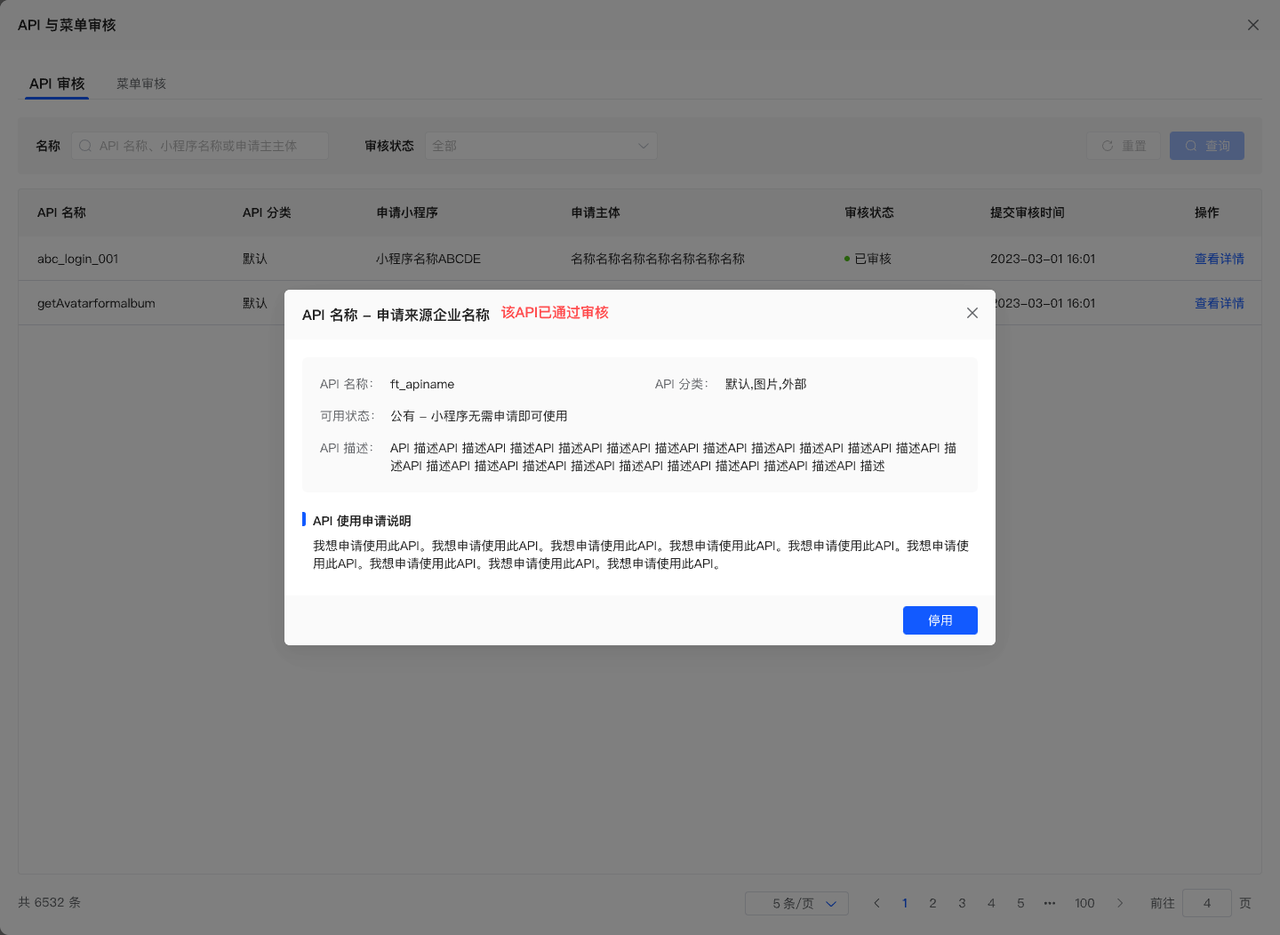
Click "View Details" to see the application details for the corresponding API or menu. For pending applications, you can choose to approve or reject them. For approved items, you can choose to disable them.
# 3.5 Others
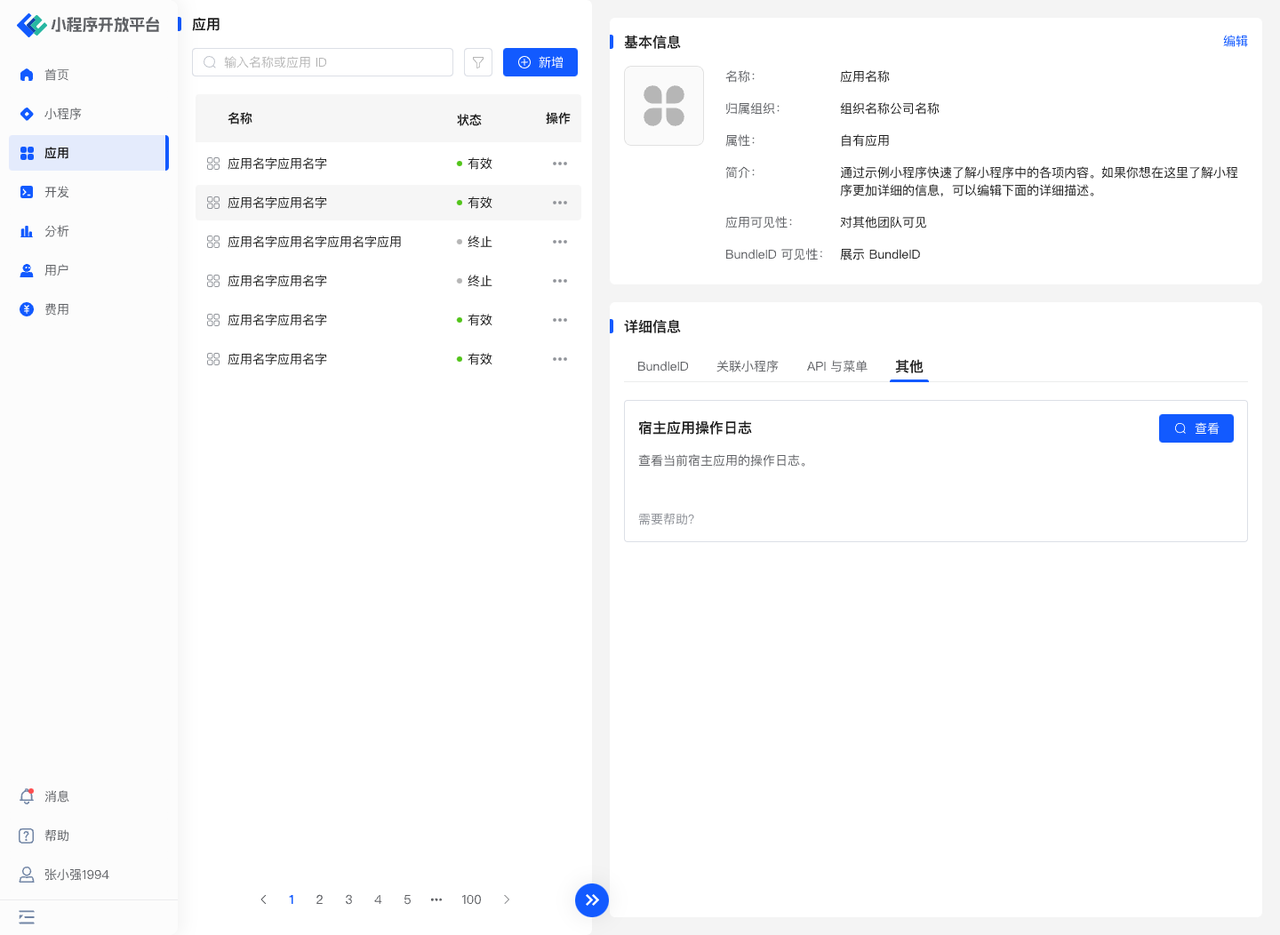
Here you can view the relevant operation logs for the application module.
- Operator: The user who performed the operation.
- Operation Module: The specific functional module where the user performed the operation, corresponding to a specific business area (here, it is Application Management).
- Operation Type: The specific action performed within the functional module.
Example: If User A creates a new application in the "Application Management" module, then: Operator: User A, Operation Module: Application Management, Operation Type: Create Application.
# 4. Environment Specifications
| Community Edition | SaaS Edition | Enterprise Edition (Annual Subscription or One-time Purchase) | |
|---|---|---|---|
| Application Management | ✅ | ✅ | ✅ |