# FinClip Studio Operation Guide
FinClip Studio is an "integrated development environment for Mini-Programs on desktop" launched for developers. Since 2021, it has been accompanying Mini-Program developers from different platforms to complete various functions such as Mini-Program development, debugging, preview, and upload.
Upgrade Notice
As various functions within FinClip IDE gradually increased, we have progressively added features such as Mini-Program compatibility checks, Mini-Program development, real-device debugging preview, one-click Mini-Program to App conversion, and Mini-Program cloud development, aiming to provide developers with a more comprehensive experience and assistance during the Mini-Program development process.
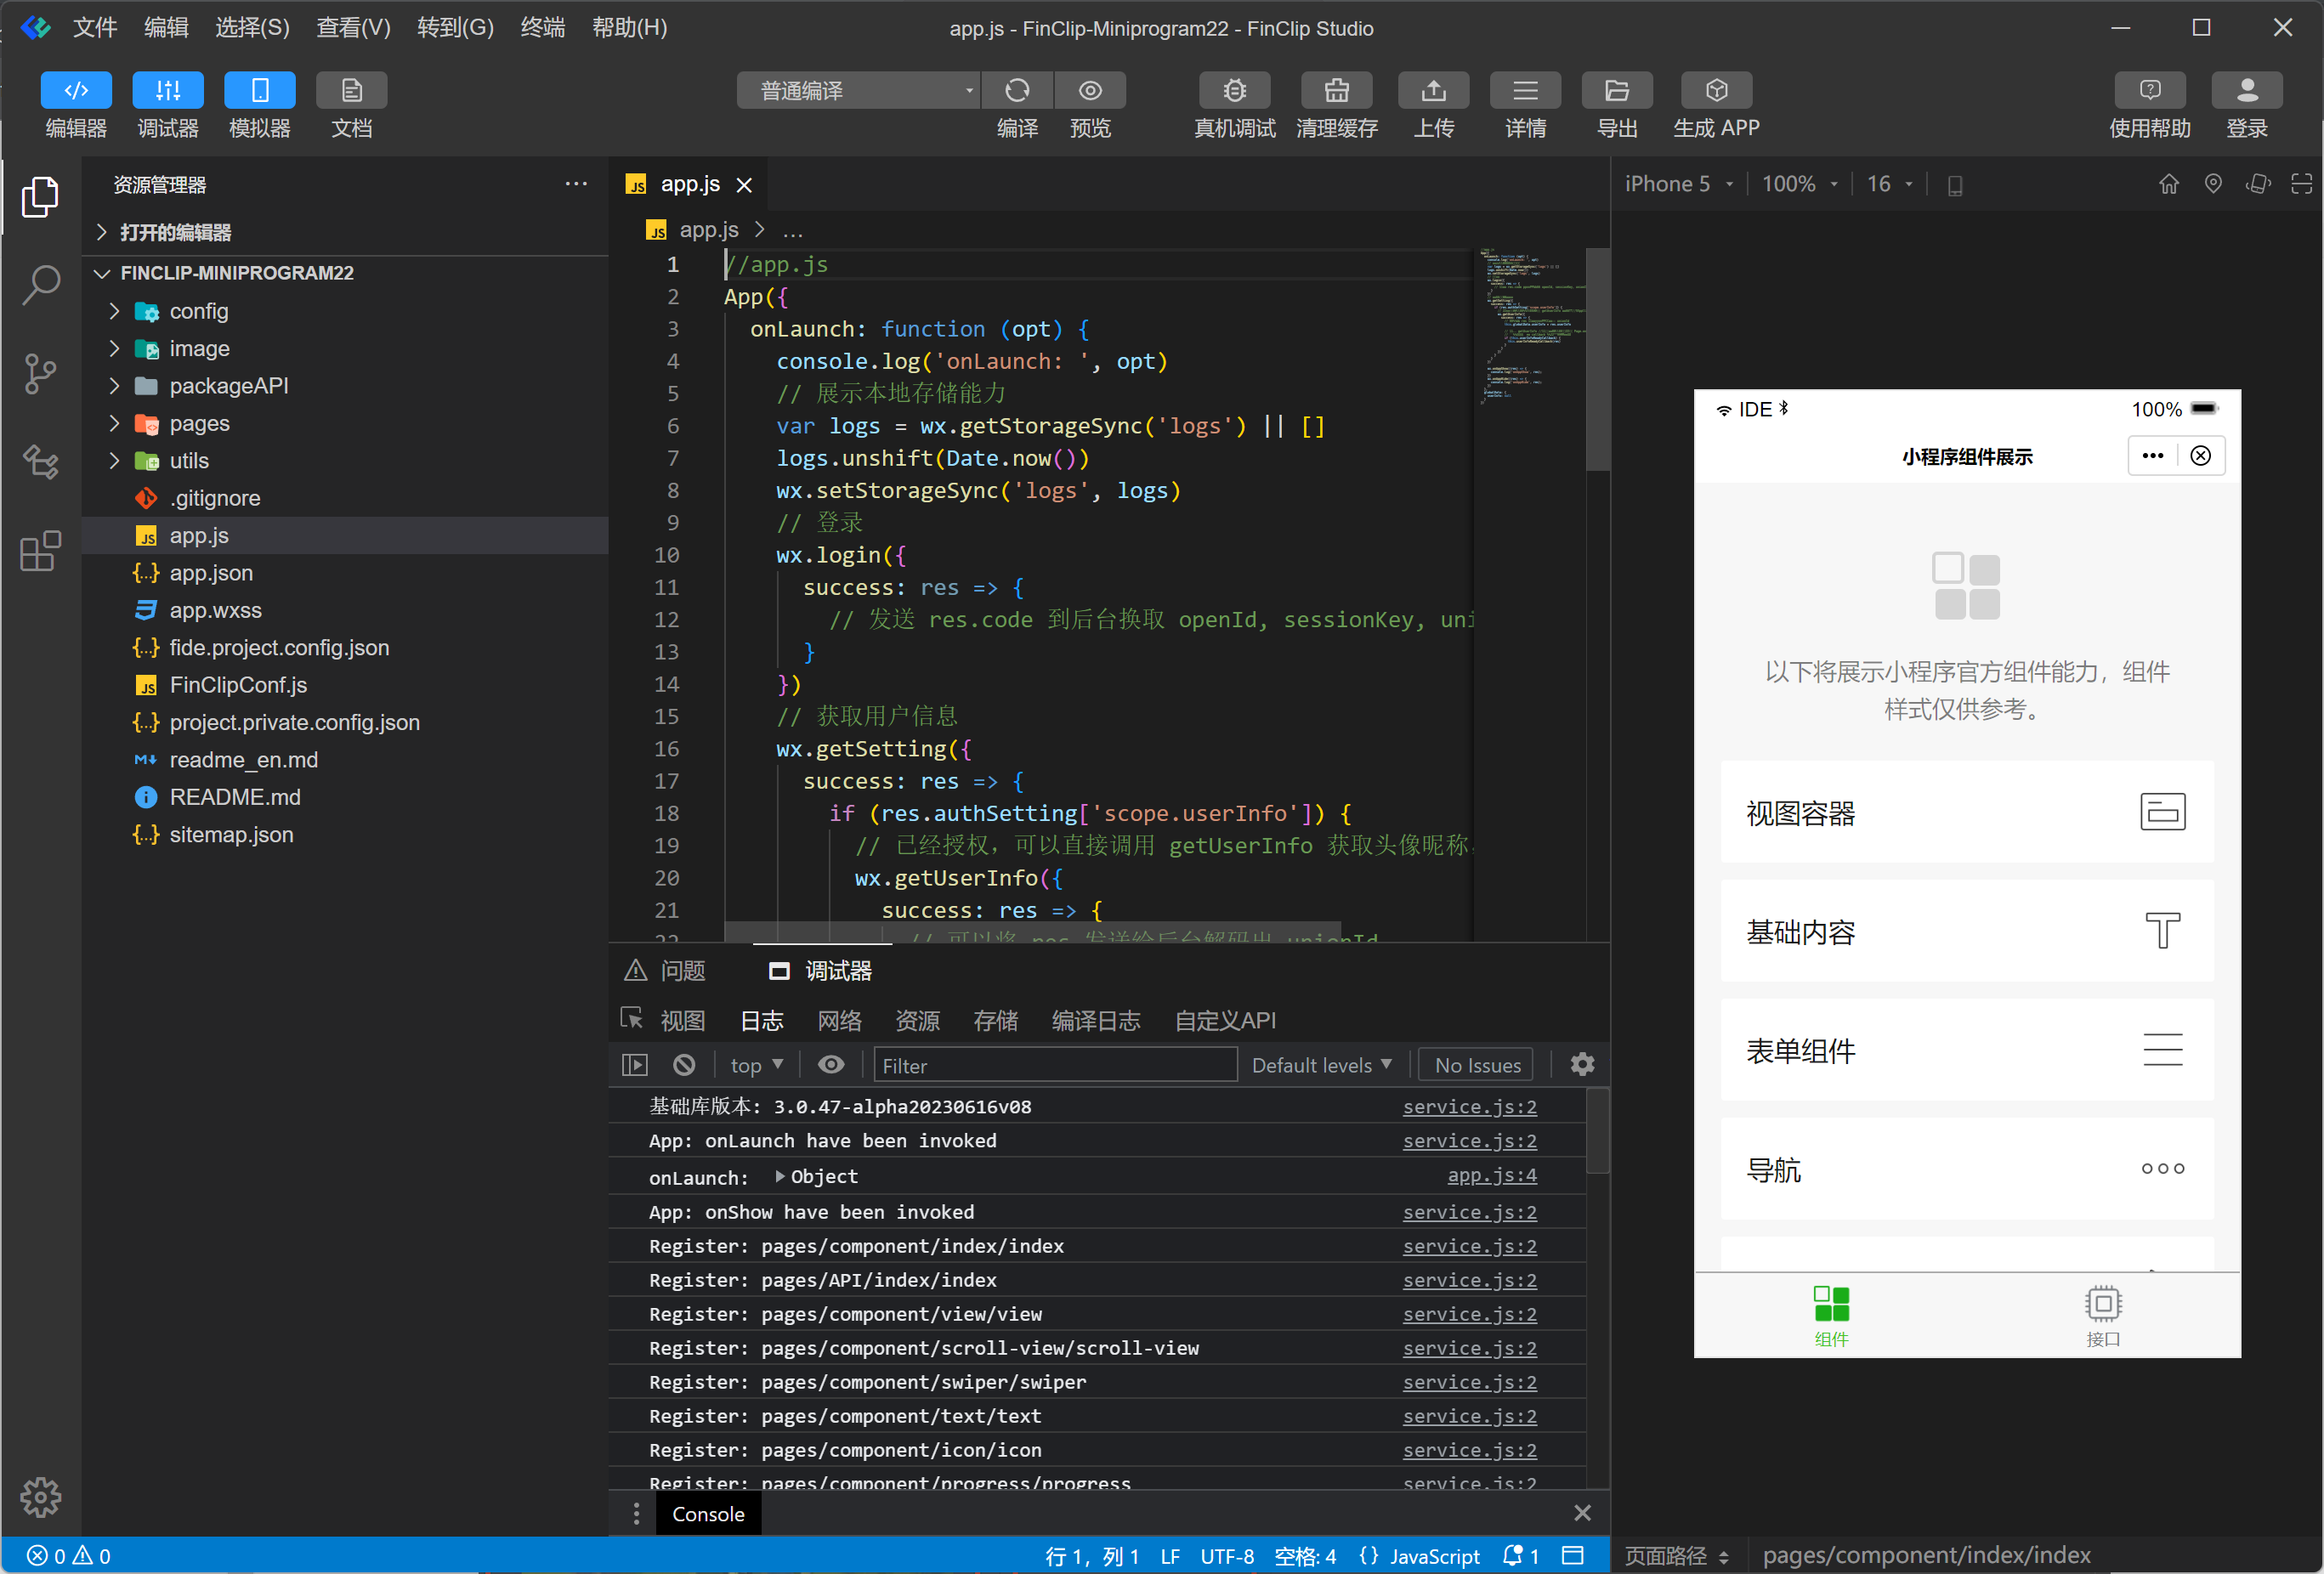
In 2022, we identified significant limitations in the performance and user experience of the existing FinClip IDE. As Mini-Program developers delved deeper into usage scenarios, we found the editor interaction experience of the original FinClip IDE insufficient. In the new version, FinClip Studio, we completely redesigned the developer tools, offering a code editor experience closer to VSCode. It natively supports VSCode plugin integration and comes pre-equipped with features expected in modern editors, such as Mini-Program code hints, code completion, JS link, code method reminders, Git extensions, and system terminal interaction.
Please note, this documentation is the operation guide for the latest version of FinClip Studio. If you wish to view the operation instructions for the older version, please click here.
# 1. Start Page
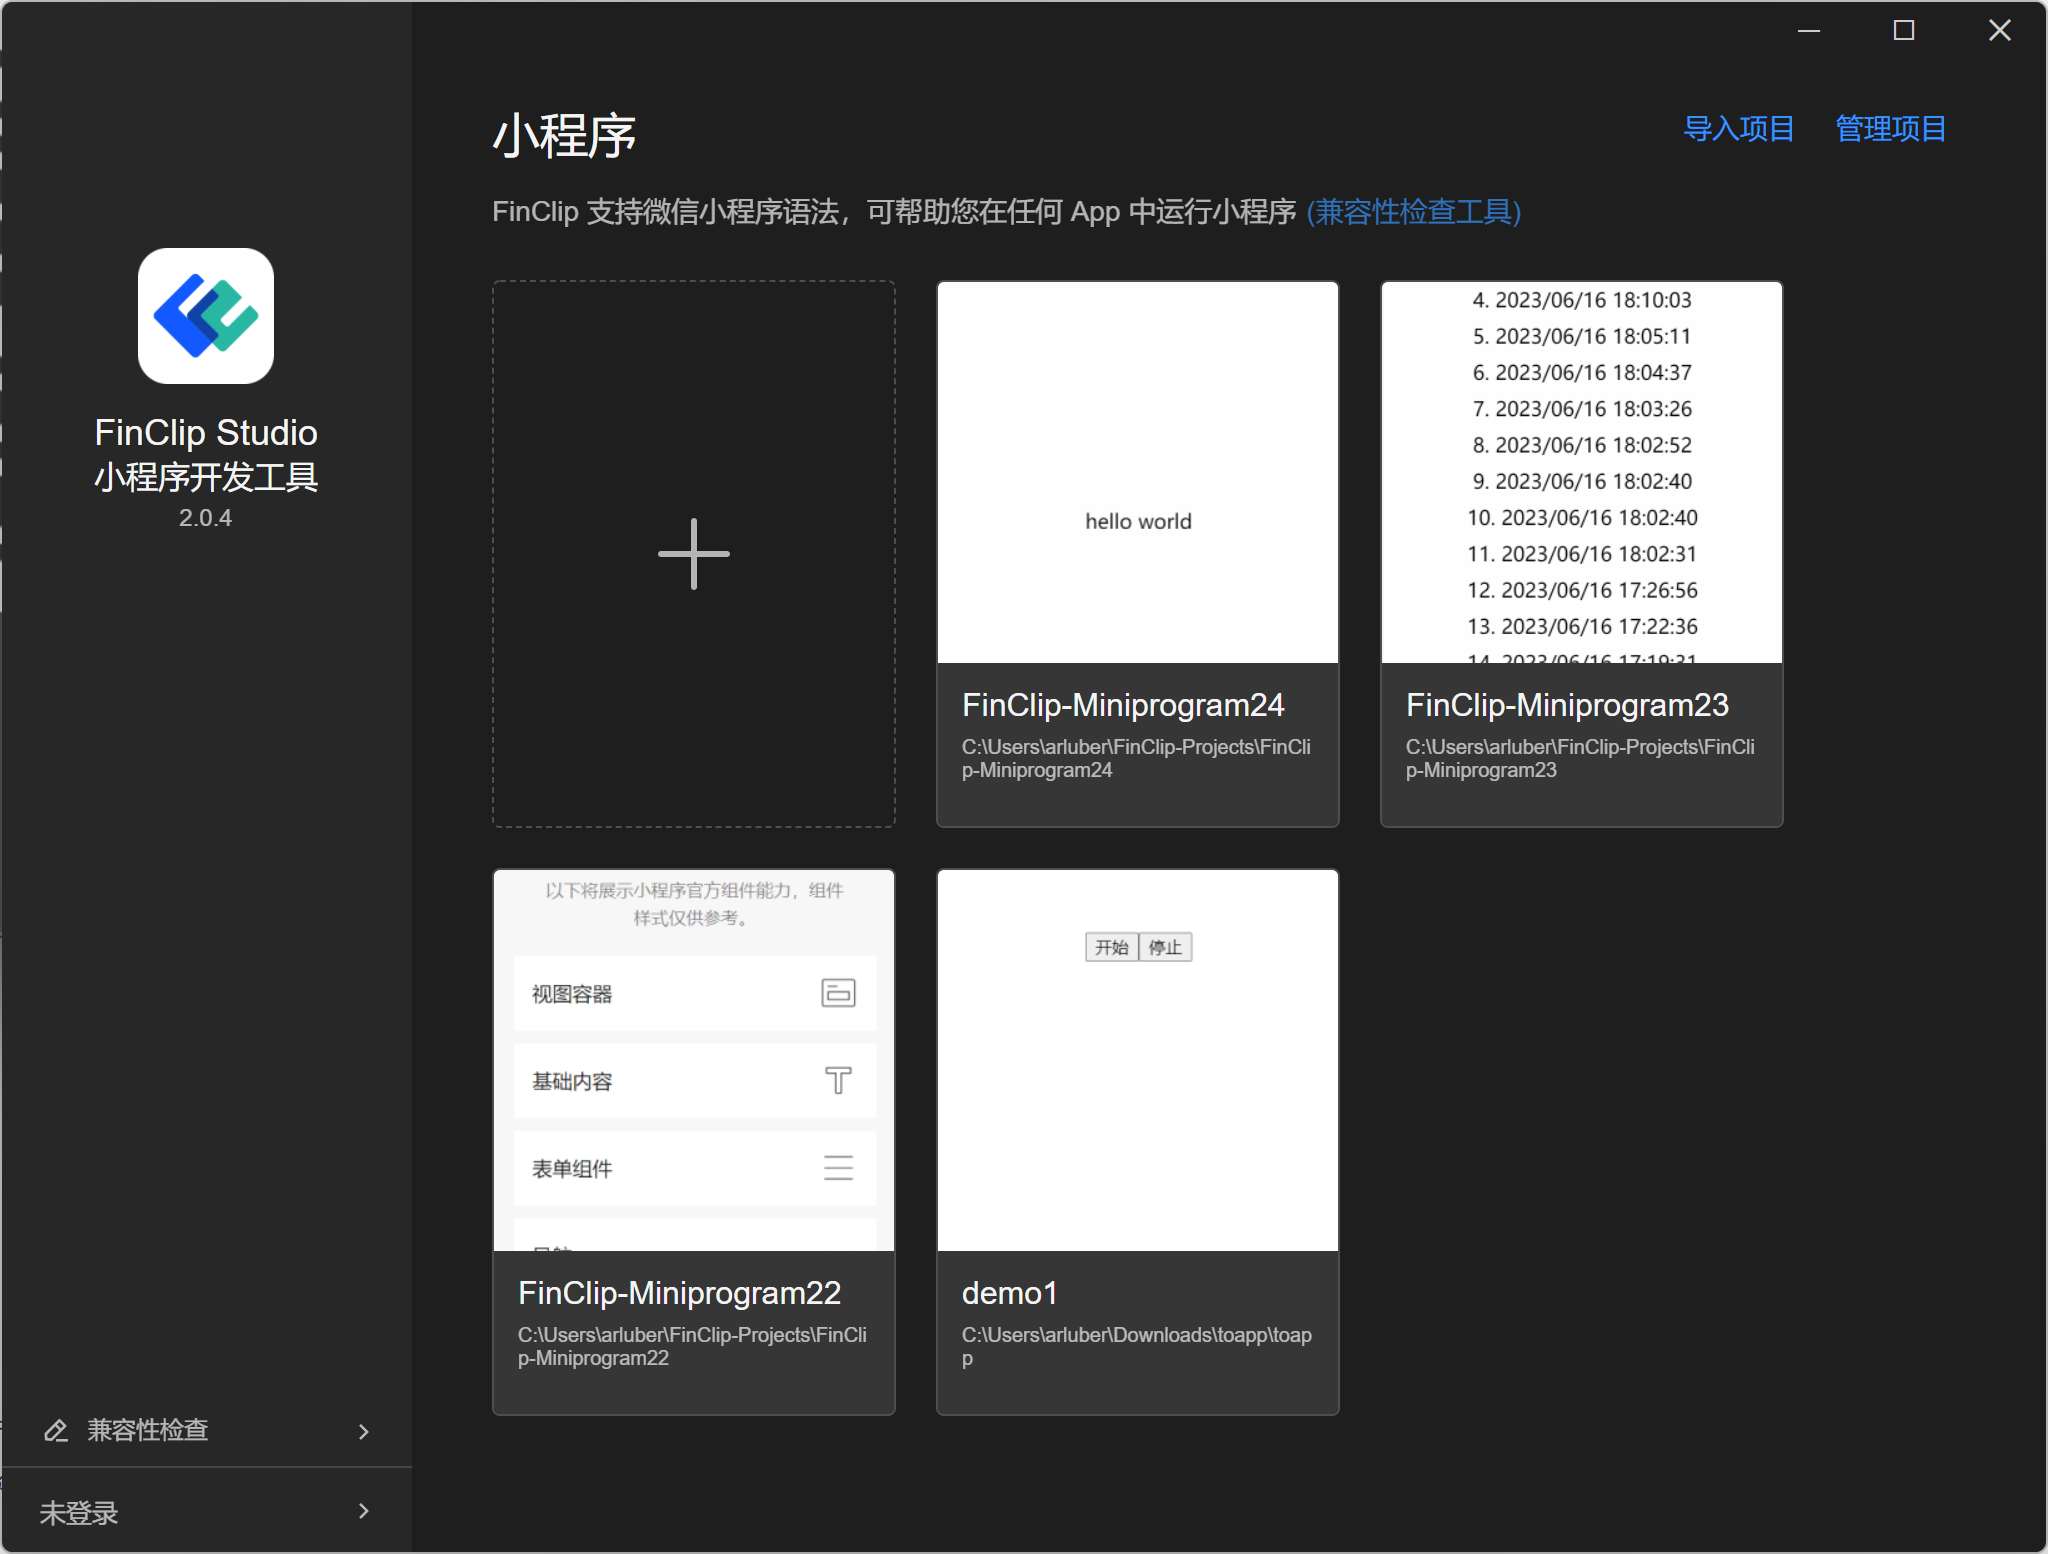
On the start interface, you can select Mini-Program projects that have been opened before. The project homepage displays a screenshot of the last opened page of the Mini-Program, making it convenient and quick to locate the desired project.
# 1.1 Create New Project
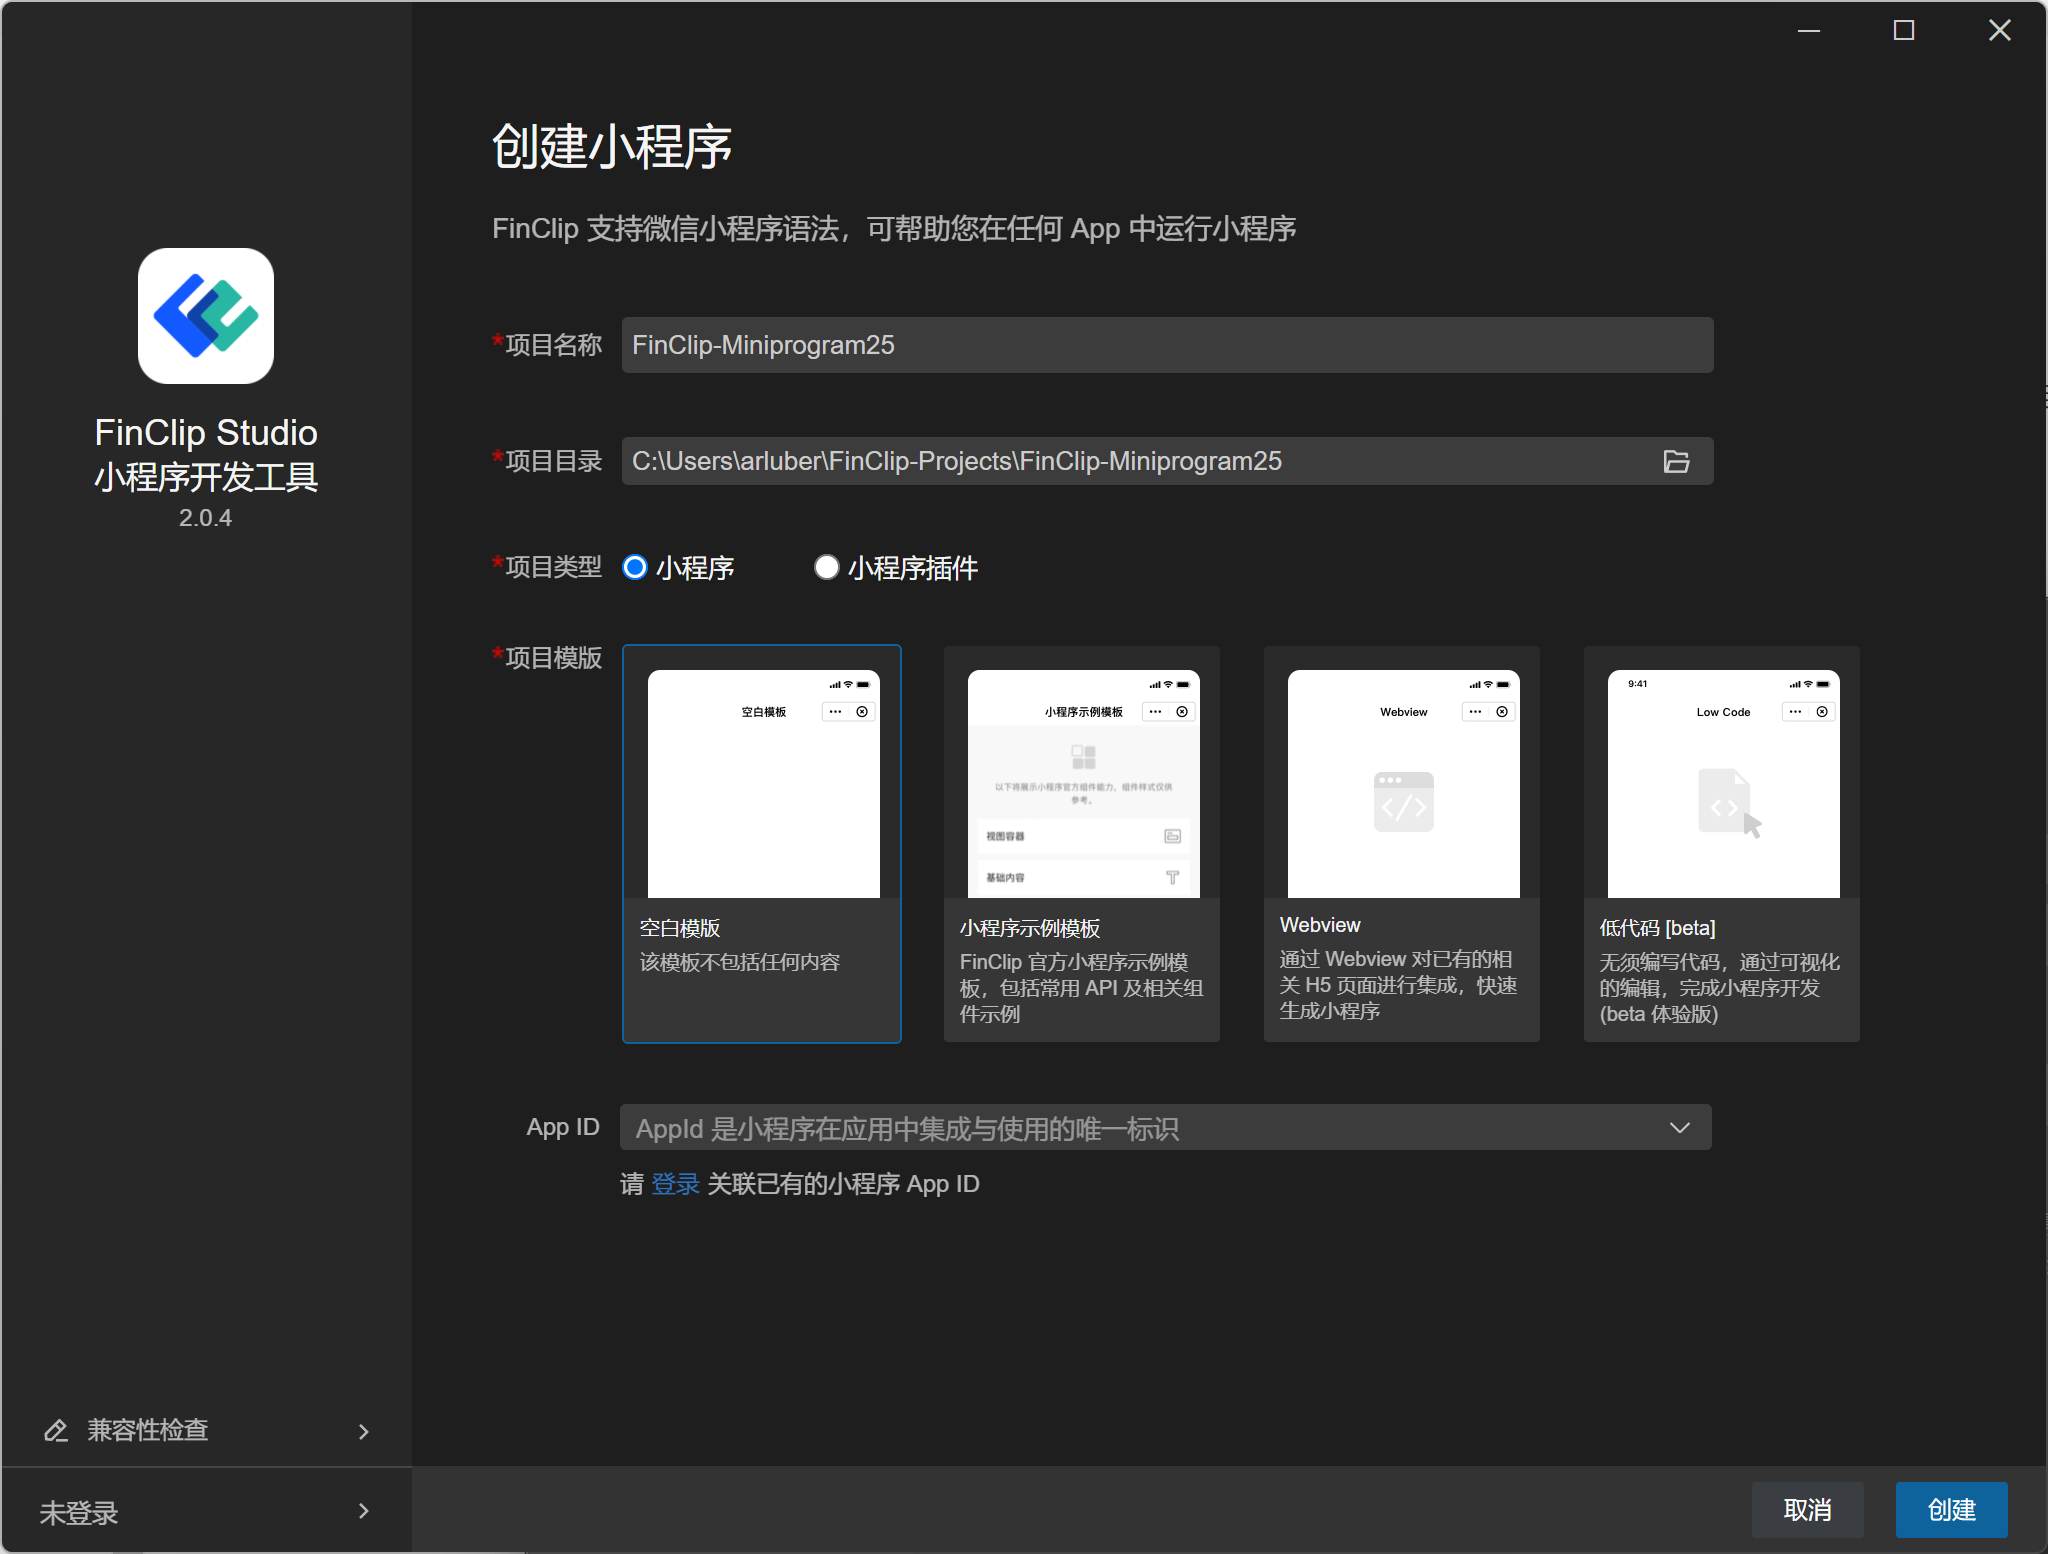
On this interface, select the project directory, type, template, and App ID. The App ID is optional; it can be left blank for local development initially. However, uploading to the Mini-Program Open Platform requires logging in and associating it with the backend Mini-Program App ID.
# 1.2 Open Existing Project
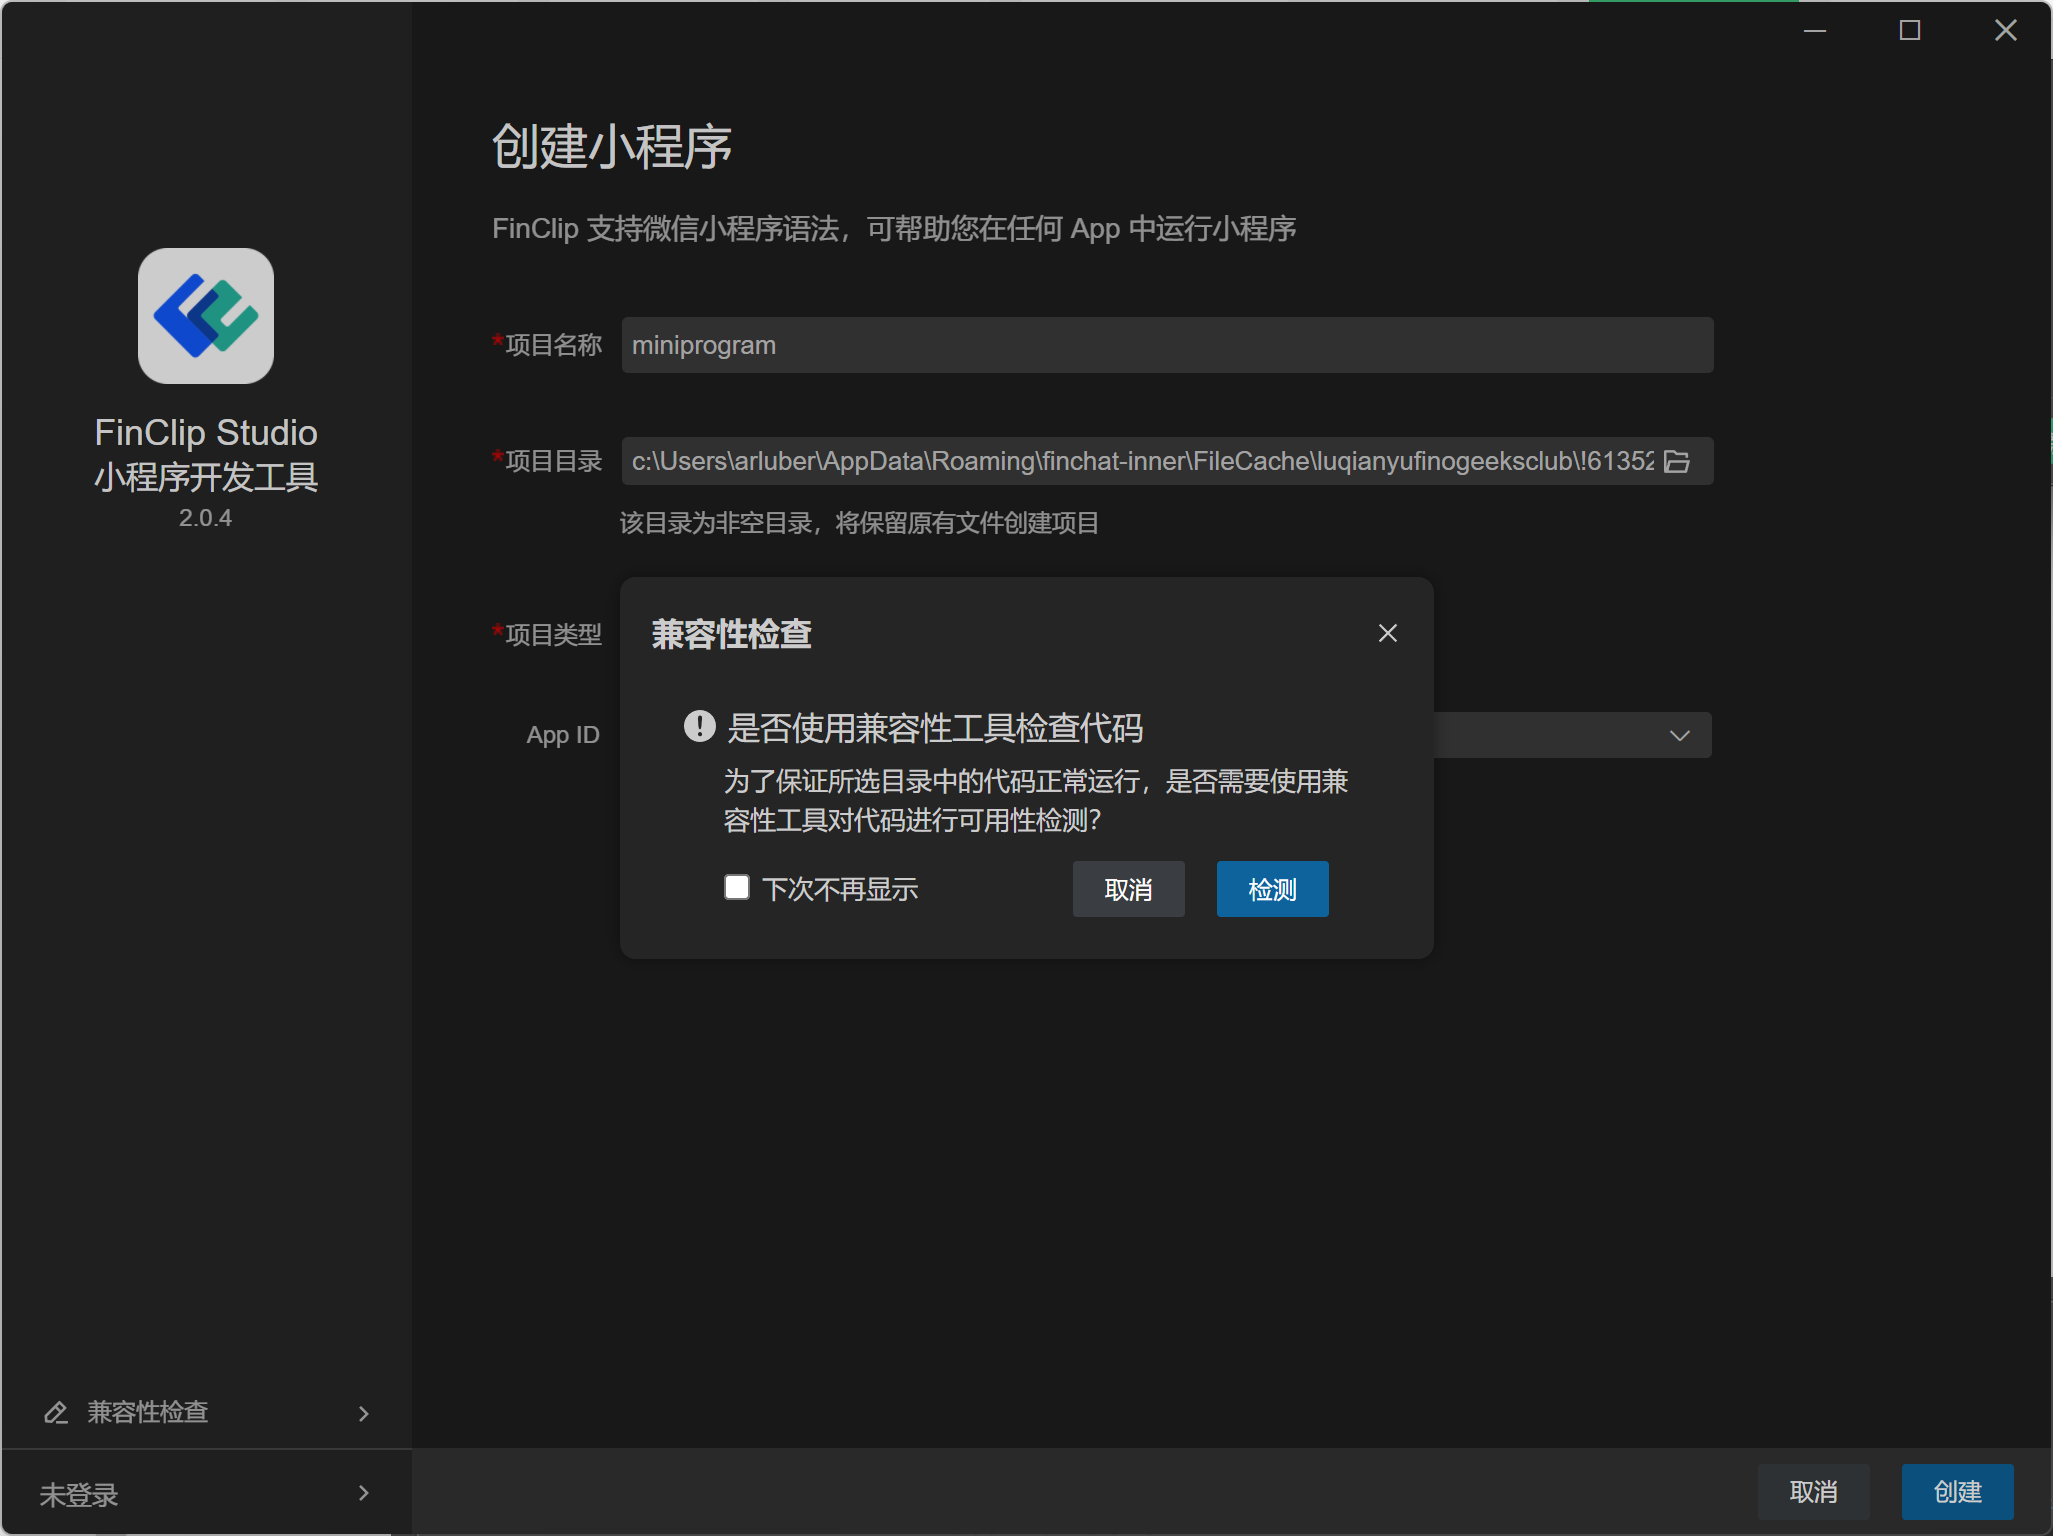
To open an existing project, simply select the directory of the already existing Mini-Program project in the project directory selector. Generally, this directory contains either project.config.json or fide.project.config.json. Note that the root directory of some code frameworks might not be the root directory of the Mini-Program itself; please discern carefully.
Before the project opens, a prompt will appear suggesting a compatibility check on the Mini-Program using the compatibility check tool. This feature will be introduced in detail below.
# 1.3 Compatibility Check
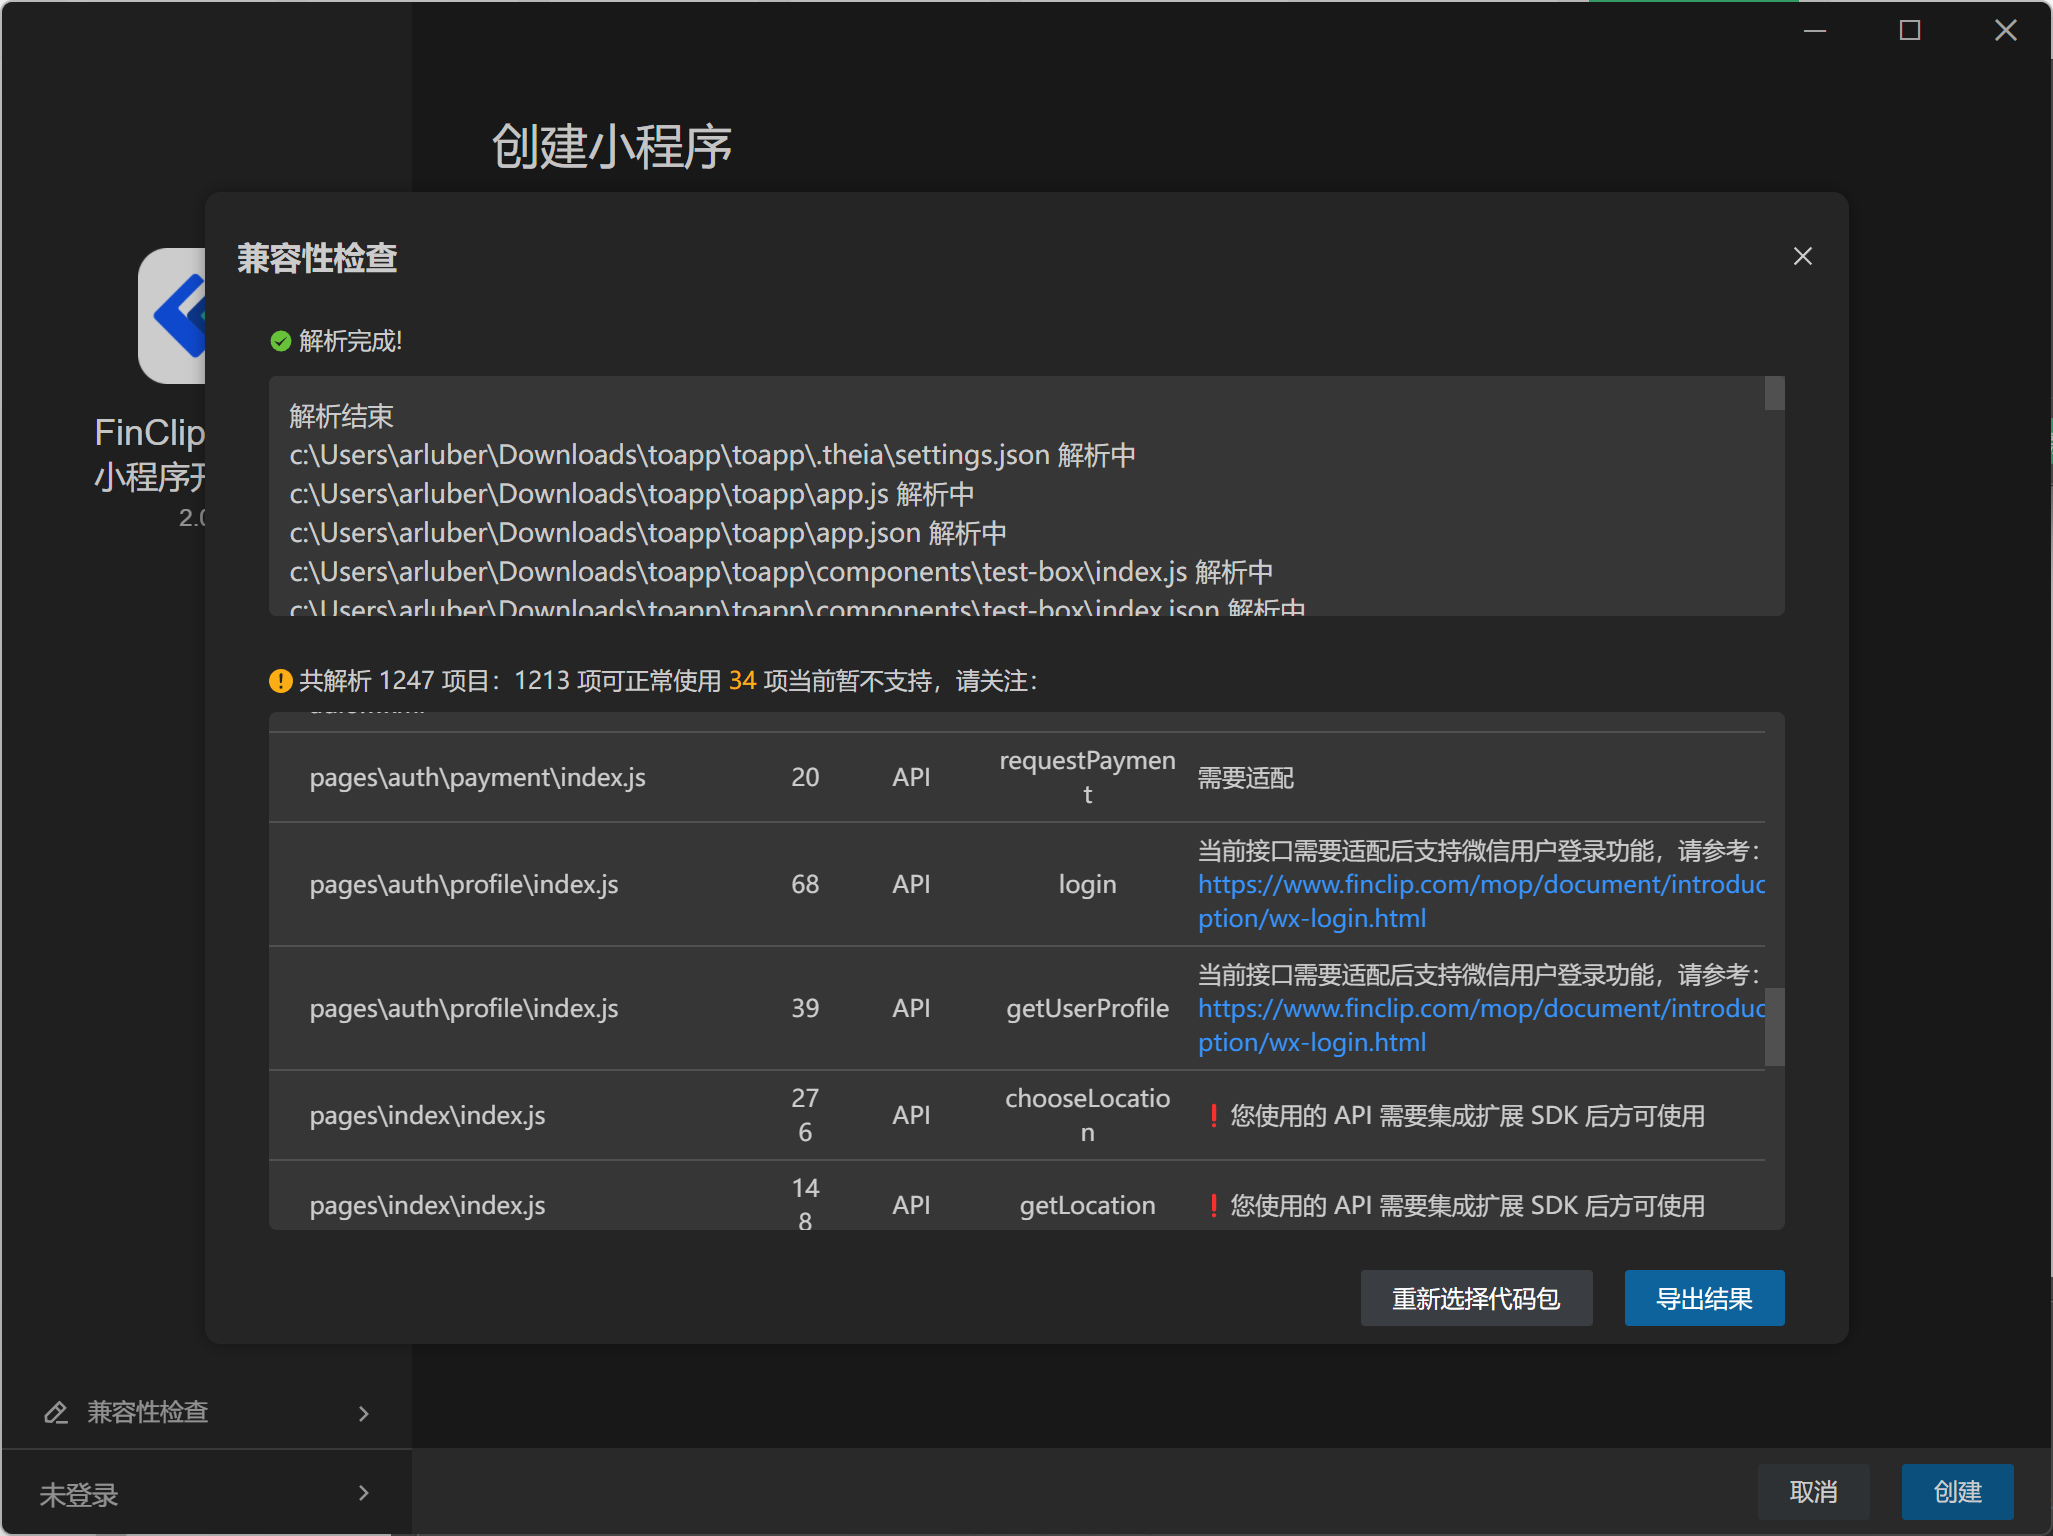
The compatibility check function in FinClip Studio scans all components and API calls within the code. For interfaces that are temporarily unsupported or require adaptation, it provides corresponding prompts.
# 1.4 Multiple Project Instances
FinClip Studio now supports opening multiple projects simultaneously. After opening a project, navigate through the menu: File -> Create Project. Following this path reopens the start page, allowing you to open multiple projects from there.
# 1.5 Login
FinClip Studio supports multiple login methods: account login, SMS login, and FinClip QR code login.
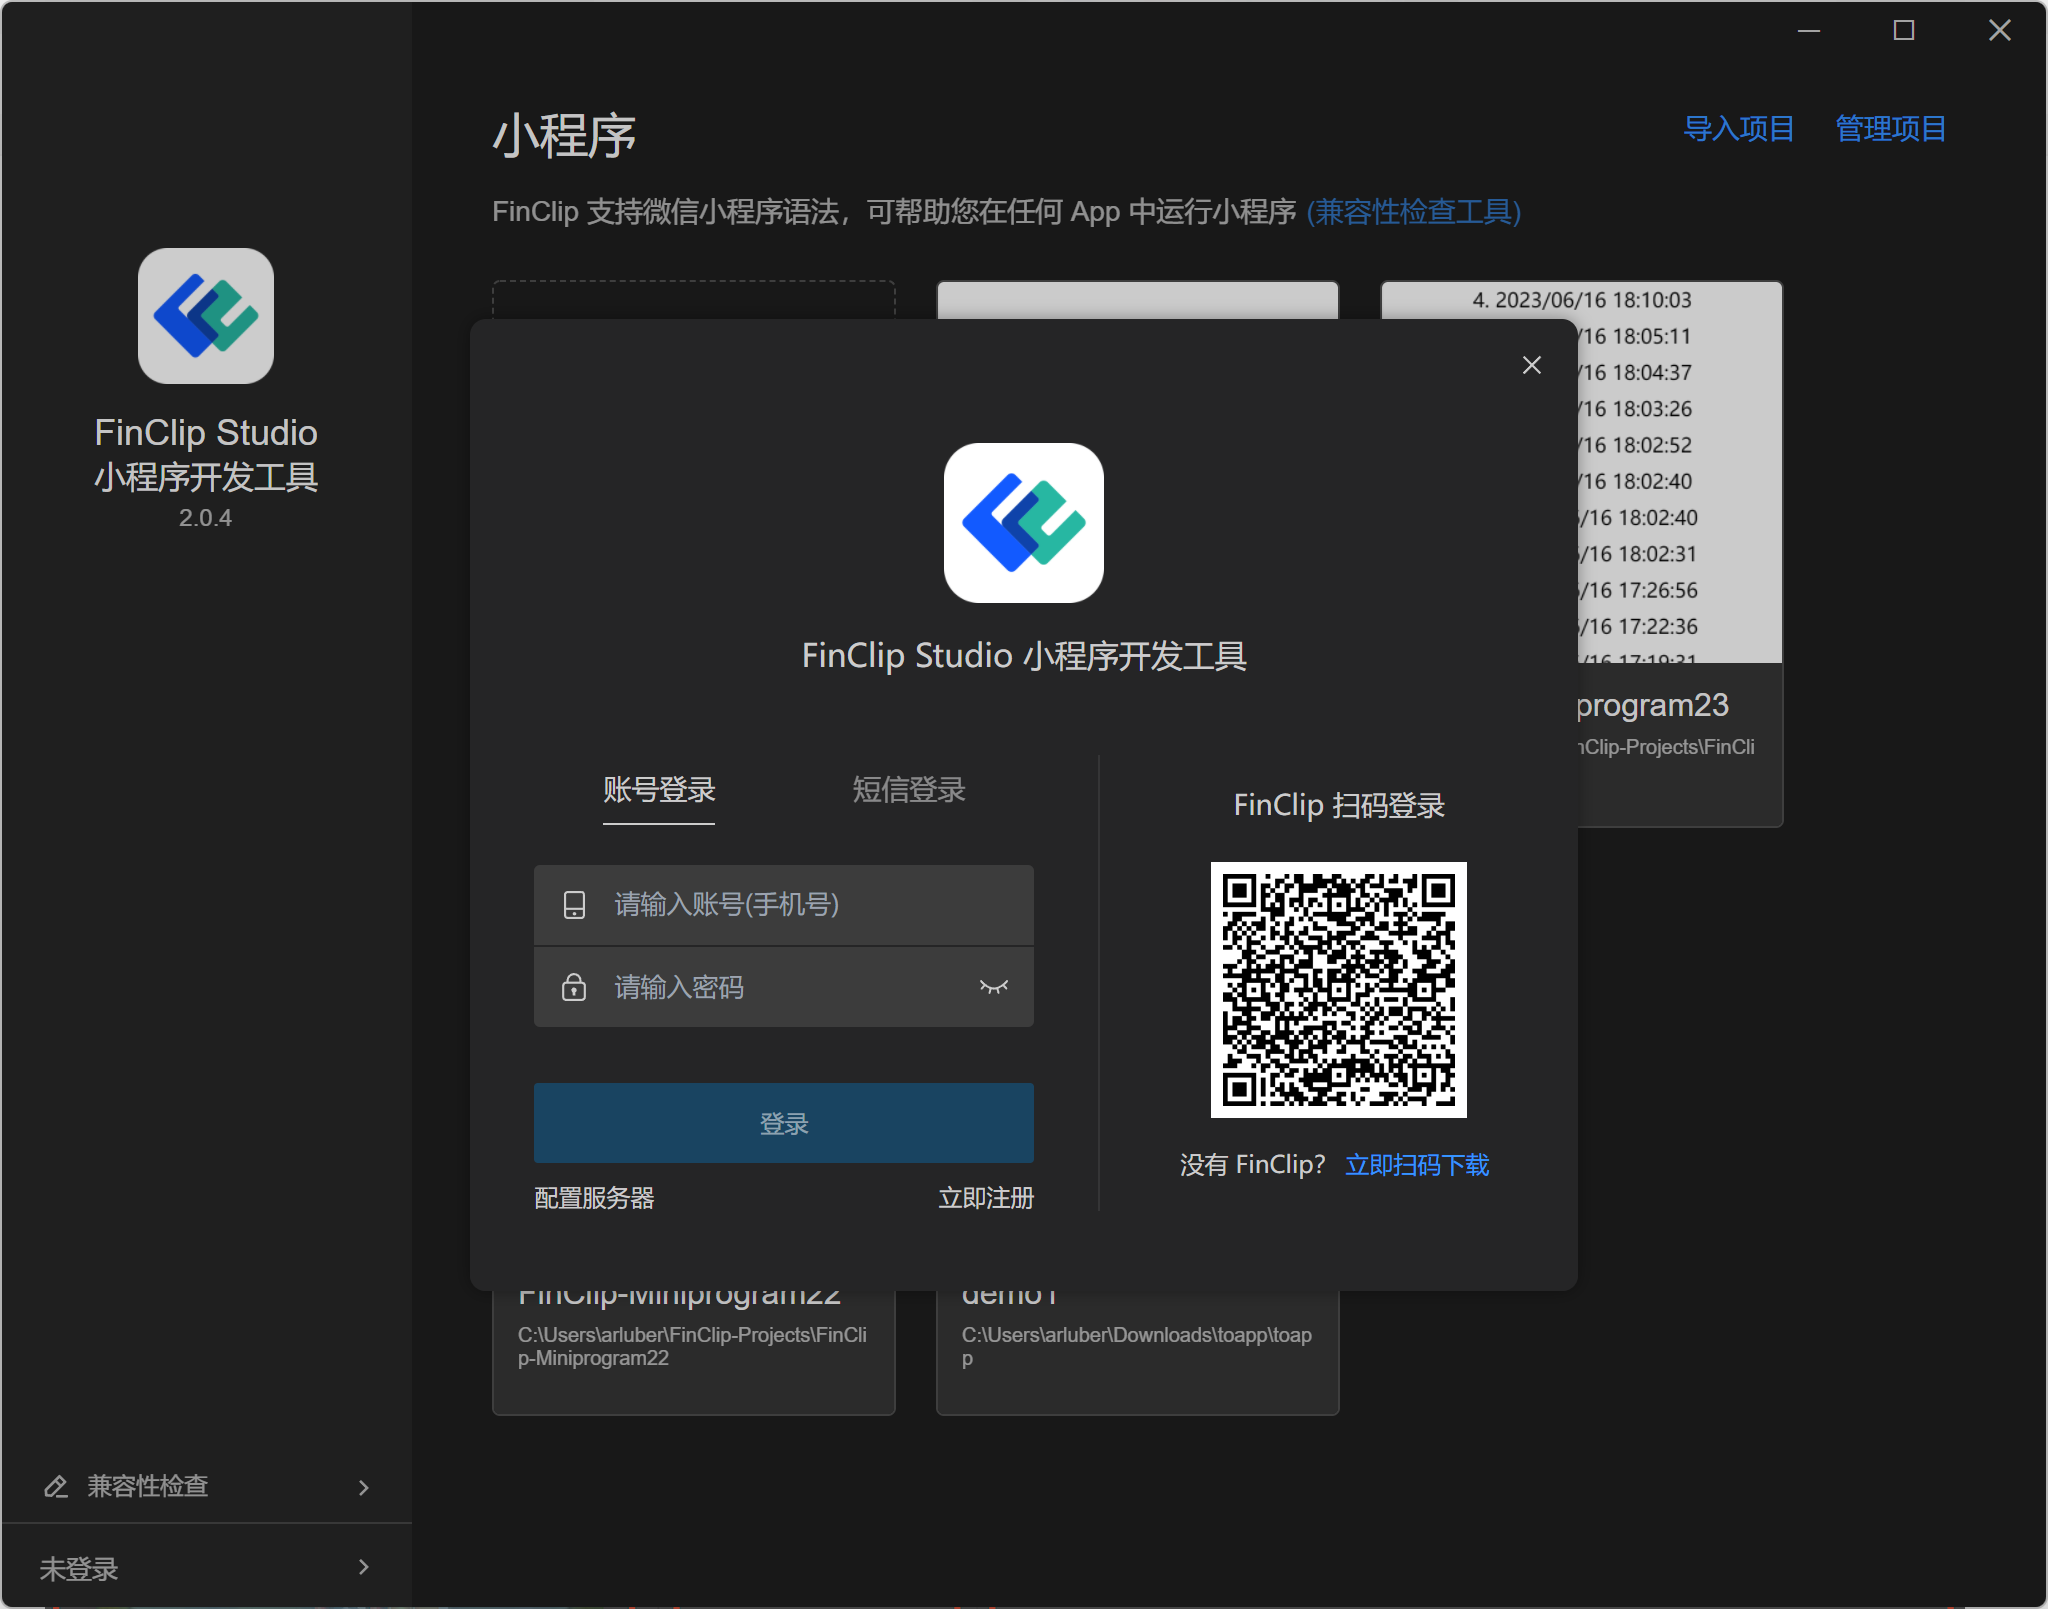
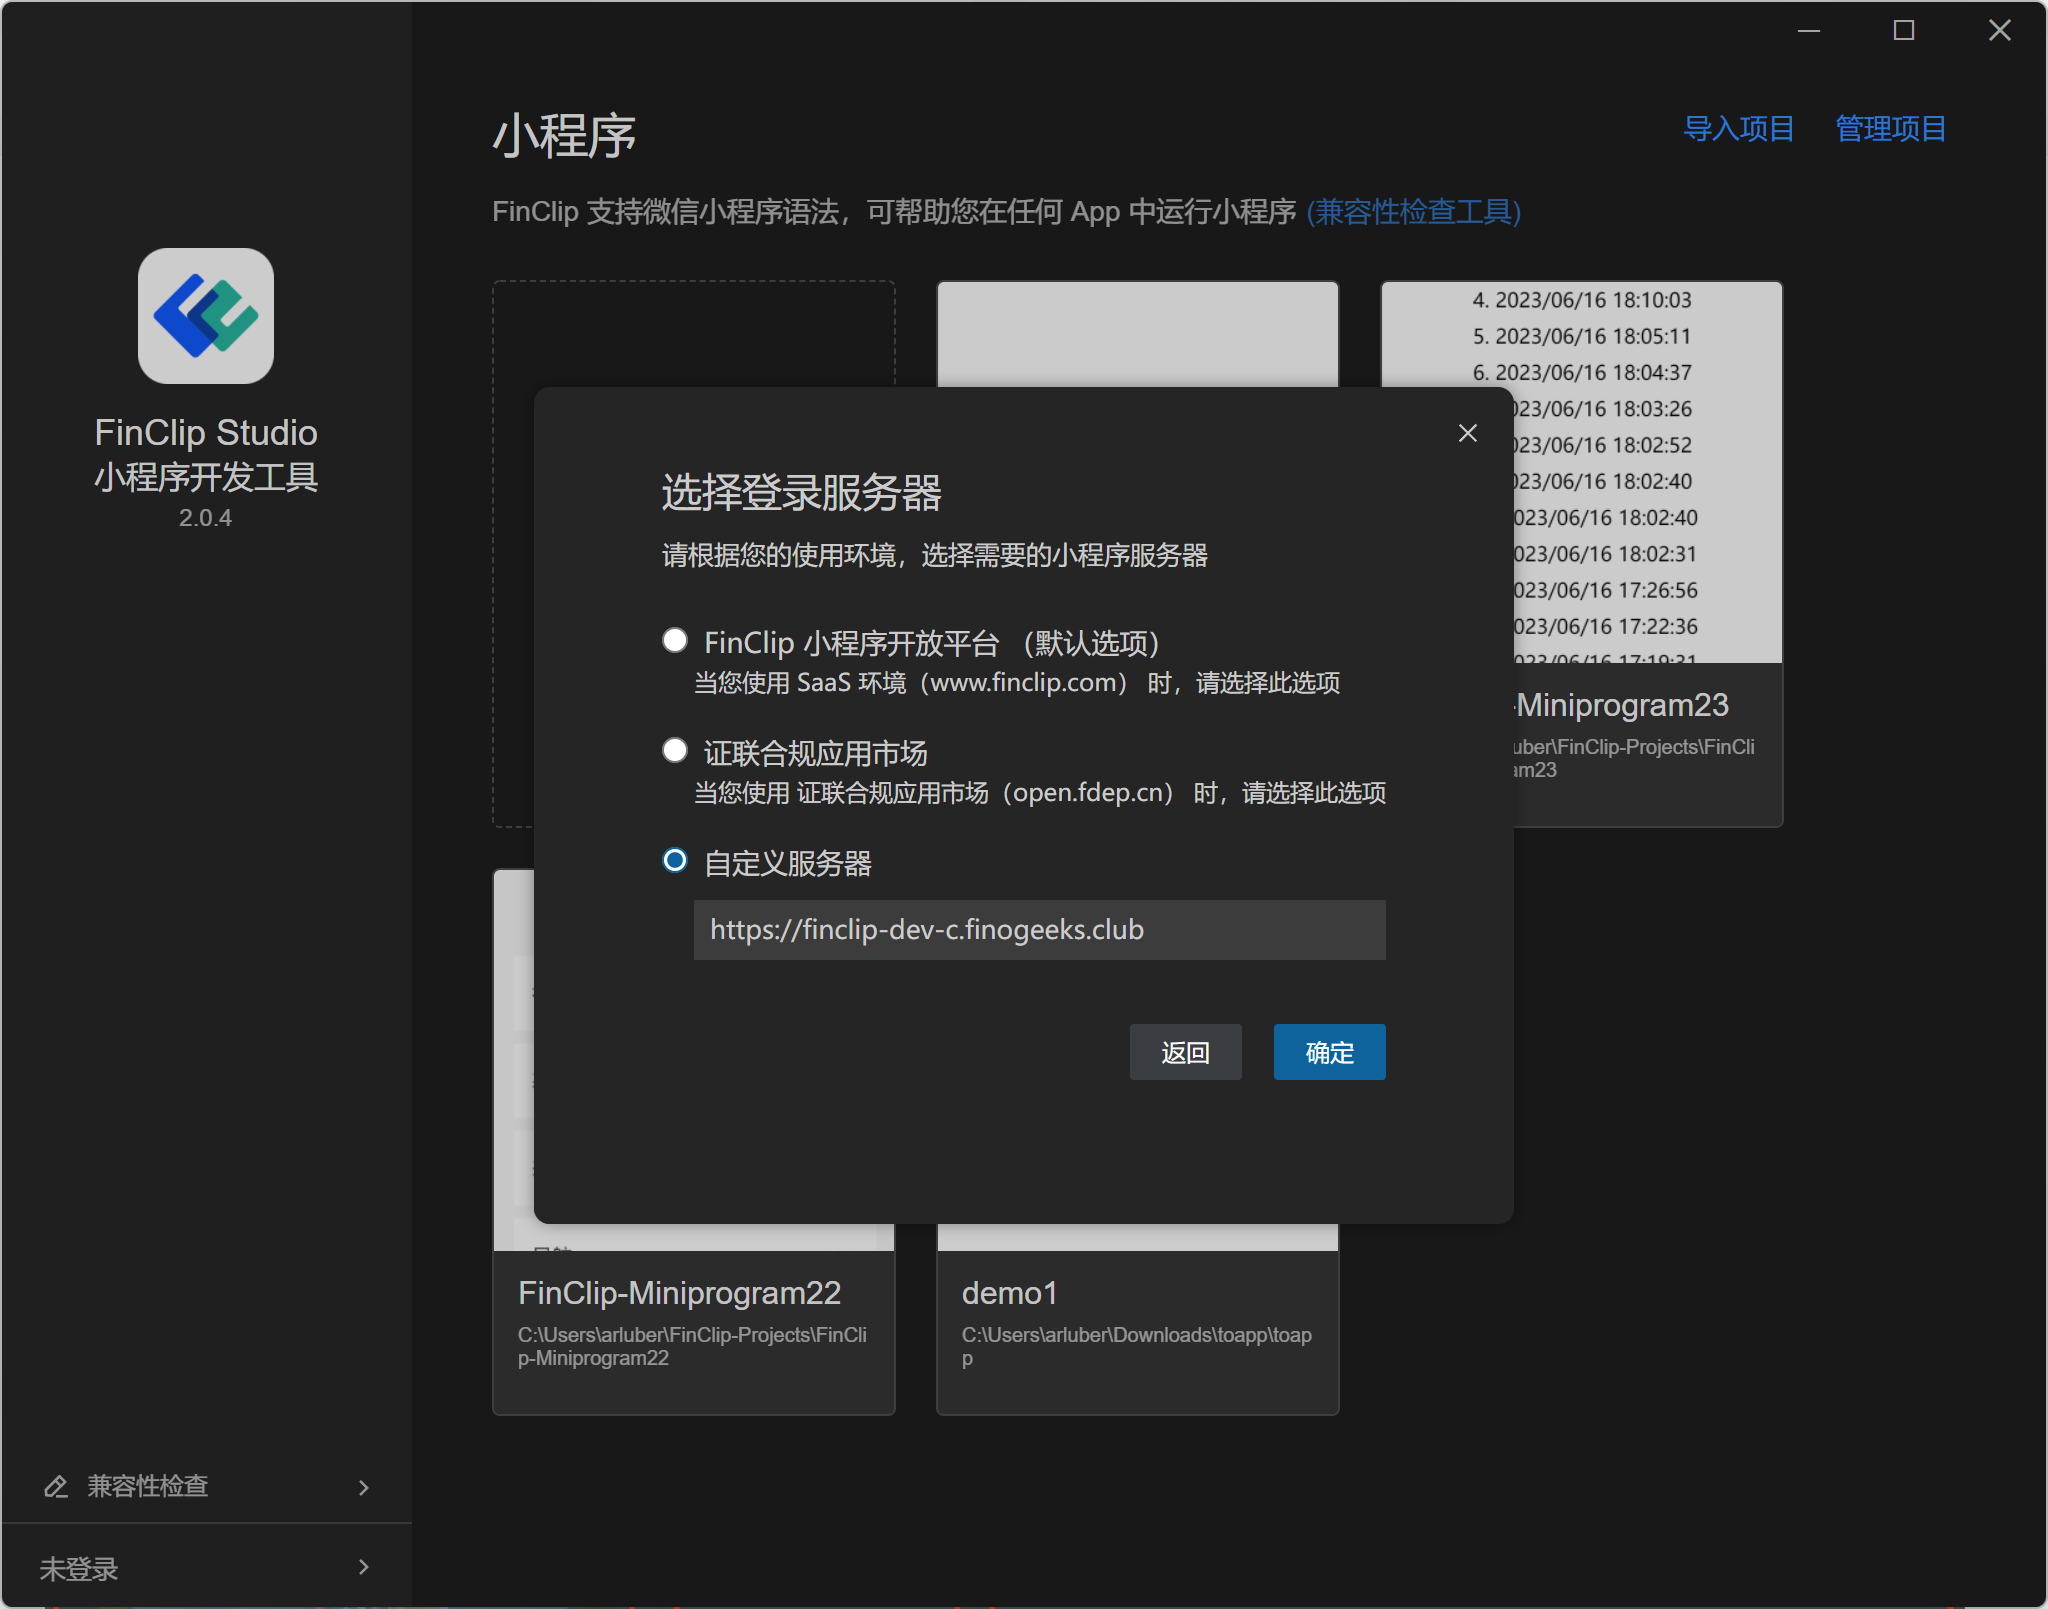
For users with private deployments, click "Configure Server" on the login interface to select the server address.
# 2. Menu Bar
The menu bar includes commonly used functions during Mini-Program development. This section will introduce the following key features:
# 2.1 Help -> Build Npm
Corresponds to the "Build Npm" function in WeChat Developer Tools. It converts the node_modules in the project into miniprograme_modules usable by Mini-Programs.
# 2.2 Help -> Delete User Data and Restart
For occasional functional abnormalities or caching issues, this provides a convenient way to reset FinClip Studio by deleting local application data and restarting. This method can resolve most problems caused by cache anomalies.
# 2.3 Help -> Upload Logs
This function uploads logs related to FinClip Studio operation and Mini-Program compilation to our servers, facilitating faster and better resolution of issues you encounter.
# 3. Toolbar
The three buttons on the left control the show/hide state of the main interface modules. At least one module must be visible.
The document icon quickly opens this FinClip Studio Operation Guide webpage.
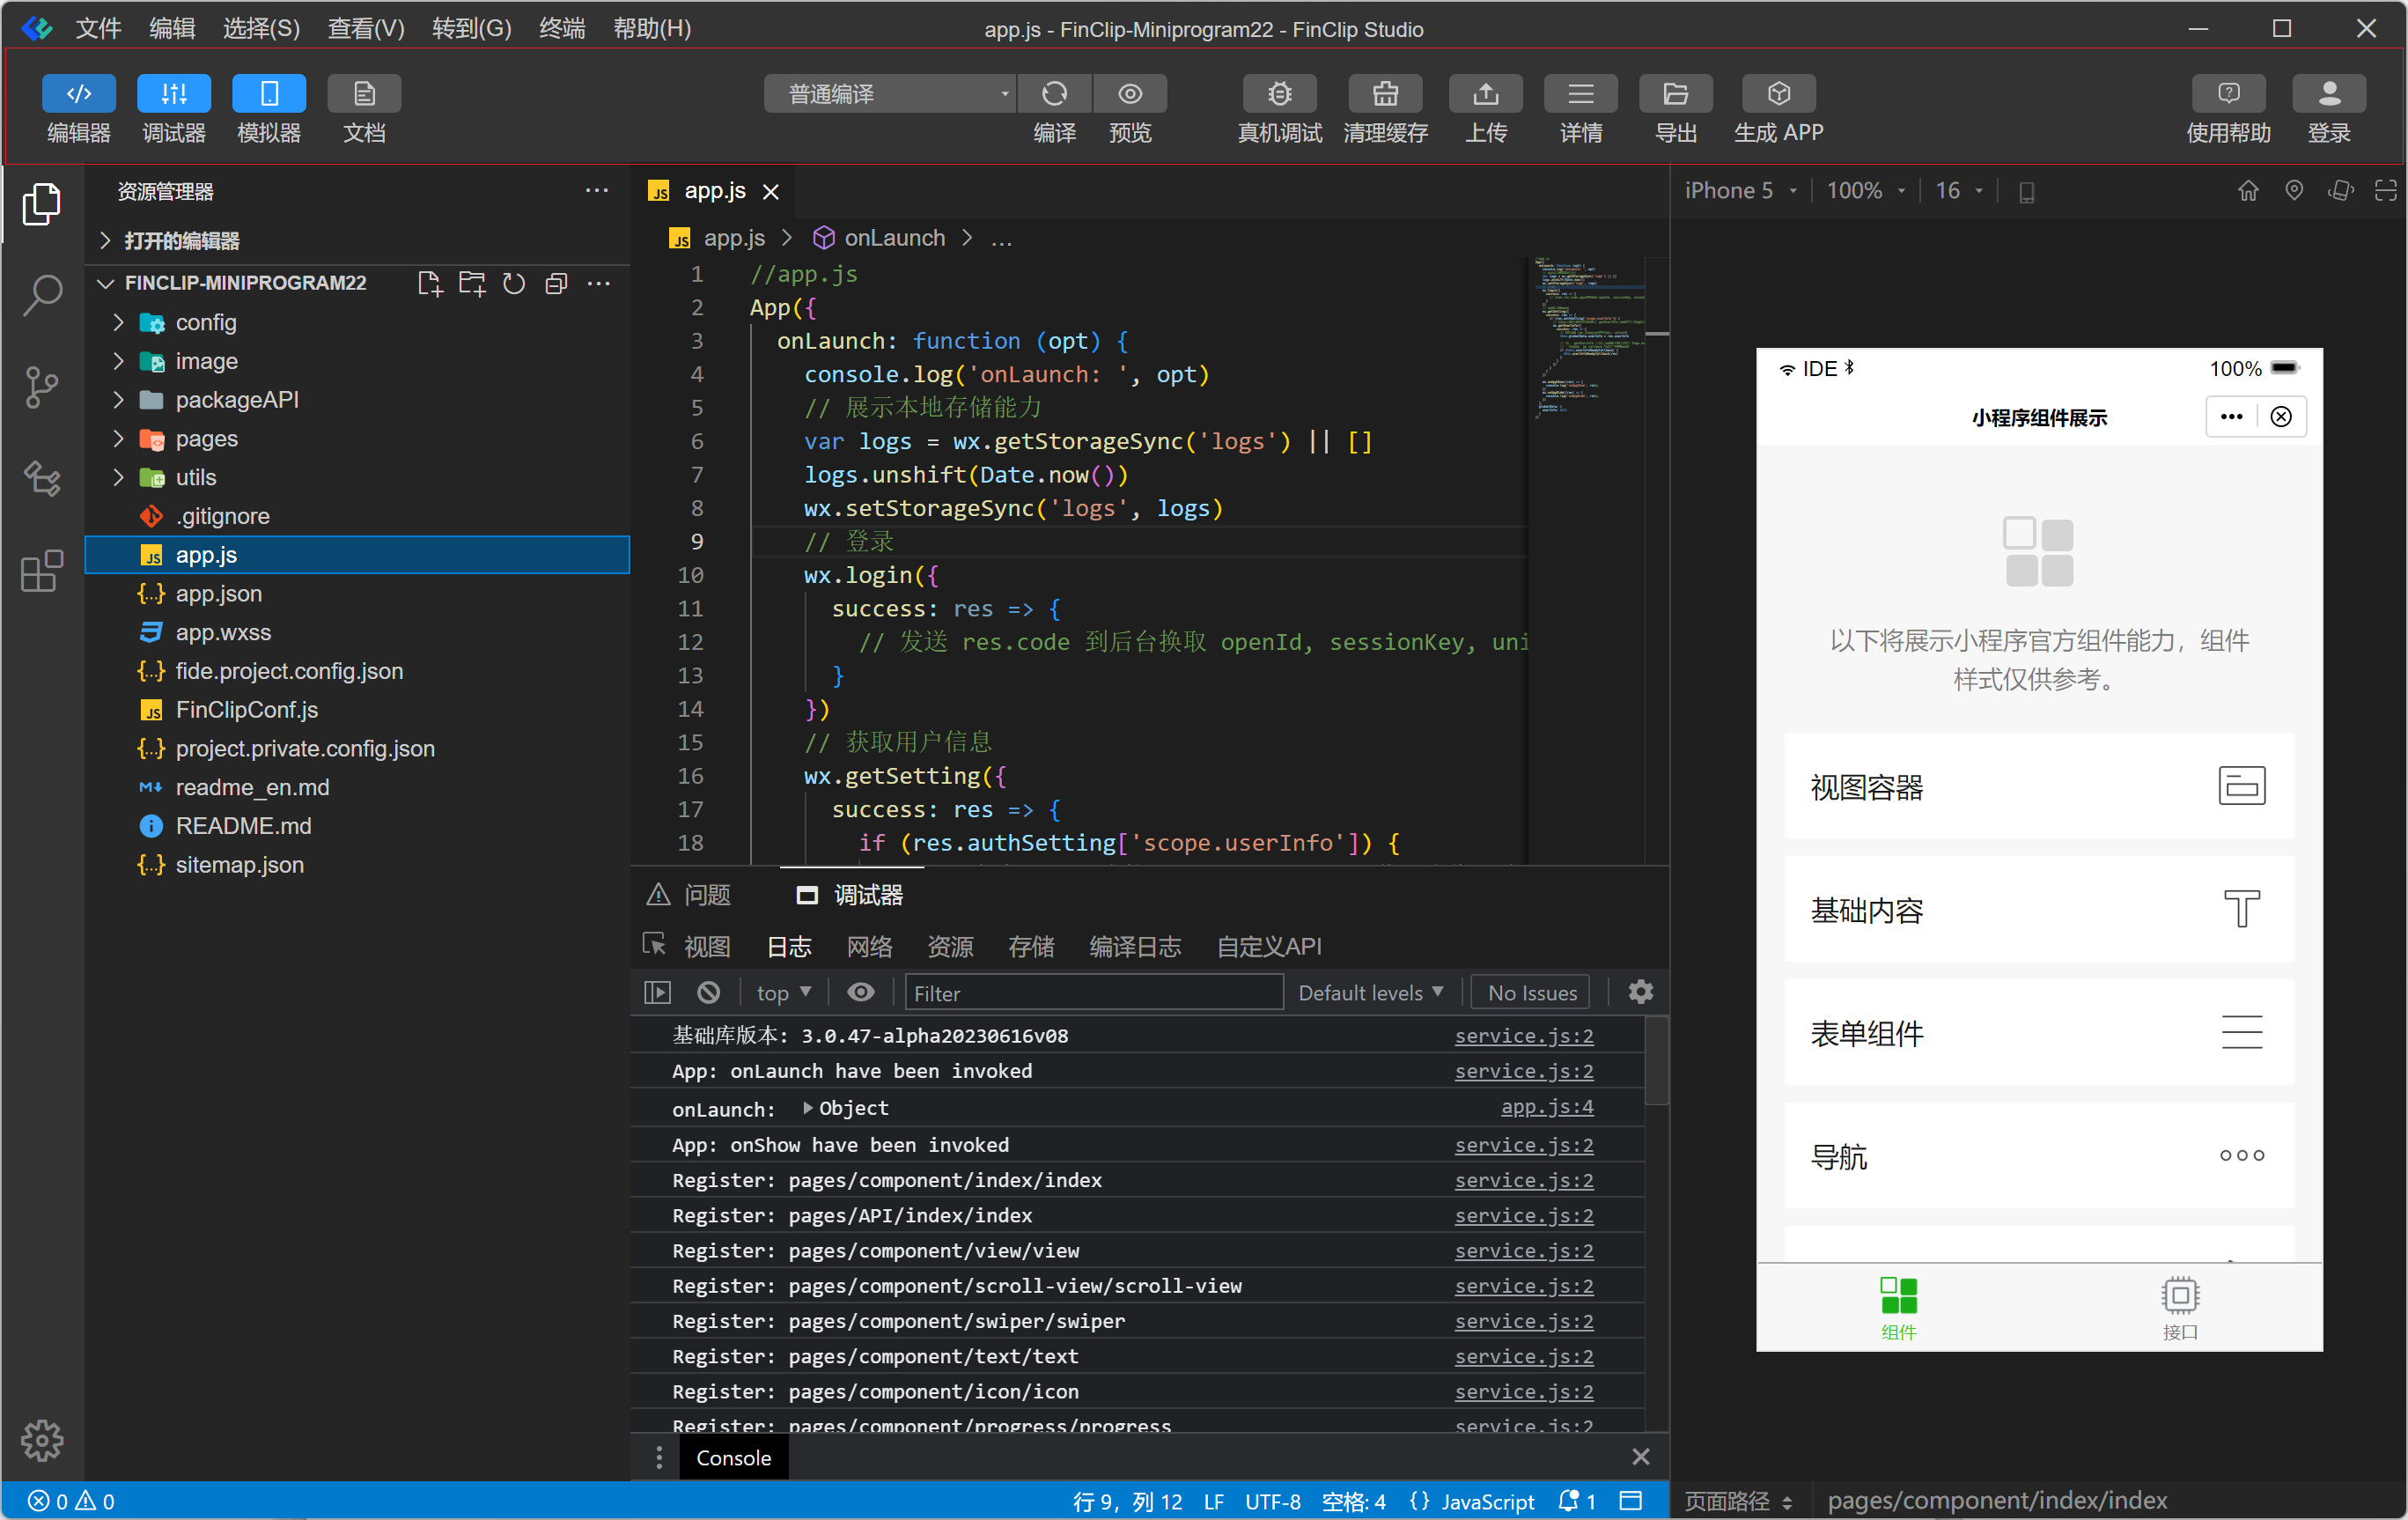
# 3.1 Custom Compilation Conditions
Custom compilation conditions allow specifying startup parameters and designating a specific page as the Mini-Program's launch page. These settings synchronize with preview and real-device debugging.
The editor's default compilation method sets the Mini-Program's entry to the home page. If you wish to debug using specific routes and parameters, use this function. For example, configuring the launch page as "/pages/user" and page parameters as "type=new_login" will cause the Mini-Program's entry page to become "/pages/user?type=new_login" after compilation, directly simulating entry into the new user login/registration page.
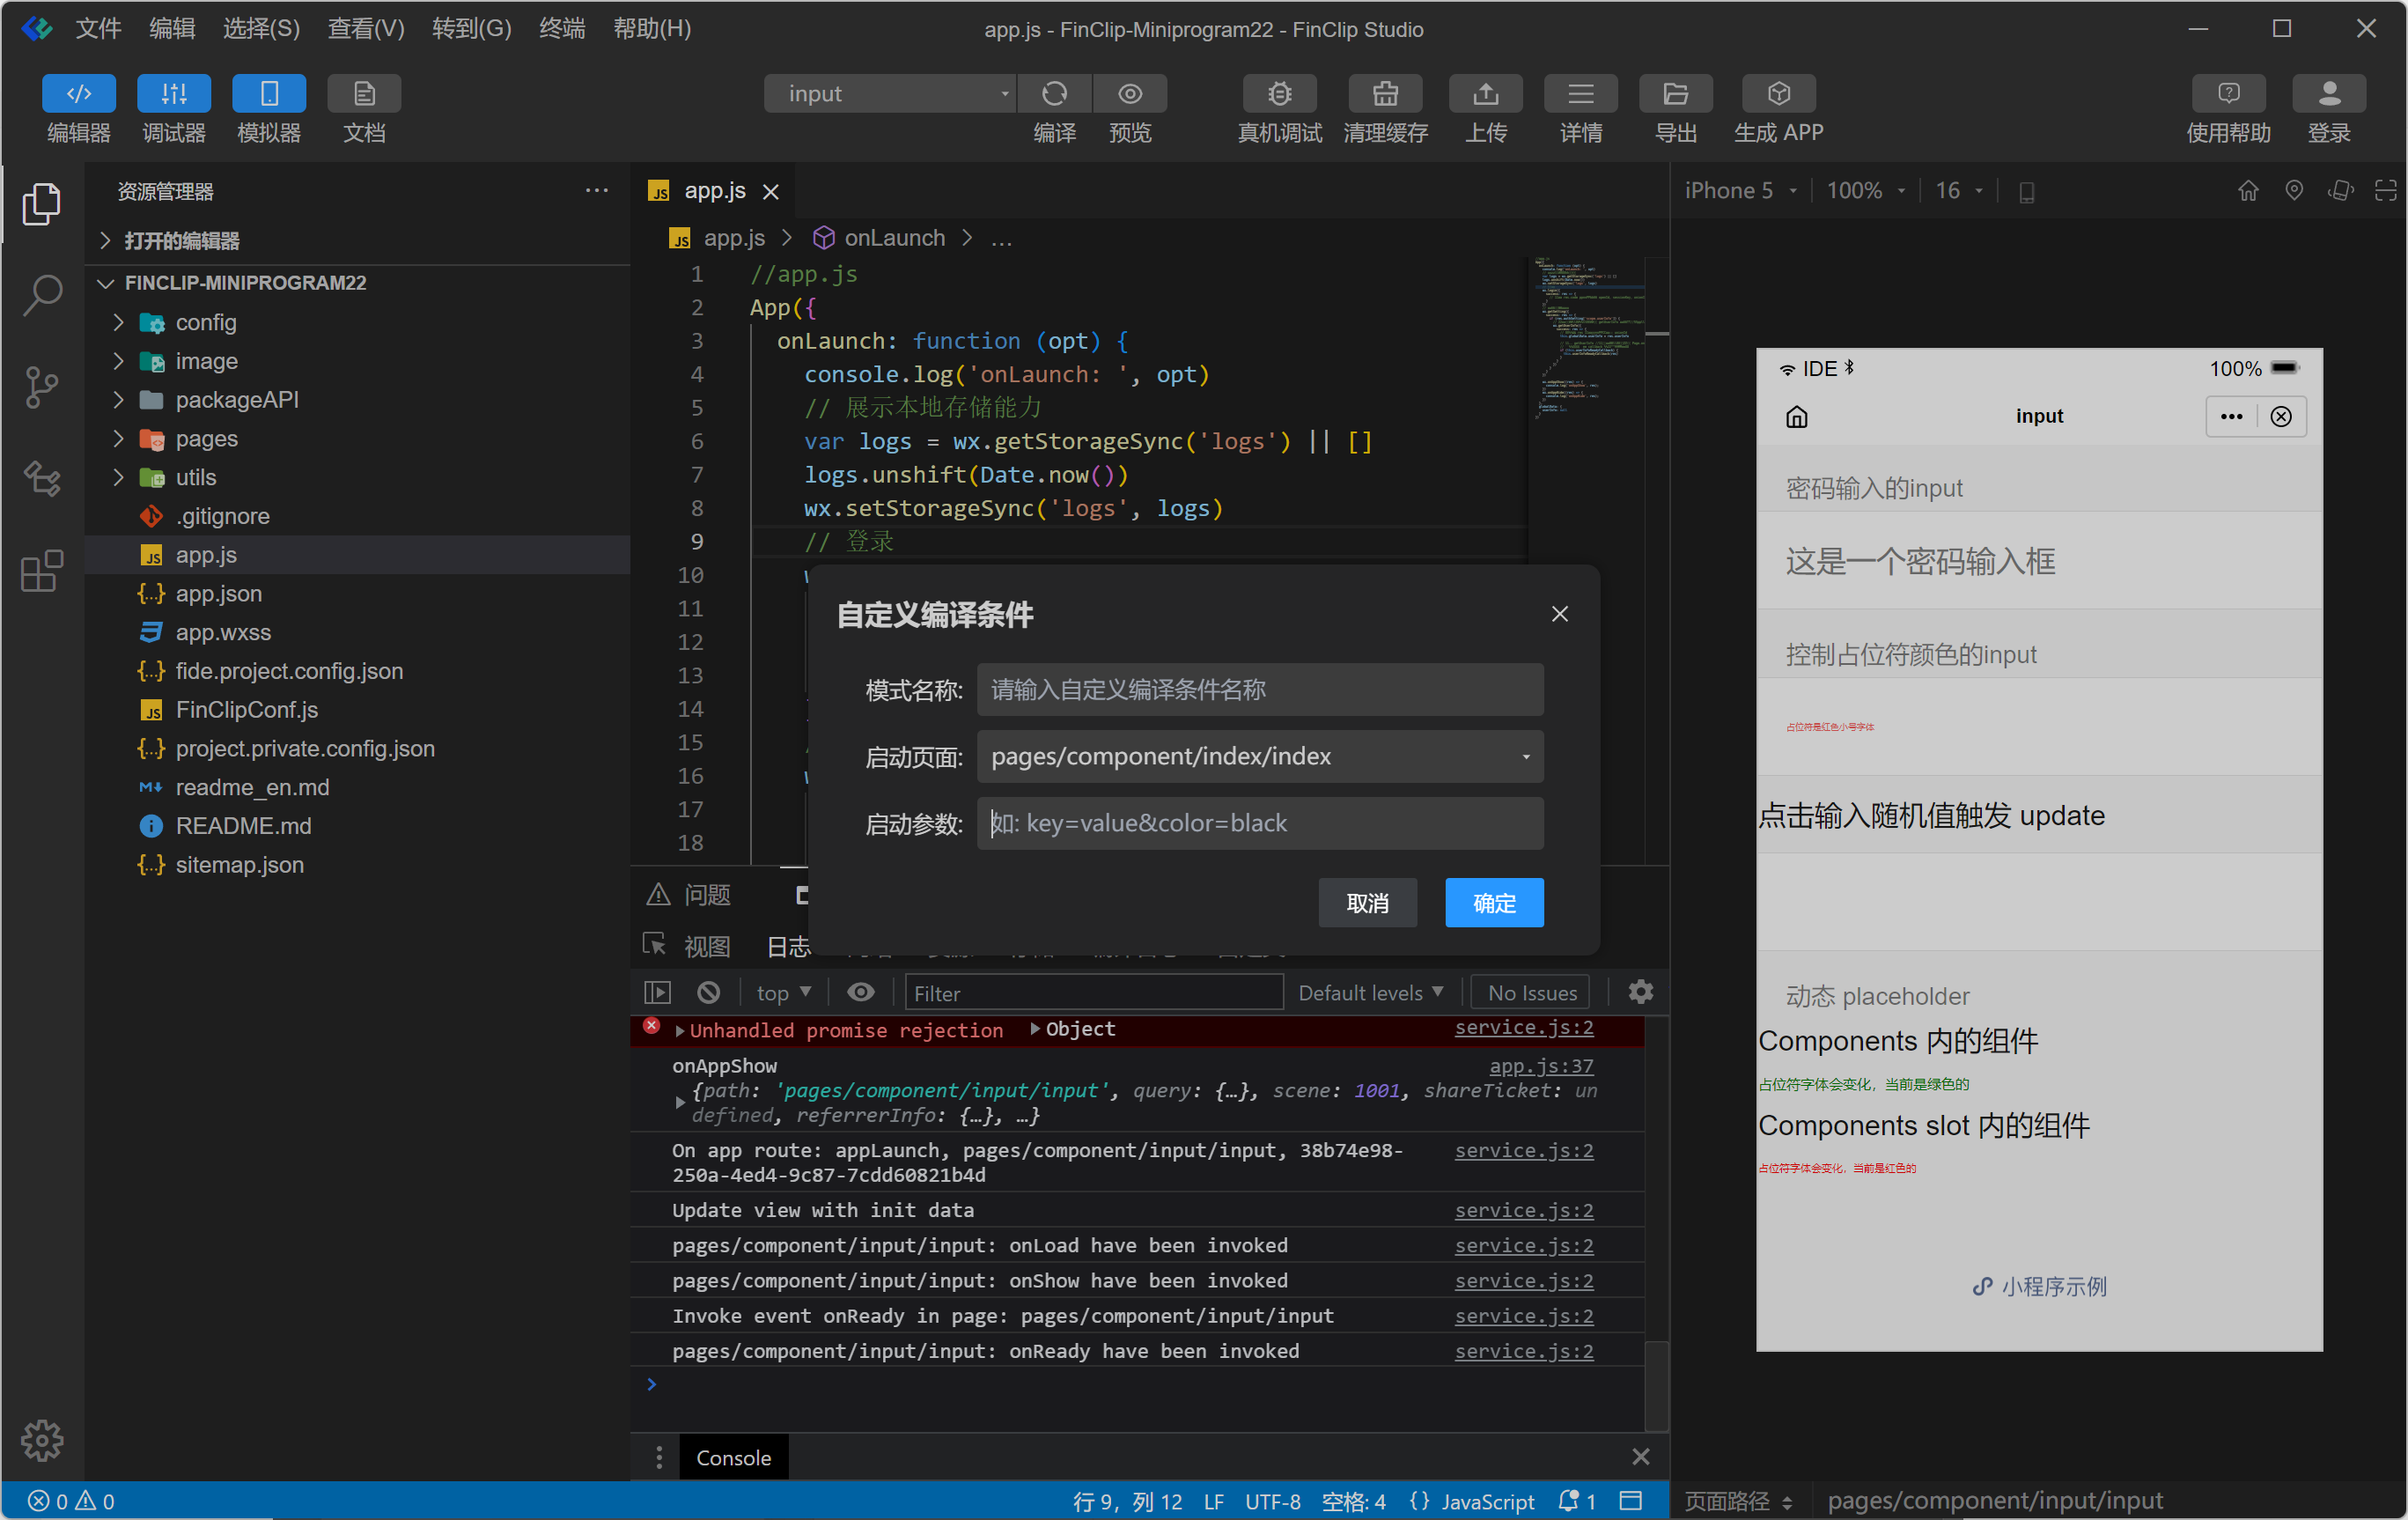
# 3.2 Preview
The preview function requires login. It generates a QR code that, when scanned with the FinClip App, allows previewing the current FinClip Mini-Program on a mobile phone.
For some intranet users, the baseURL can be specified to your own proxy server implementation to complete the preview process.
# 3.3 Real-Device Debugging
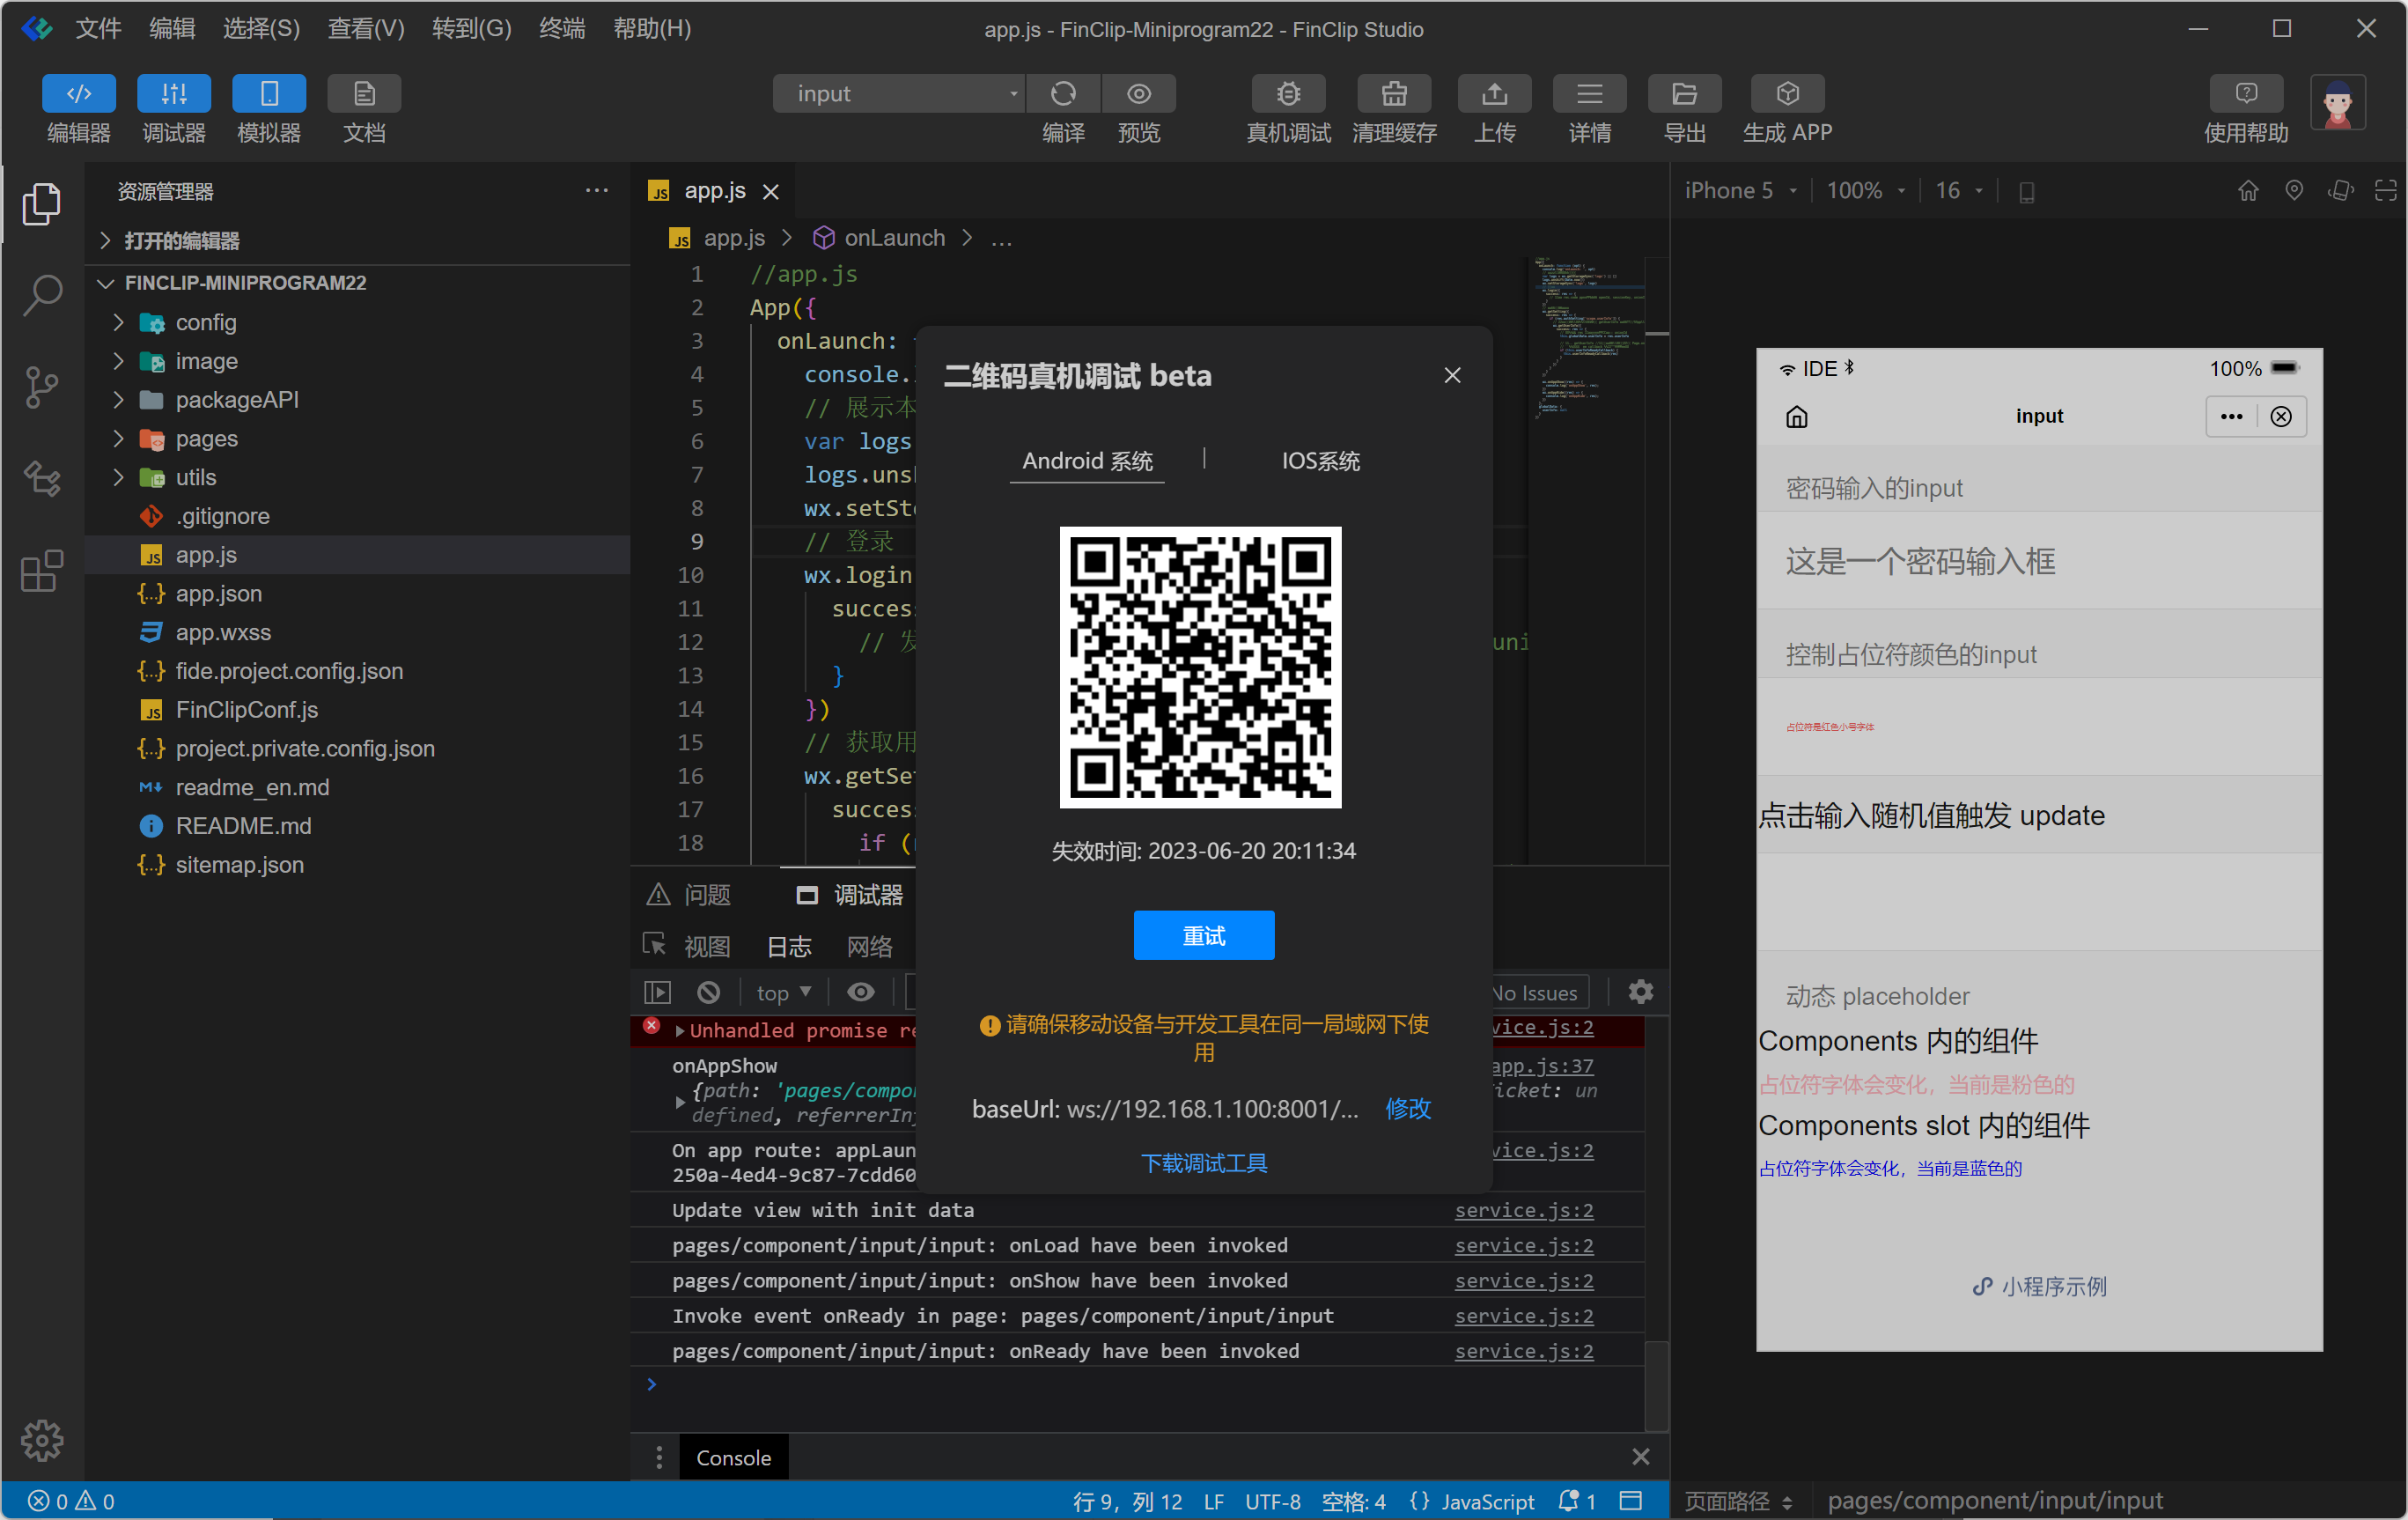
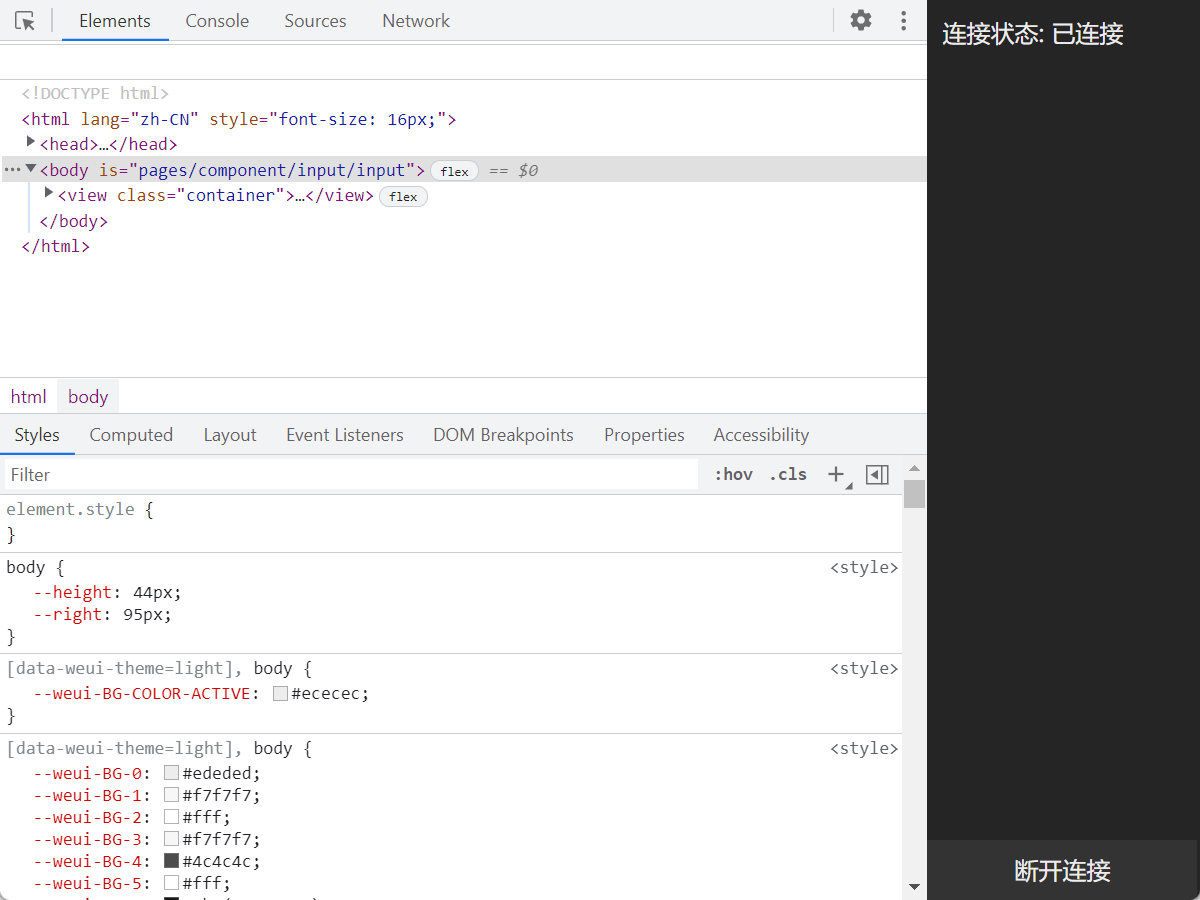
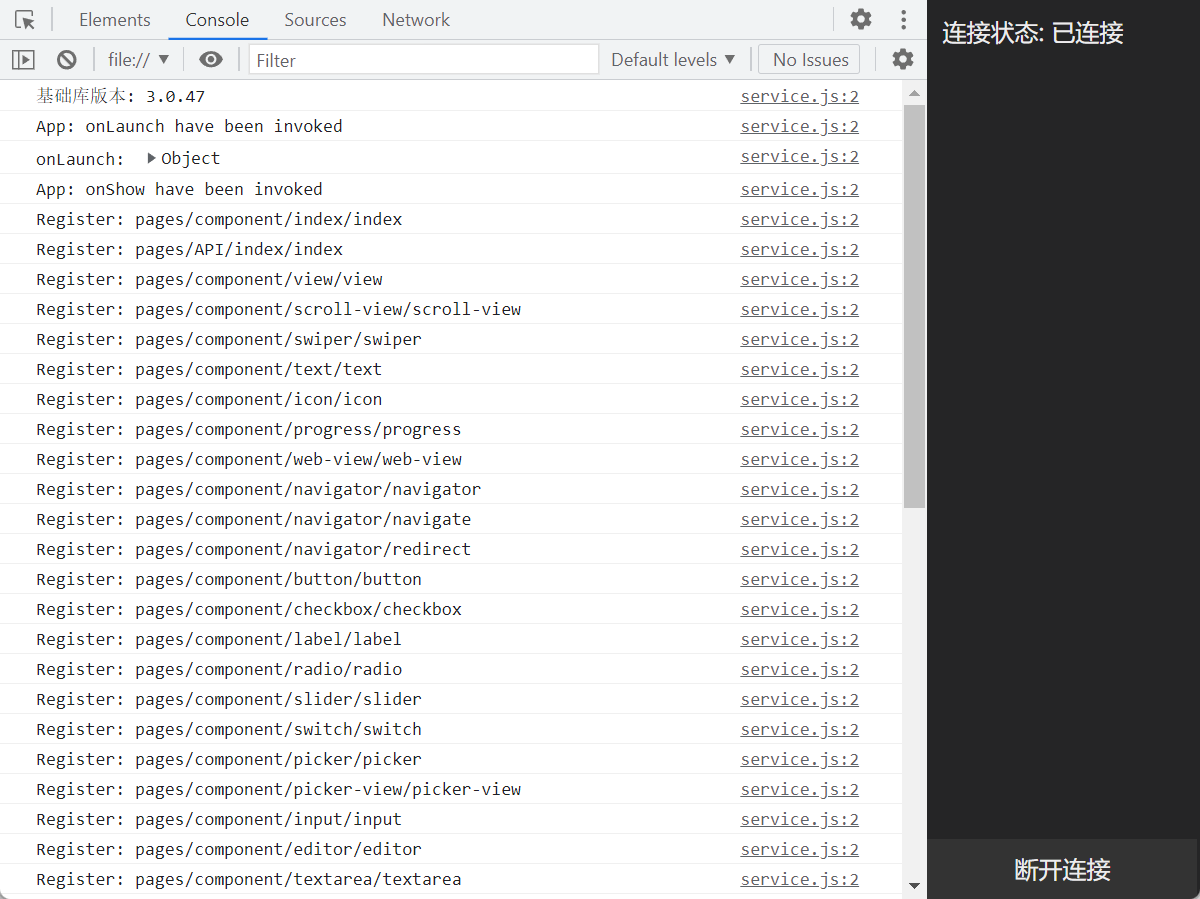
Real-device debugging allows debugging Mini-Programs running on the Fantai Assistant using the DevTools developer tools, helping developers better locate issues and proceed with development.
The Elements panel allows inspecting the element state and CSS of the Mini-Program.
The Console panel displays the Mini-Program's output logs, accesses global variables, directly calls APIs for debugging, or sets breakpoints in running code.
# 3.4 Upload Mini-Program
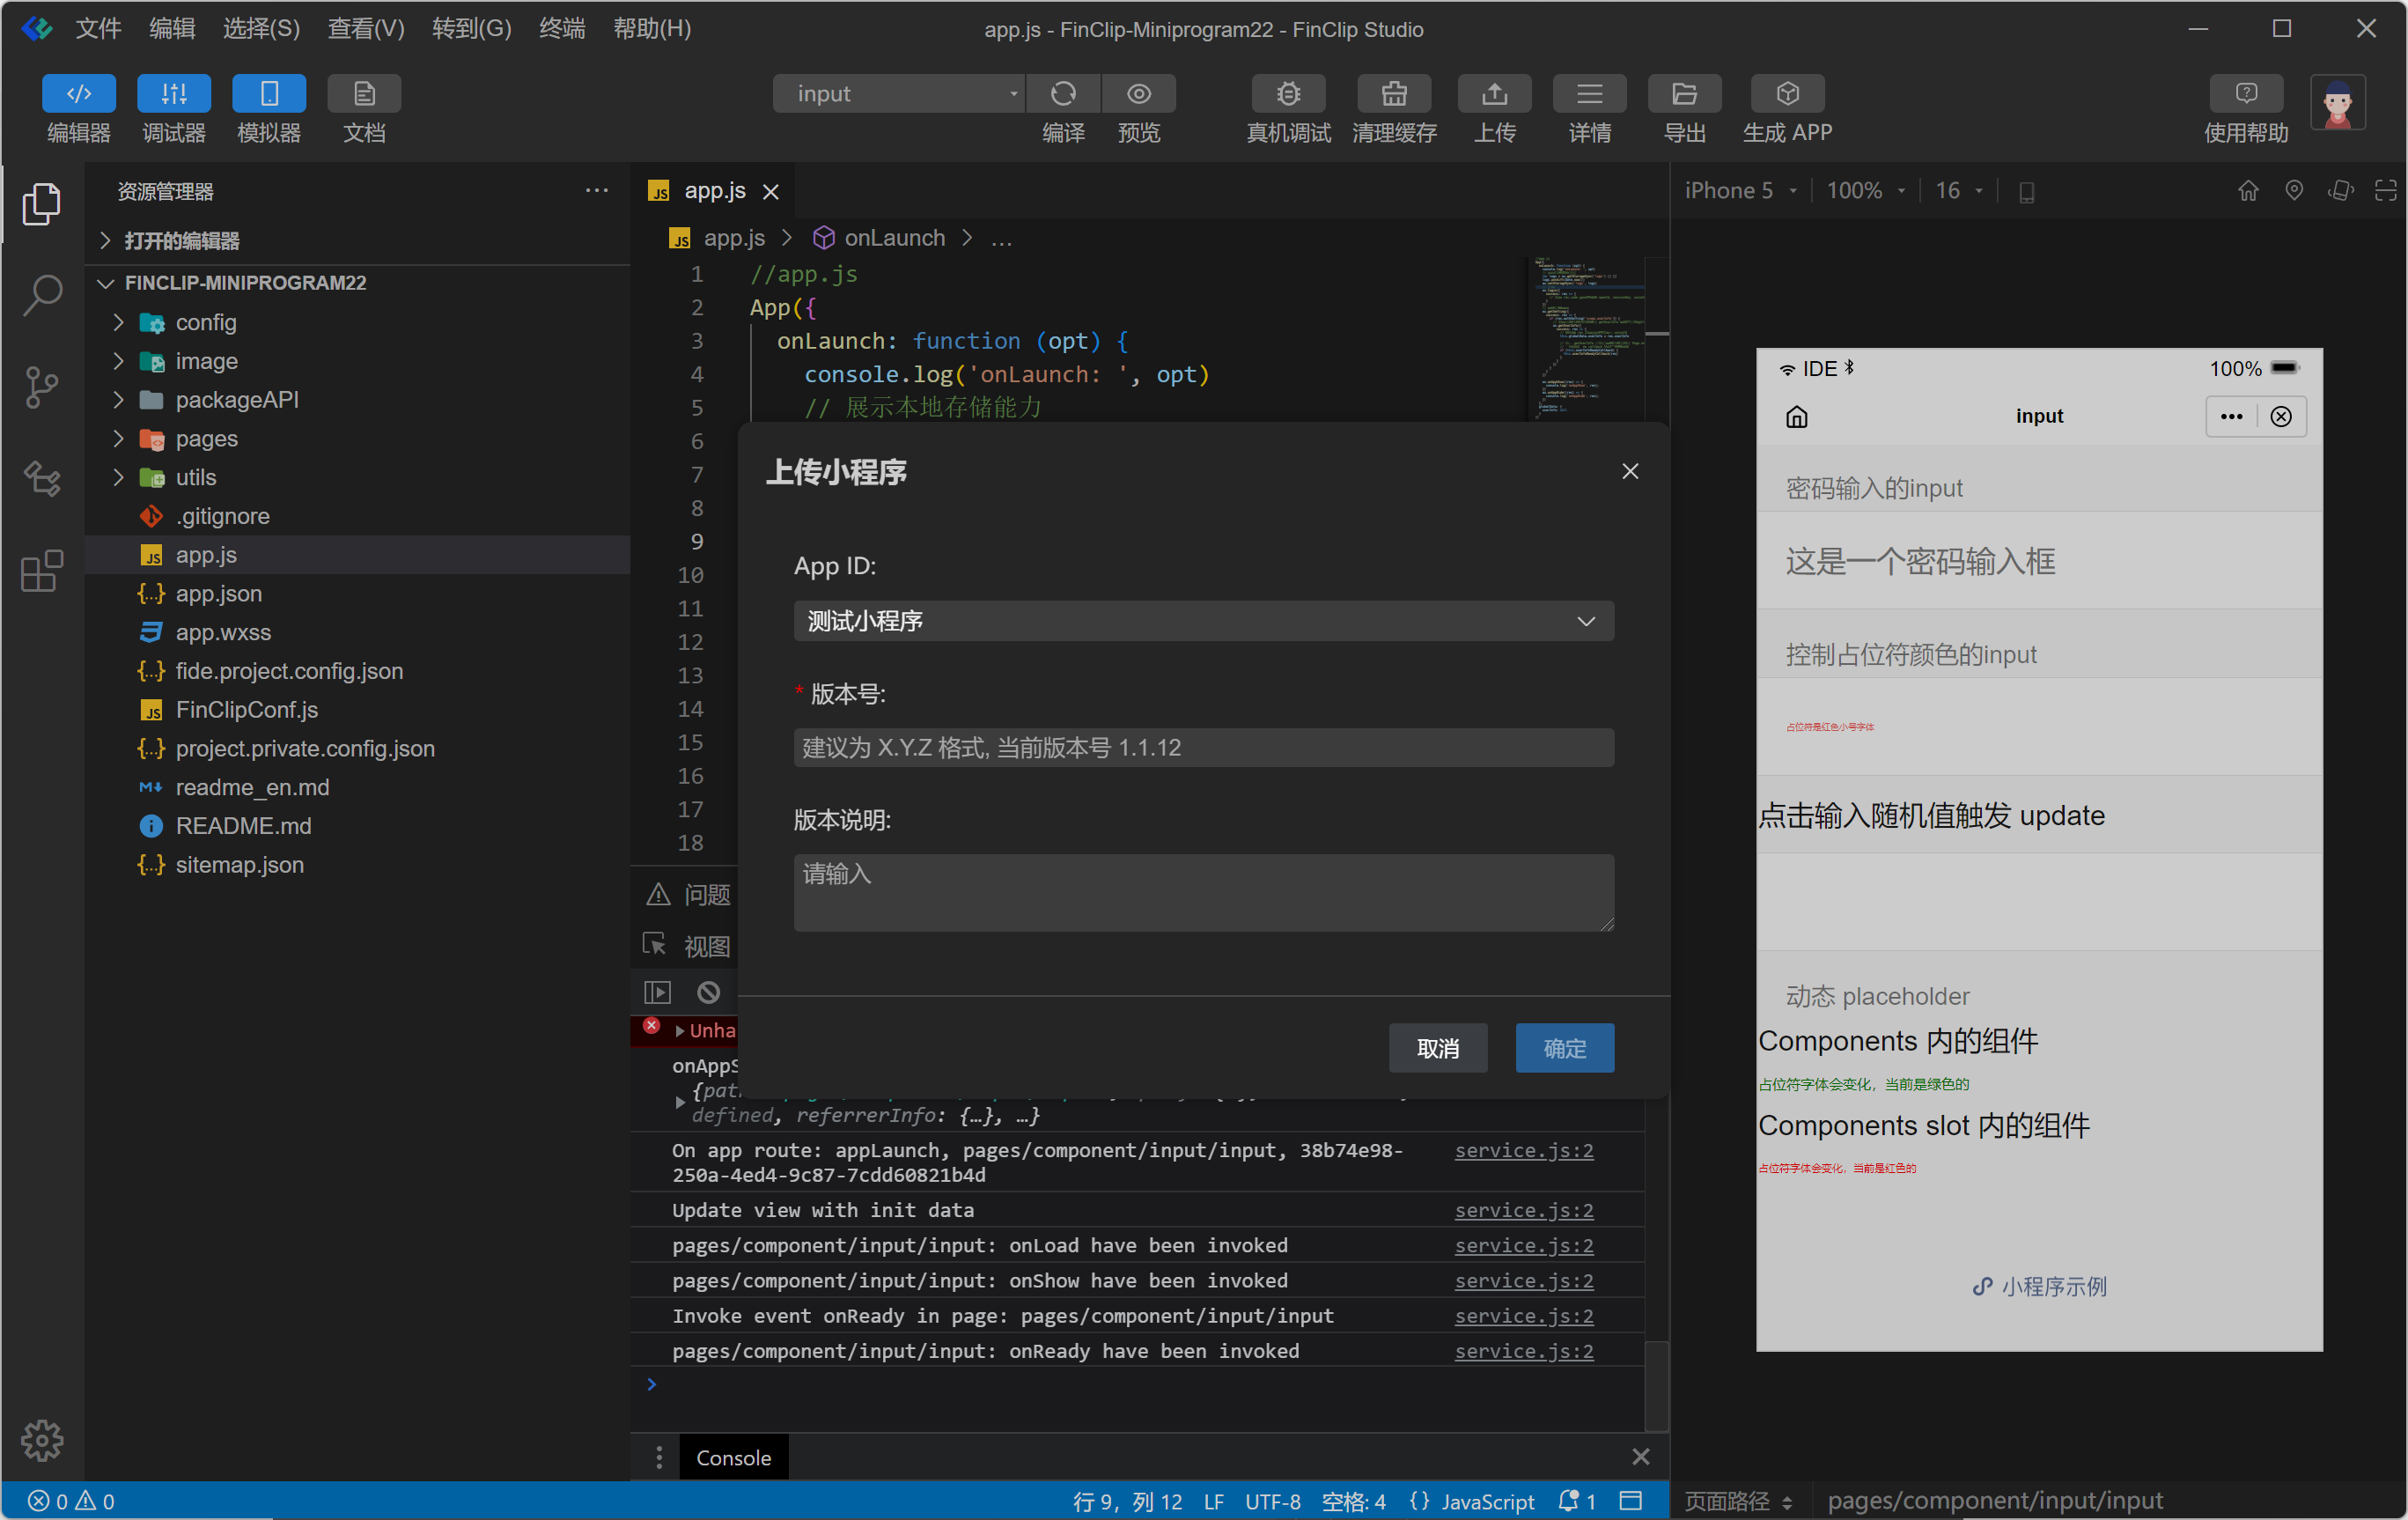
This allows directly uploading the current Mini-Program to the FinClip platform.
# 3.5 Generate App
The "Generate App" function helps developers export existing Mini-Program code into installable files (or project files) usable in iOS, Android, and native HarmonyOS. Developers no longer need comprehensive mobile application development and packaging skills. By focusing primarily on product design and functional implementation within the Mini-Program, they can obtain Apps that can be published on app stores or installed directly on mobile phones and other smart devices. For specific usage, refer to the link: https://super-apps.ai/mop/document/develop/developer/convert/convert-app.html#_1-function-introduction (opens new window)
# 4. Details
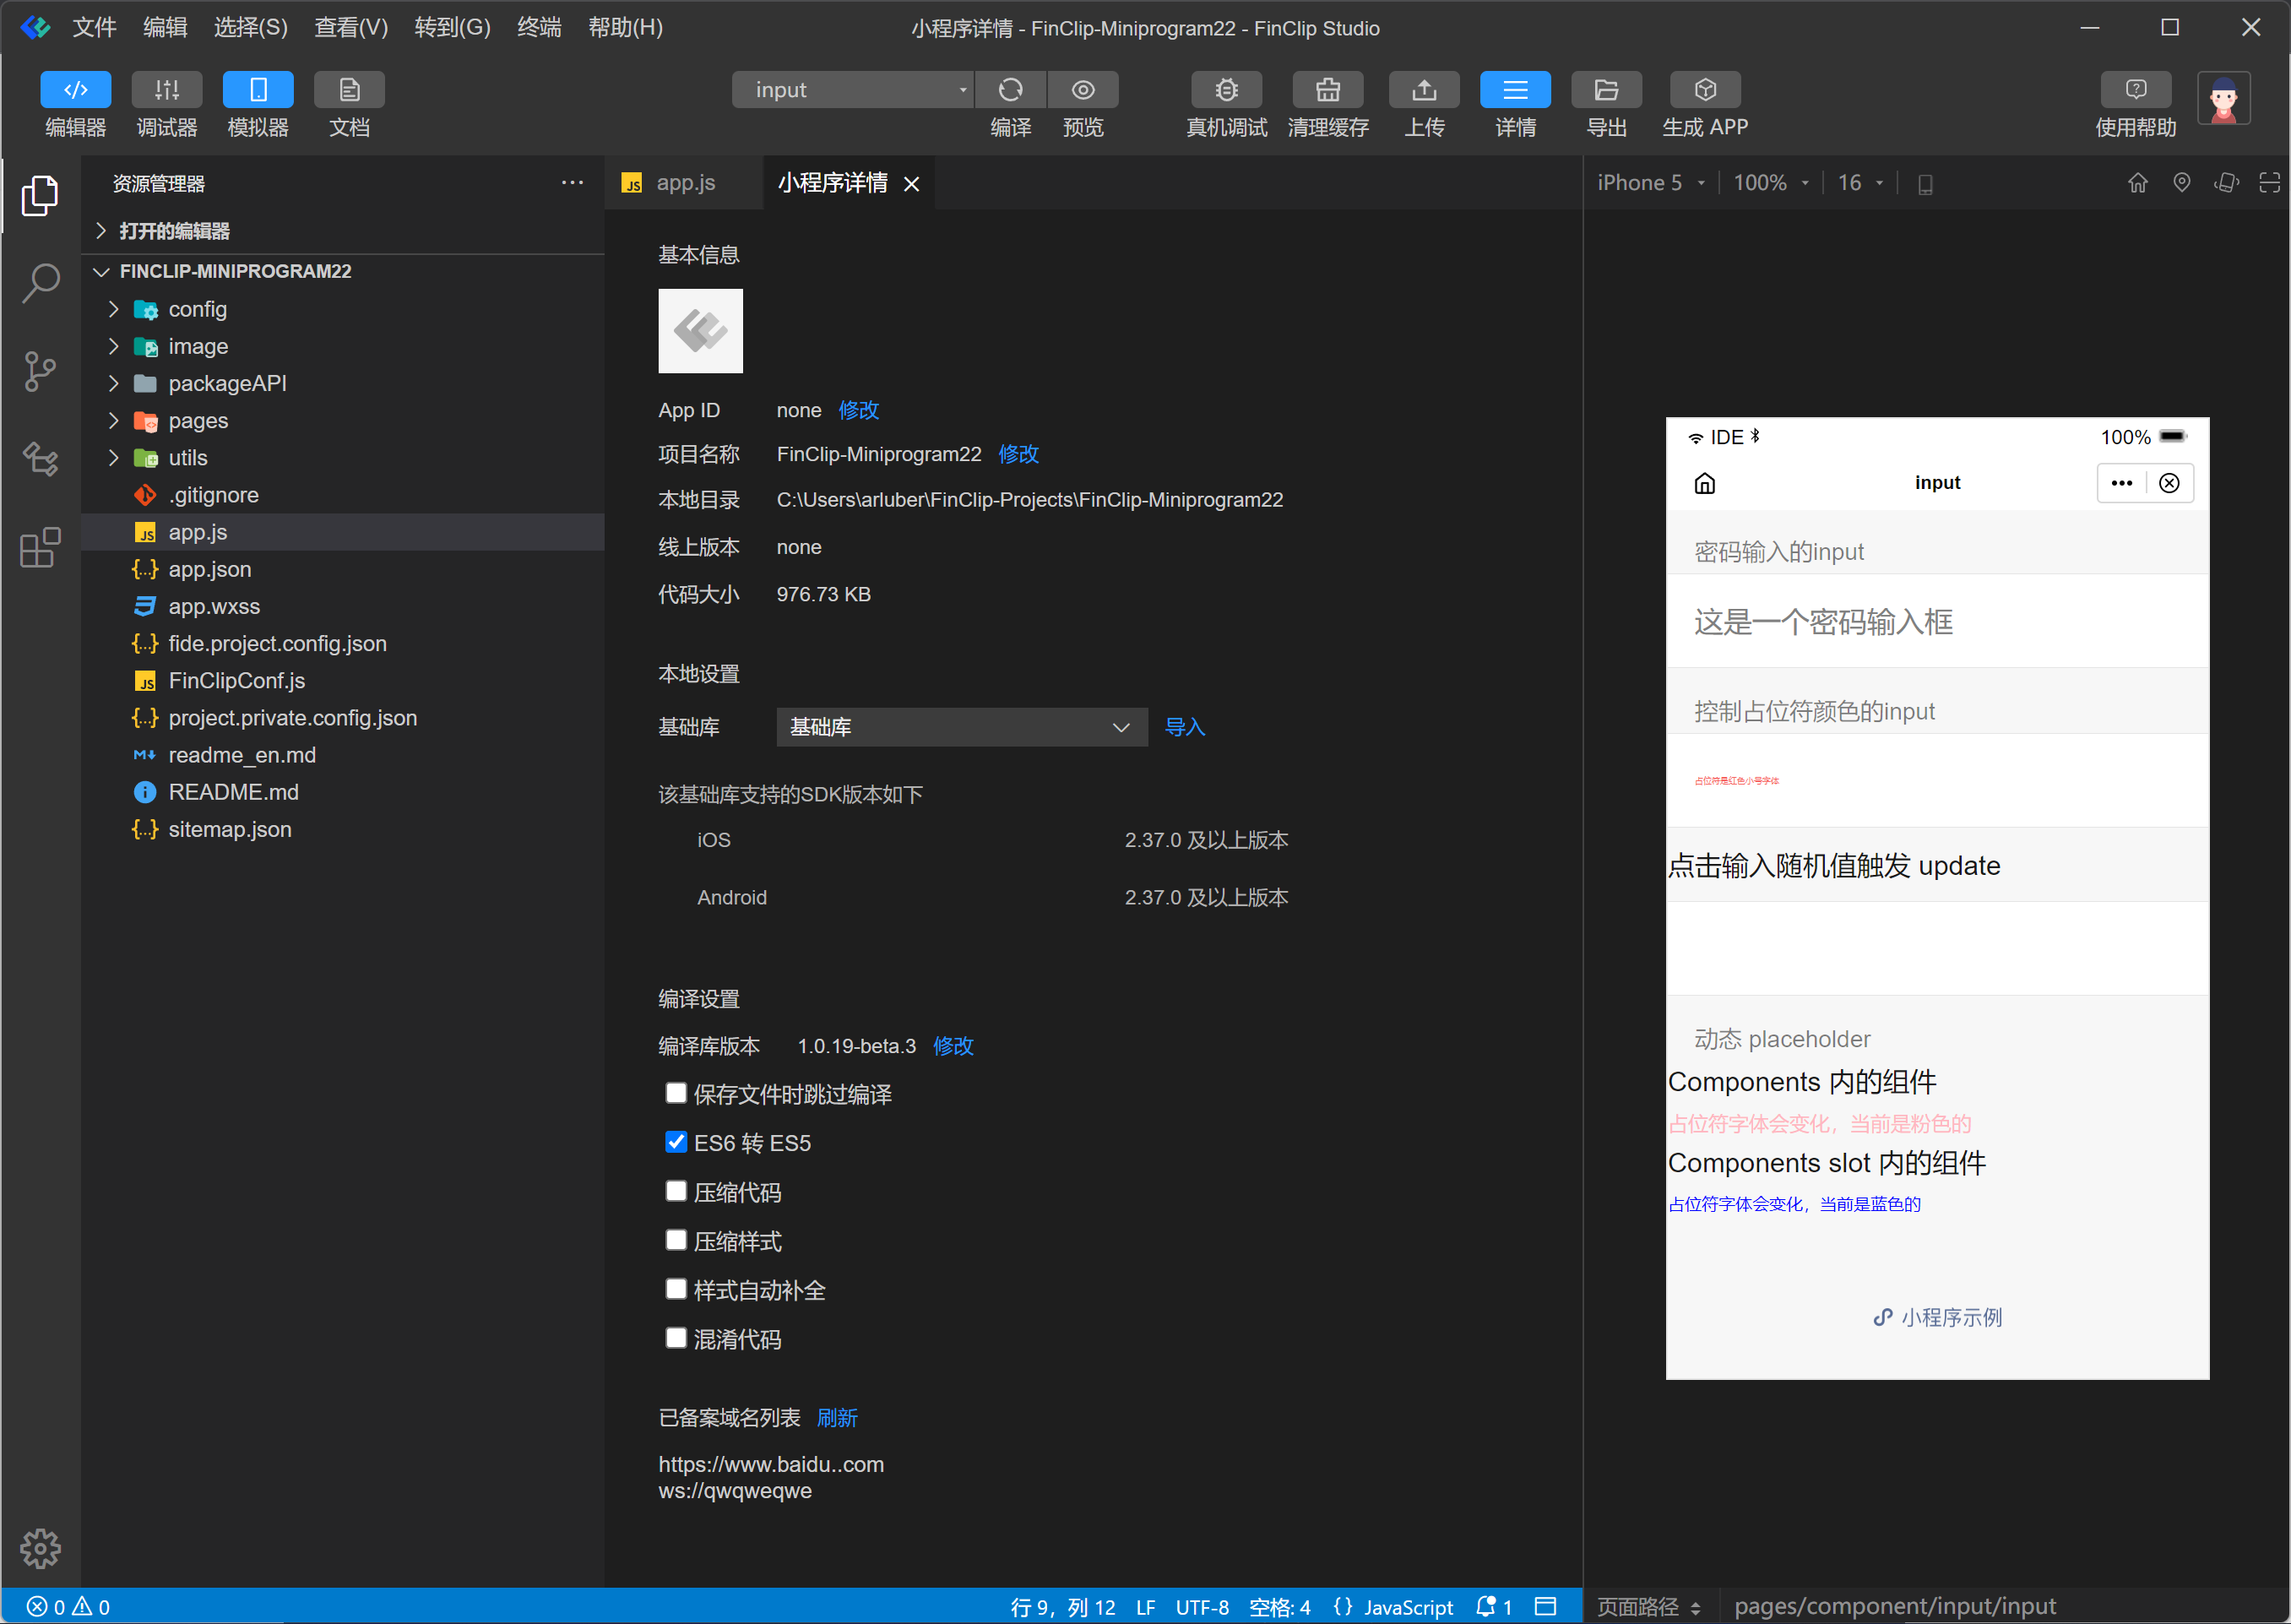
Clicking Details displays detailed information about the currently compiling Mini-Program, including basic information, local settings, compilation settings, and filed domain information (displayed only after login):
Basic Information: Basic details of the Mini-Program, such as App ID, project name, local directory, latest online version, and compiled code size. Local Settings: Local Mini-Program Base Library version, UA information. Compilation Settings: Configure whether compilation is required when saving files. Filed Domain List: When logged in, this loads the domain information you set in FinClip. If resource loading failures occur during local preview or after upload, check here.
# 4.1 Compilation Settings
Compilation settings support adjustments for the following 7 functions:
# 4.1.1 Modify Base Library Version
Click Modify to change the current Base Library version used for compilation.
# 4.1.2 Skip Compilation When Saving Files
FinClip Studio automatically compiles and reloads the Mini-Program upon saving files by default. Checking this option skips this step; manual clicking of the compile button on the toolbar is required for each compilation.
# 4.1.3 ES6 to ES5 Conversion
When checked, the compilation process automatically converts ES6 syntax to ES5 using Babel for better compatibility. Unchecking this might cause Mini-Program loading failures on real devices.
# 4.1.4 Style Auto-Prefixing
Uses autoprefixer (opens new window) during preview, real-device debugging, and upload to automatically add prefixes to style classes, adapting style compatibility for different browser kernels on real devices. The browsers parameter for autoprefixer is set to [ 'iOS >= 8', 'Chrome >= 37', ]. Checking this option increases the code package size.
# 4.1.5 Style Compression
Uses cssnano (opens new window) to compress .wxss files during preview, real-device debugging, and upload.
# 4.1.6 Code Compression
Uses UglifyJS or Terser to compress .js files during preview, real-device debugging, and upload.
# 4.1.7 Code Obfuscation
Uses UglifyJS or Terser to obfuscate .js files during preview, real-device debugging, and upload.
# 5. Code Editing
The editing area allows basic operations like code writing, file addition, deletion, and renaming for the current project.
# 5.1 File Operations
Right-click on the directory tree and select "New Page" to automatically generate the required .fxml, .ftss, .js, and .json files for the page.
# 5.2 Auto-Save
After editing code, the tool automatically saves the current editing state. Closing the tool directly or switching to another project won't lose the edited file state. However, note that modified content is only physically written to the disk when the user actively saves the file. If "Auto Save" is enabled in the settings (File -> Auto Save), the tool automatically saves modifications to the disk, achieving a no-need-for-manual-save effect.
# 5.3 Auto-Completion
Compared to the old FIDE developer tools, FinClip Studio provides more comprehensive auto-completion functionality.
- Editing
.jsfiles assists developers by auto-completing all APIs with related comment explanations and providing code template support. - Editing
.fxmlfiles helps developers directly write relevant tags and their attributes. - Editing
.jsonfiles assists in completing relevant configurations and provides real-time hints.
# 5.4 Code Link
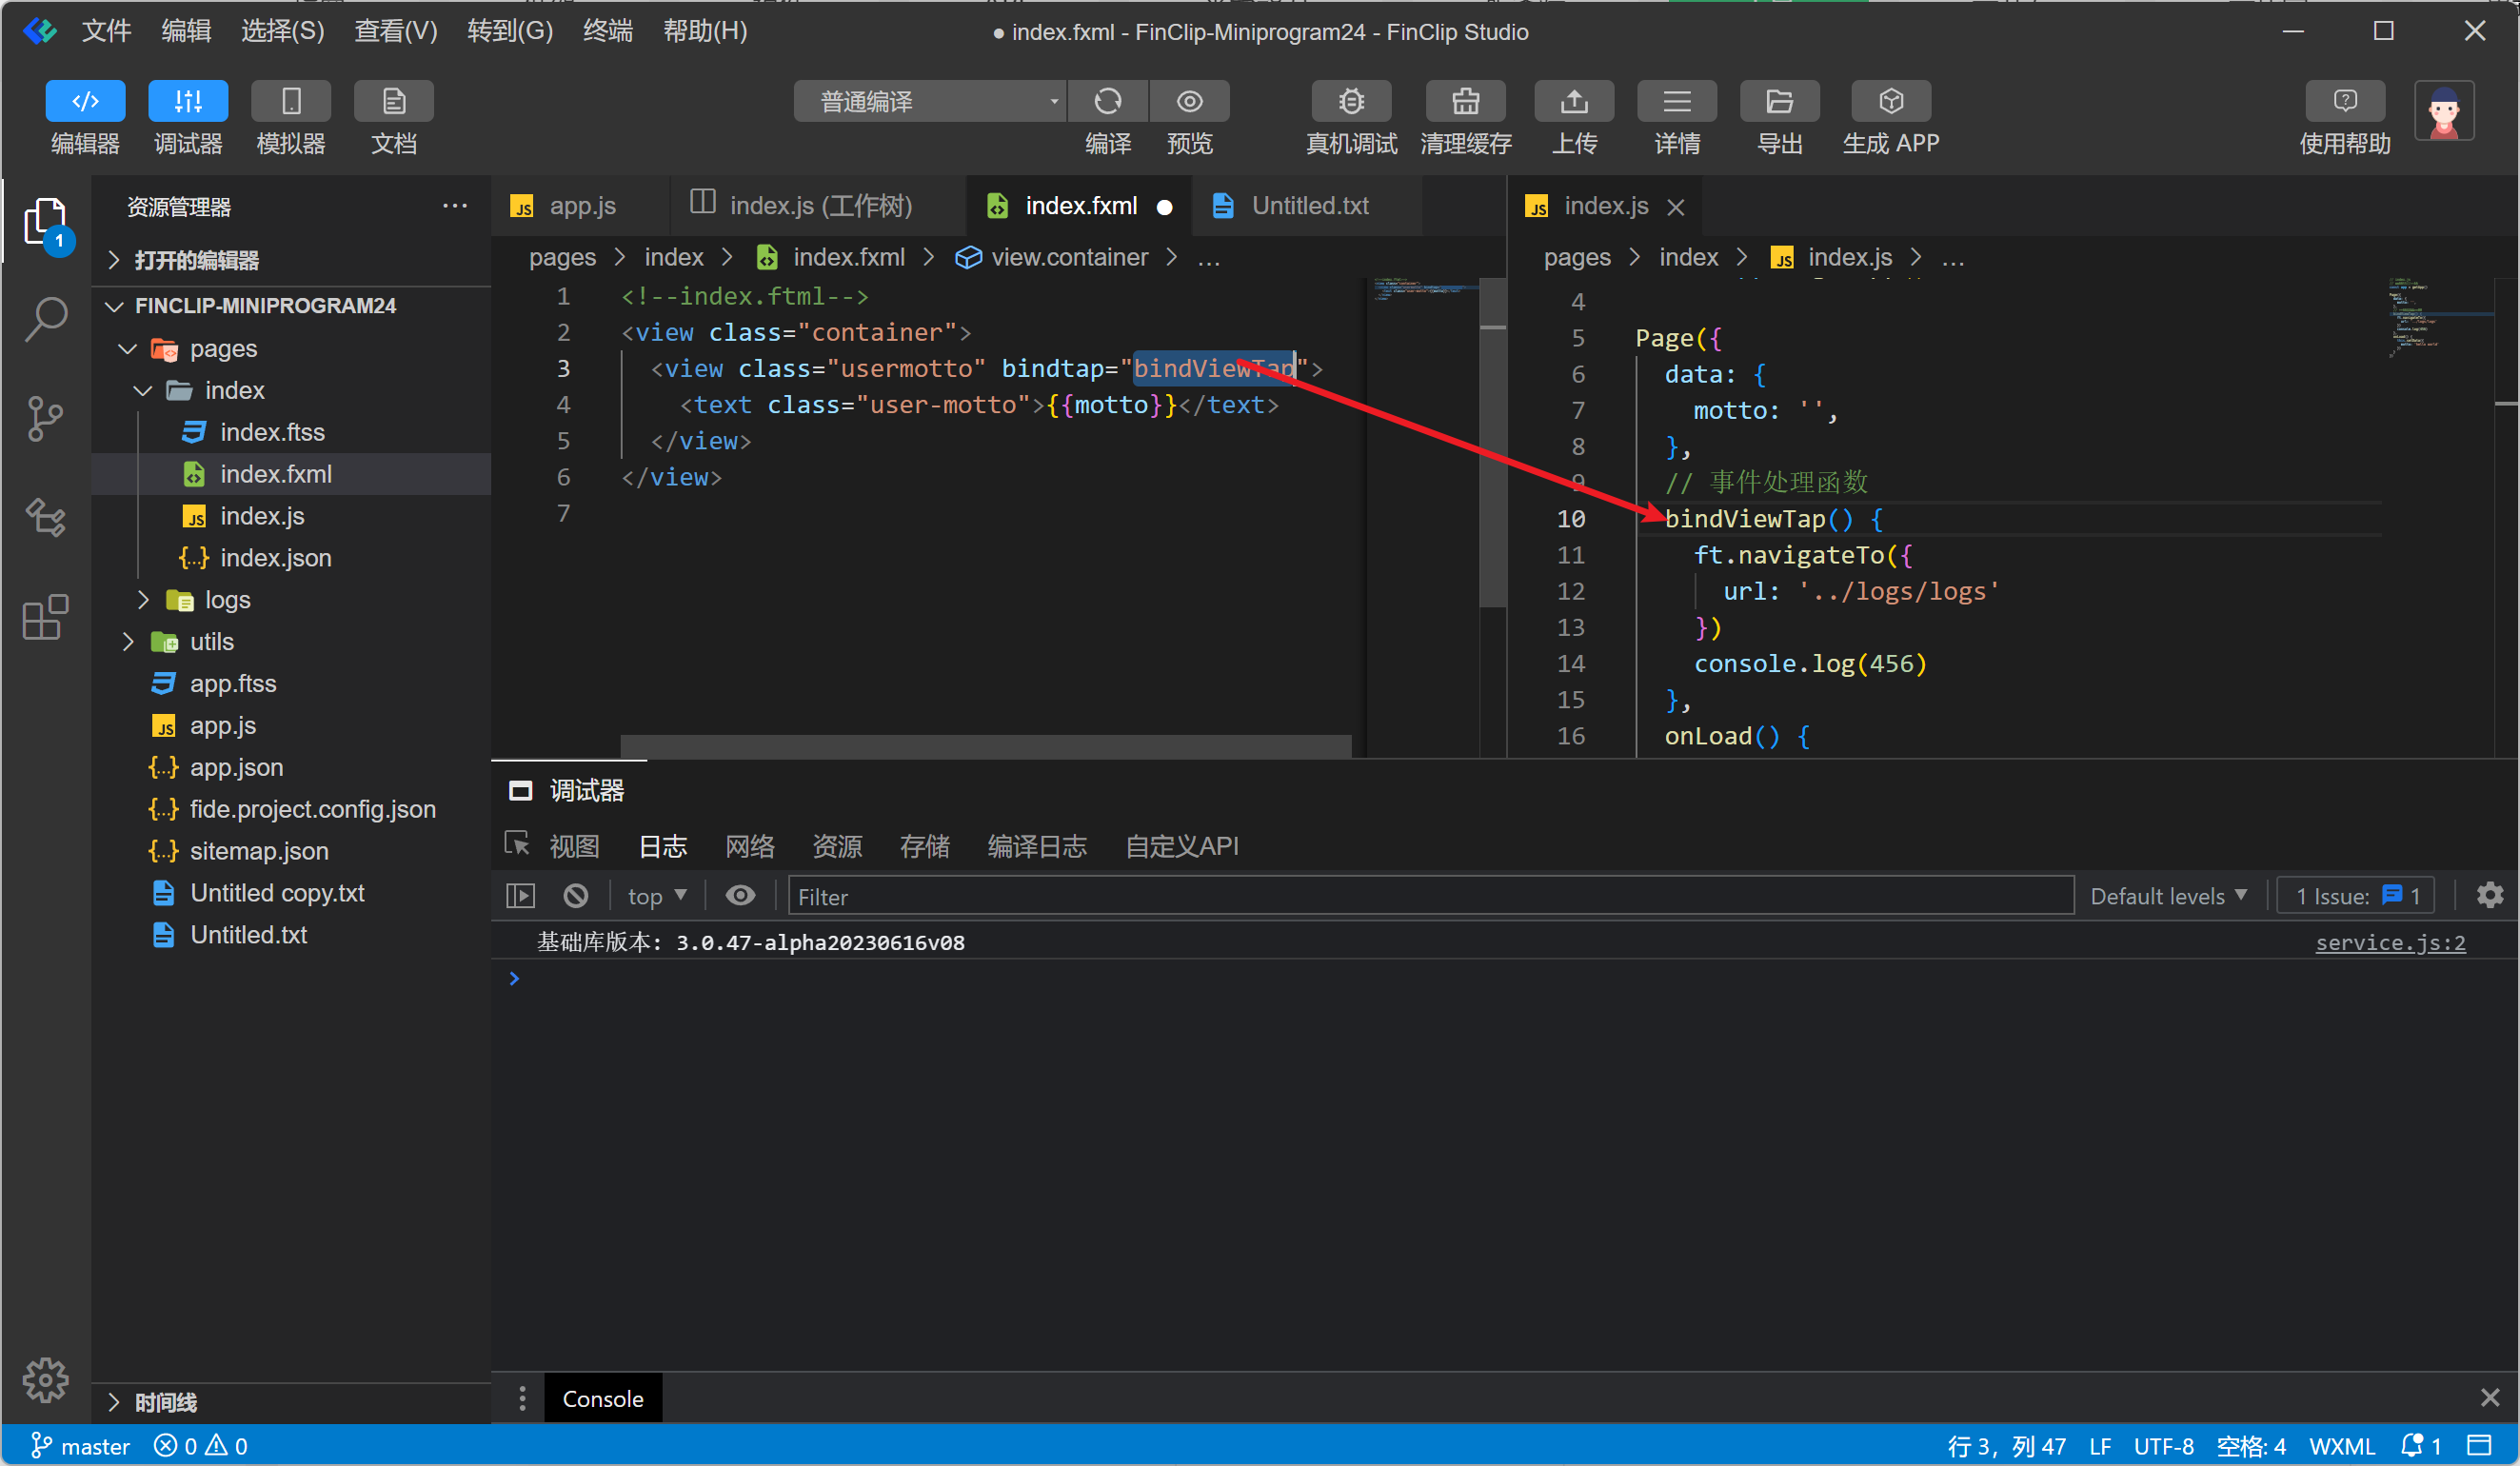
In .fxml files, holding Ctrl and clicking a bound method quickly links to the definition point in the corresponding .js file.
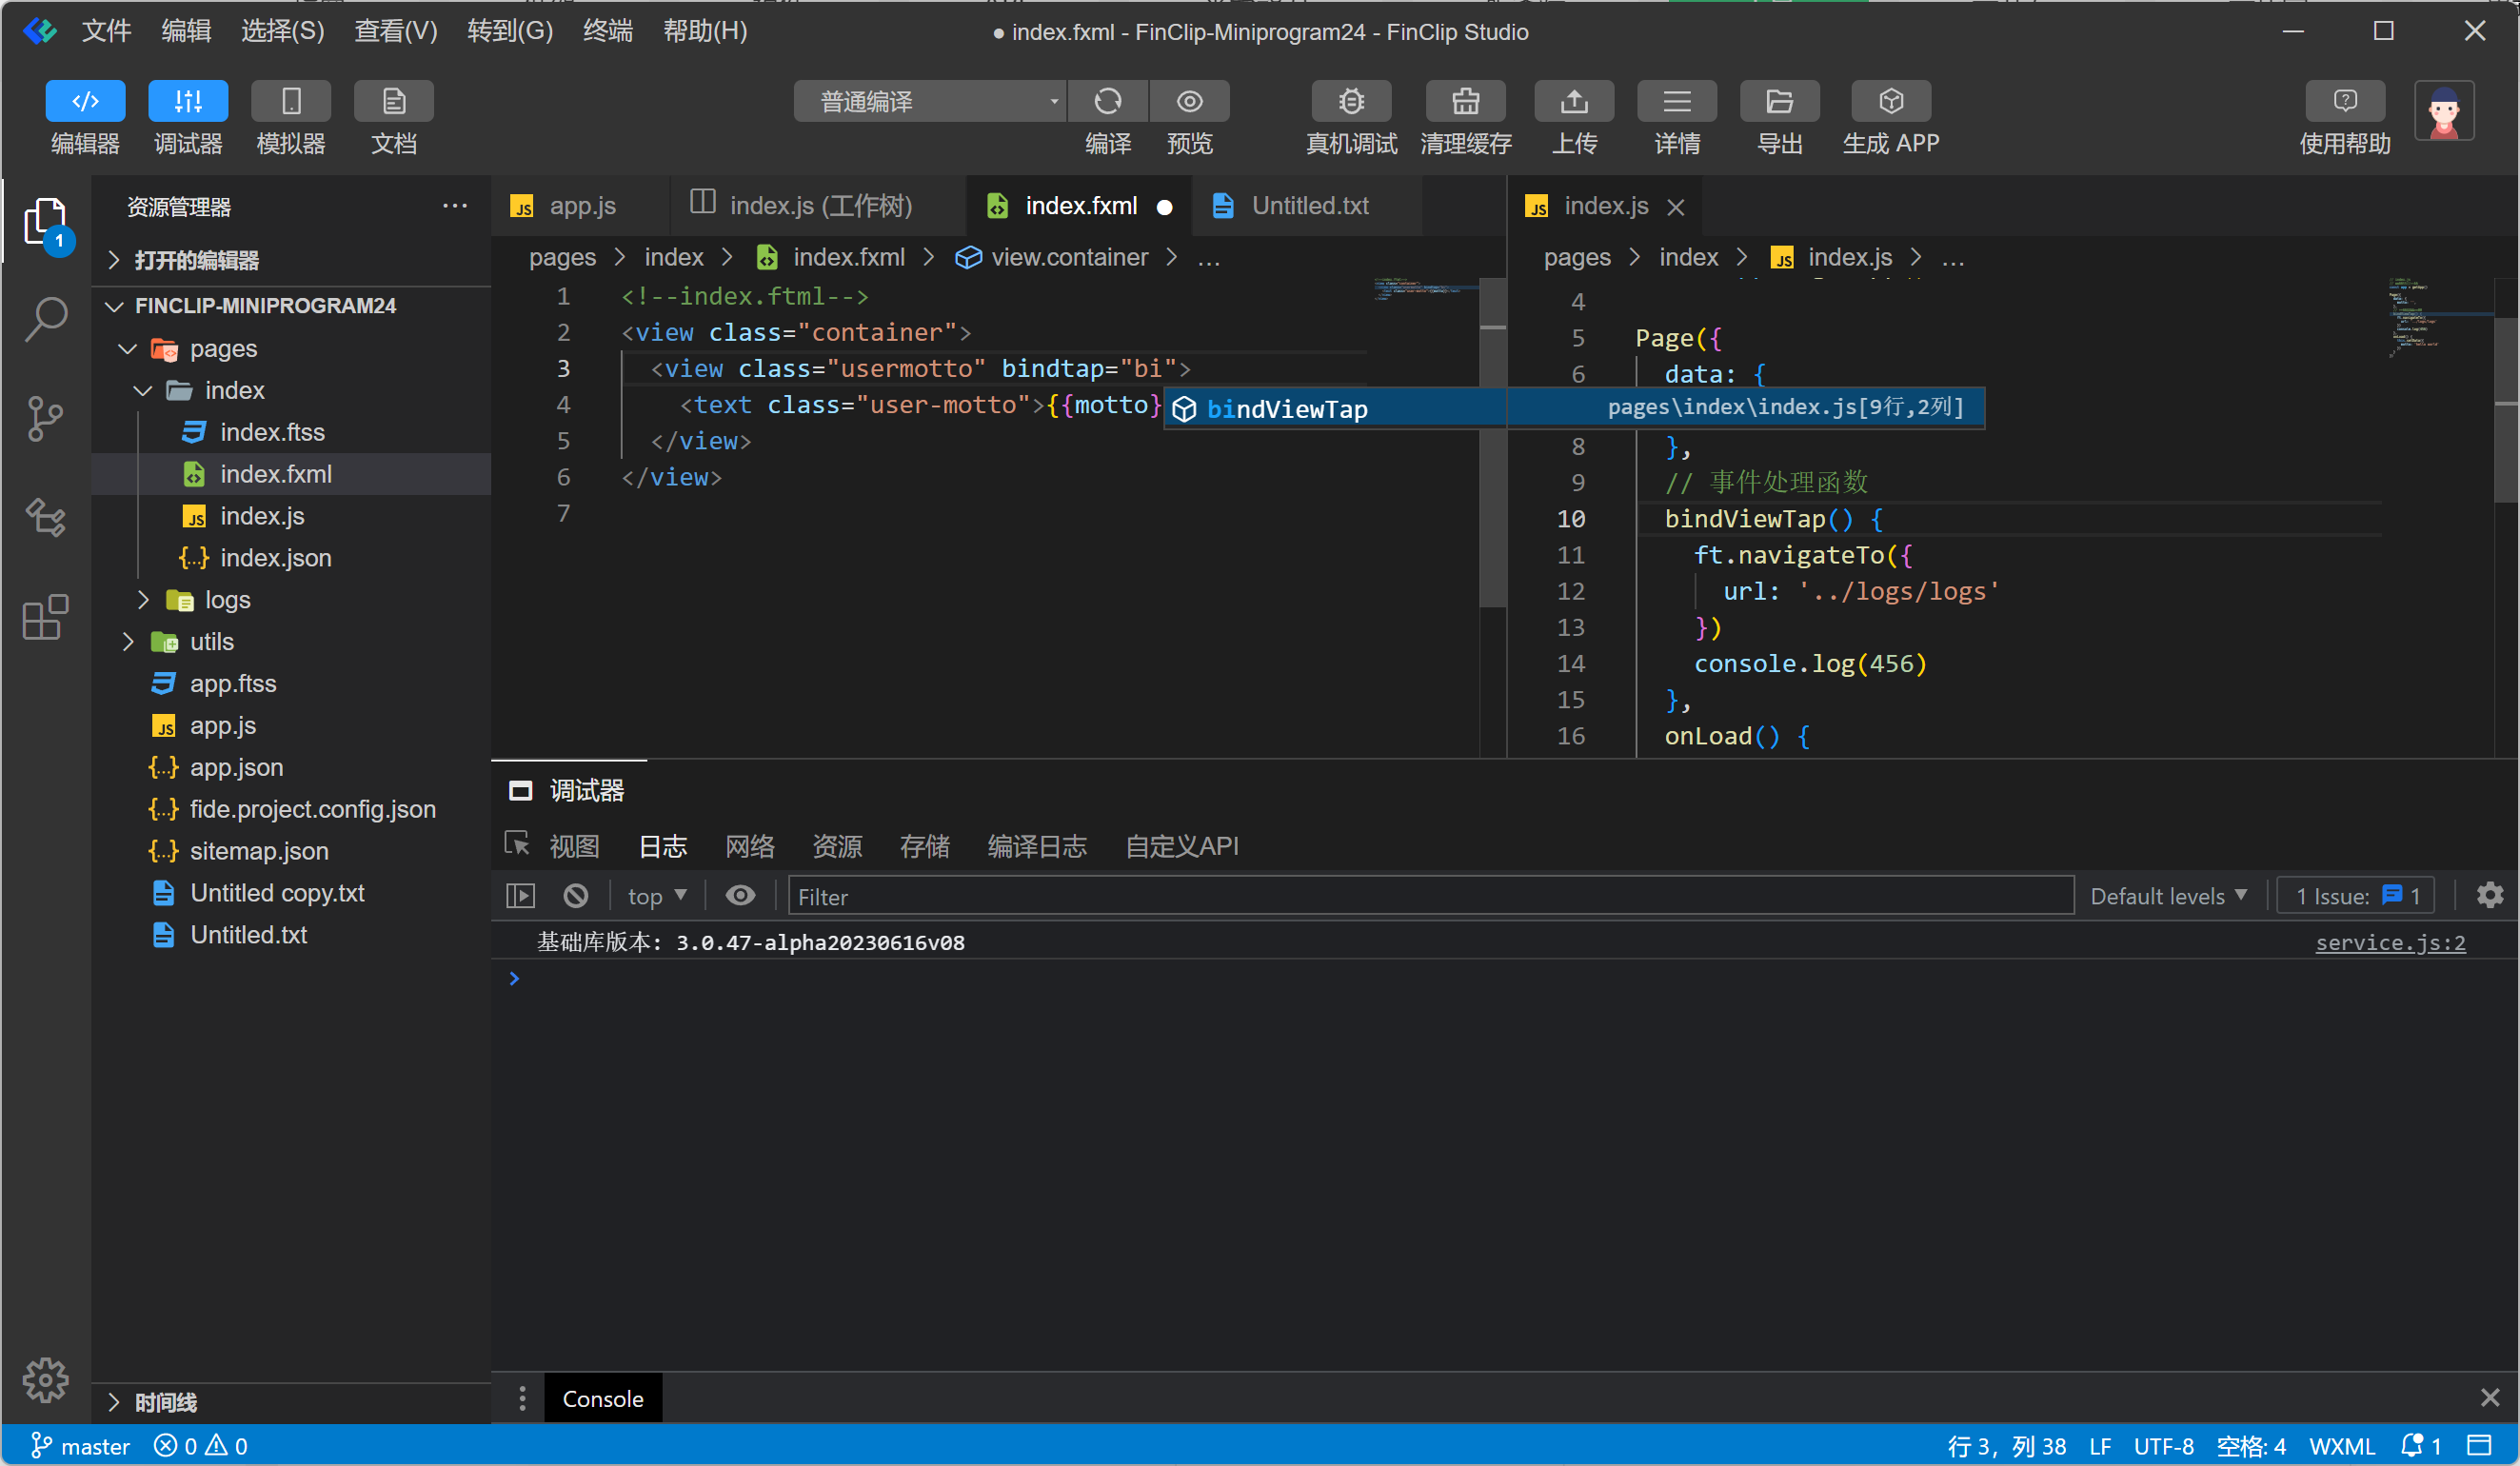
Furthermore, during code completion, FinClip Studio automatically scans the available methods in the corresponding page's .js file, enhancing development efficiency.
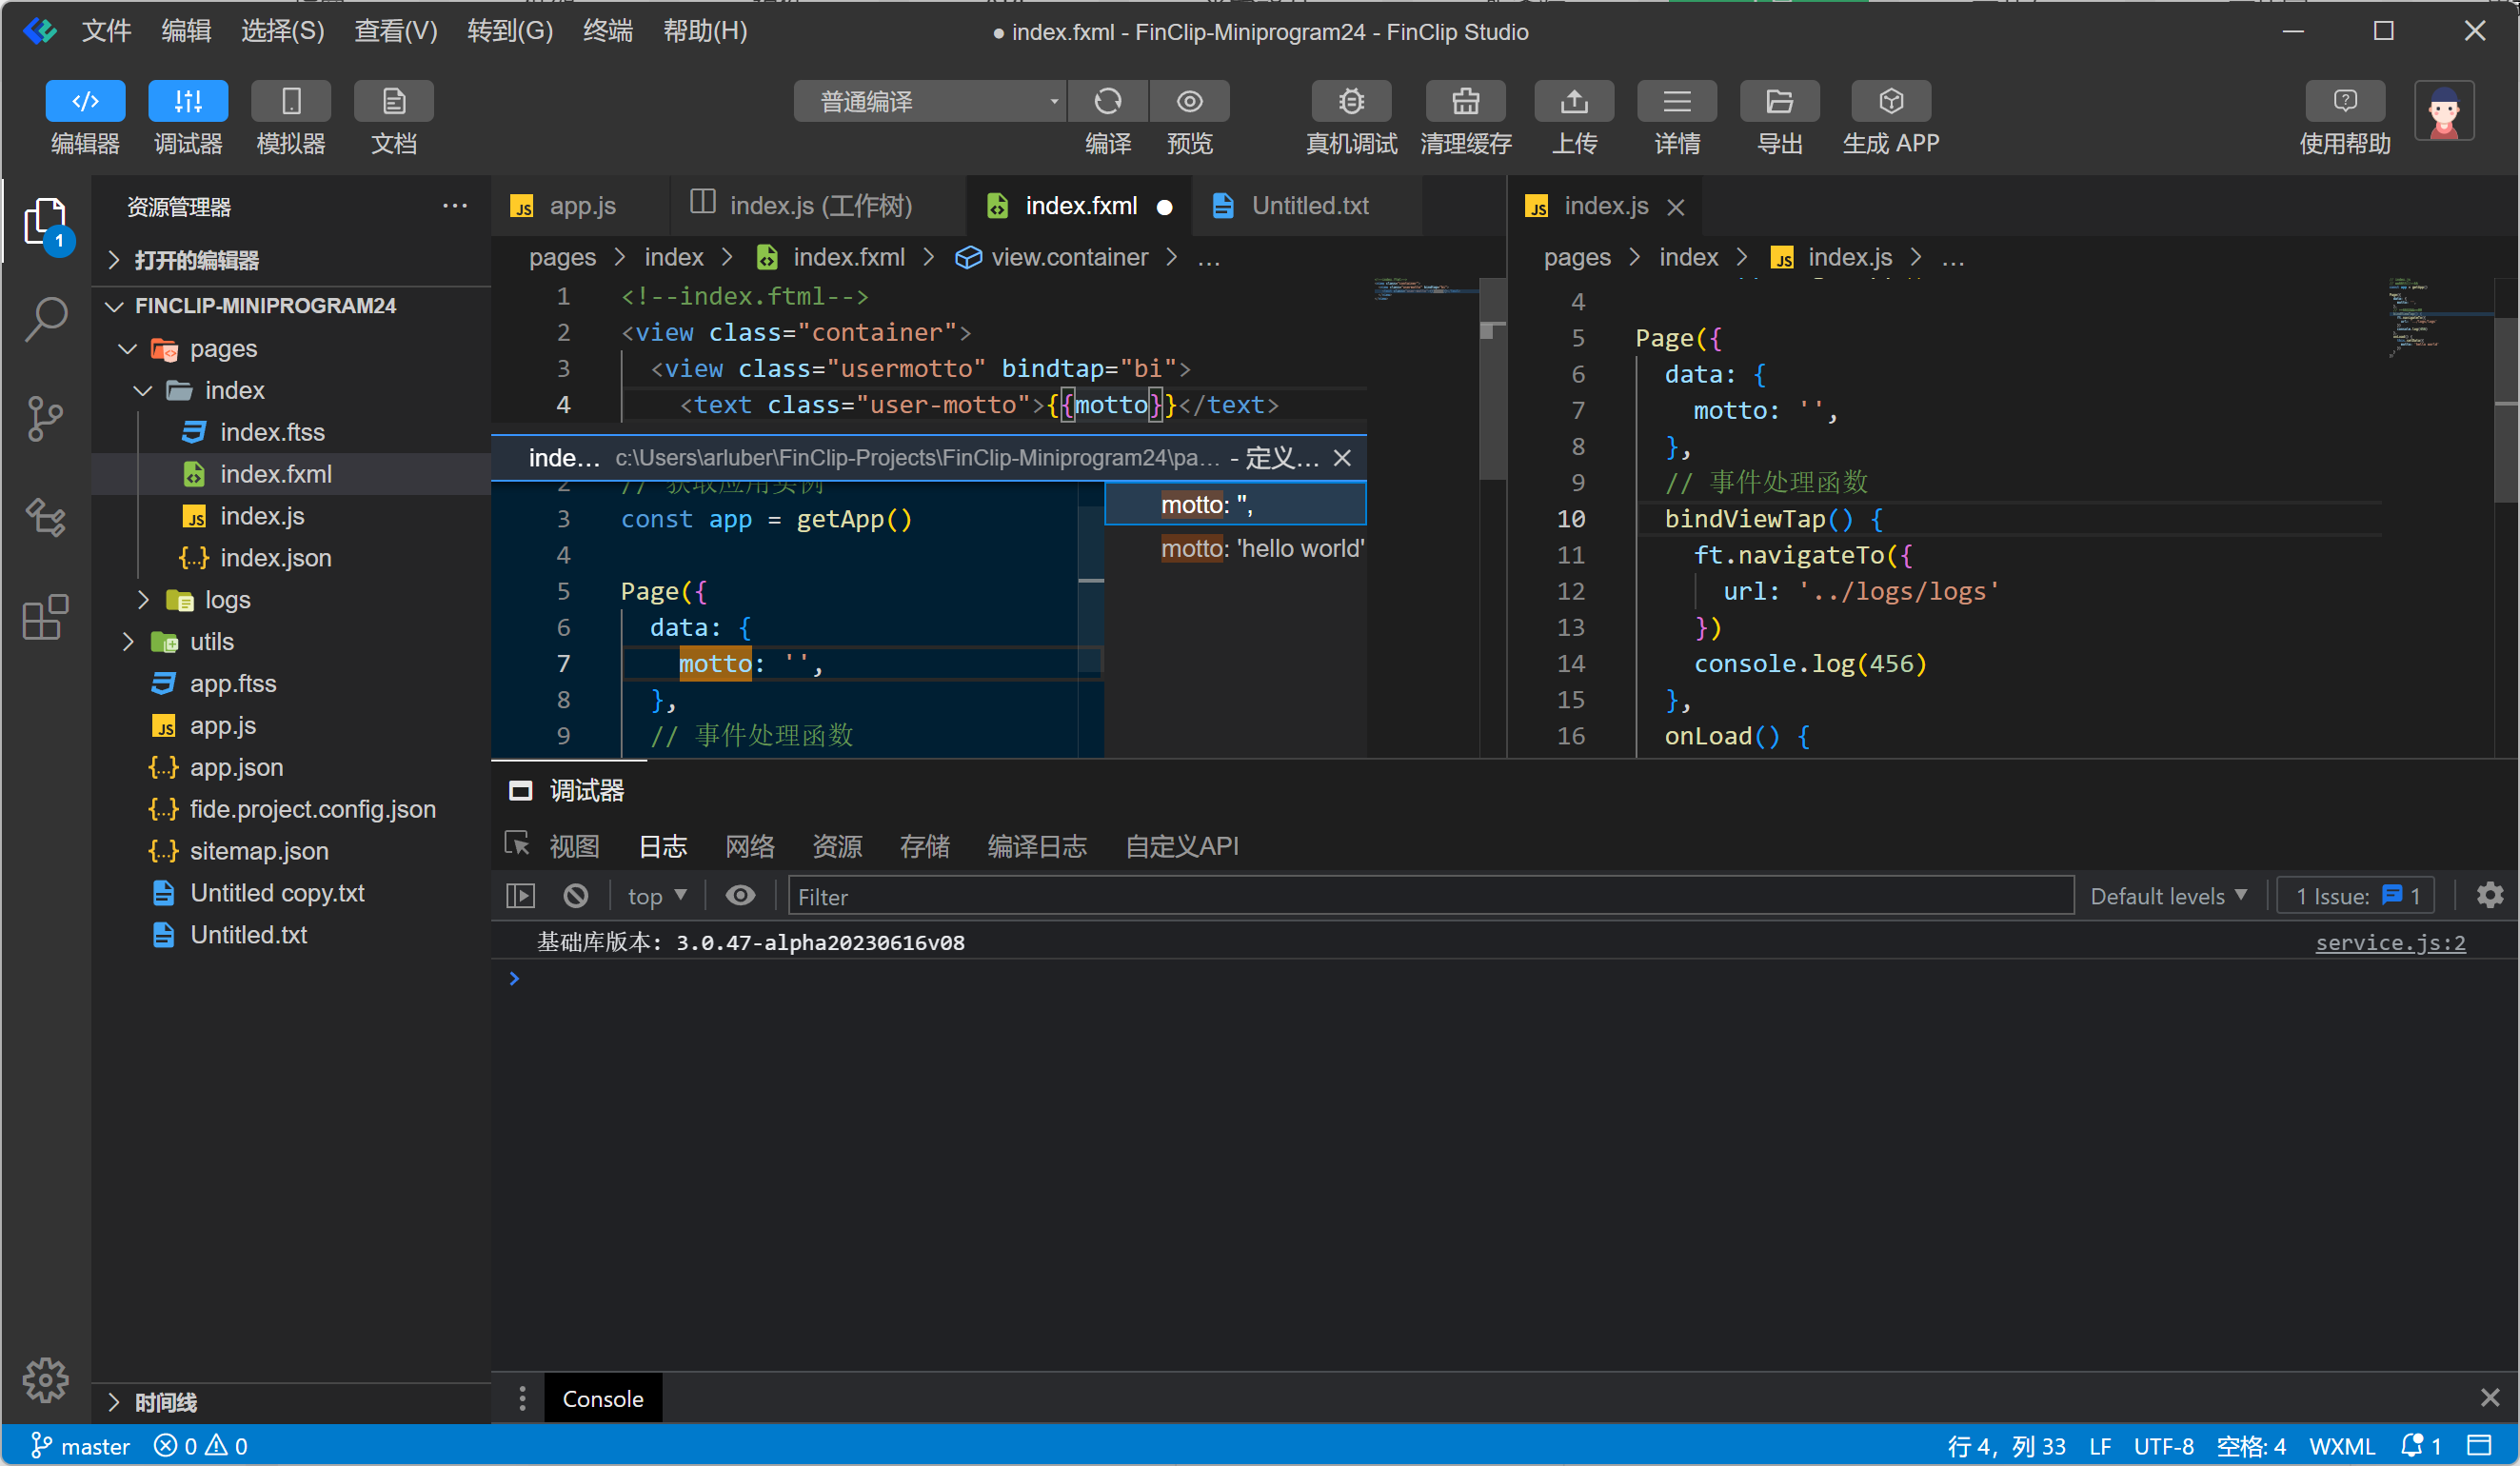
For data, you can also quickly find the definition and modification location by pressing Ctrl (Cmd) + Click.
# 5.5 Editor Extensions
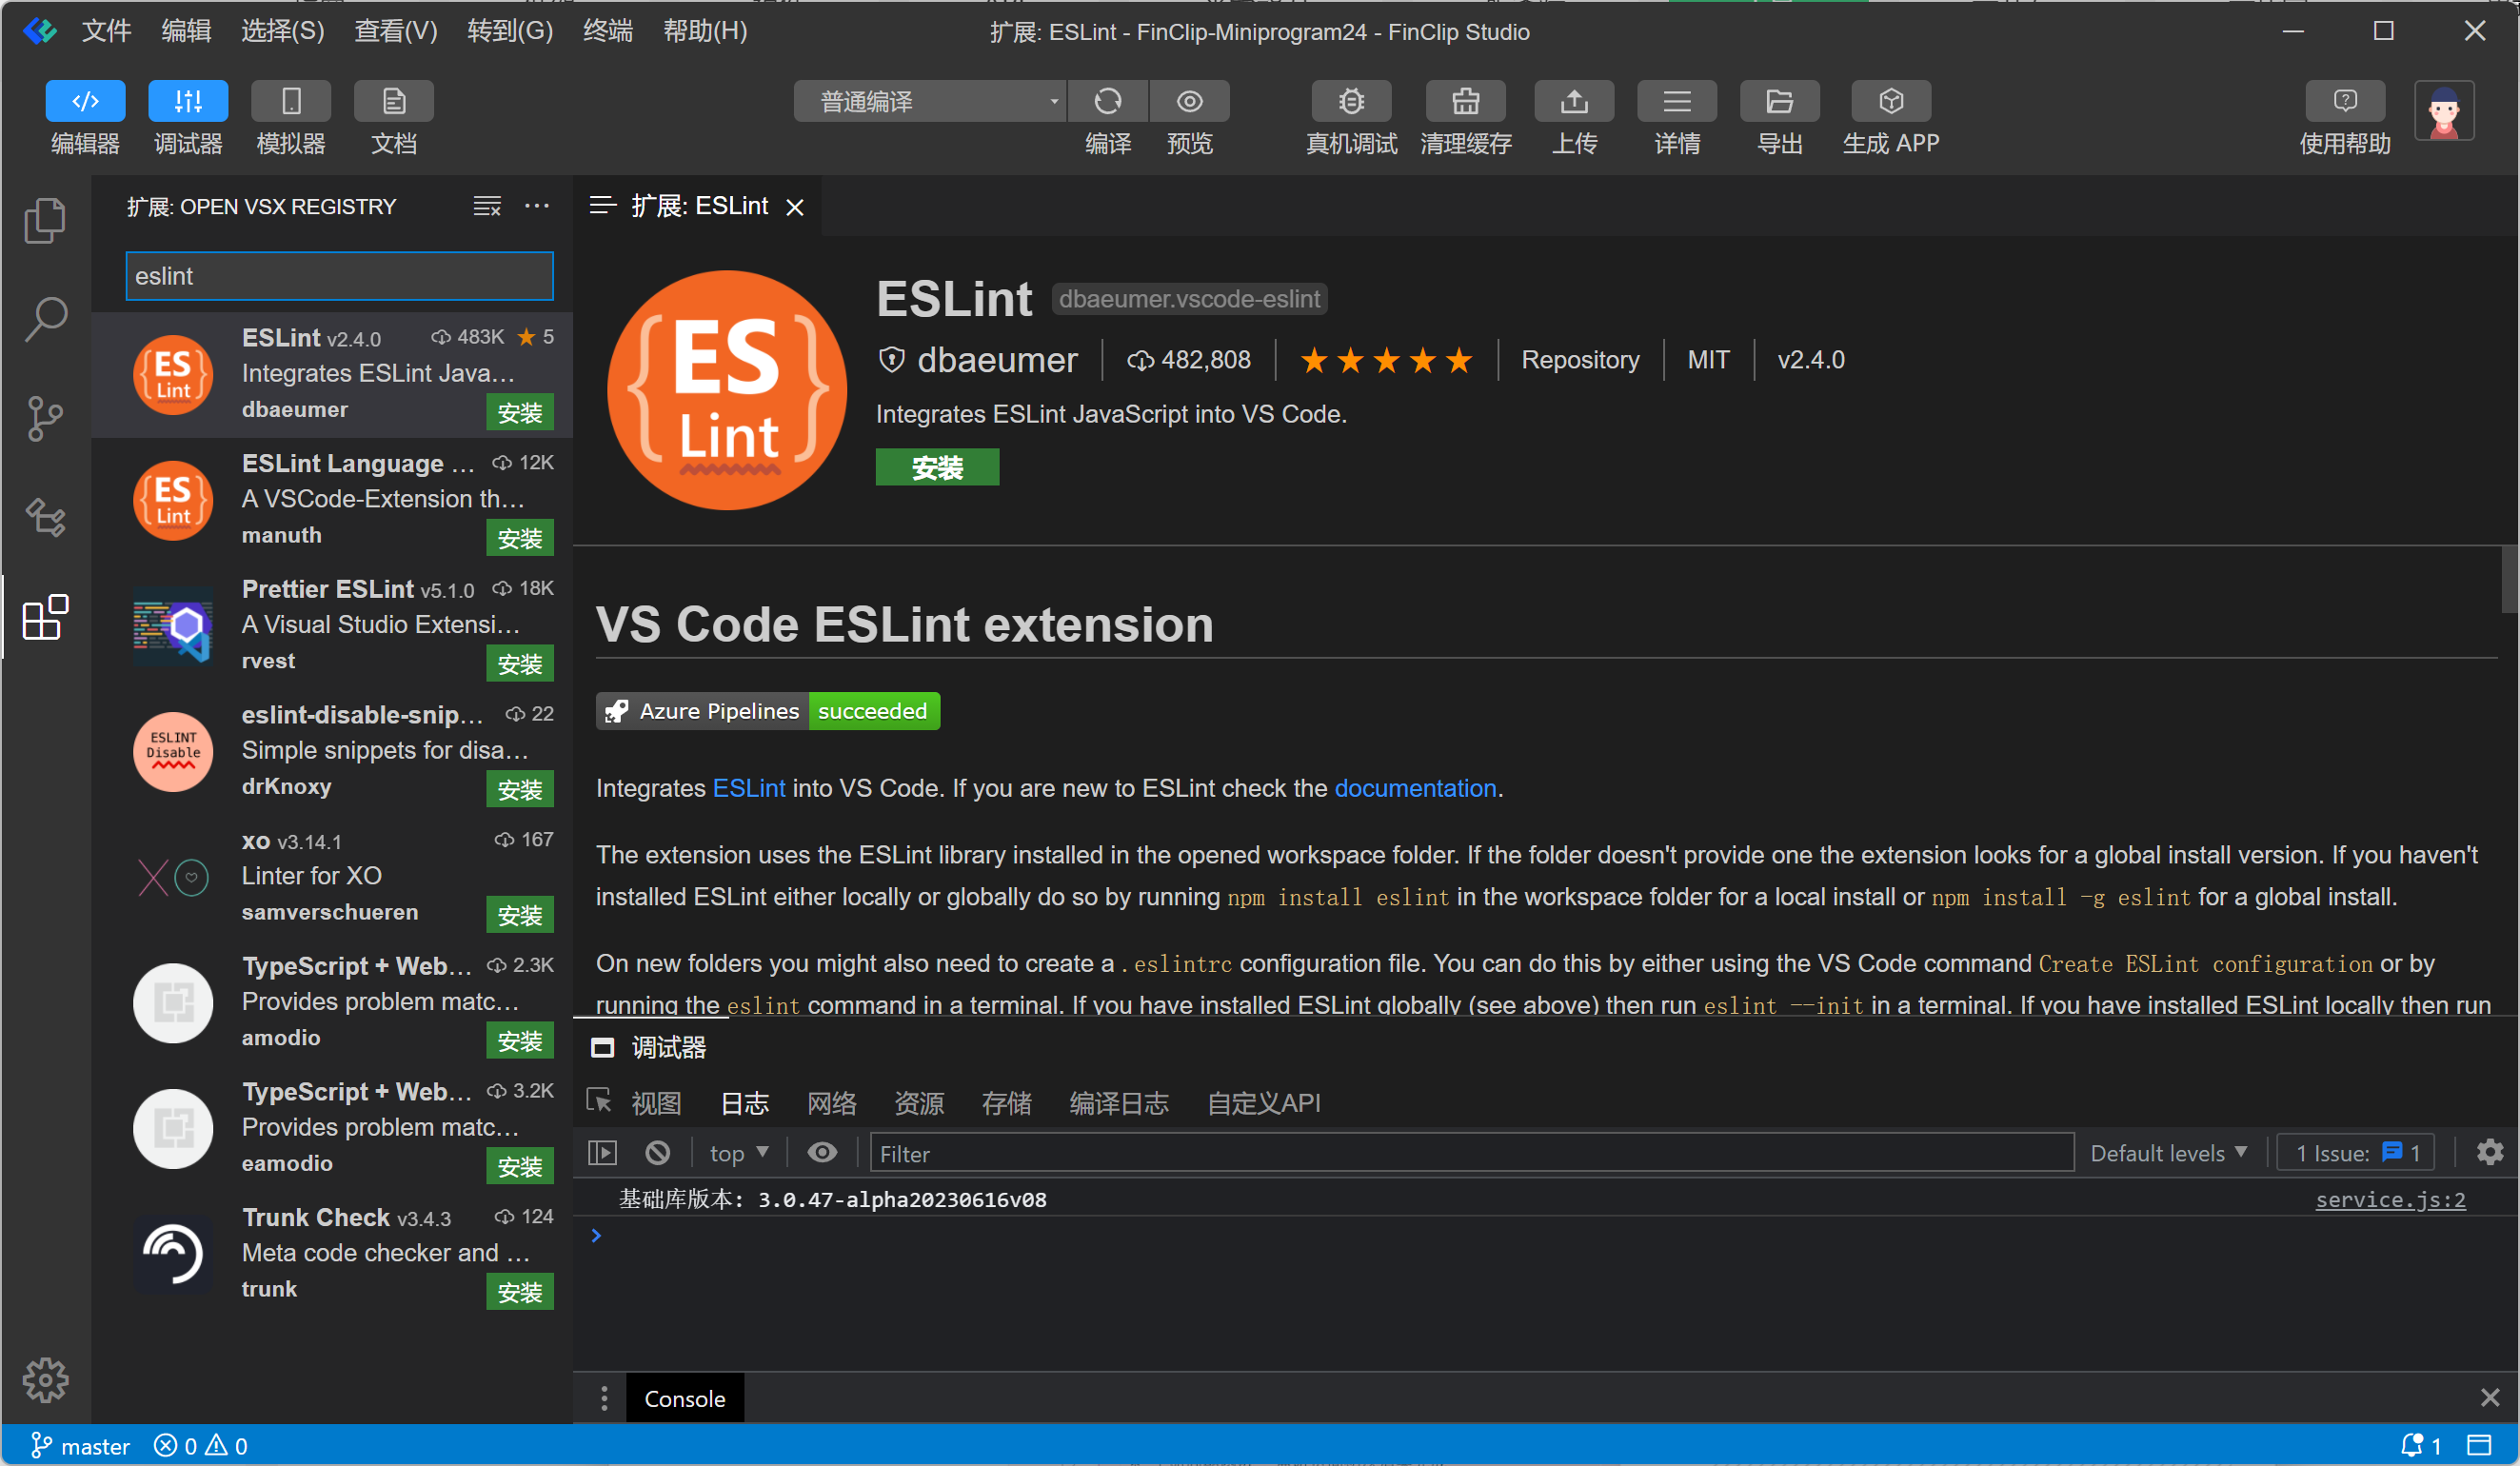
FinClip Studio comes with a small extension marketplace. While not as extensive as the official VSCode marketplace, the most commonly used editor plugins can be found here. Built on the Theia framework, FinClip Studio has relatively high compatibility with VSCode plugins. For desired plugins, installation directly from VSIX files is also supported.
Here is the support status of VSCode plugin APIs by the Theia framework: https://eclipse-theia.github.io/vscode-theia-comparator/status.html (opens new window)
FinClip Studio updates approximately every two weeks, striving to sync with Theia's official versions to maintain VSCode compatibility.
# 5.6 Git Status Display
If the Mini-Program project directory (the directory containing project.config.json) is a Git repository, the editor can display the current Git status.
For those unfamiliar with Git concepts, search engines can be used to find related information.
The FinClip Studio Git extension essentially wraps Git commands into clickable functions. Understanding basic Git concepts makes these interactions intuitive and easy to use.
# 5.6.1 Directory Tree
As shown in the image, when certain files have changes, the directory tree displays corresponding icons on the right side of the file name to indicate this status. If a collapsed directory contains files with changes, a dot icon appears on its right side indicating this situation.
The meanings of the file icon statuses are as follows:
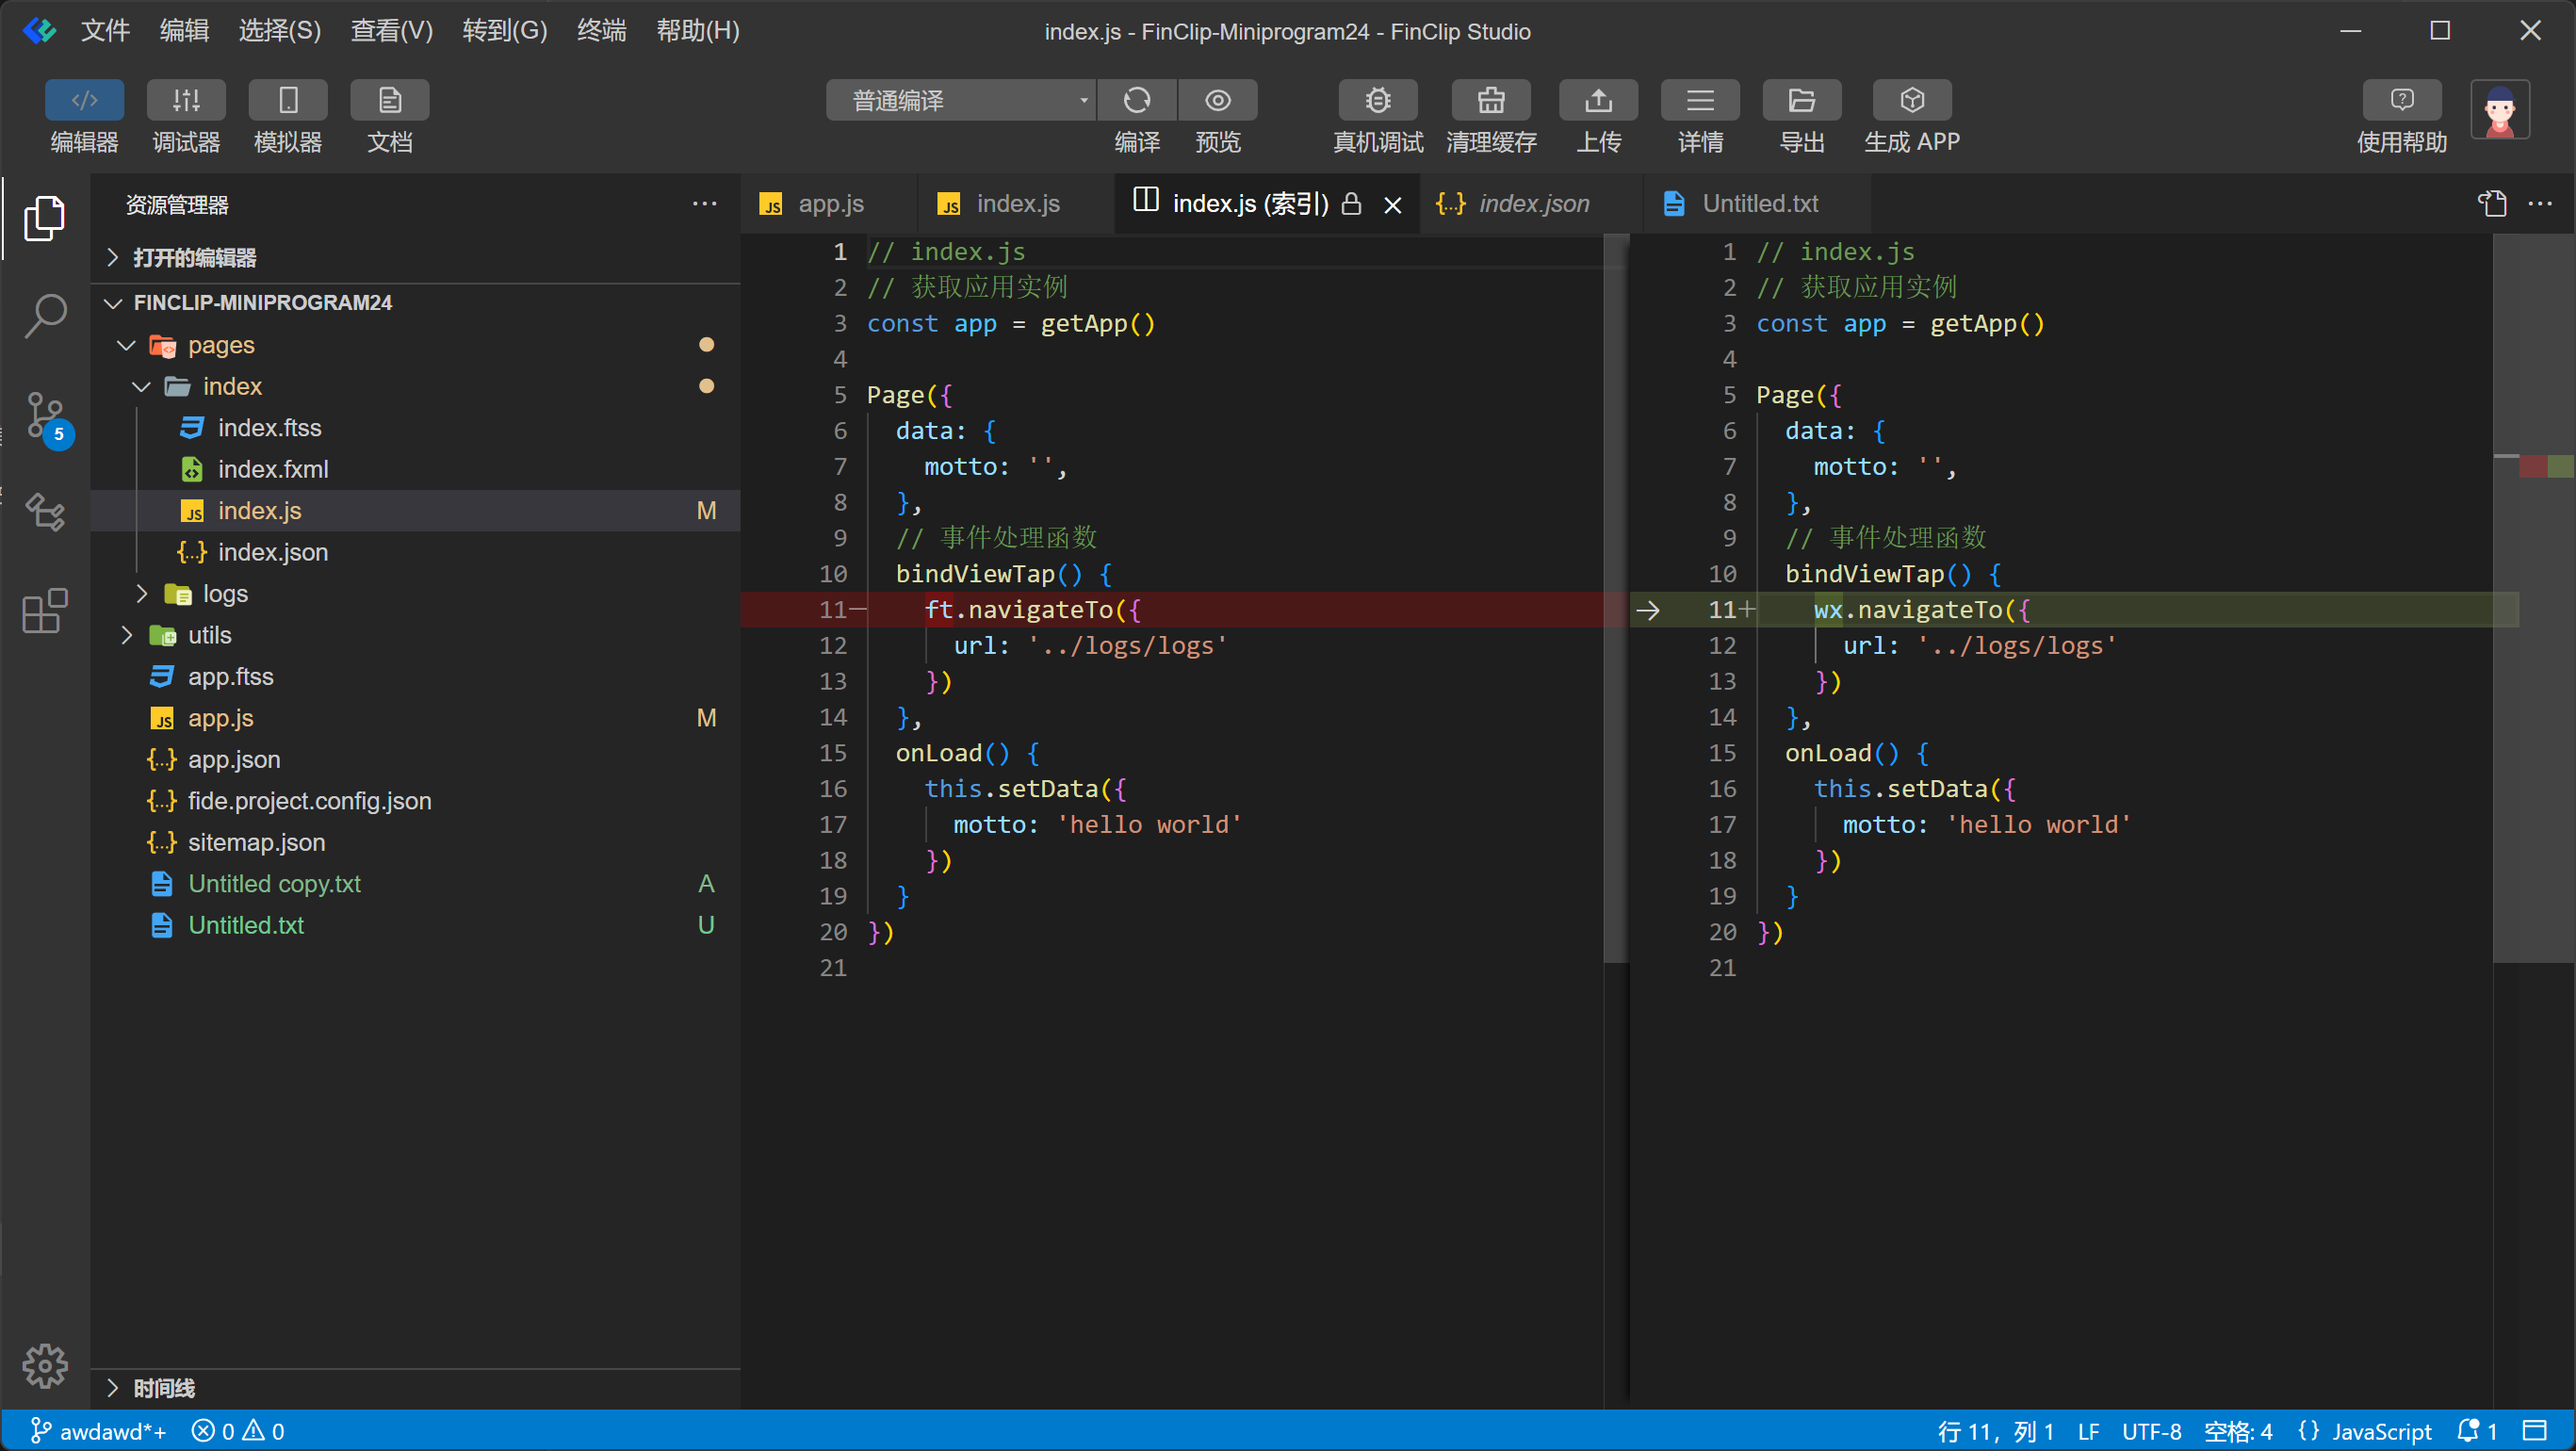
| Icon | Meaning |
|---|---|
| A | New File (Added, Staged) |
| M | File Modified |
| C | File Conflict |
| D | File Deleted |
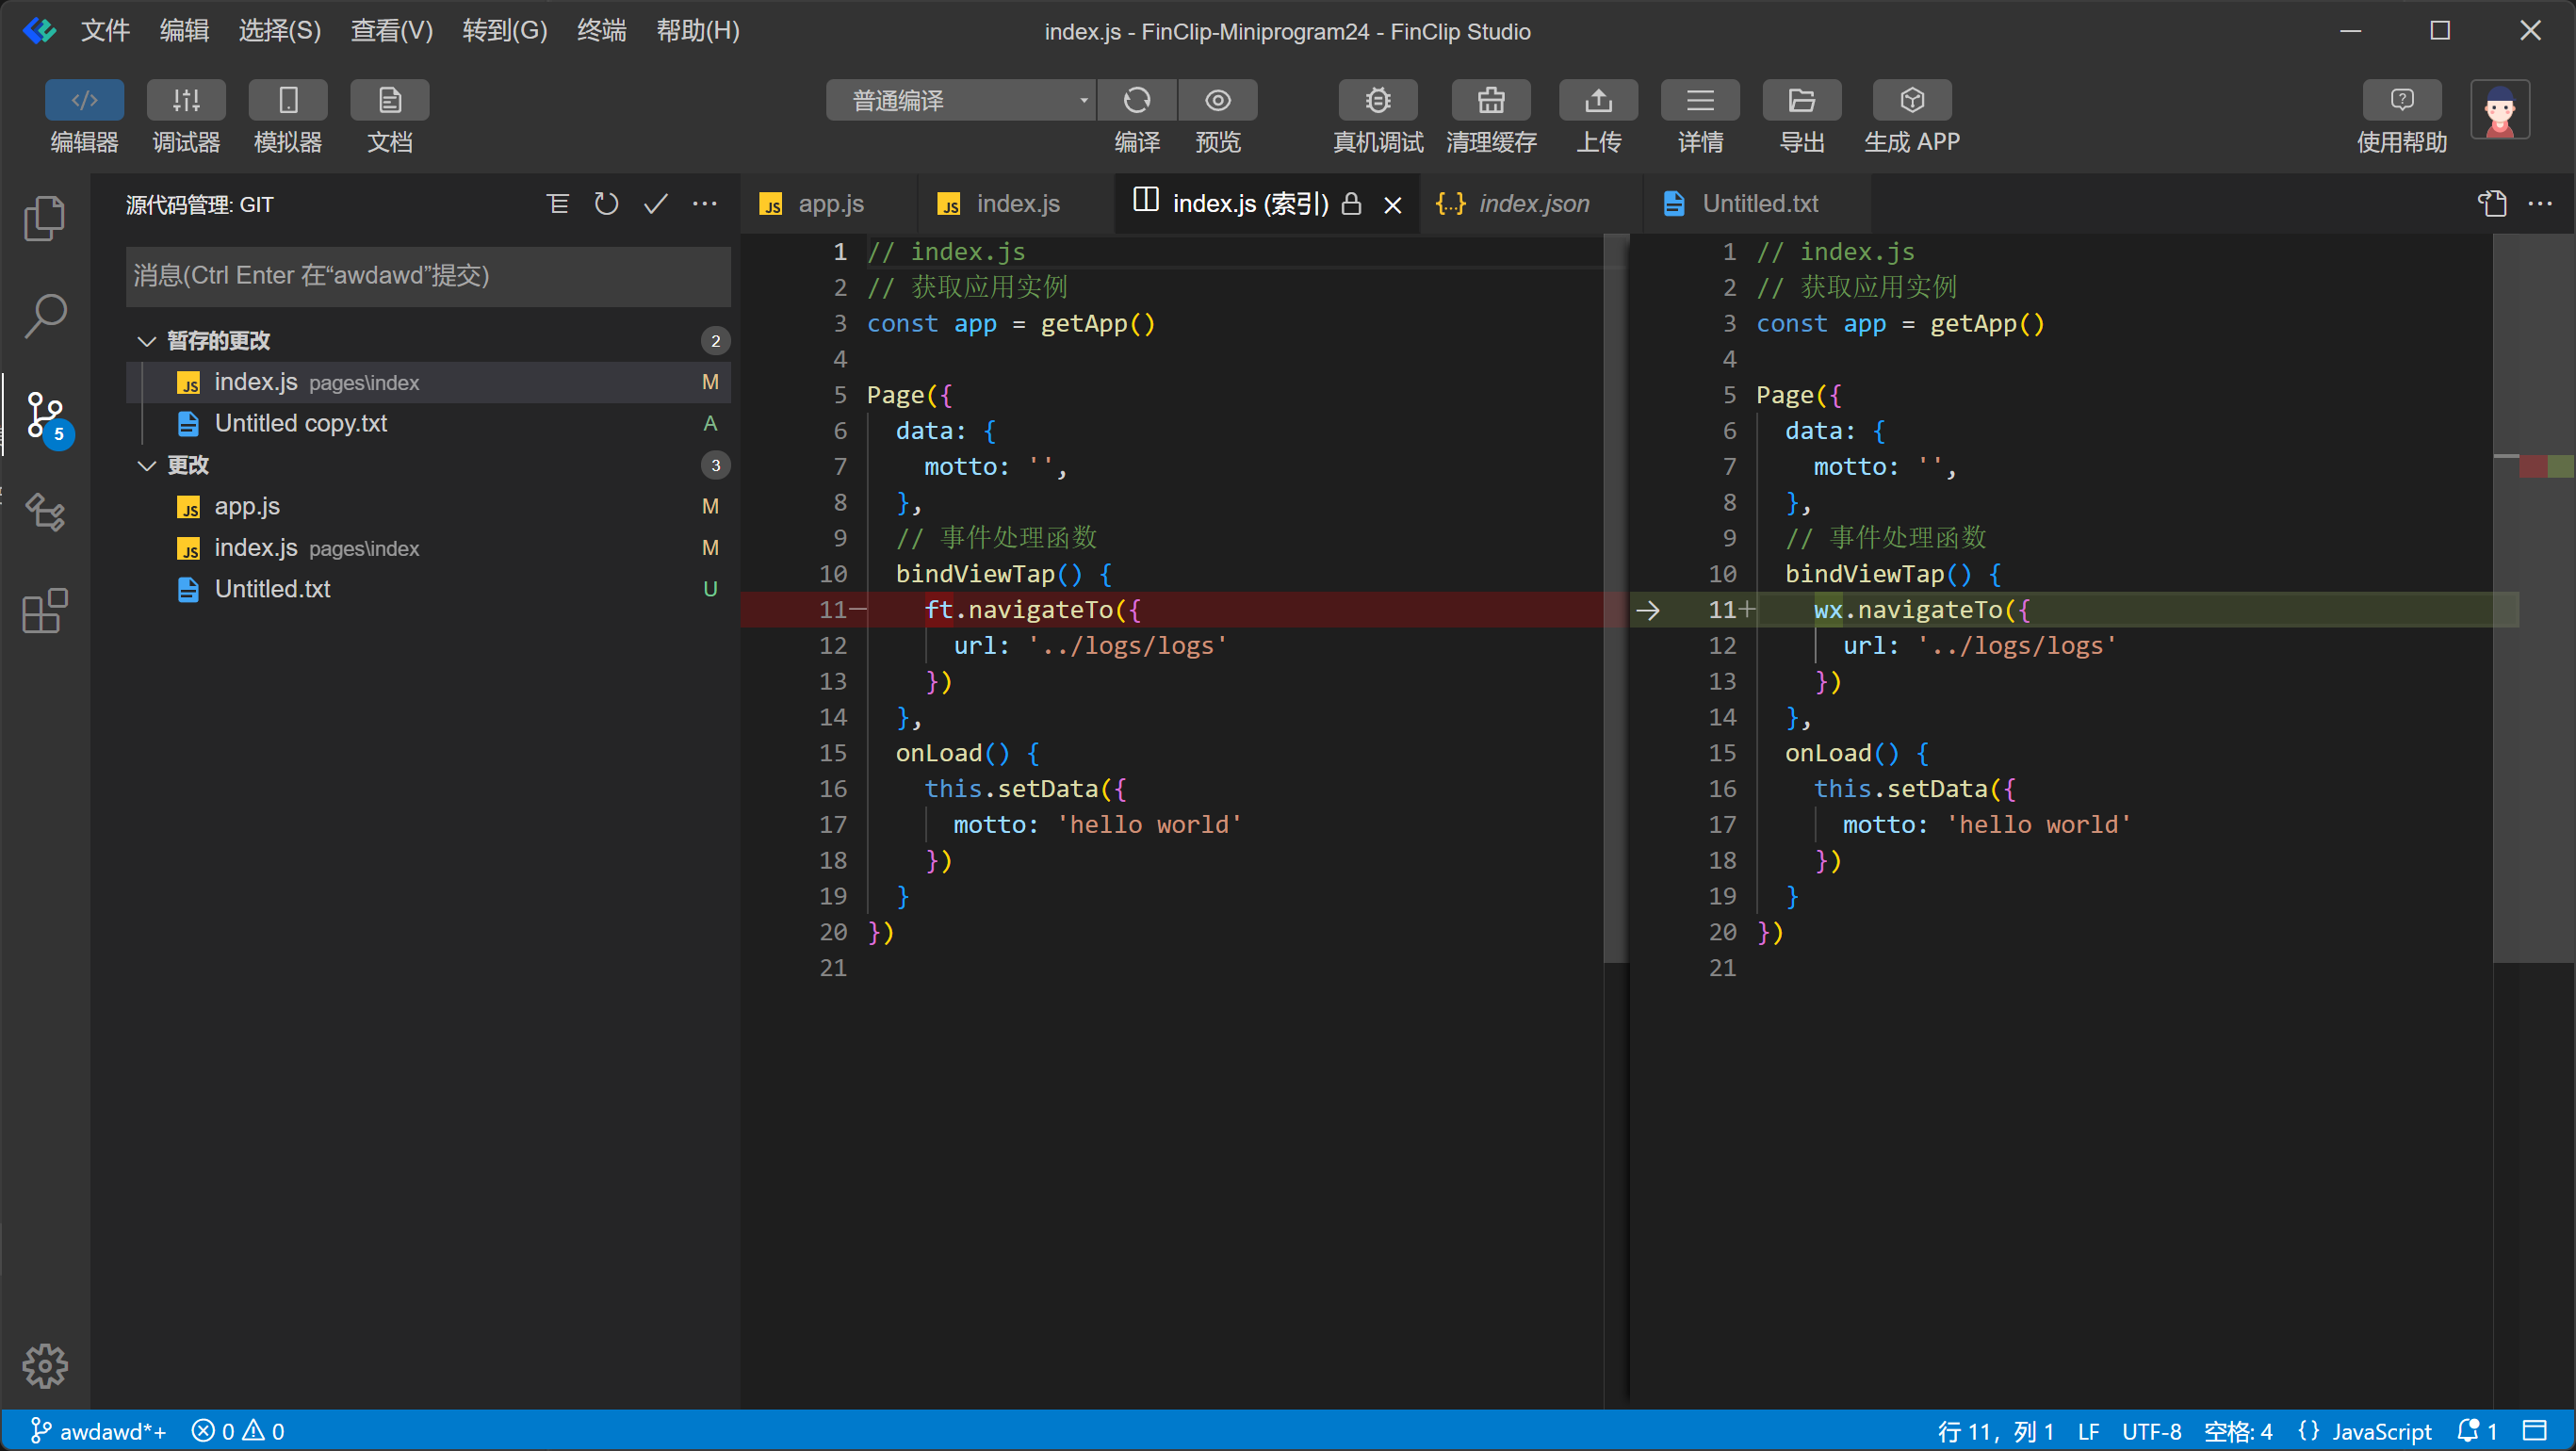
For modified files, you can select Source Control on the left sidebar and click to view the specific changes in the current file.
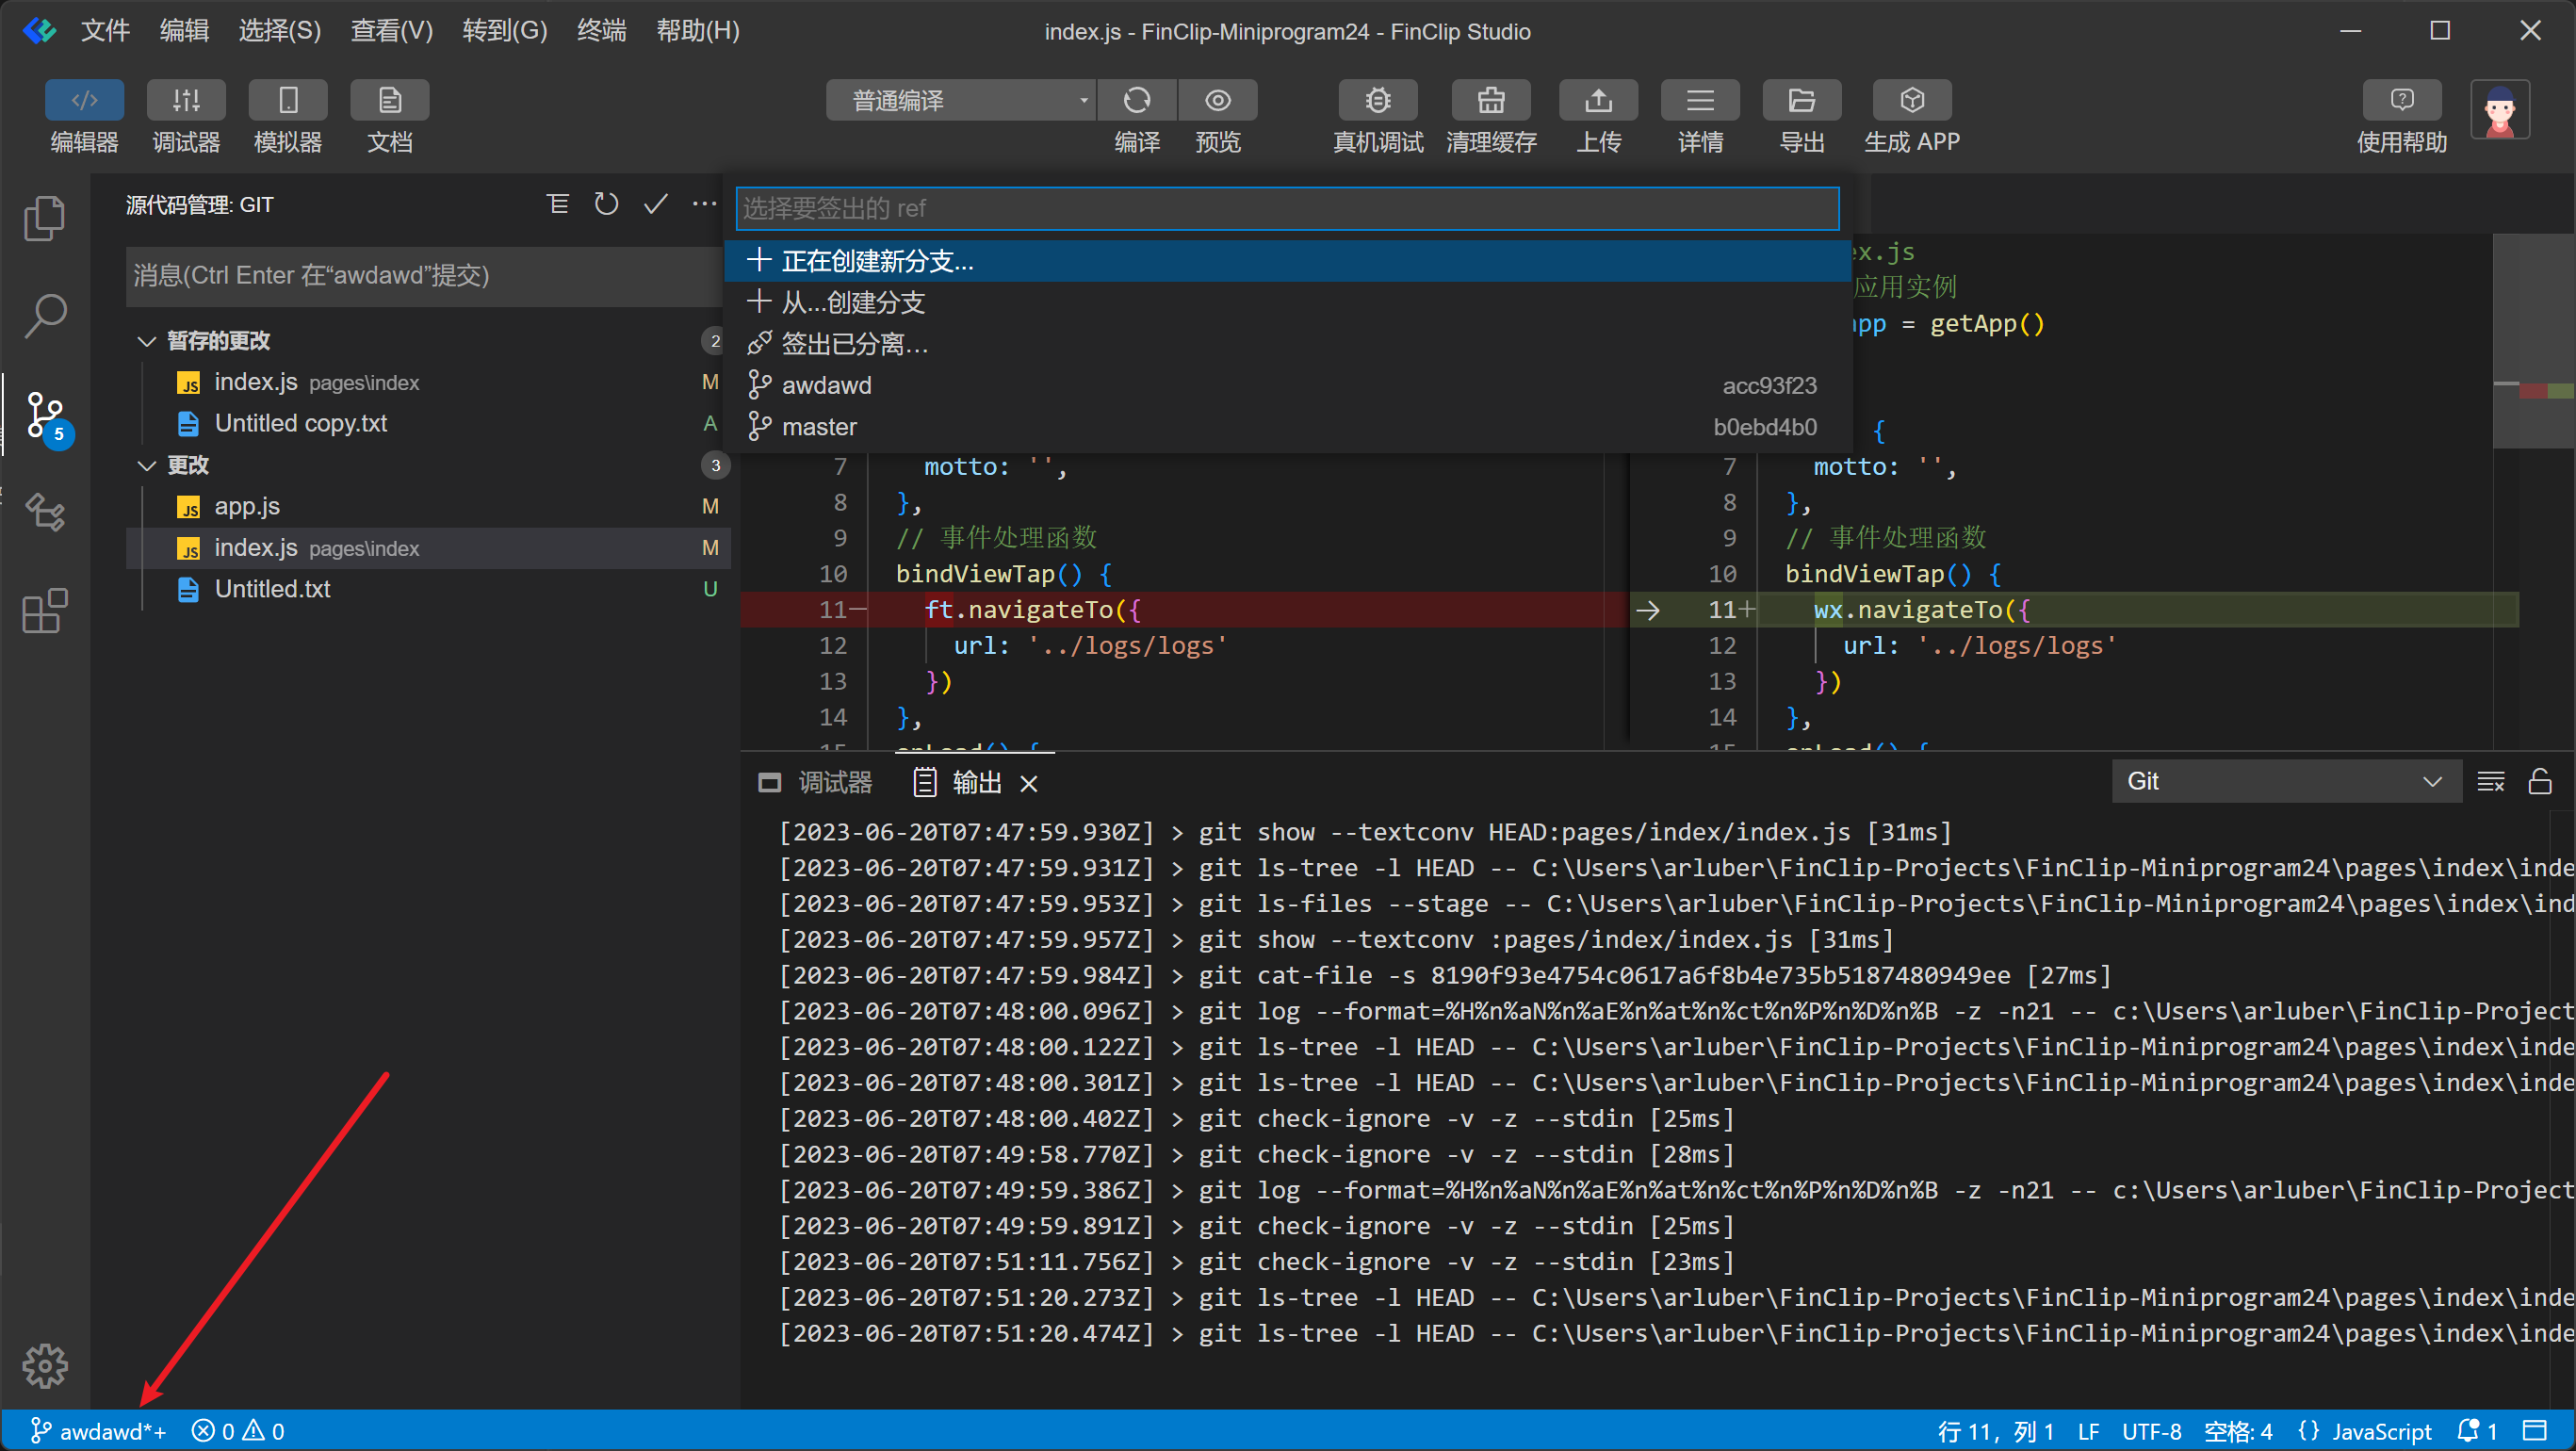
Clicking the bottom-right corner supports quick branch switching, branch creation, and other operations.
When code conflicts occur during merging, conflicts are visible within the code editor interface. After manually resolving conflicts, click the + sign next to "Merge Changes"; Git enters the staged state, allowing continuation of other Git operations.

# 6. Debugging Tools
# 6.1 View
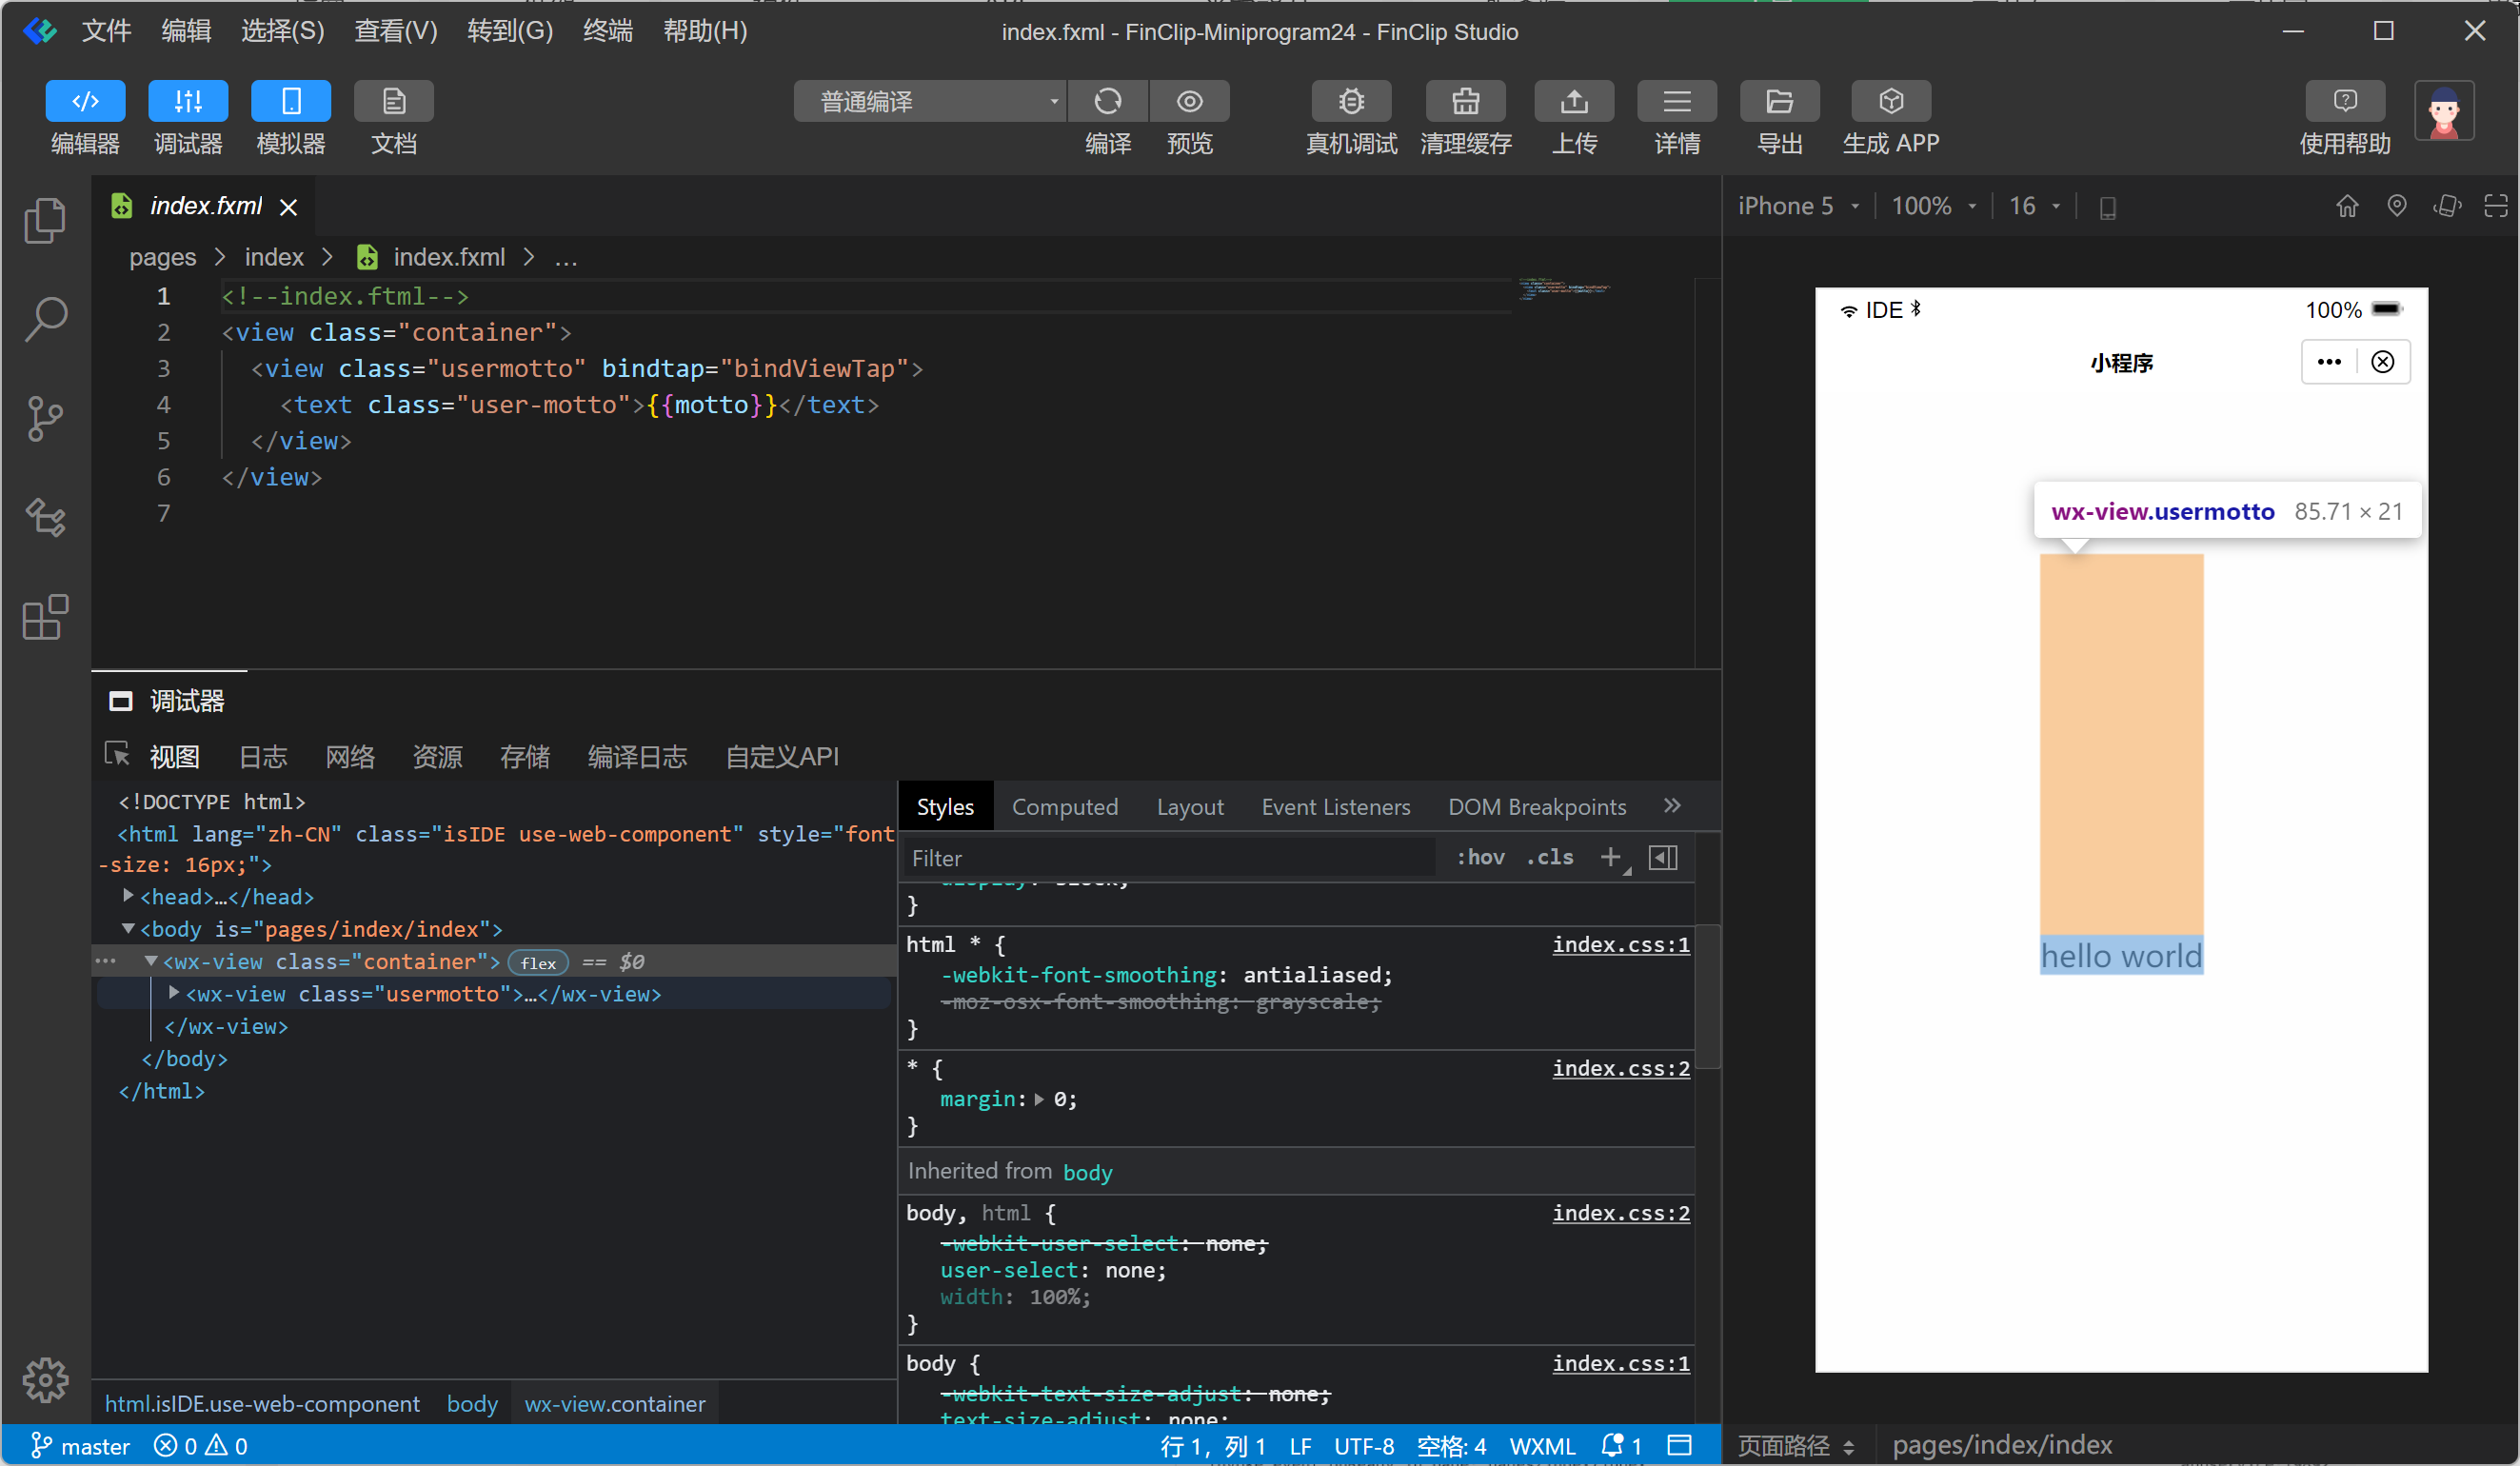
The actual rendering structure of the Mini-Program is relatively close to Mini-Program components. Here you can see the actual DOM structure. This area currently uses the native DevTools debugger. Development is ongoing for this section; the post-development effect will be consistent with WeChat Developer Tools, displaying the FXML tree structure here.
You can either highlight corresponding elements in the view or use the arrow on the left side of the view to locate the corresponding DOM node by selecting the element.
# 6.2 Console
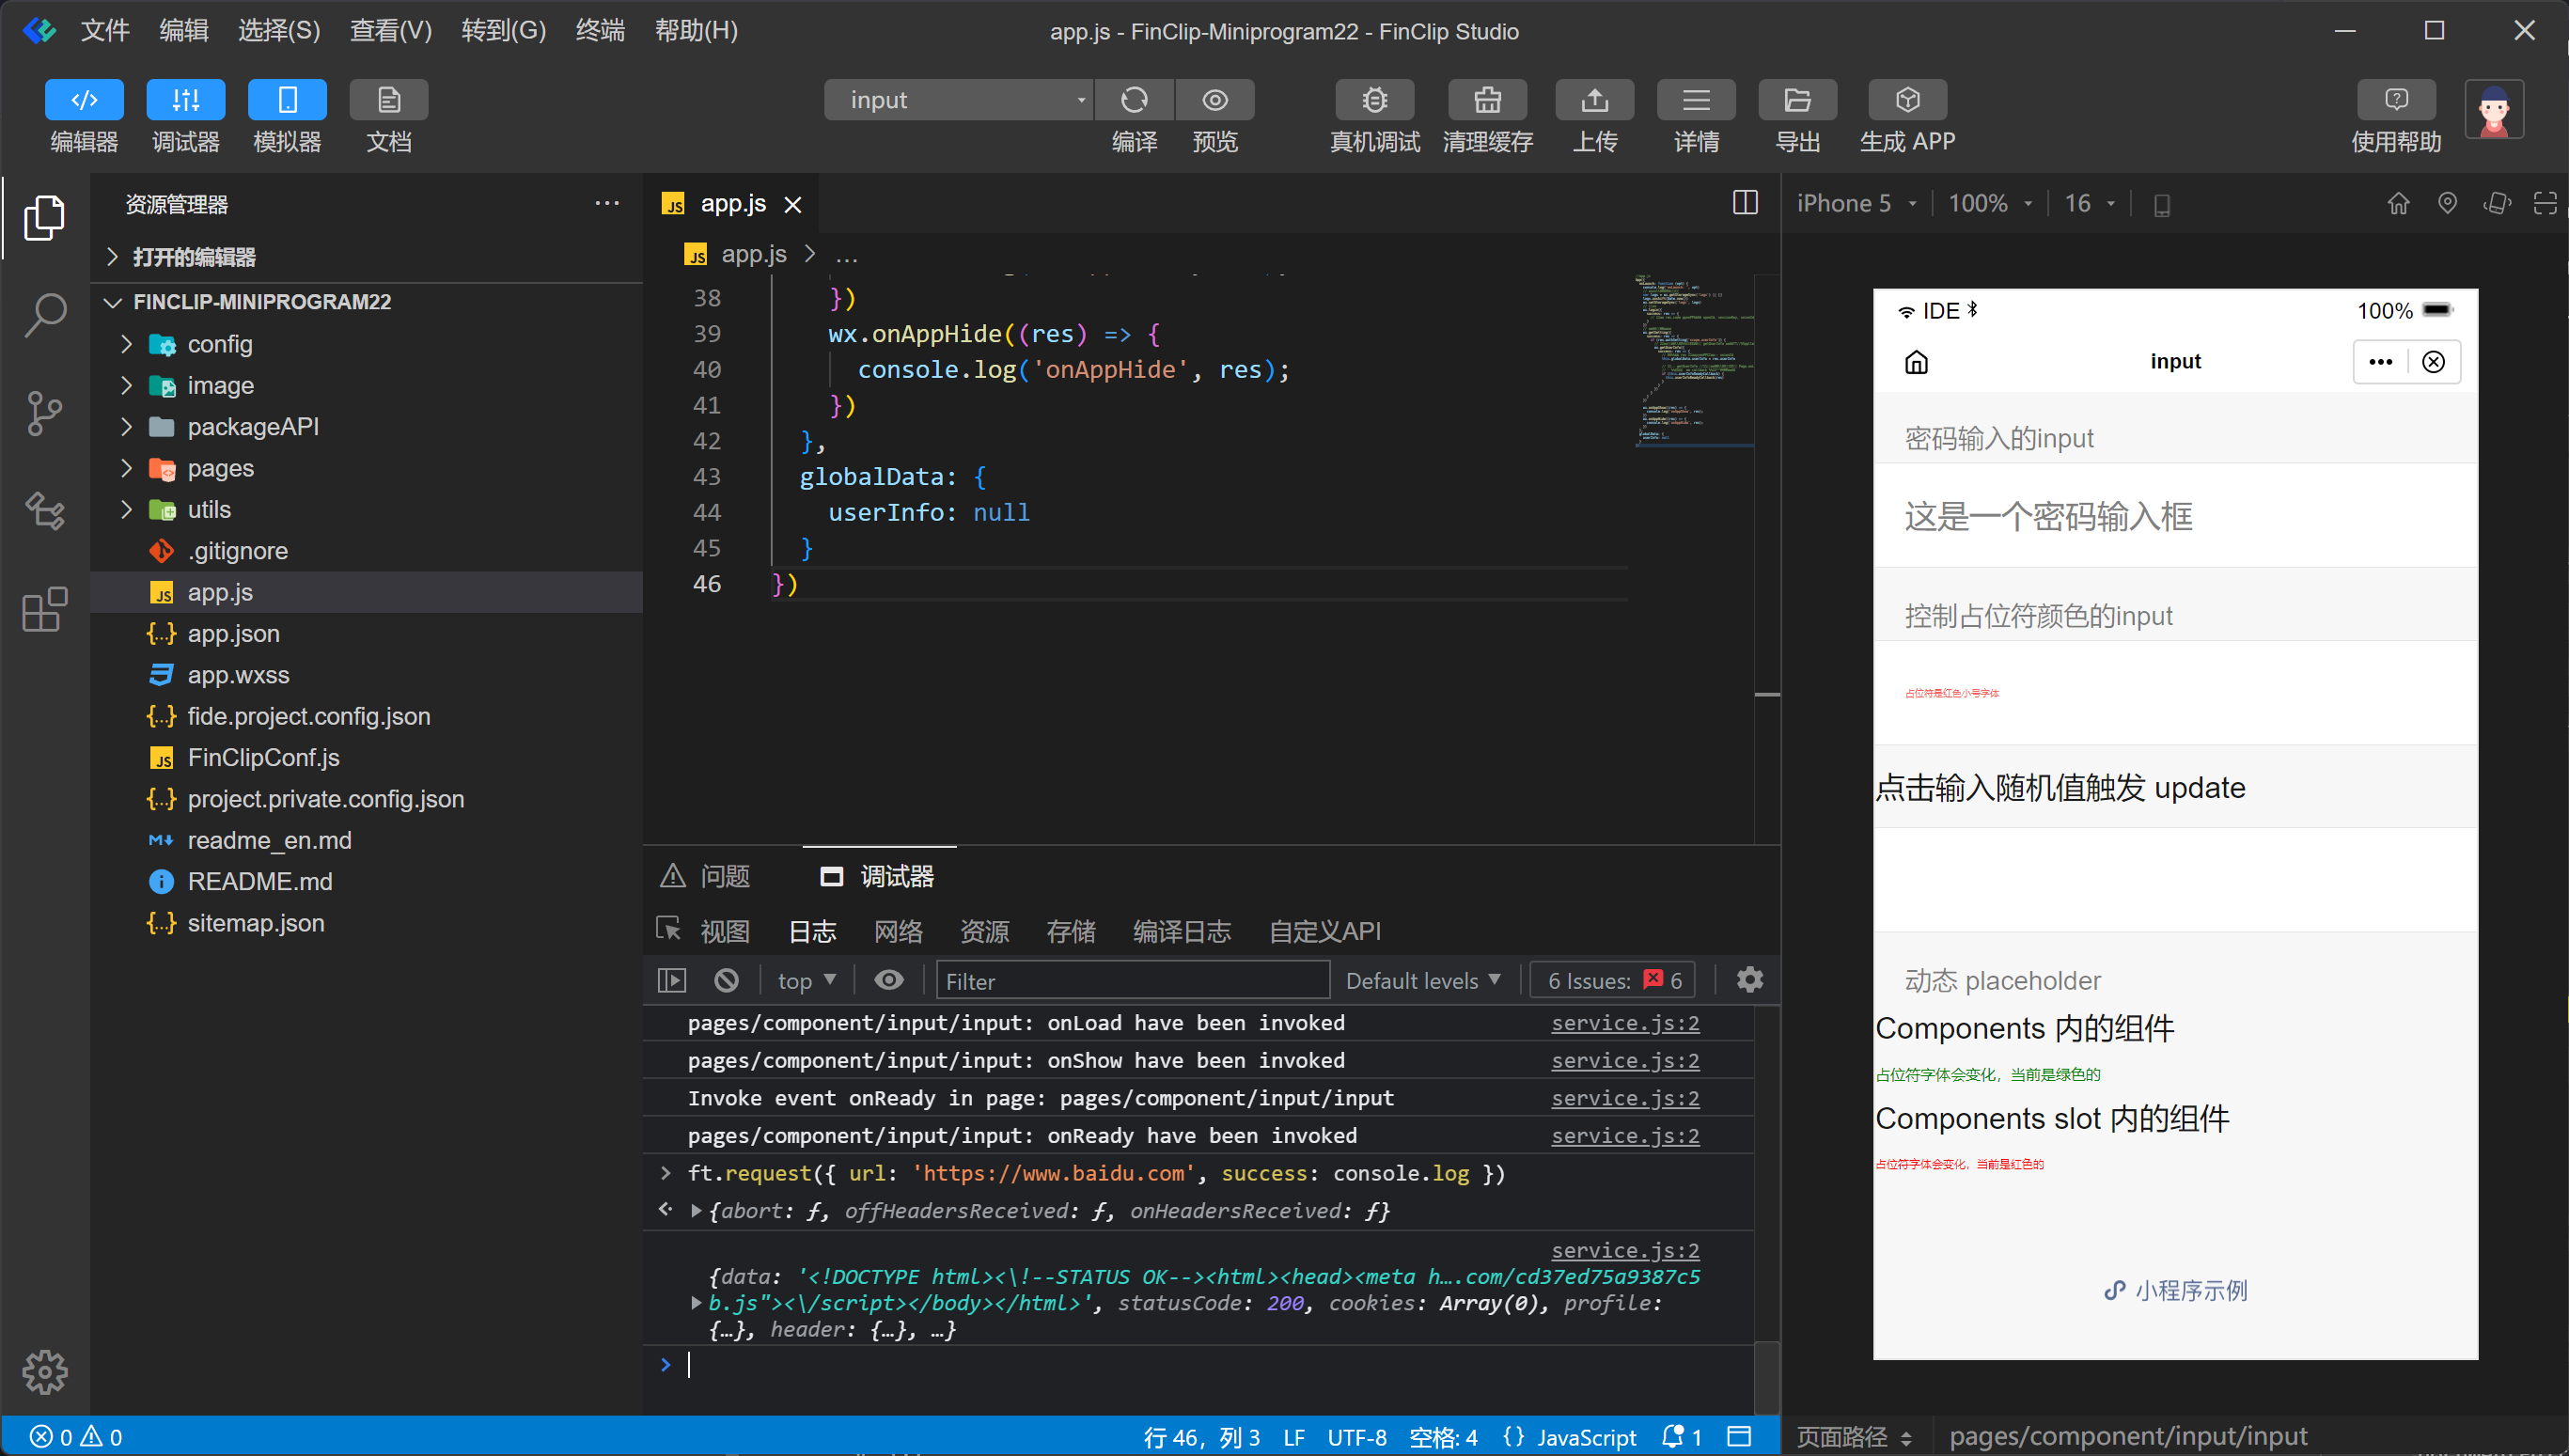
Clicking the Console panel directly displays the Mini-Program's runtime logs. APIs can also be called directly here for more convenient development and debugging.
# 6.3 Network
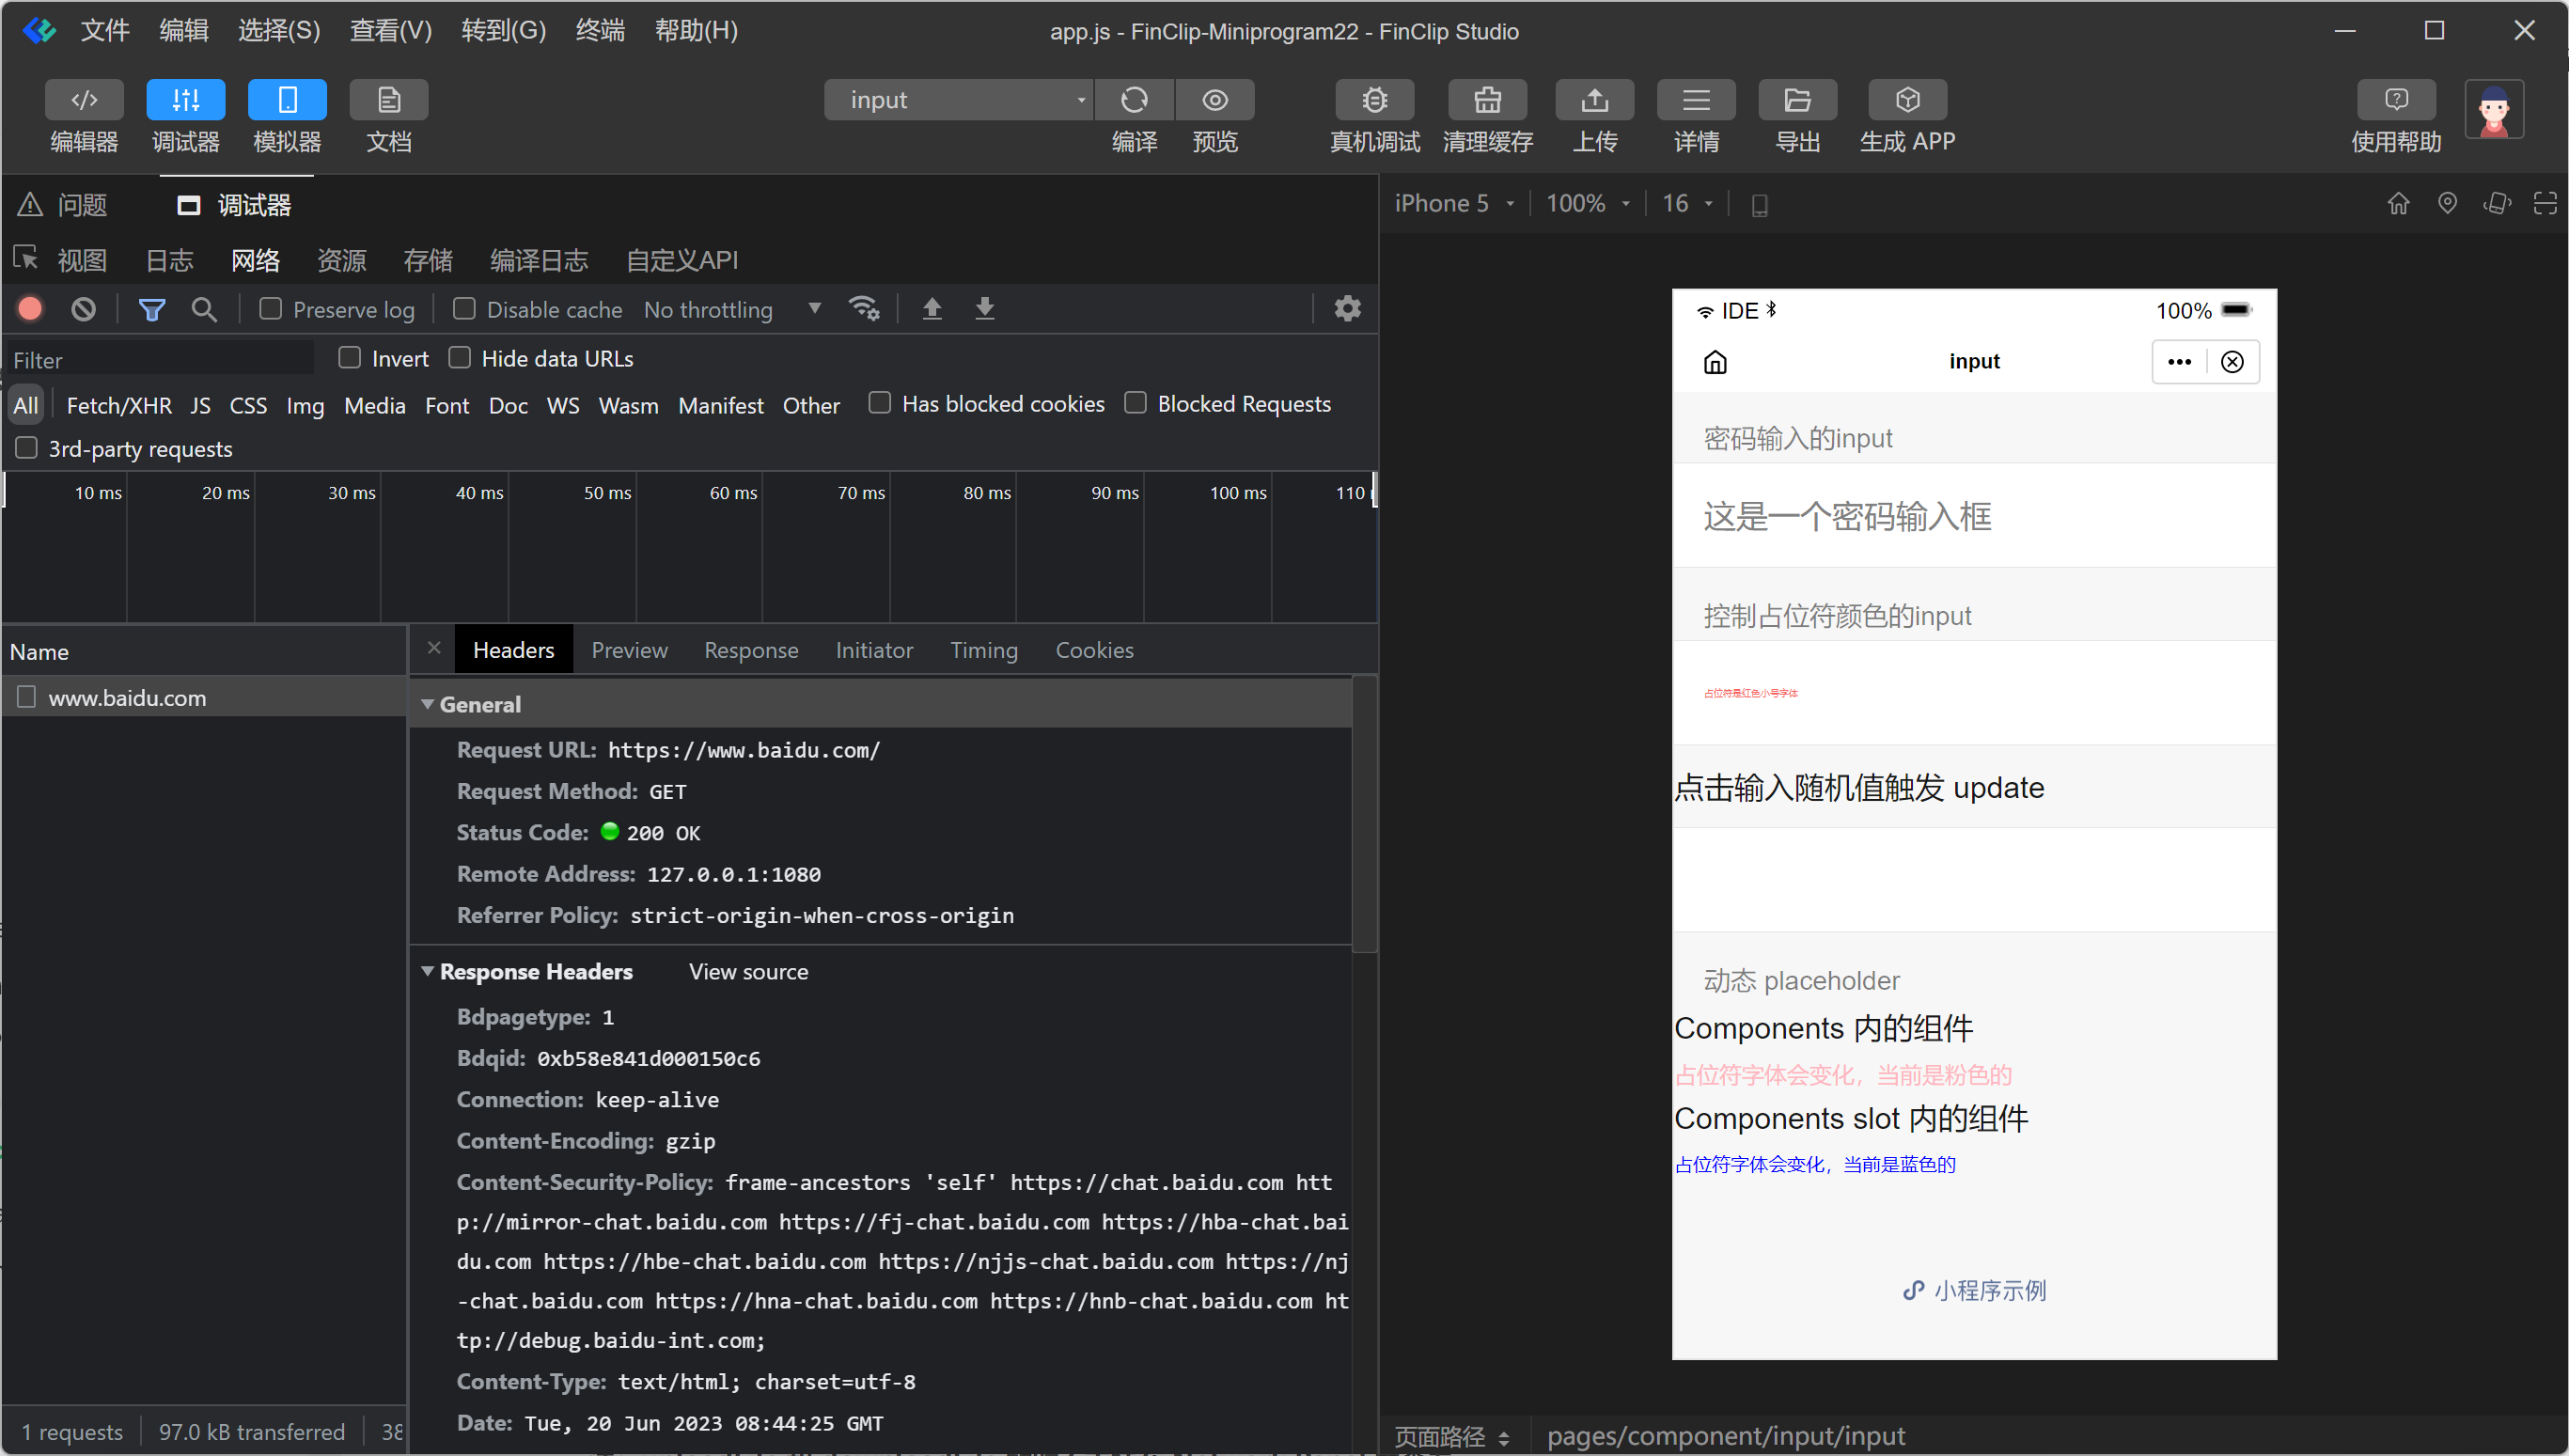
The Network panel observes and displays request details for APIs like request, uploadFile, downloadFile, and websocket.
# 6.4 Sources
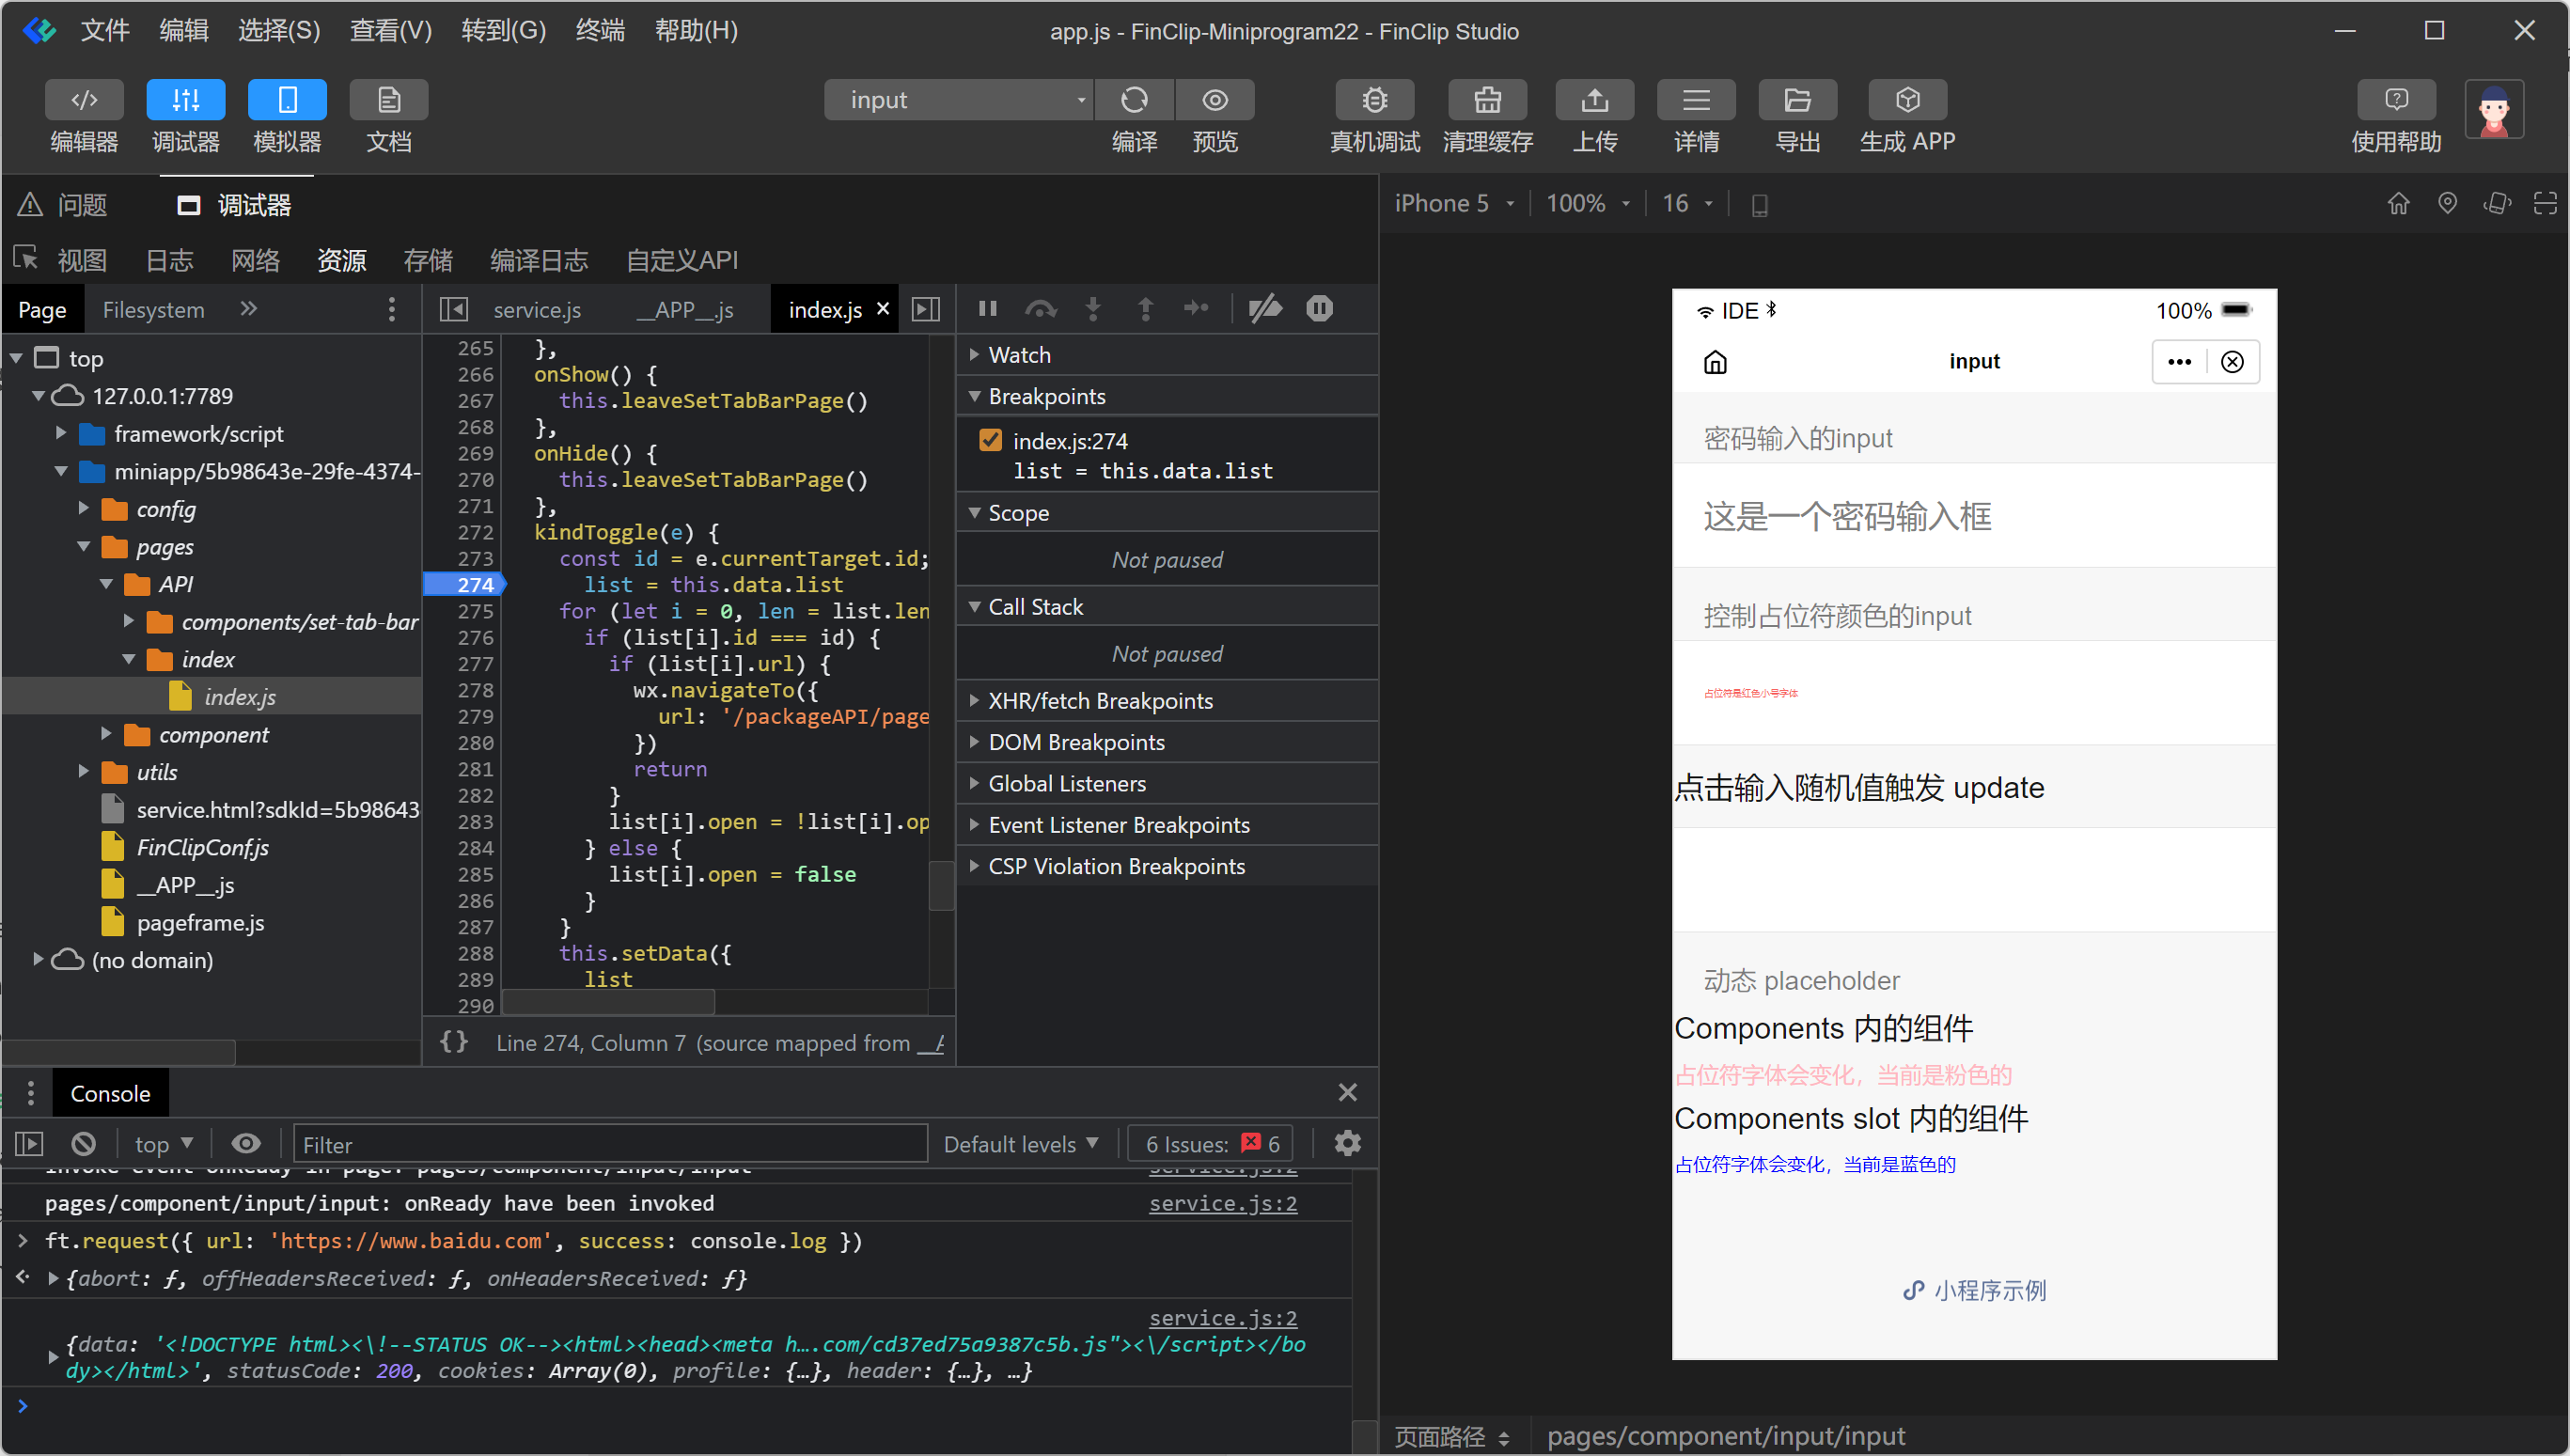
The Sources panel allows setting breakpoints for debugging the Mini-Program.
**APP**.js is the actual compiled and running code.
Based on the code directory of the Mini-Program page, you can find the source-mapped original .js code.
Breakpoint debugging can be performed both in **APP**.js and the source-mapped original source code.
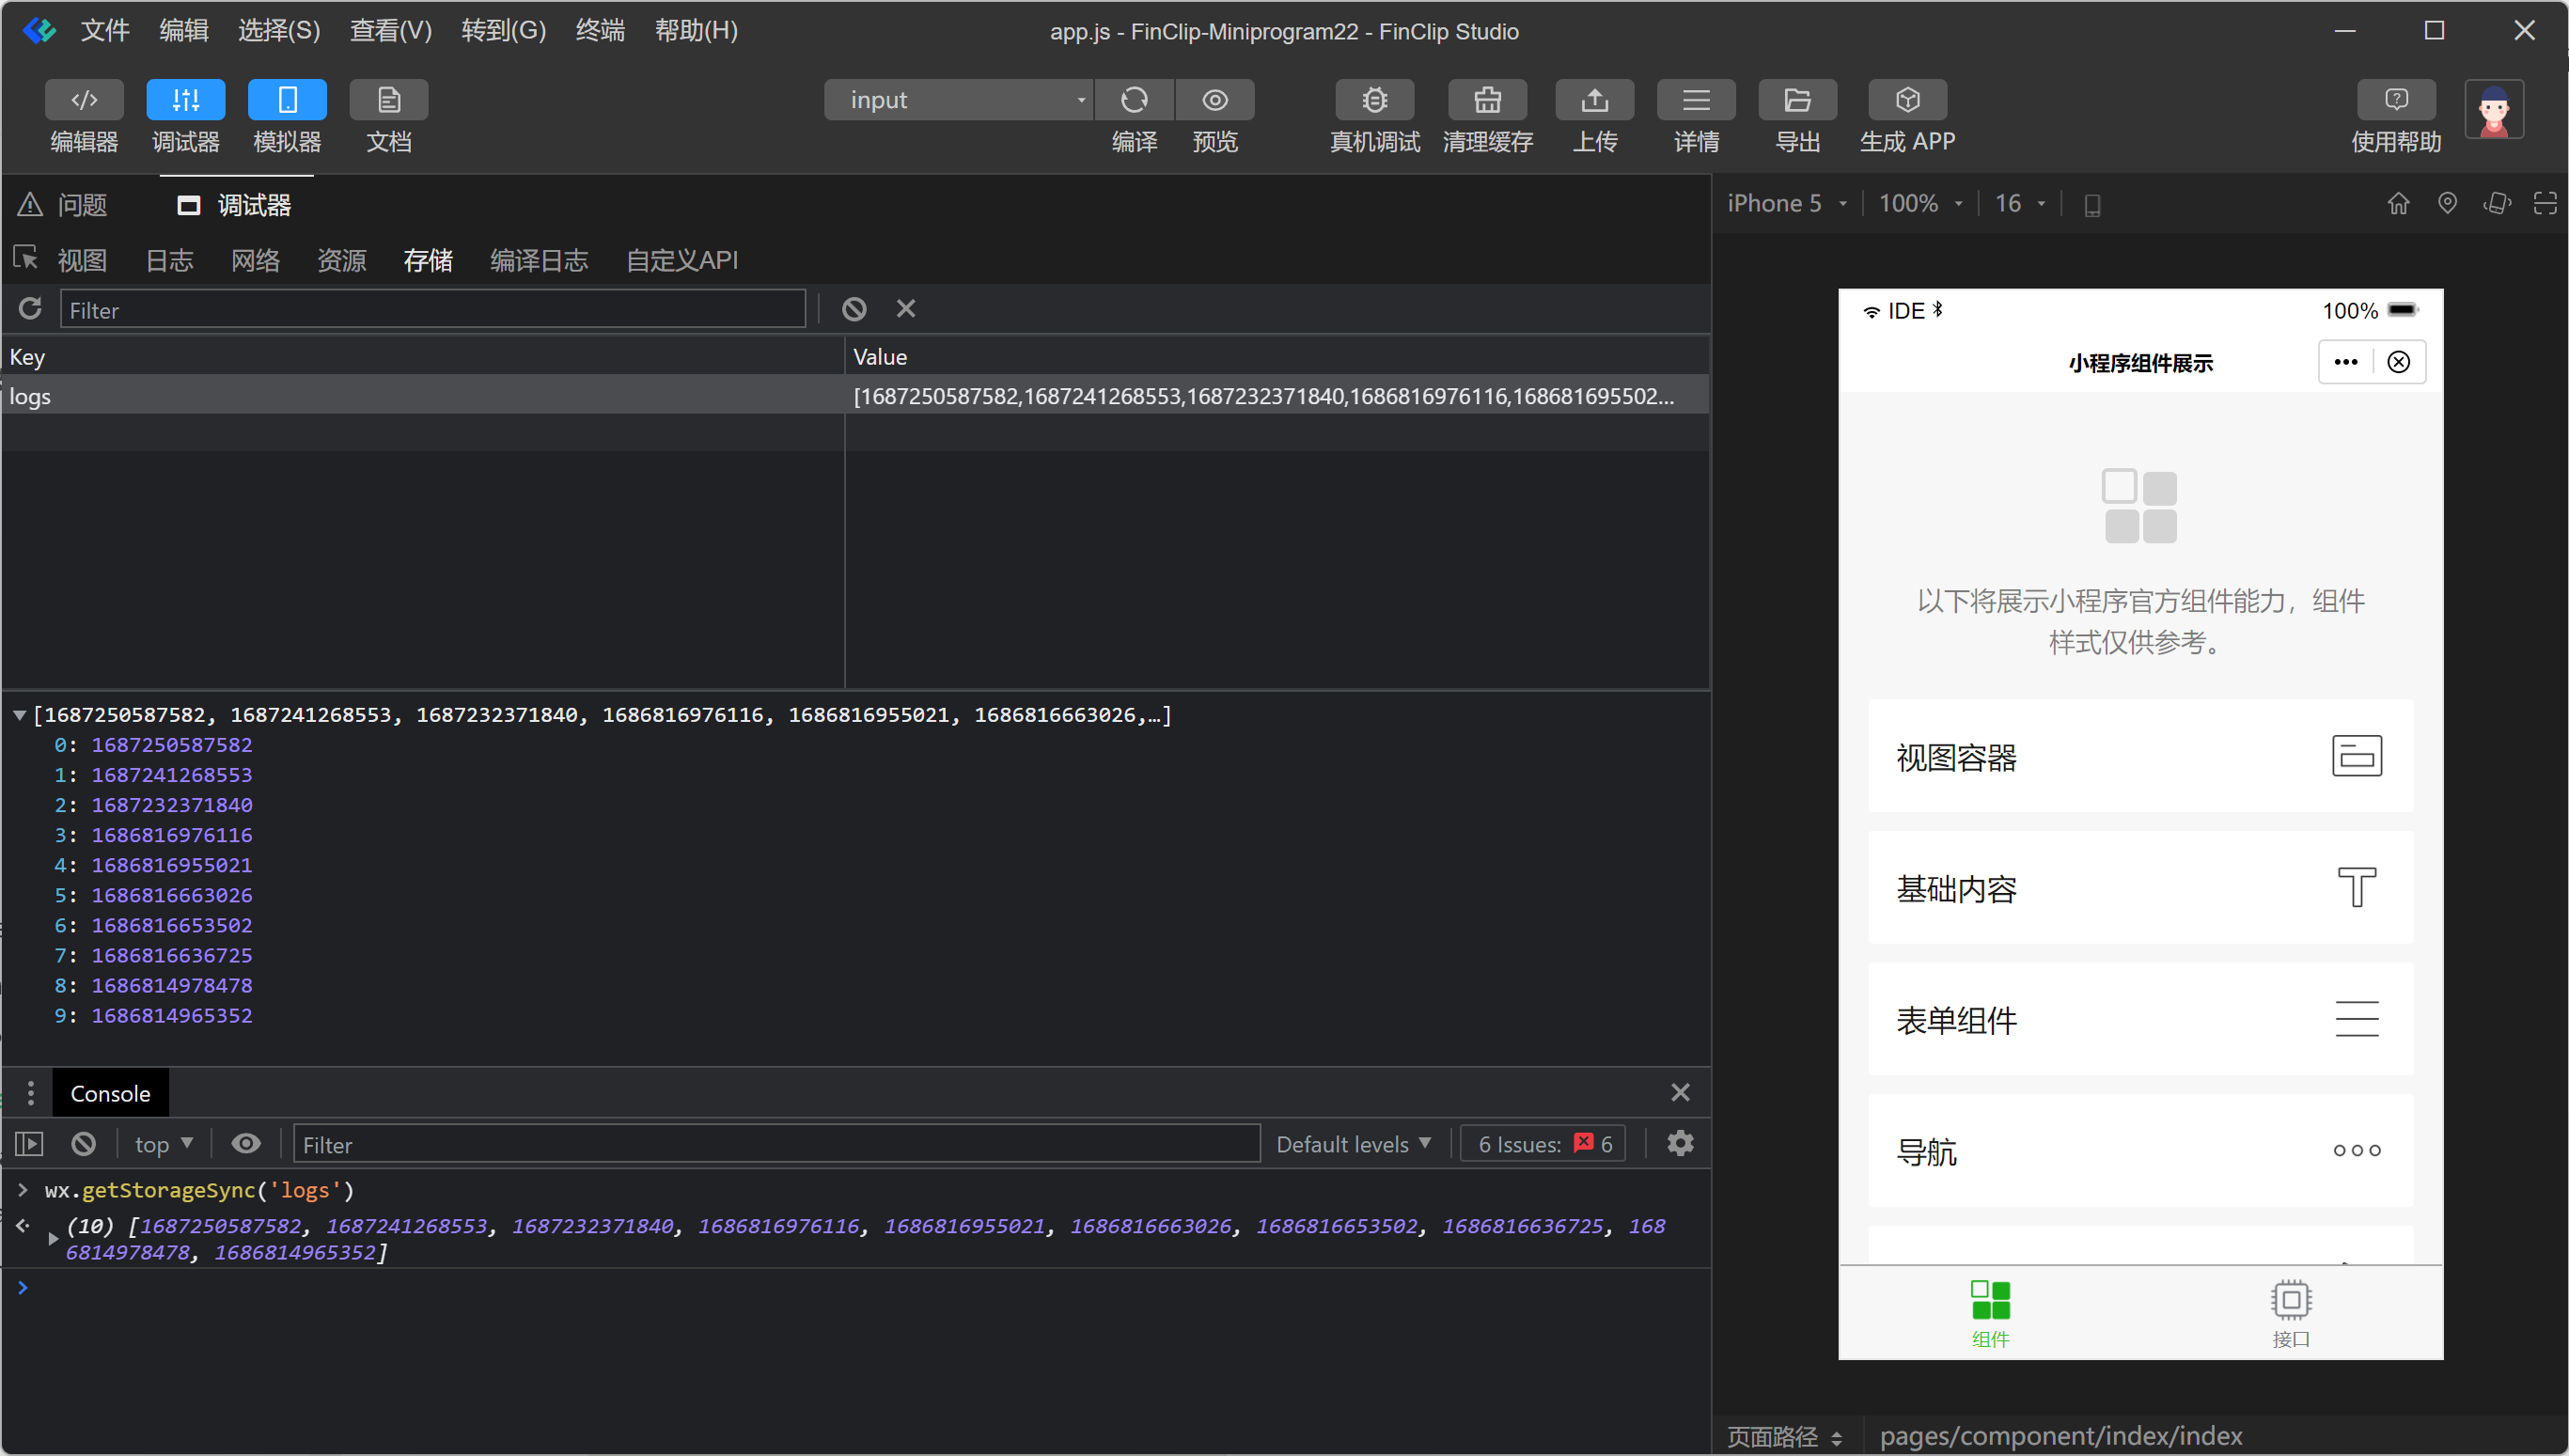
# 6.5 Storage
Displays the data storage situation for the current project using storage-related interfaces.
Data can be directly deleted (press Delete key), added, or modified within the Storage panel.
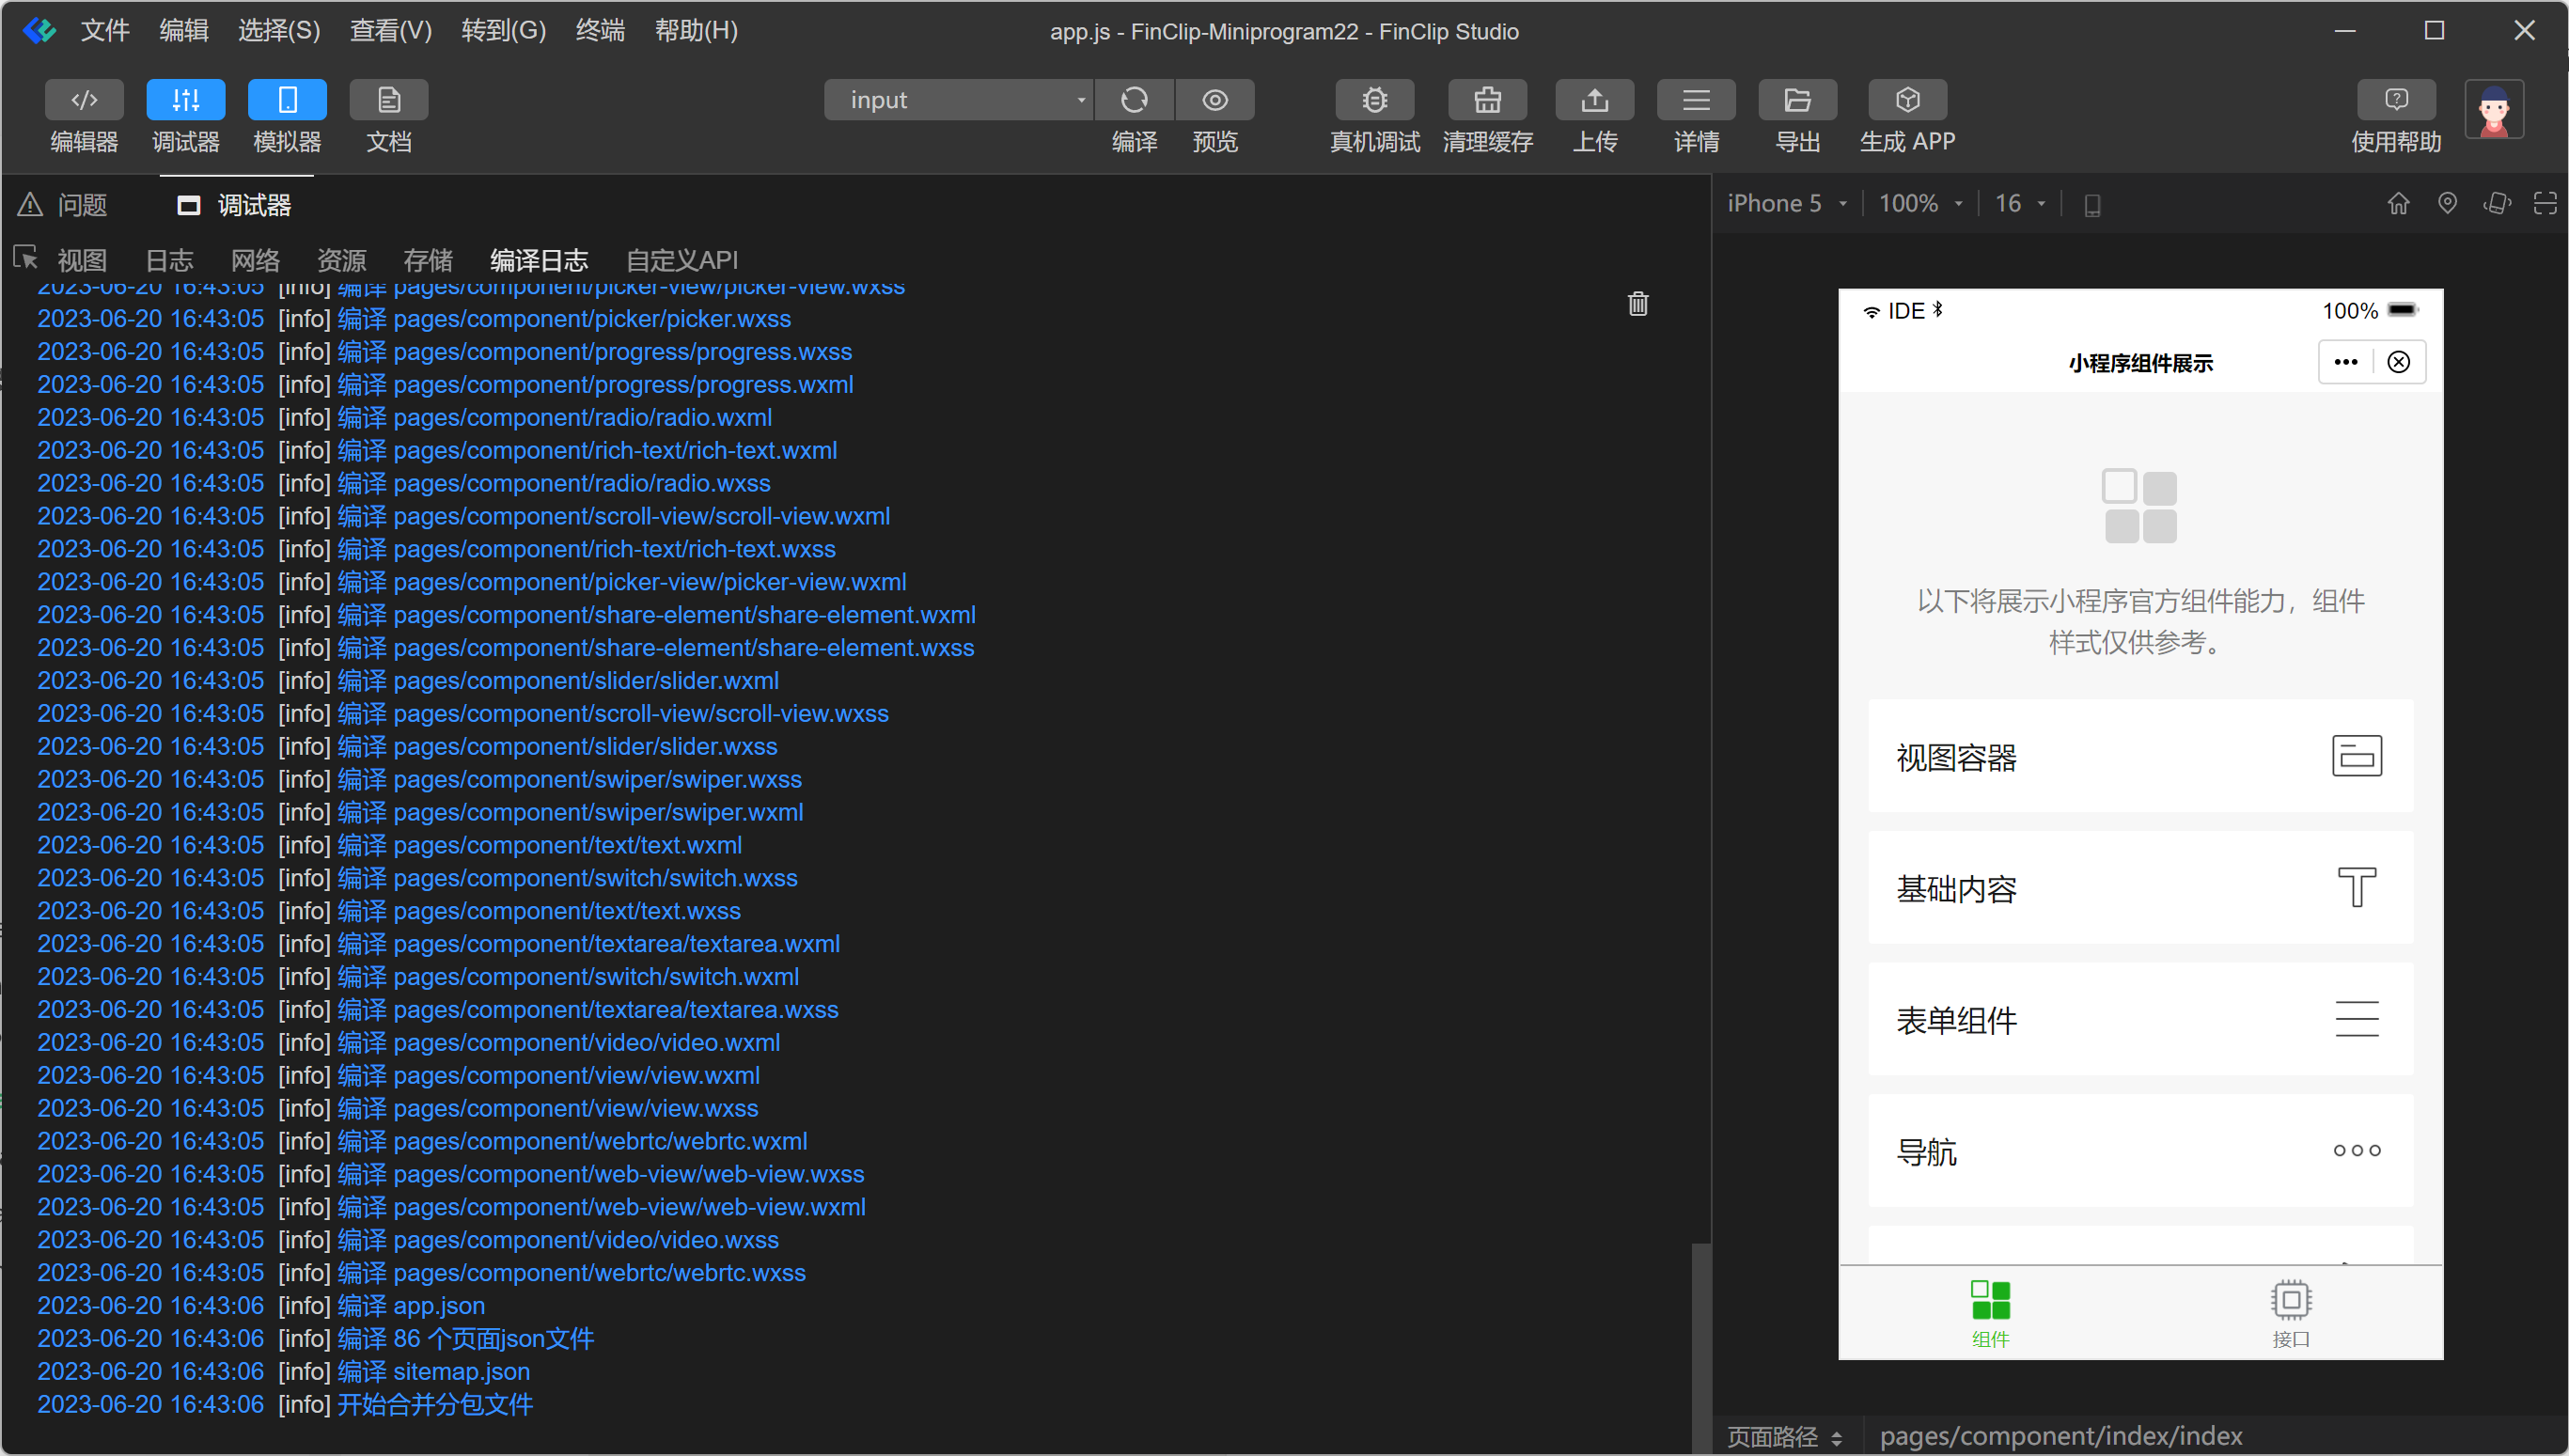
# 6.6 Compilation Logs
View the Mini-Program's compilation logs here.
# 6.7 Custom APIs
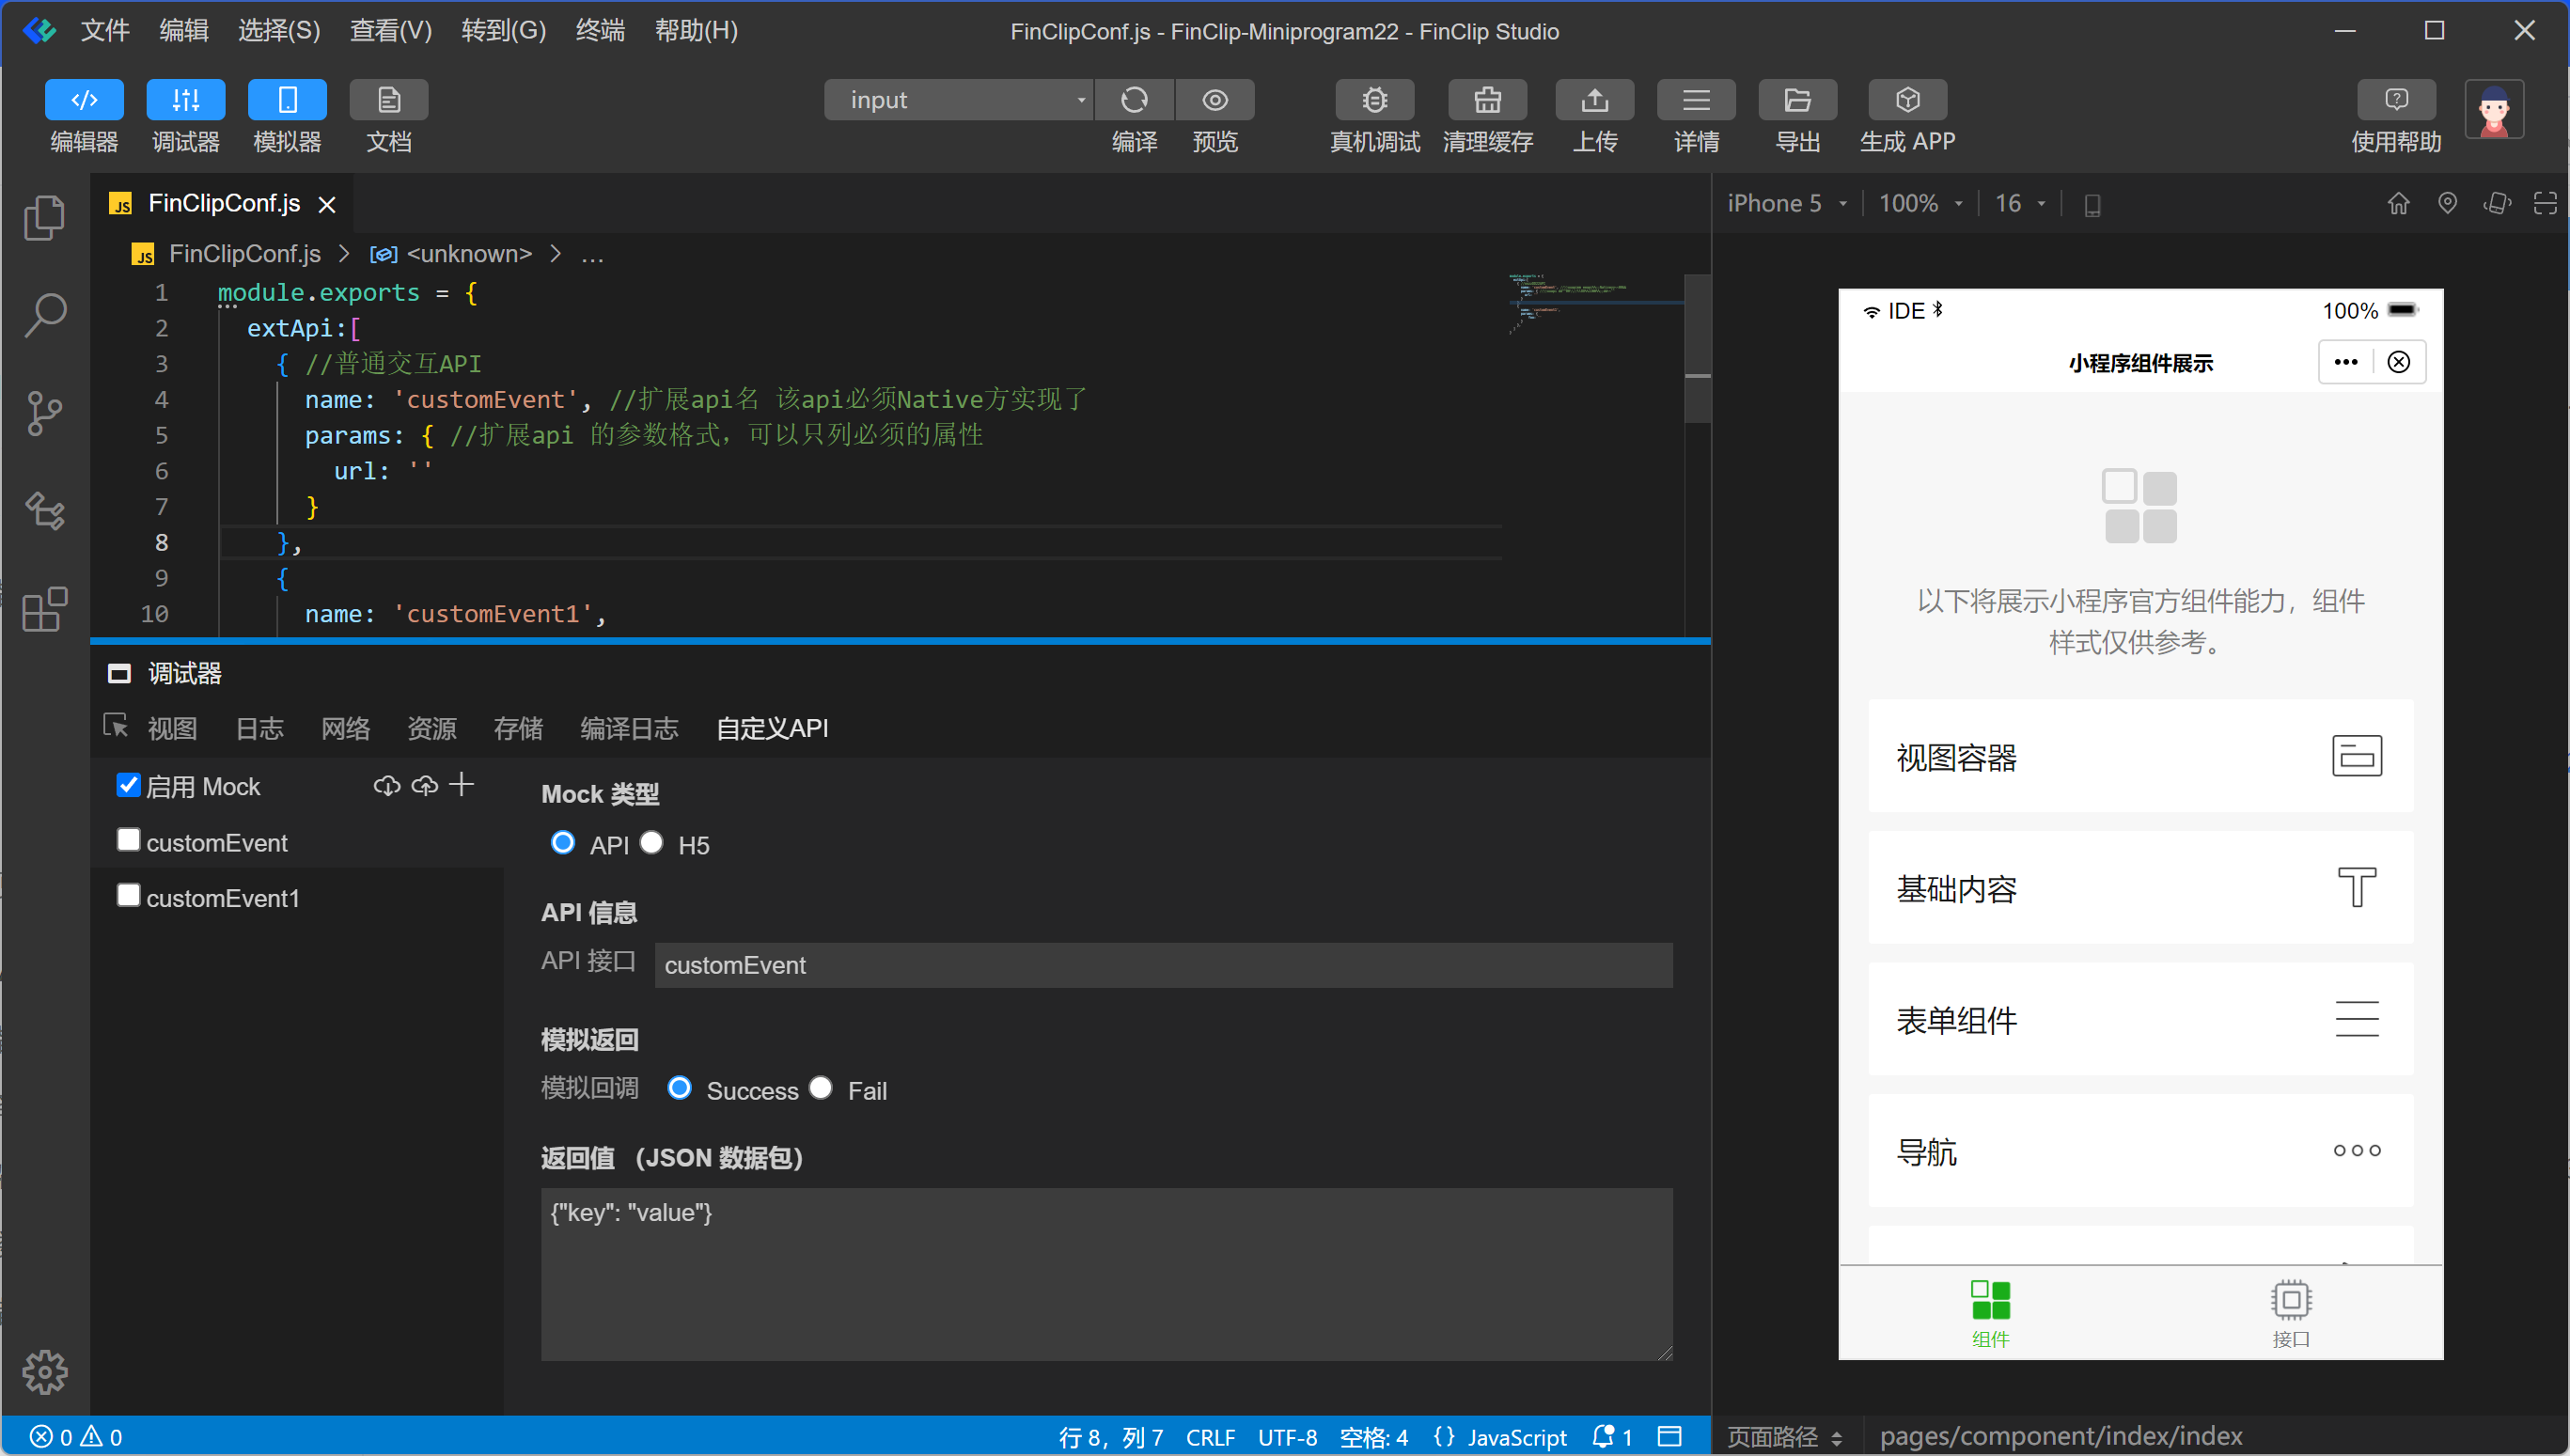
If a Mini-Program needs to call capabilities provided by the Host-App that are not implemented or cannot be implemented by the FinClip Mini-Program SDK, Custom APIs can be registered. This enables the Mini-Program to call APIs registered within the App.
For documentation on the FinClip Custom API mechanism, please refer to the links:
- iOS: https://super-apps.ai/mop/document/runtime-sdk/ios/api/api-custom.html (opens new window)
- Android: https://super-apps.ai/mop/document/runtime-sdk/android/api/api-custom.html (opens new window)
FinClip Studio automatically scans the Custom API configurations in FinClipConf.js and adds them to the Custom API panel.
Within the Custom API panel, you can specify the mock return value and return type for Custom APIs.
Checking "Enable" causes calls to the corresponding Custom API to return the specified mock value, allowing related logic to be tested within FinClip Studio.
# 6.8 Low-Code Development Capability
You can select the "Low-Code" template when creating a new project to explore its usage. Alternatively, click here to view the detailed guide for the low-code tool.
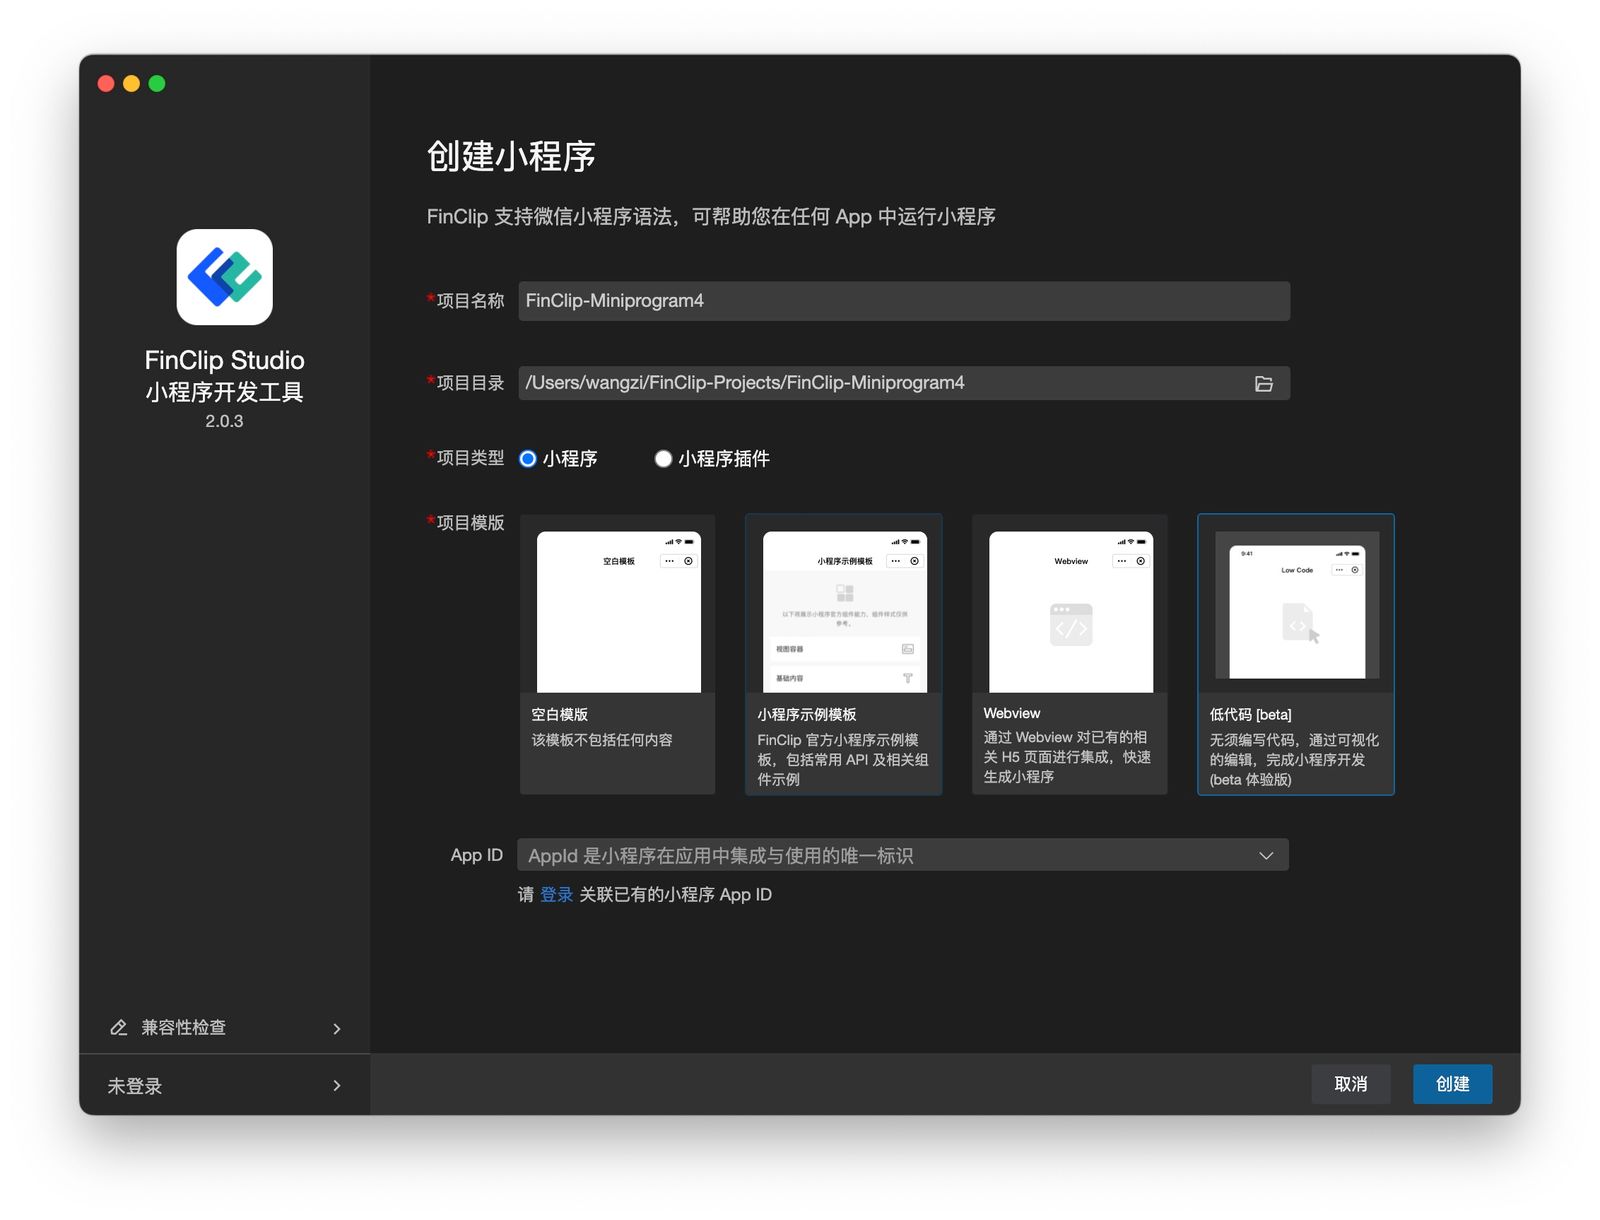
Different from common low-code development tools on the market, the low-code tool provided by FinClip Studio is more oriented towards R&D personnel, aiming to accelerate their development process and thereby making the development of related projects and applications simpler.
# Direct Data Source Connection
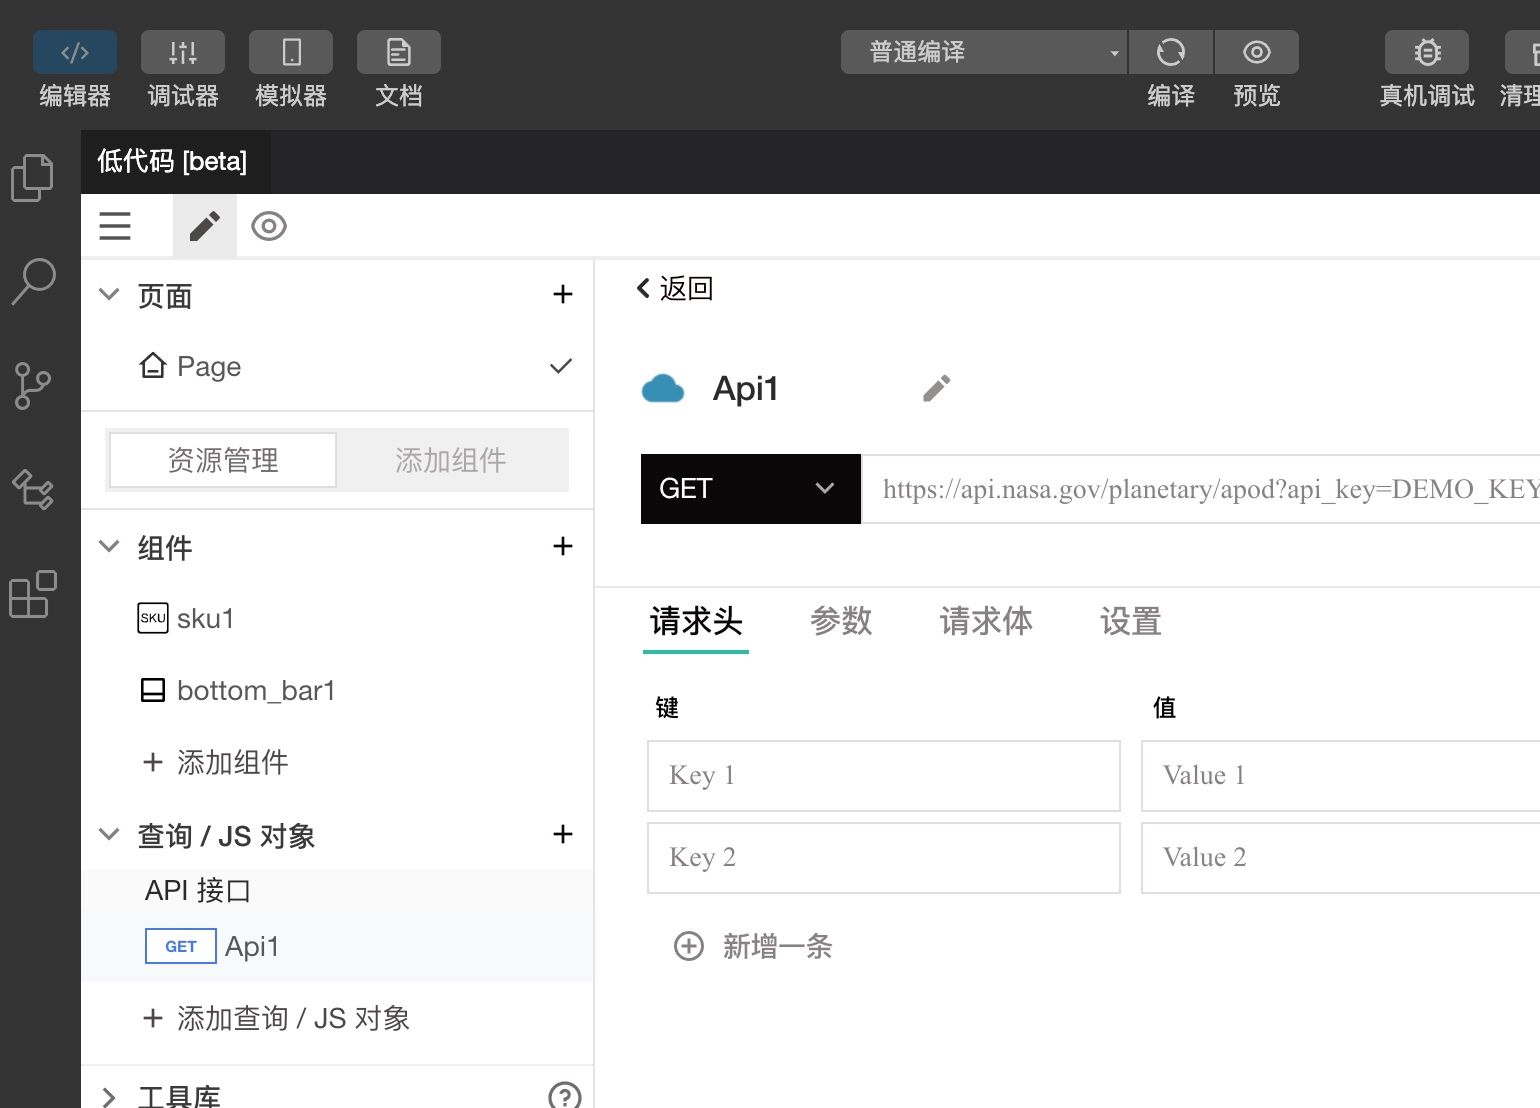
The low-code tool can directly connect to data sources (API, DB) without intruding into the customer's architecture. Any backend data becomes JS variables that can be freely transformed and configured onto any view component.
# Visual Modeling Tools
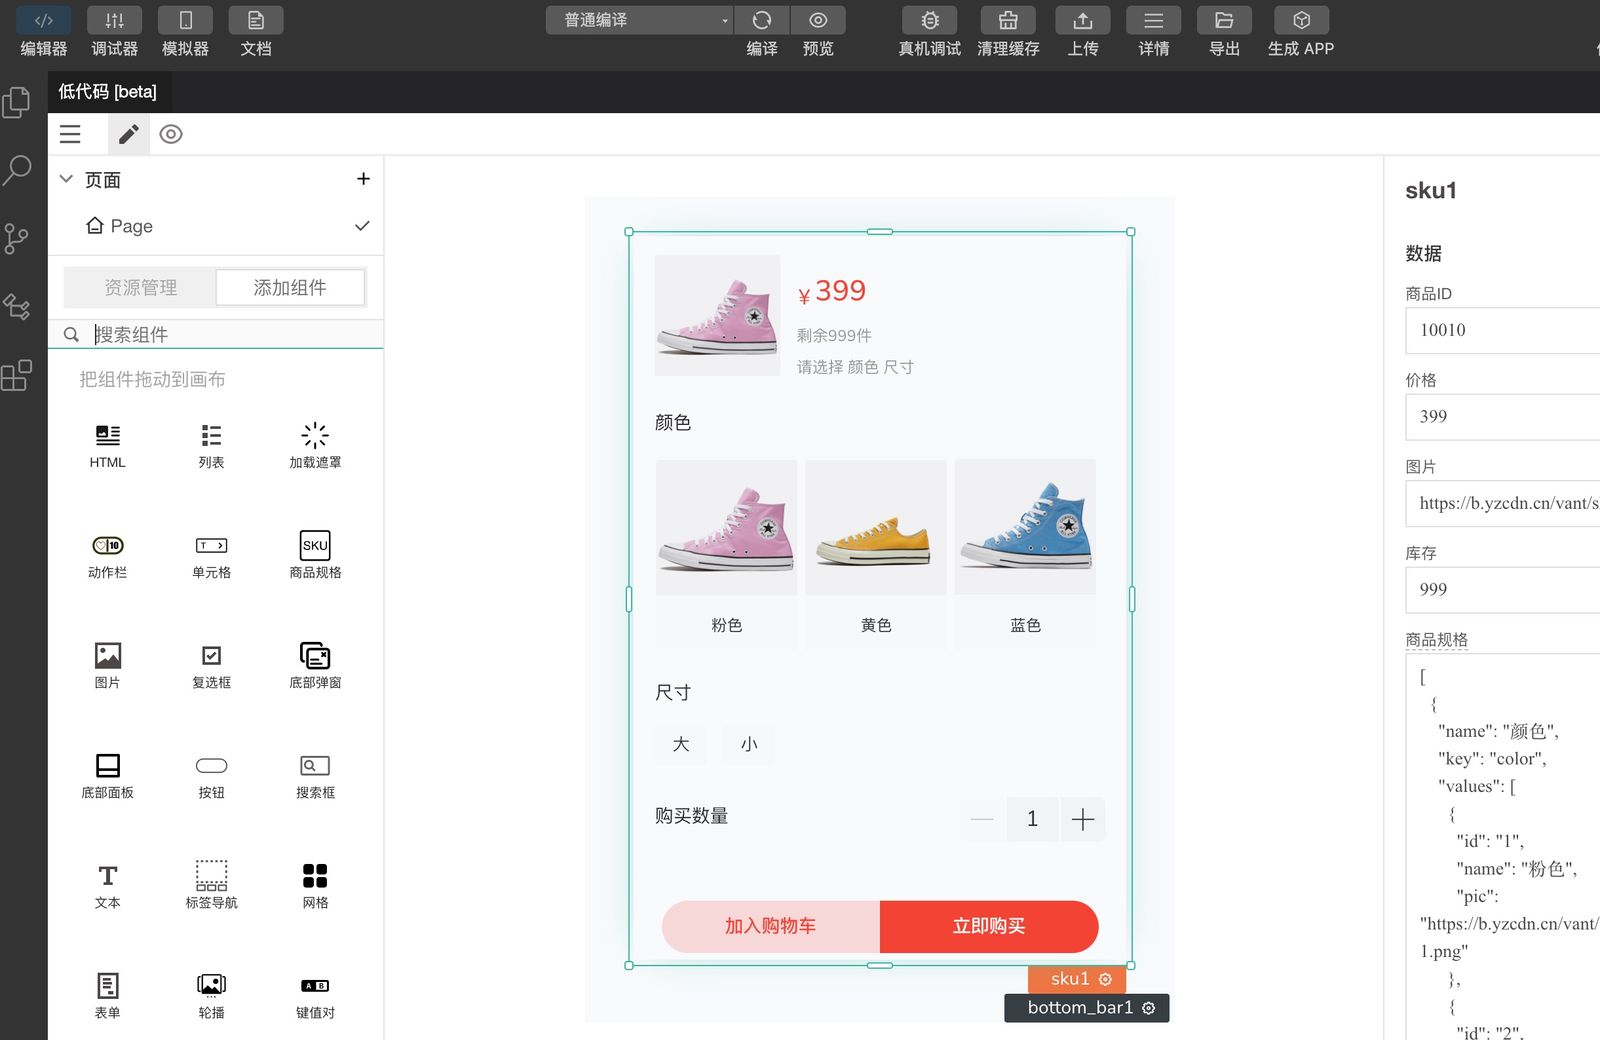 The low-code tool comes with intuitive and flexible visual modeling components, such as tables, charts, forms, buttons, and more. Developers can configure various components through drag-and-drop actions, eliminating the need to repeatedly write complex code.
# 7. FinMuse (AI Copilot)
FinMuse is an AI-powered intelligent assistant based on FinClip Mini-Programs, designed to help developers quickly implement Mini-Program functionalities.
Click FinMuse in the sidebar, and enter text in the chat panel to start a conversation. Use Shift+Enter to create a new line.

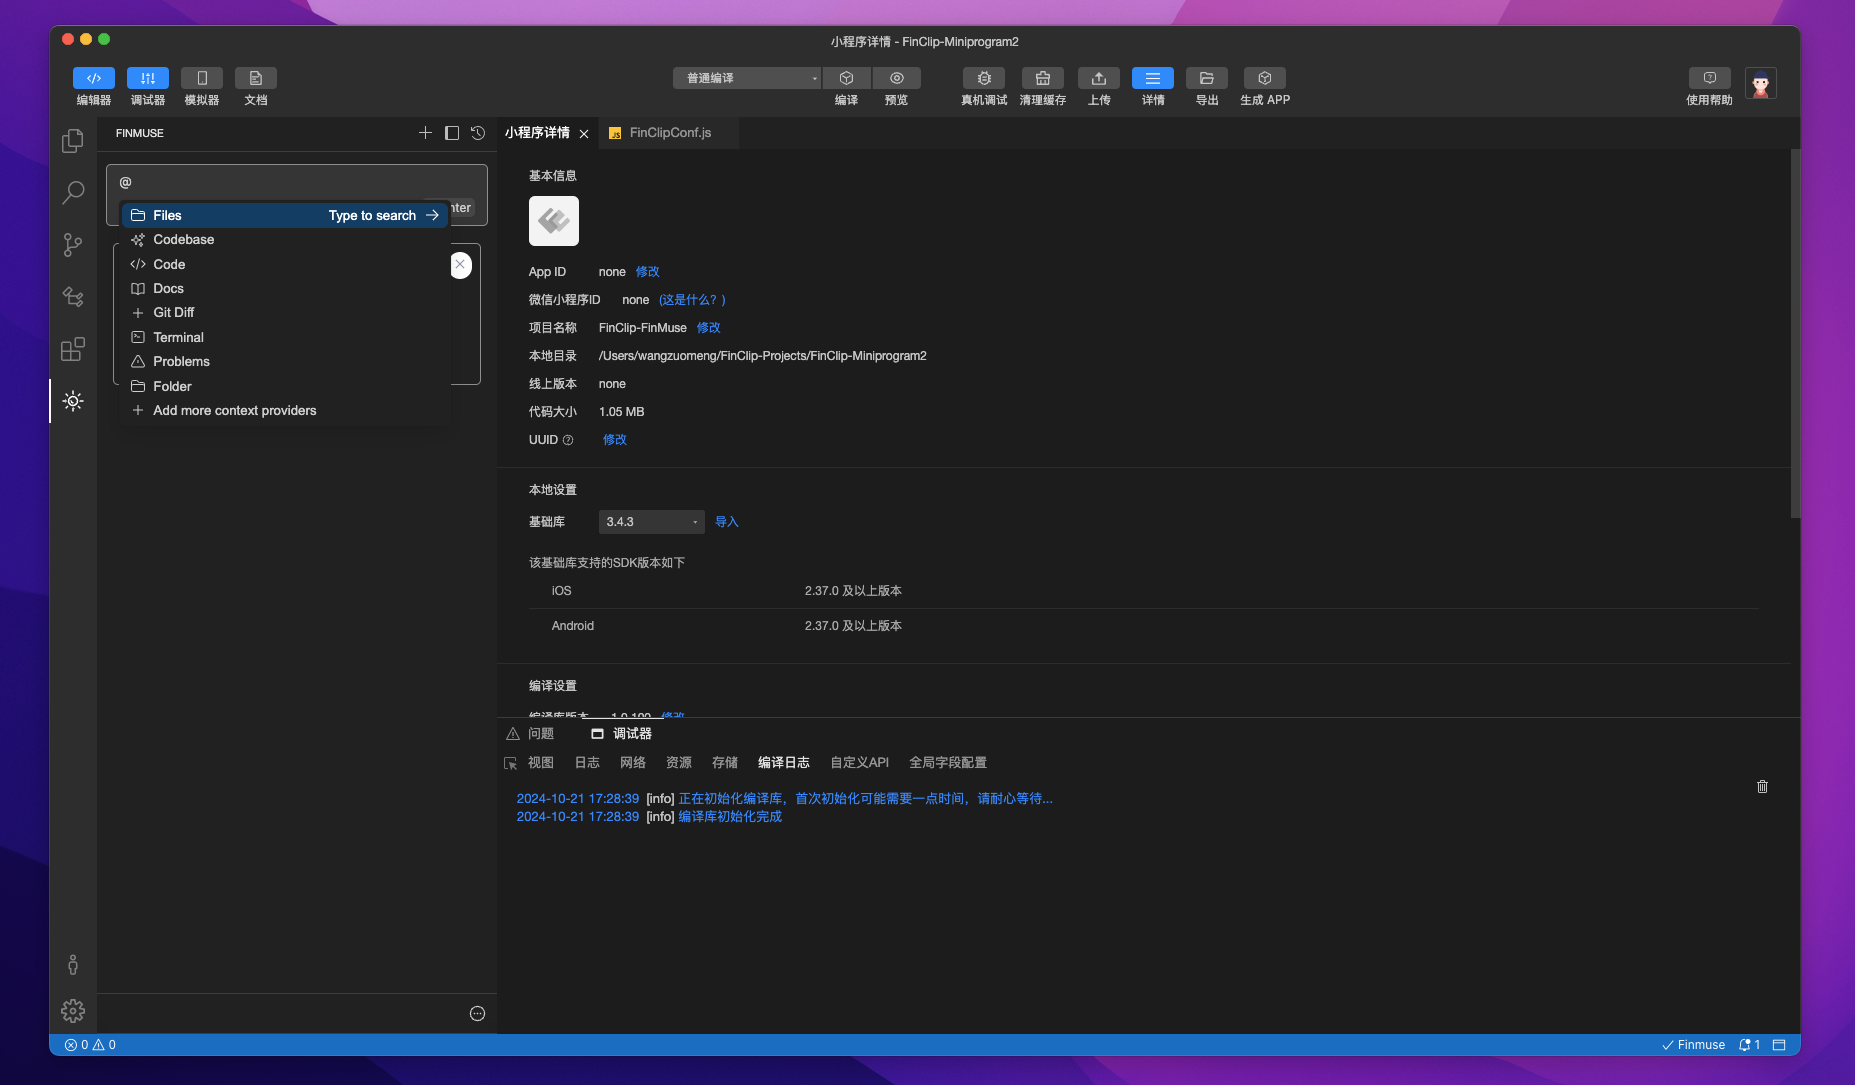
# Reference Files or Websites
Input @ to reference relevant files or webpages; this makes the response results more accurate.
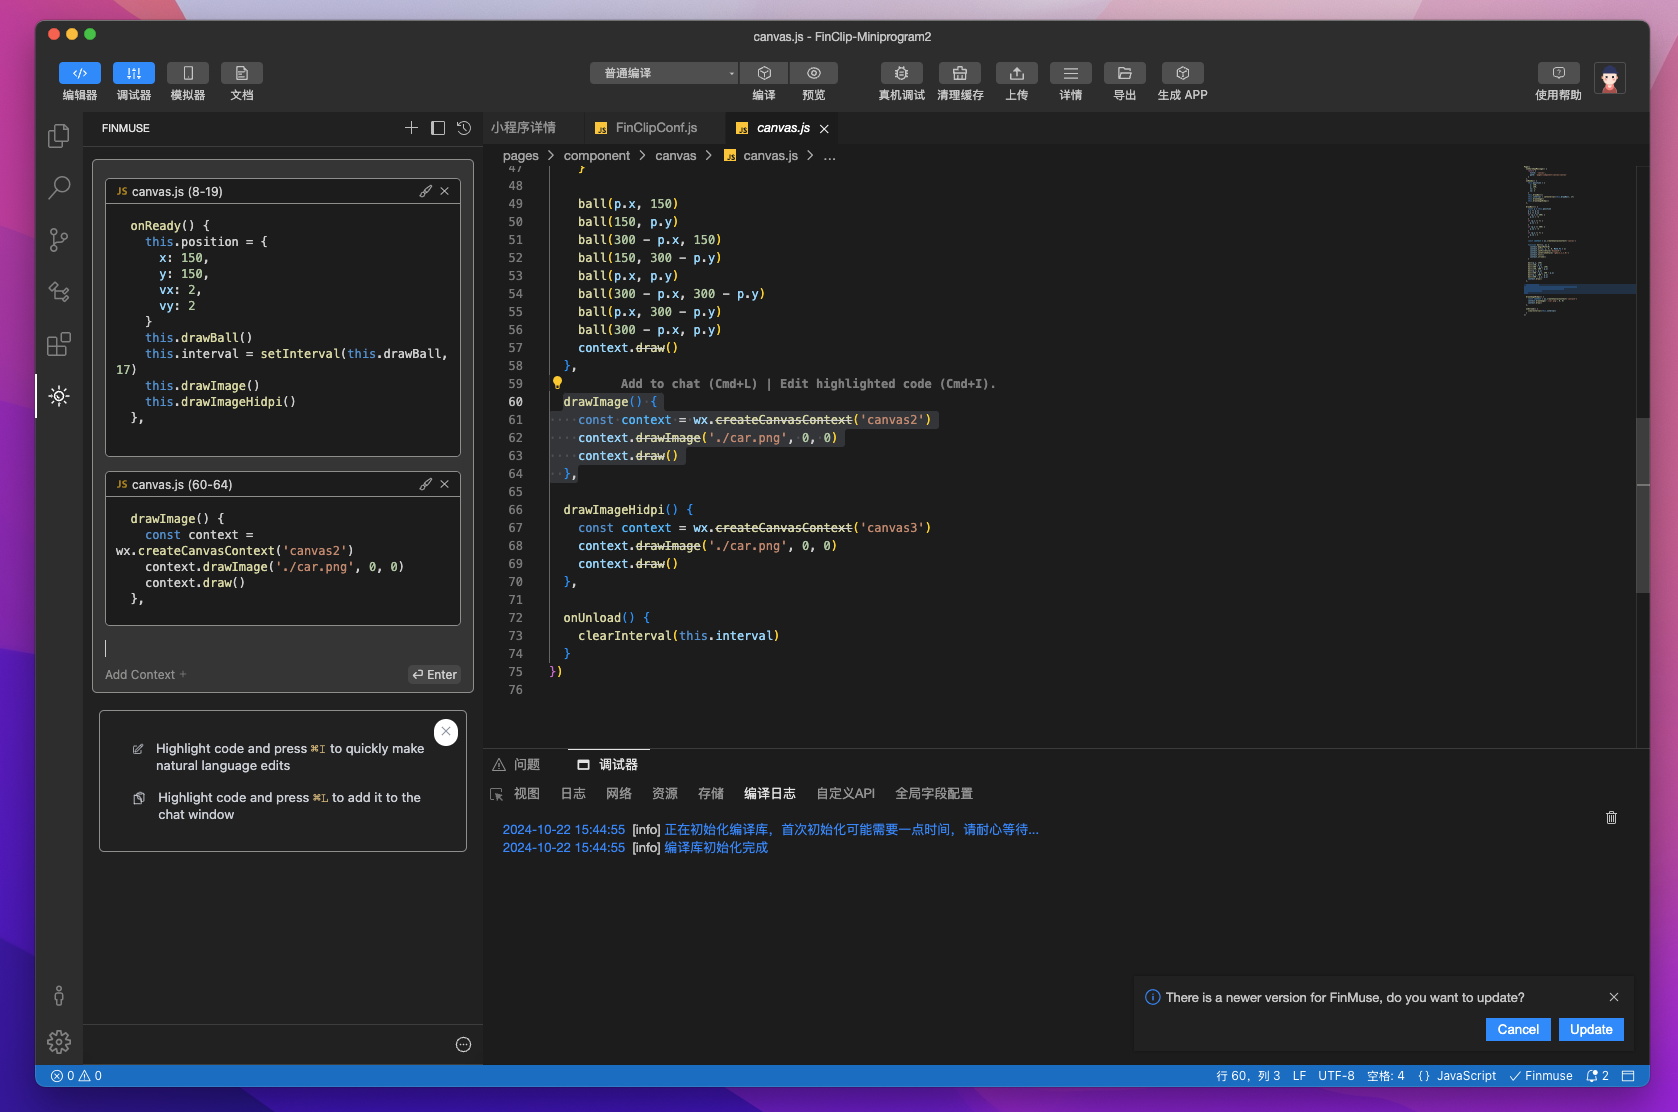
# Use Shortcut to Reference Code Blocks
Select a code block and press the shortcut Cmd+L (macOS) / Ctrl+L (Windows) to directly reference it in the chat.
After referencing a code snippet, entering the /edit command in the chat window can automatically modify the referenced code.
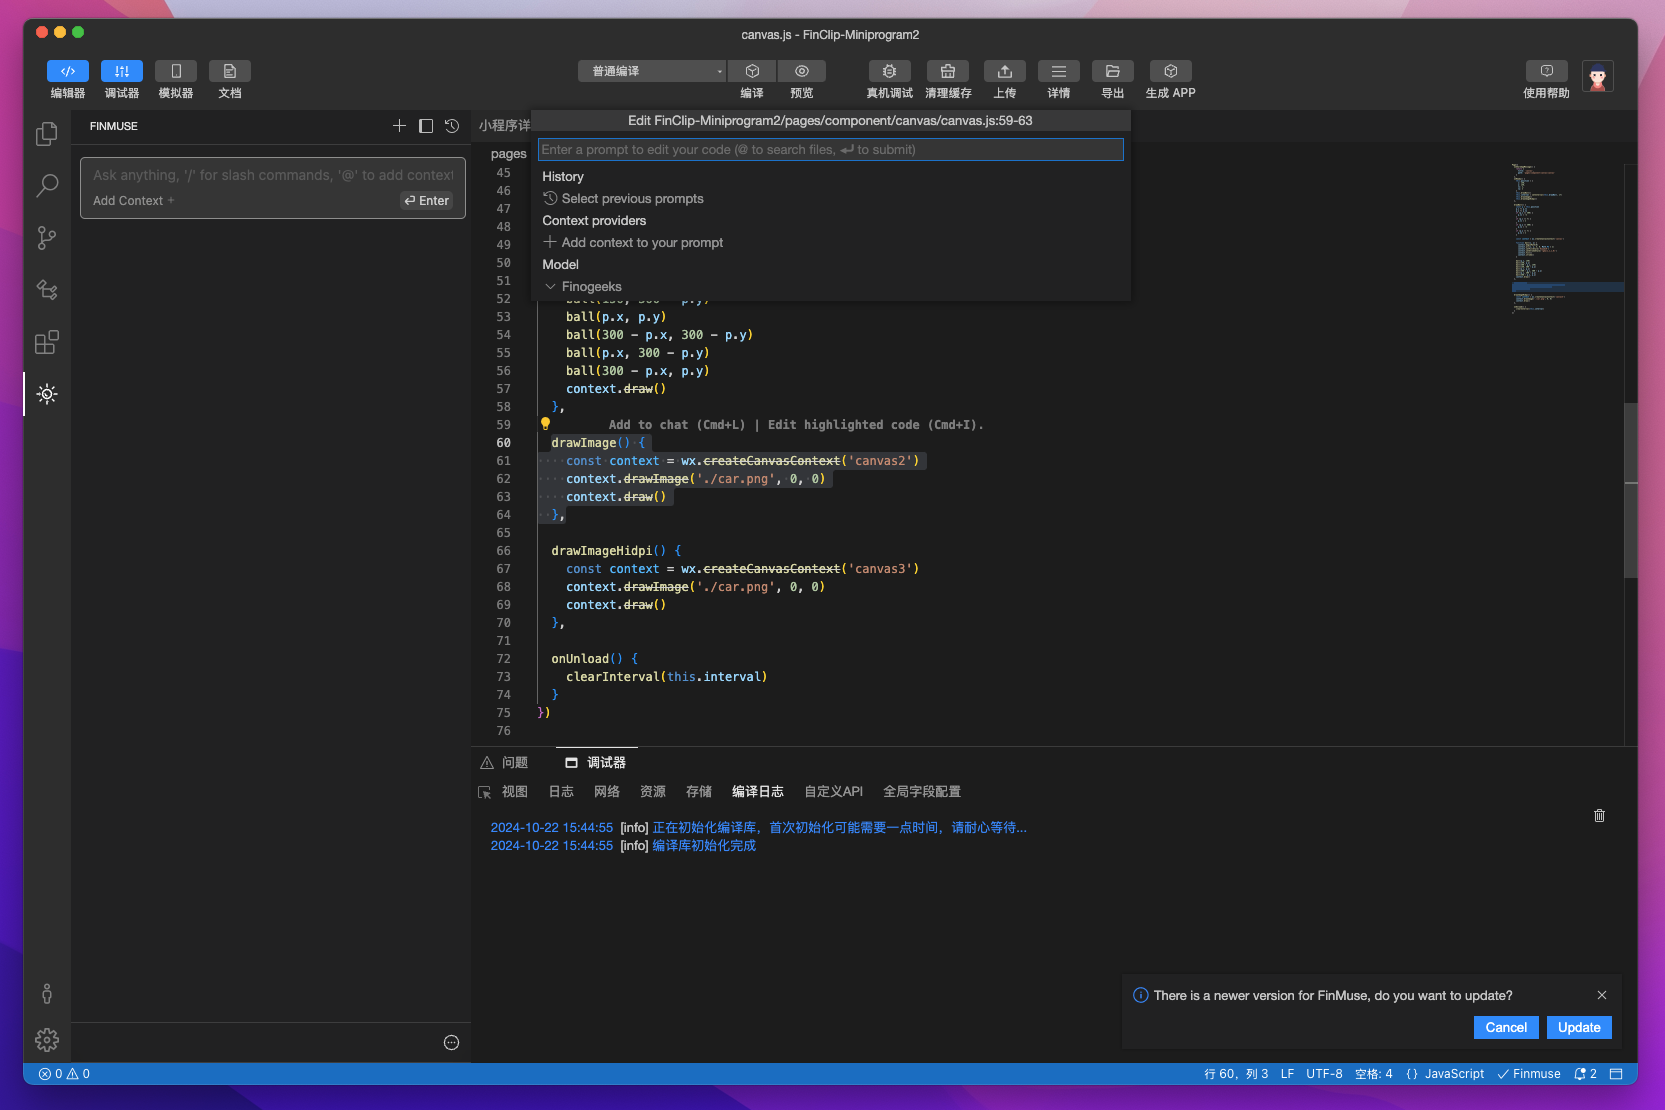
# Quickly Edit Currently Selected Code
Select a code block and press the shortcut Cmd+I (macOS) / Ctrl+I (Windows) to directly modify the selected code.
# Custom Referenced Websites
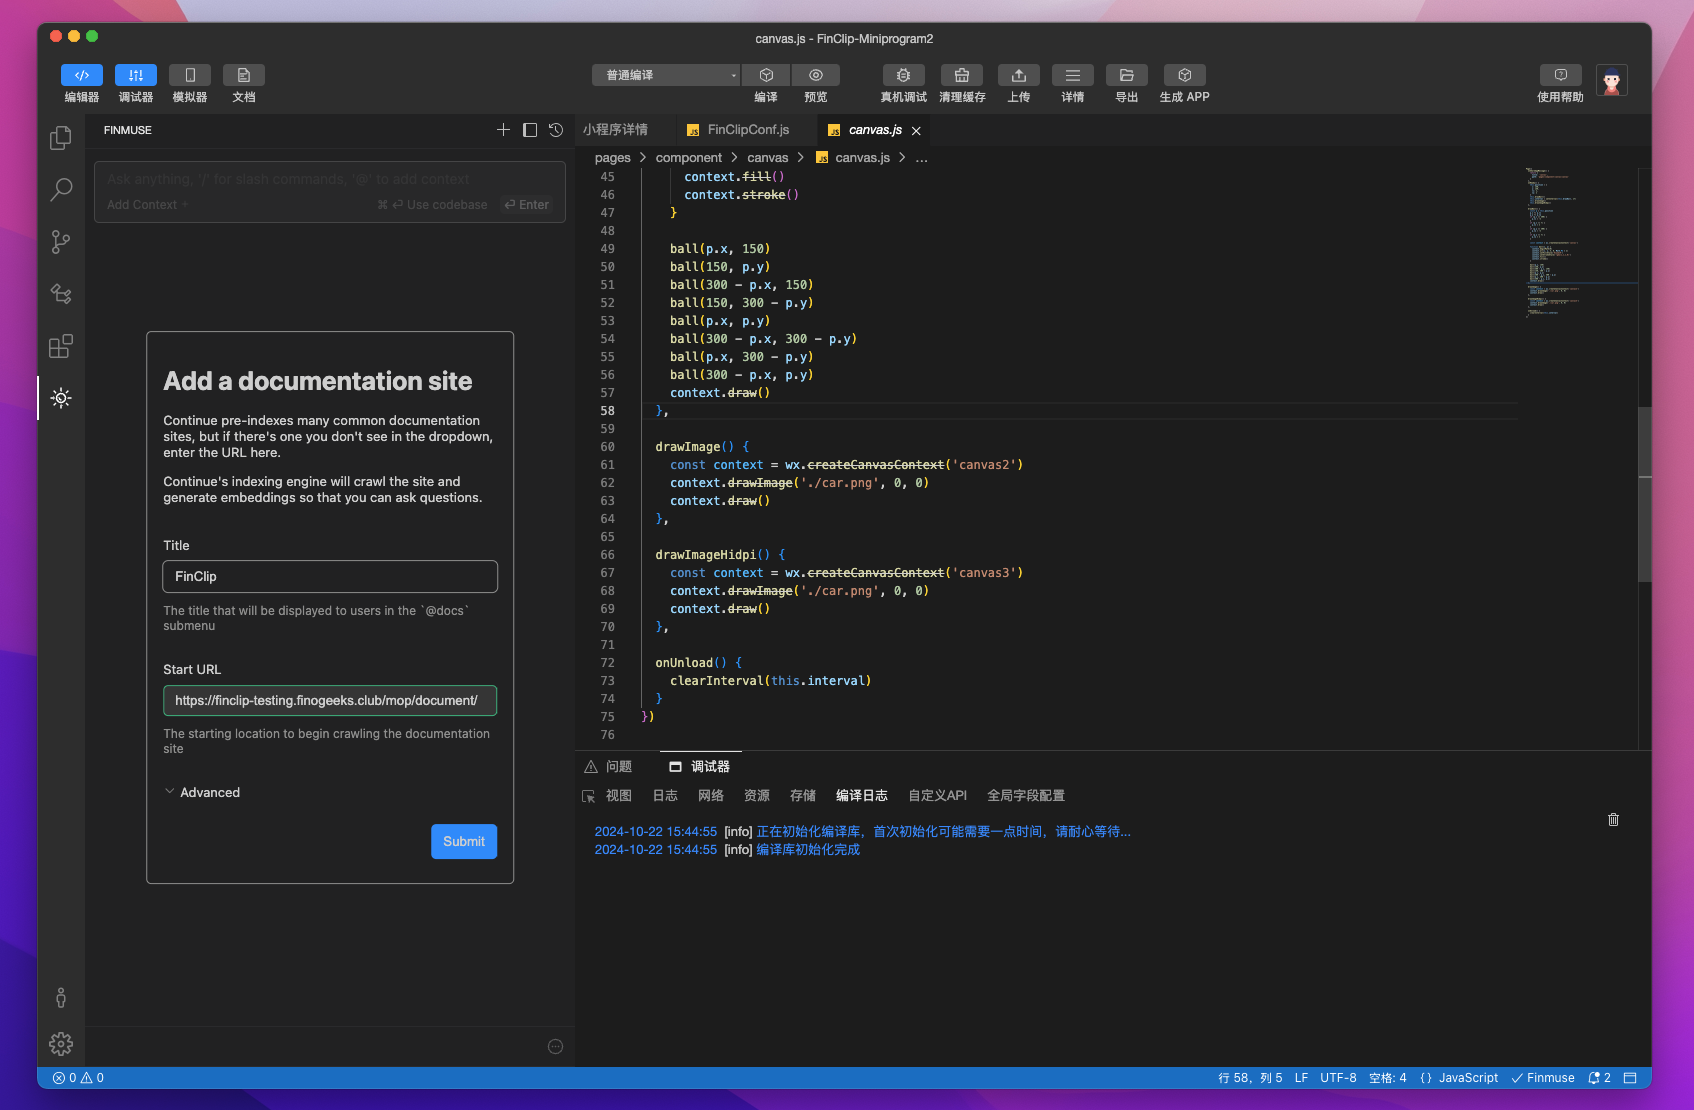
In the chat window, type @docs, press Enter, and select the Add Docs option to customize referenced documentation.
This operation requires sufficient computer performance. When adding new documentation, multiple local processes are started to crawl the website content, generating embeddings locally.
# Custom Commands
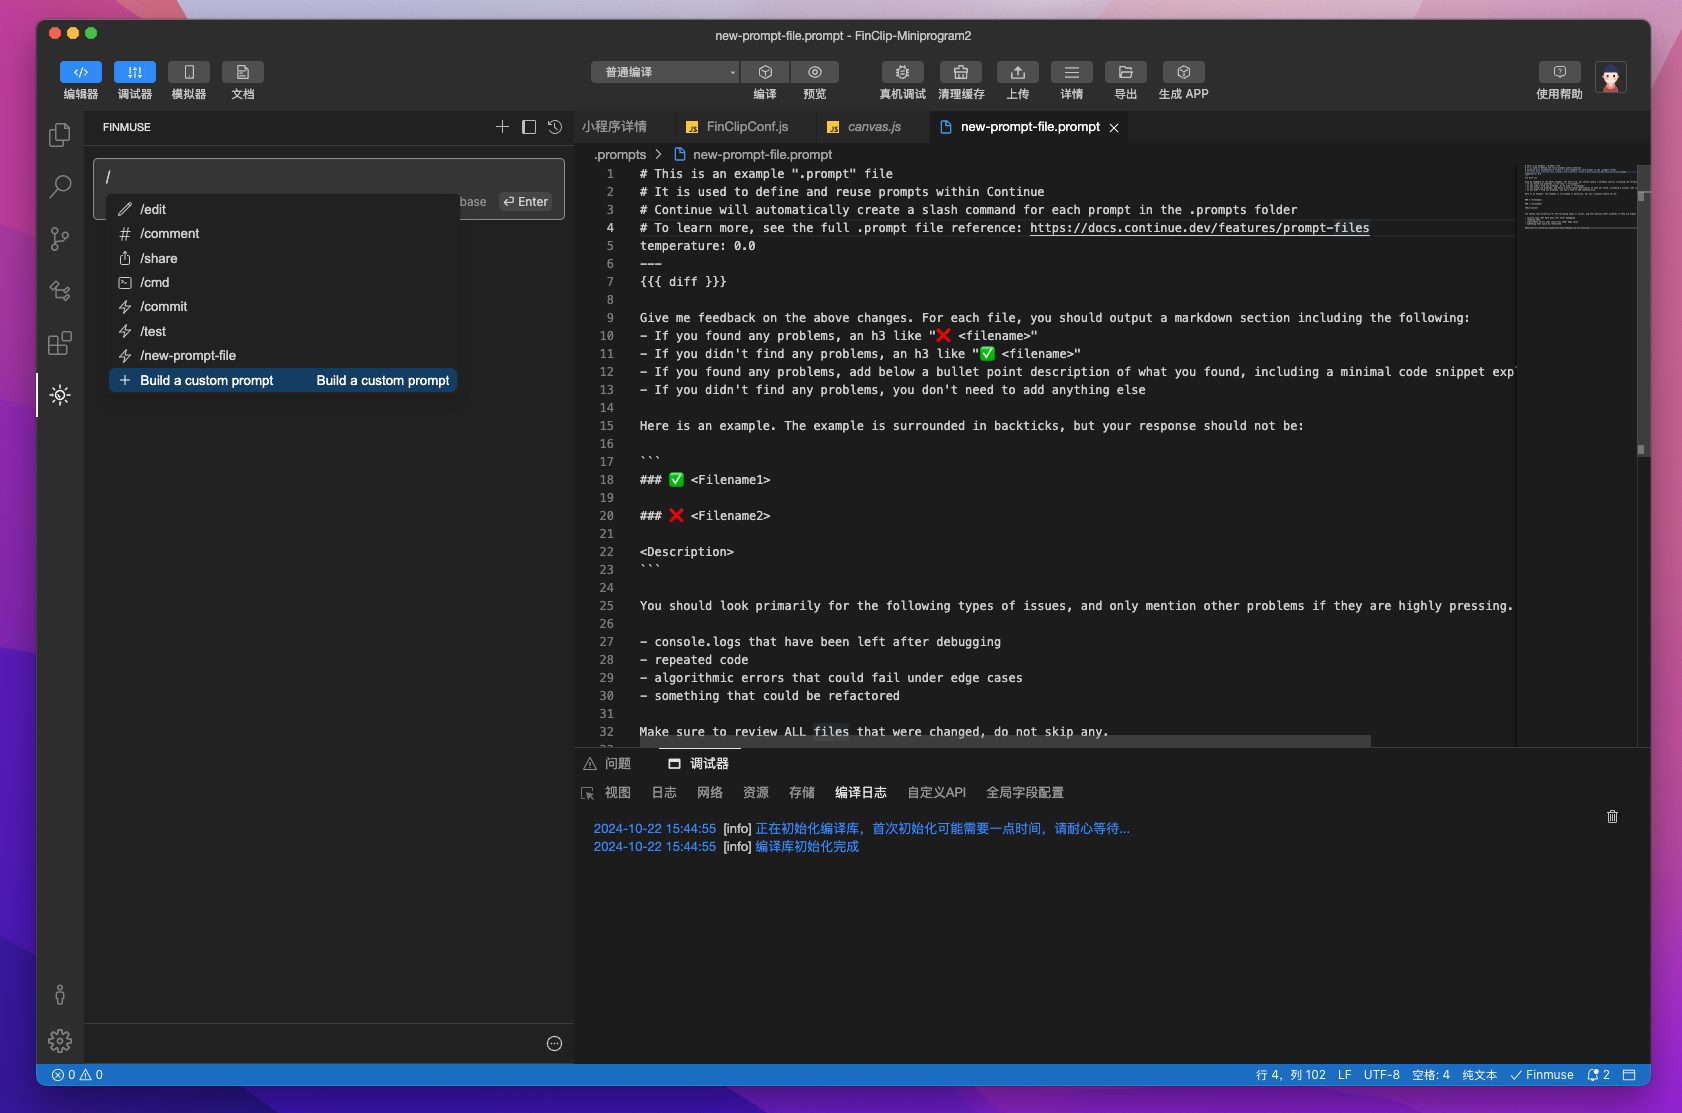
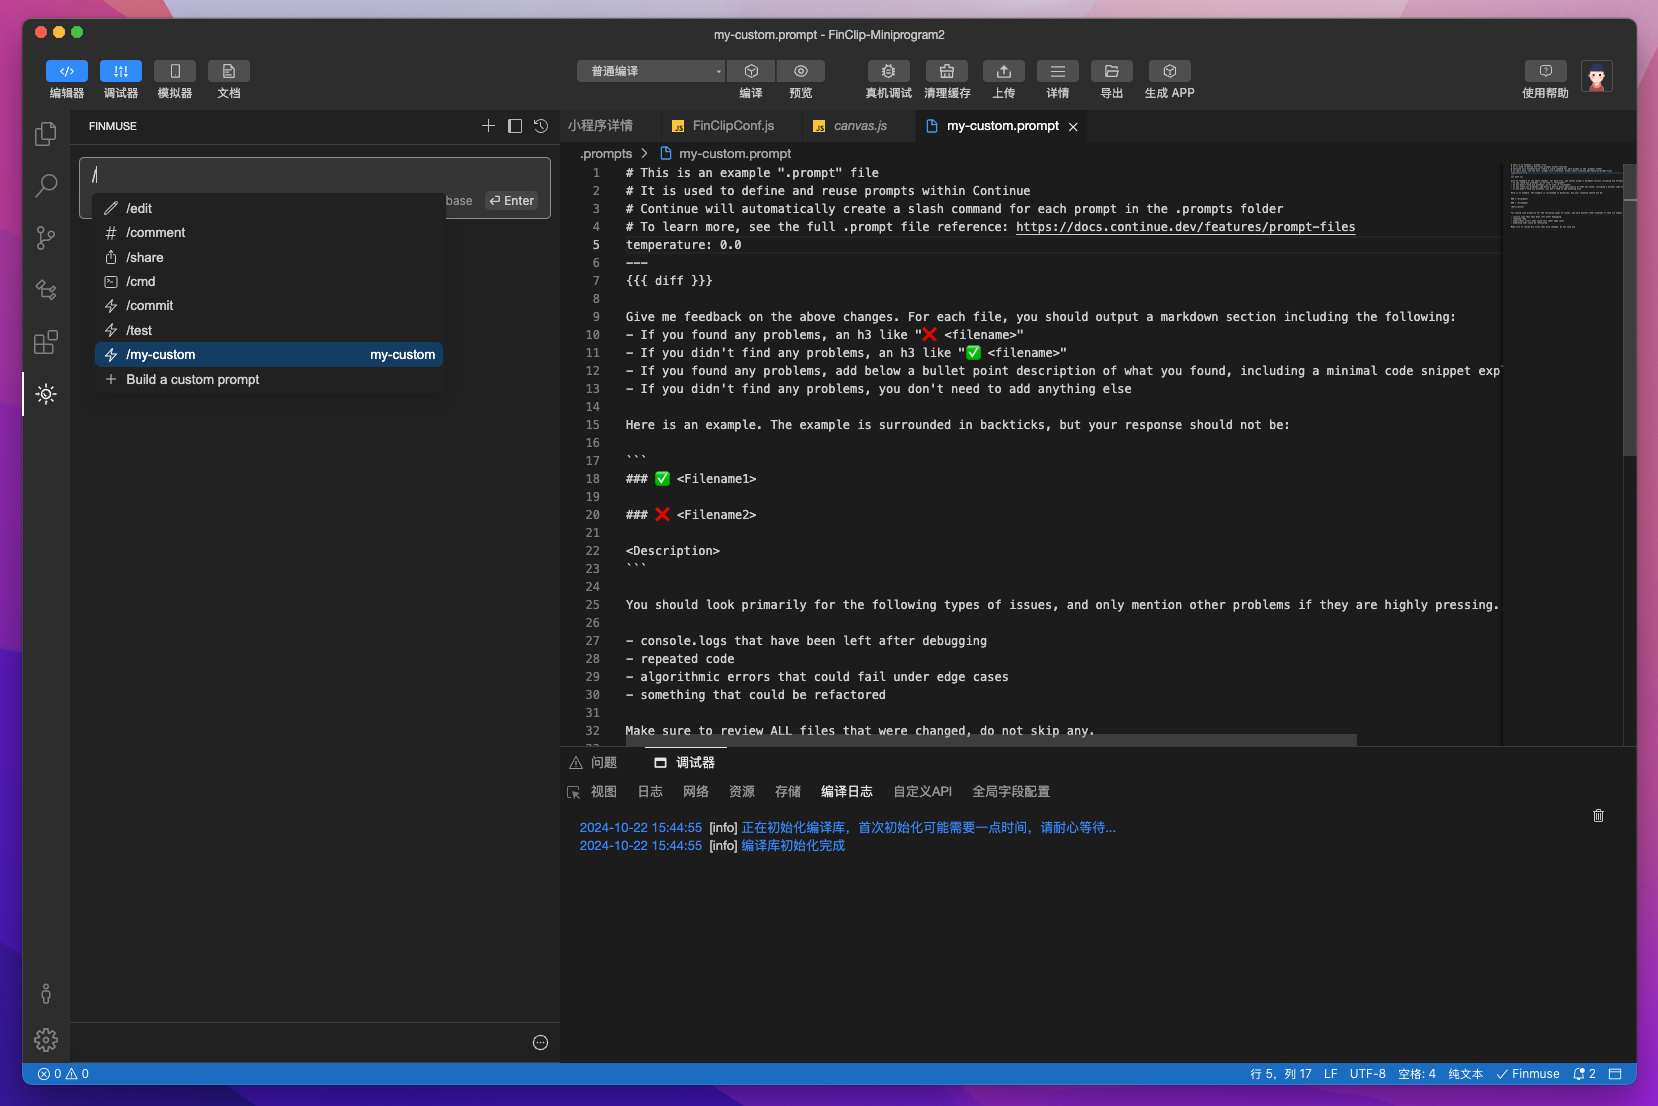
In the chat box, type / and select Build a custom prompt. This creates a .prompts/new-prompt-file.prompt file in the current project's root path. The filename becomes the command name.