# FinClip Cloud Operation Center Operation Guide (Not for Customer Distribution)
Please Note This operation guide is only applicable to the Community Edition and Enterprise Edition. To view the SaaS edition operation guide, please click SaaS Operation Instructions (This document is still being continuously updated. Some illustrations may differ from the online environment; please refer to the text descriptions as the authoritative source.)
# 1. User Management
# 1.1 Personnel Management
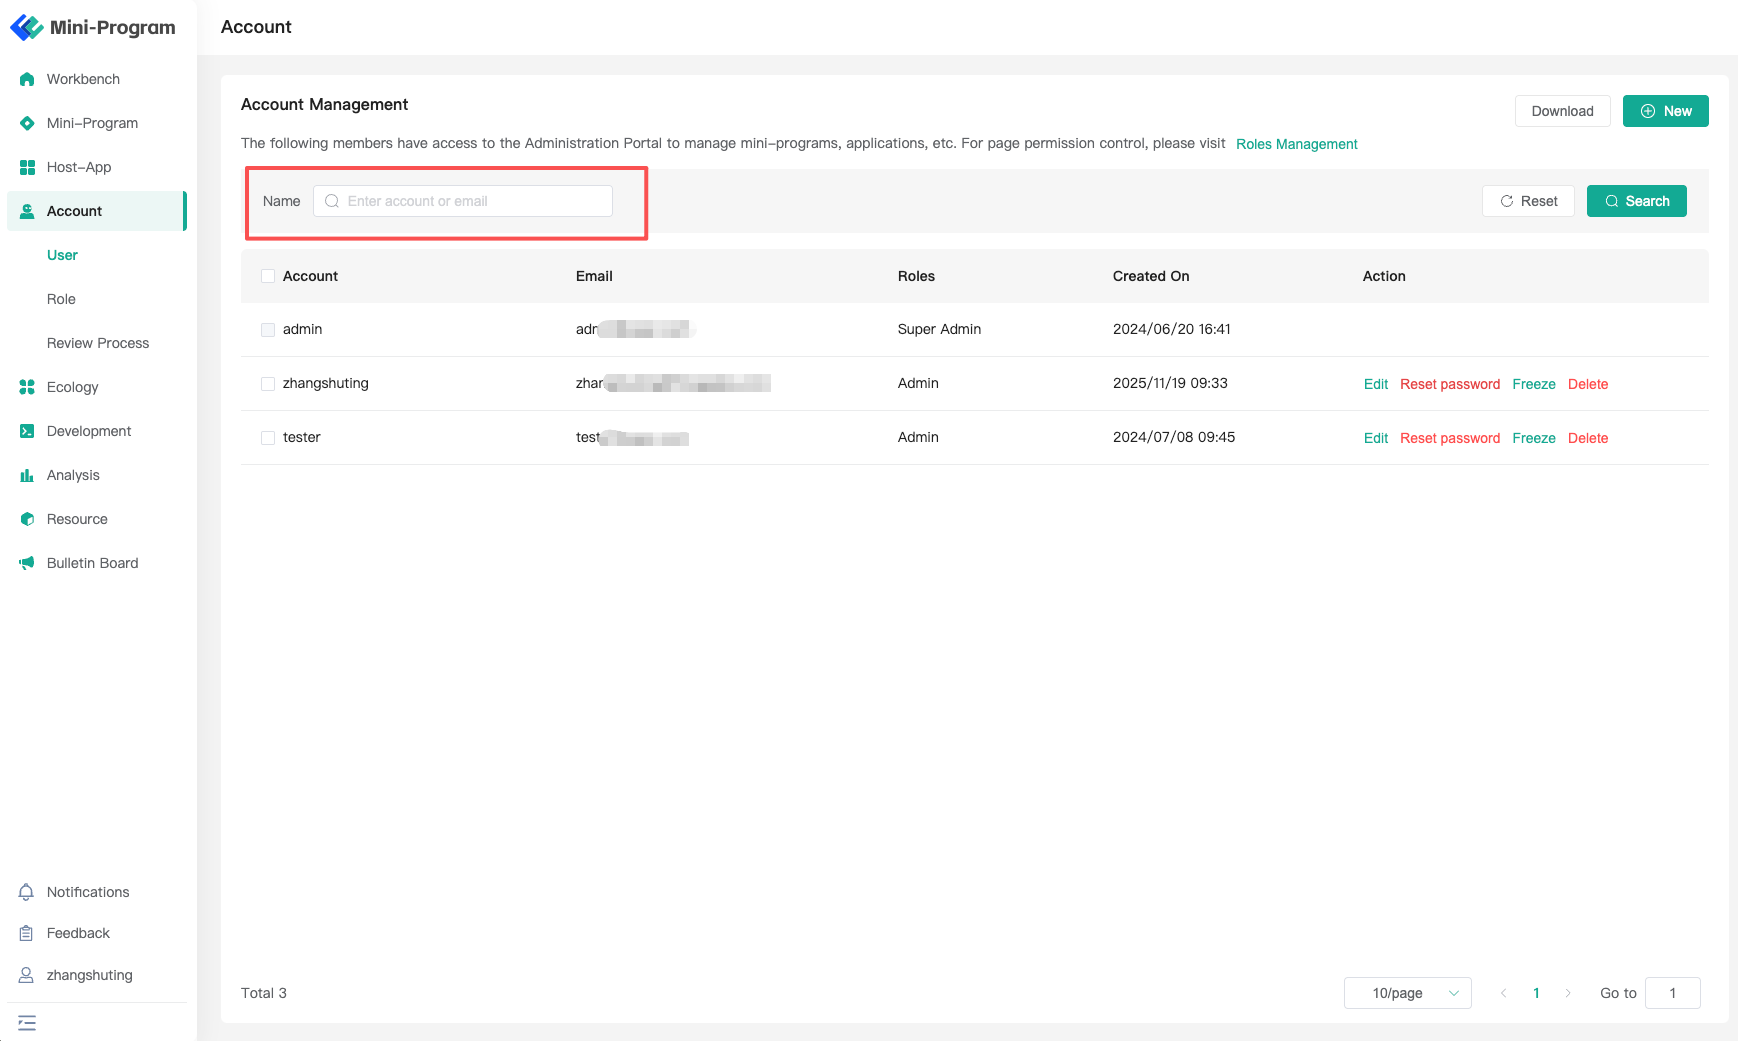
In the Personnel Management module, you can assign different roles to platform members and perform operations such as adding, deleting, modifying, and querying them.
# 1.1.1 Role Introduction
Note: The roles mentioned here are system-default preset roles. You can add custom roles according to business needs. For specific operations, please refer to section 1.2 Role Management.
- Super Administrator: The Super Administrator account is generated by the system. Therefore, the Super Administrator has permissions for all modules in the Operation Center. This account cannot be deleted or edited.
- Administrator: The Administrator has permissions for all modules in the Operation Center. This role cannot be deleted but can be edited.
- Other Roles: Such as Data Analyst, Product Manager, etc. Custom role configurations are possible.
# 1.1.2 Operation Instructions
# Add Member
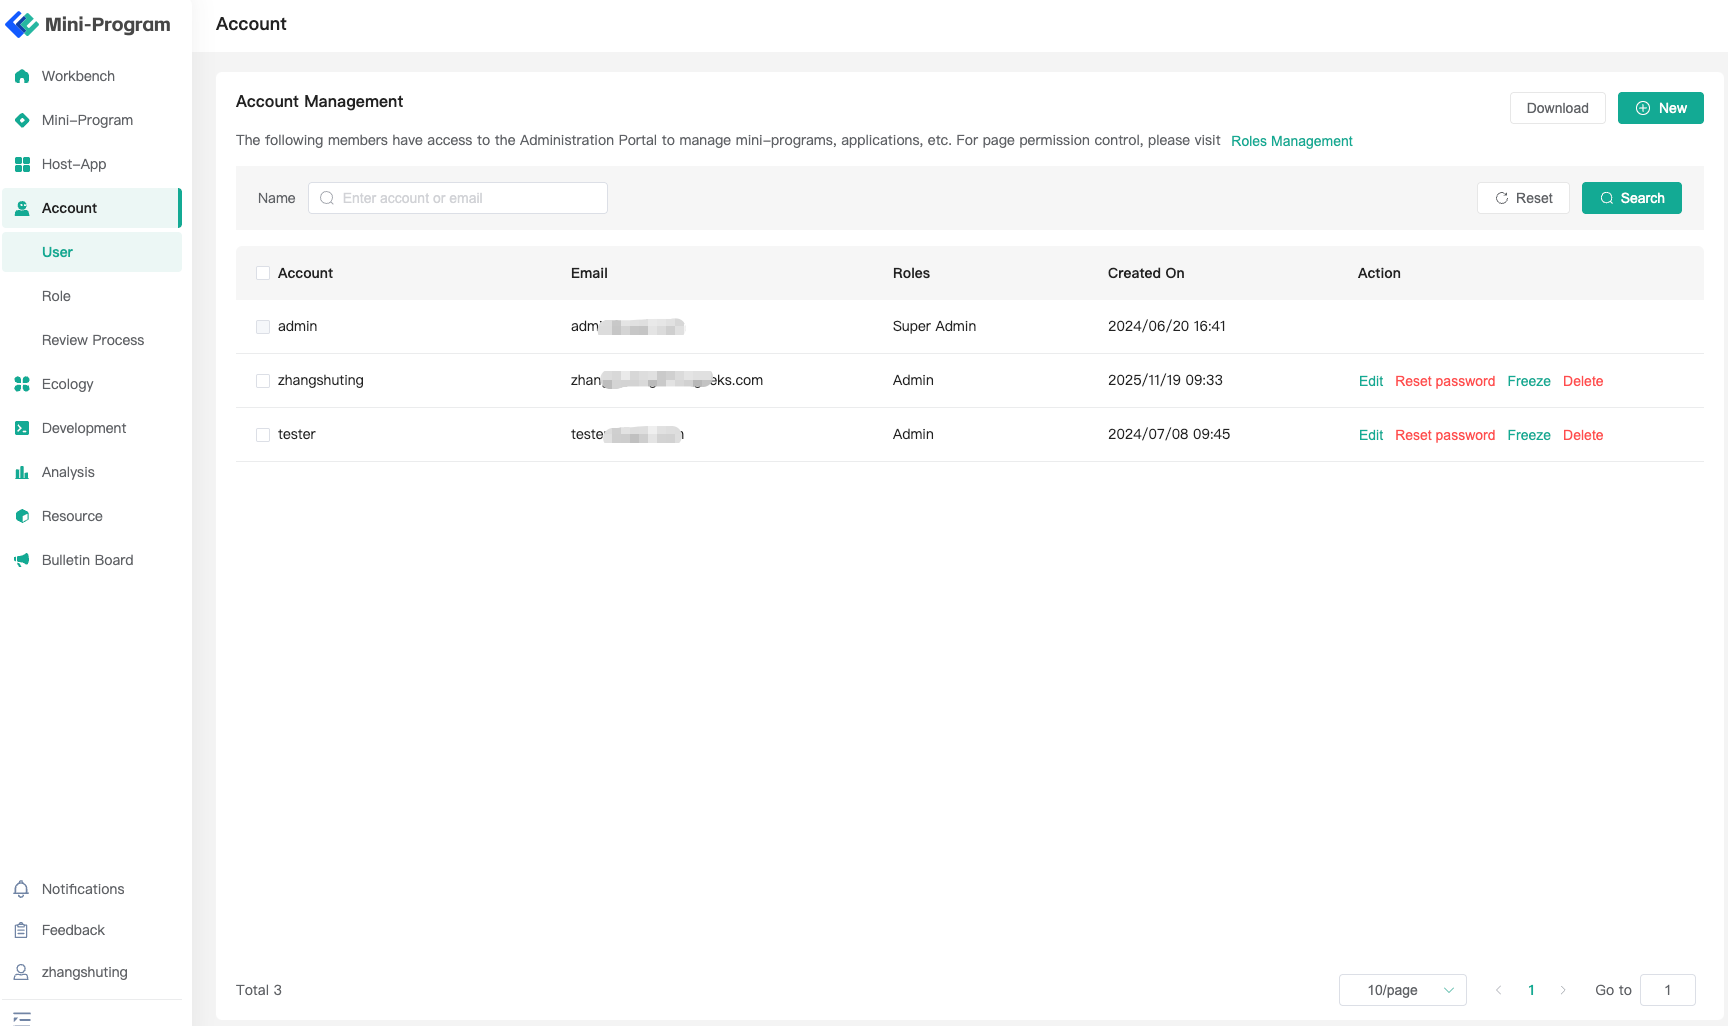
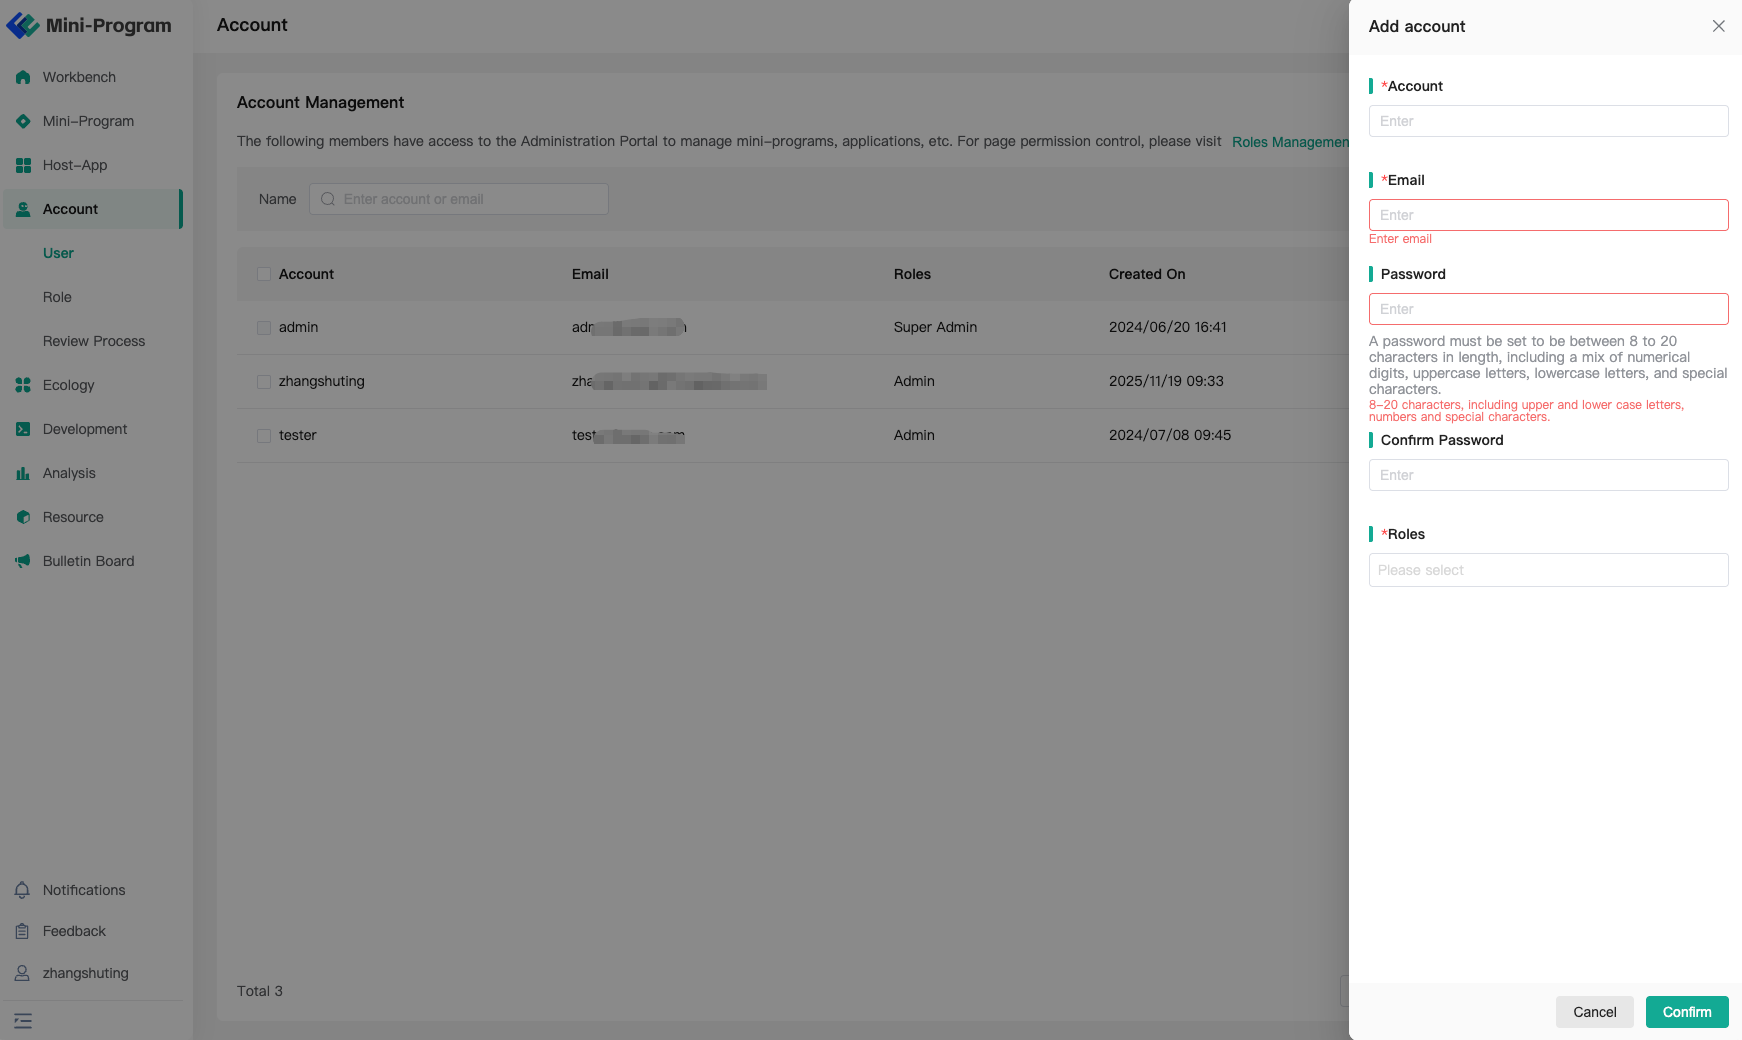
Administrators can add other operational members in the "Personnel Management" module:
- Click the "Add" button on the page.
- Enter the member's username, phone number, email, login password, and other information, set their role, and then click "OK" to complete the addition.
- After addition, the member can log in to the Operation Center's Management Console using the corresponding account.
# Delete Member
If you need to delete a member:
- You can select multiple members and click the "Batch Delete" button above to perform a batch operation.
- Alternatively, you can click the "Delete" button at the end of a specific member's row to delete individually.
# Modify Member
To modify a member's information:
- Click the "Edit Role" button on the right side of the member to enter the personal information editing page.
- On the personal details page, all information except the phone number can be edited.
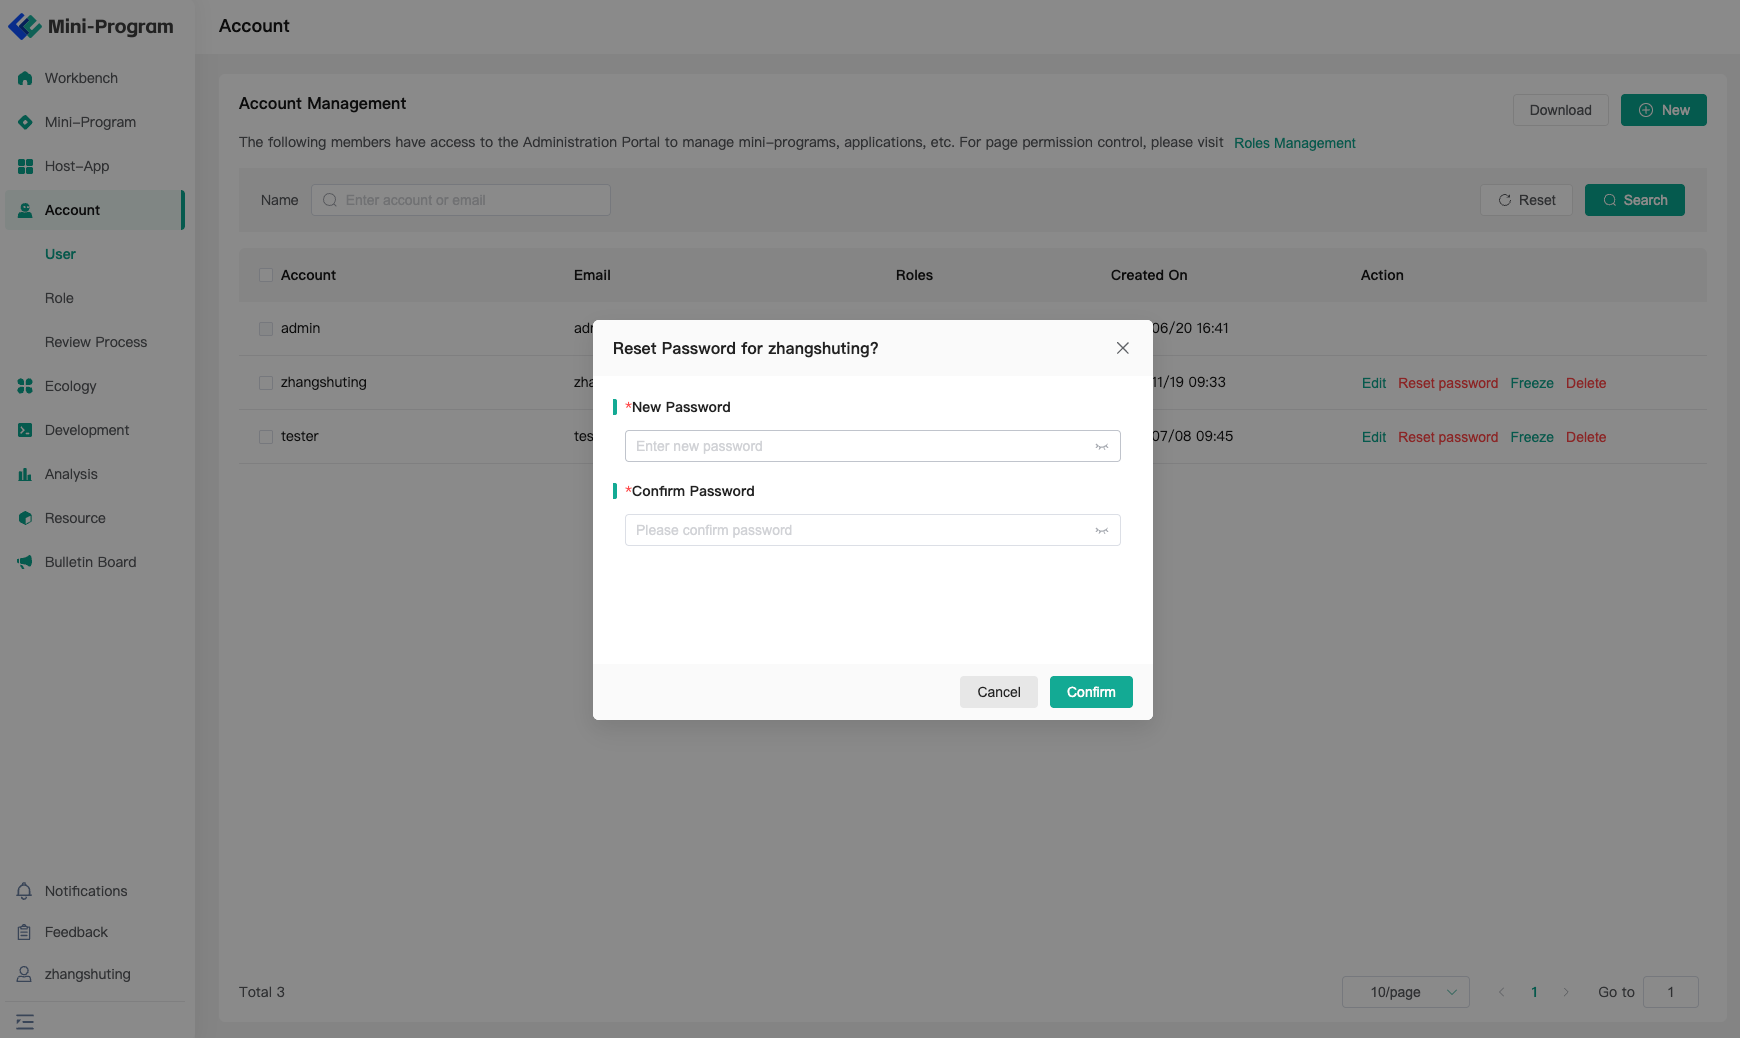
- To reset a member's login password, click "Reset Password" on the right side of the list. The default password after reset is: Abcd@1234.

# Search Member
- You can search for members using the search box in the upper left corner of the page.
- Supports searching by username, phone number, or email.
# 1.2 Role Management
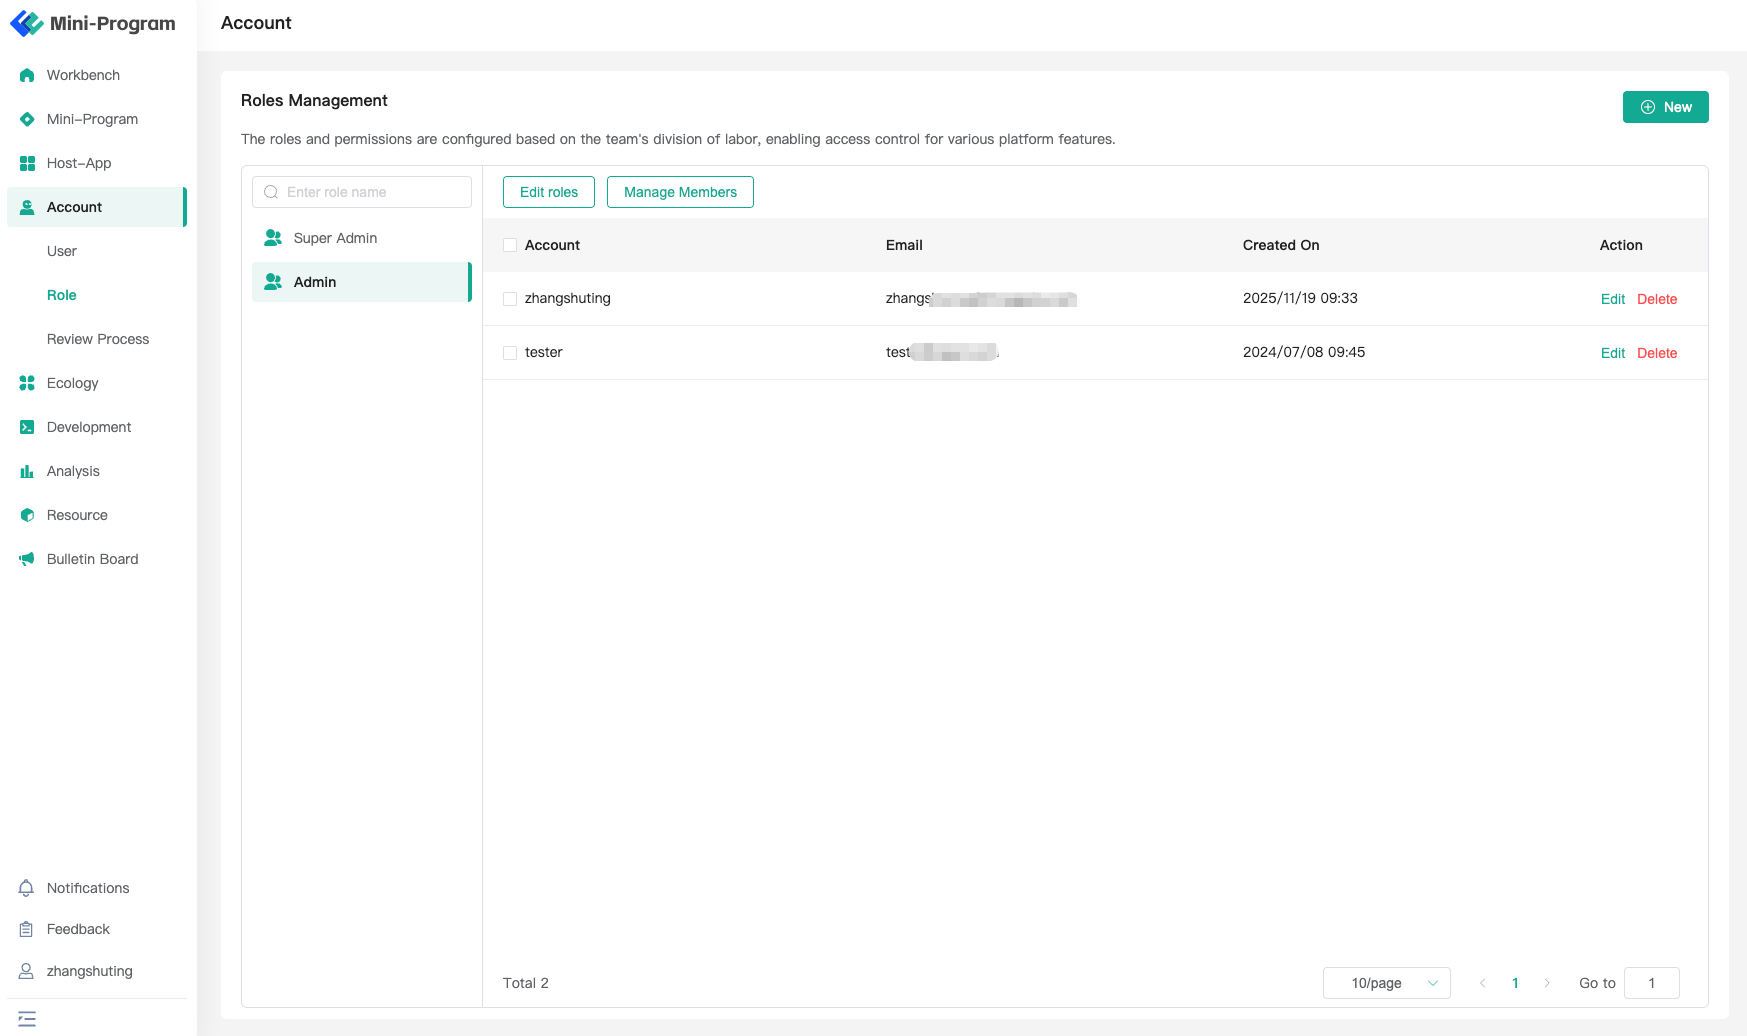
The Operation Center supports custom roles and permission configuration. You can assign roles to employees with different functions to control the permissions of other accounts. The specific operations are as follows:
- Step 1: Add Role
Click the "Add" button on the "User - Role Management" page.
- Step 2: Configure Permissions
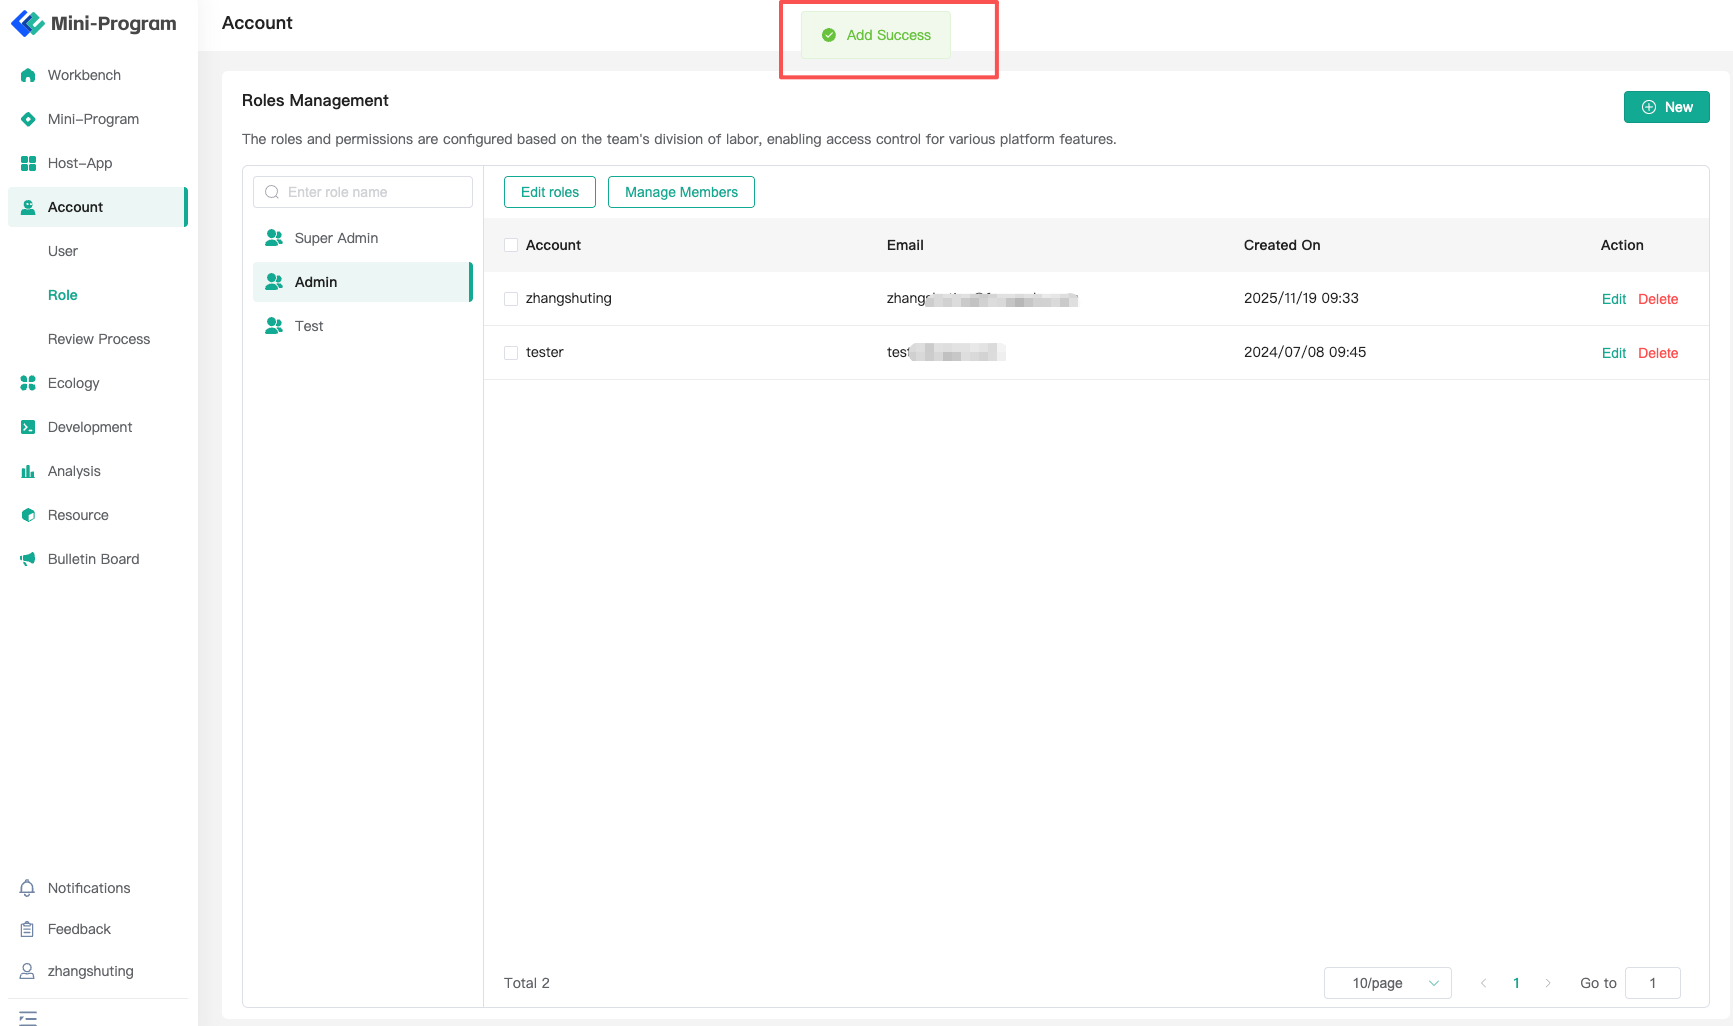
In the pop-up window, enter the role name, configure the corresponding permissions for the role, and then click "Save". (Note: The image is a schematic; the configured permissions here should cover all modules.)
- Step 3: Assign Role Members
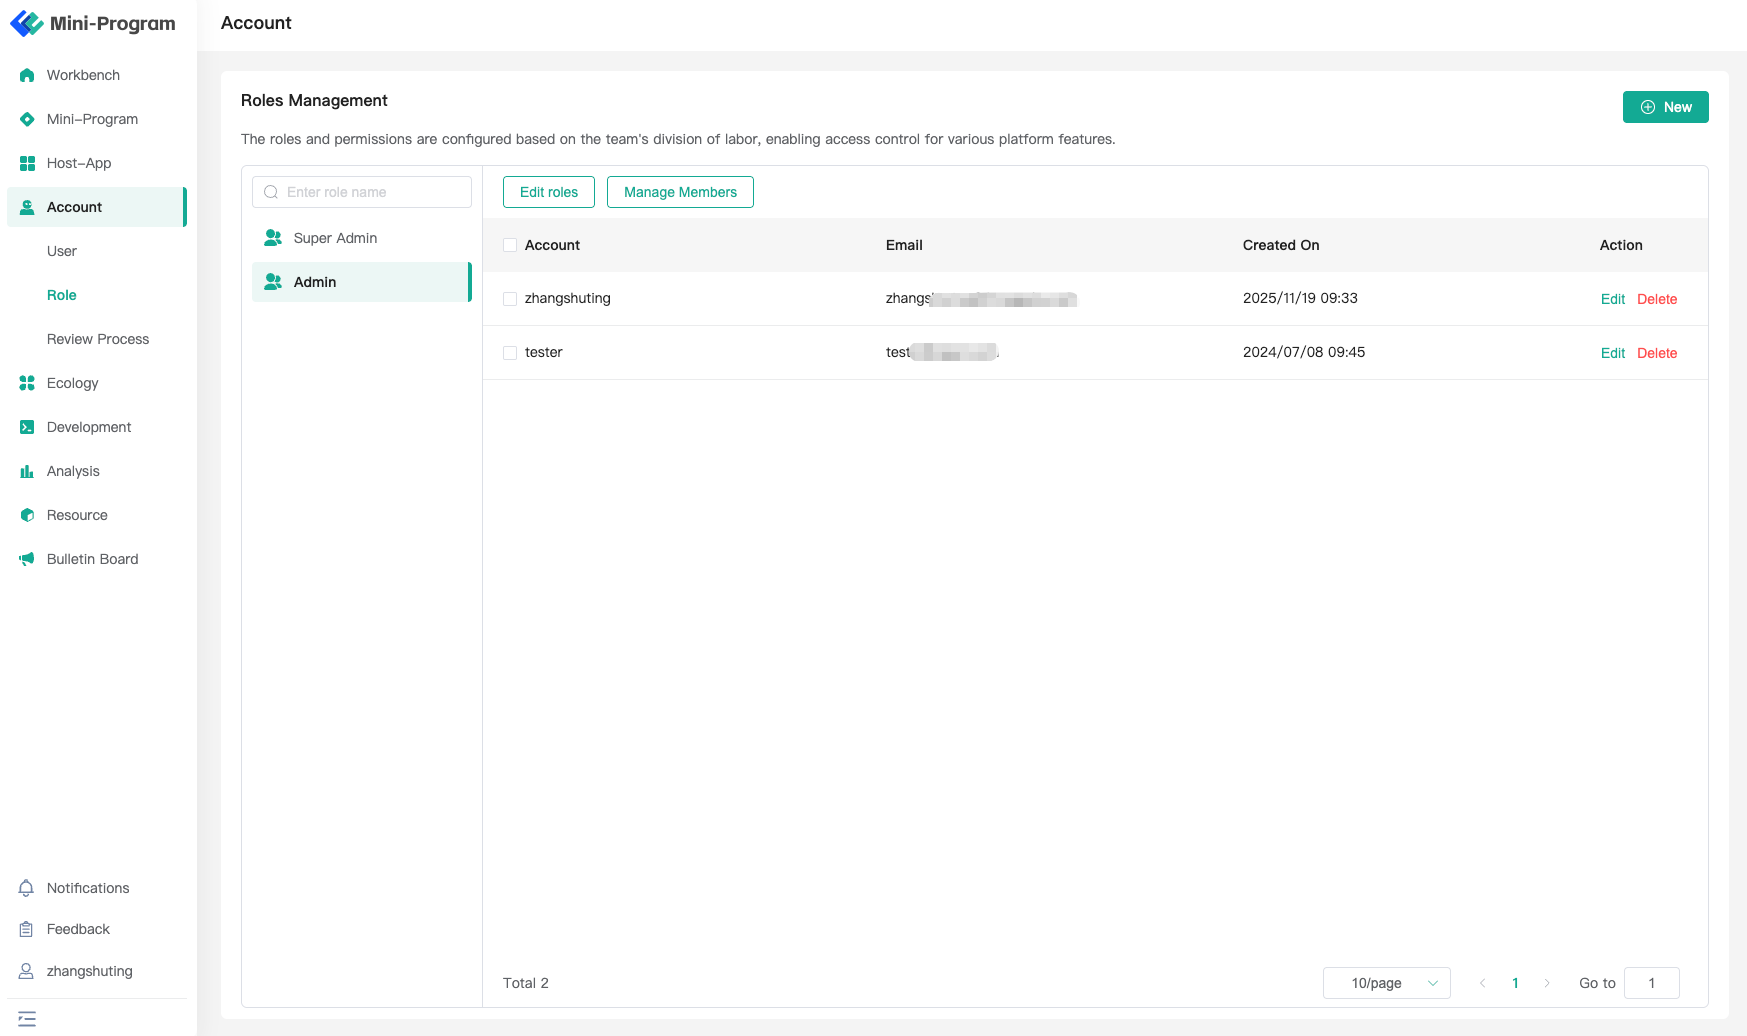
Finally, go to the Role Management page, search for the specific role name, select "Manage Accounts", and assign the corresponding account to this role, as shown below:
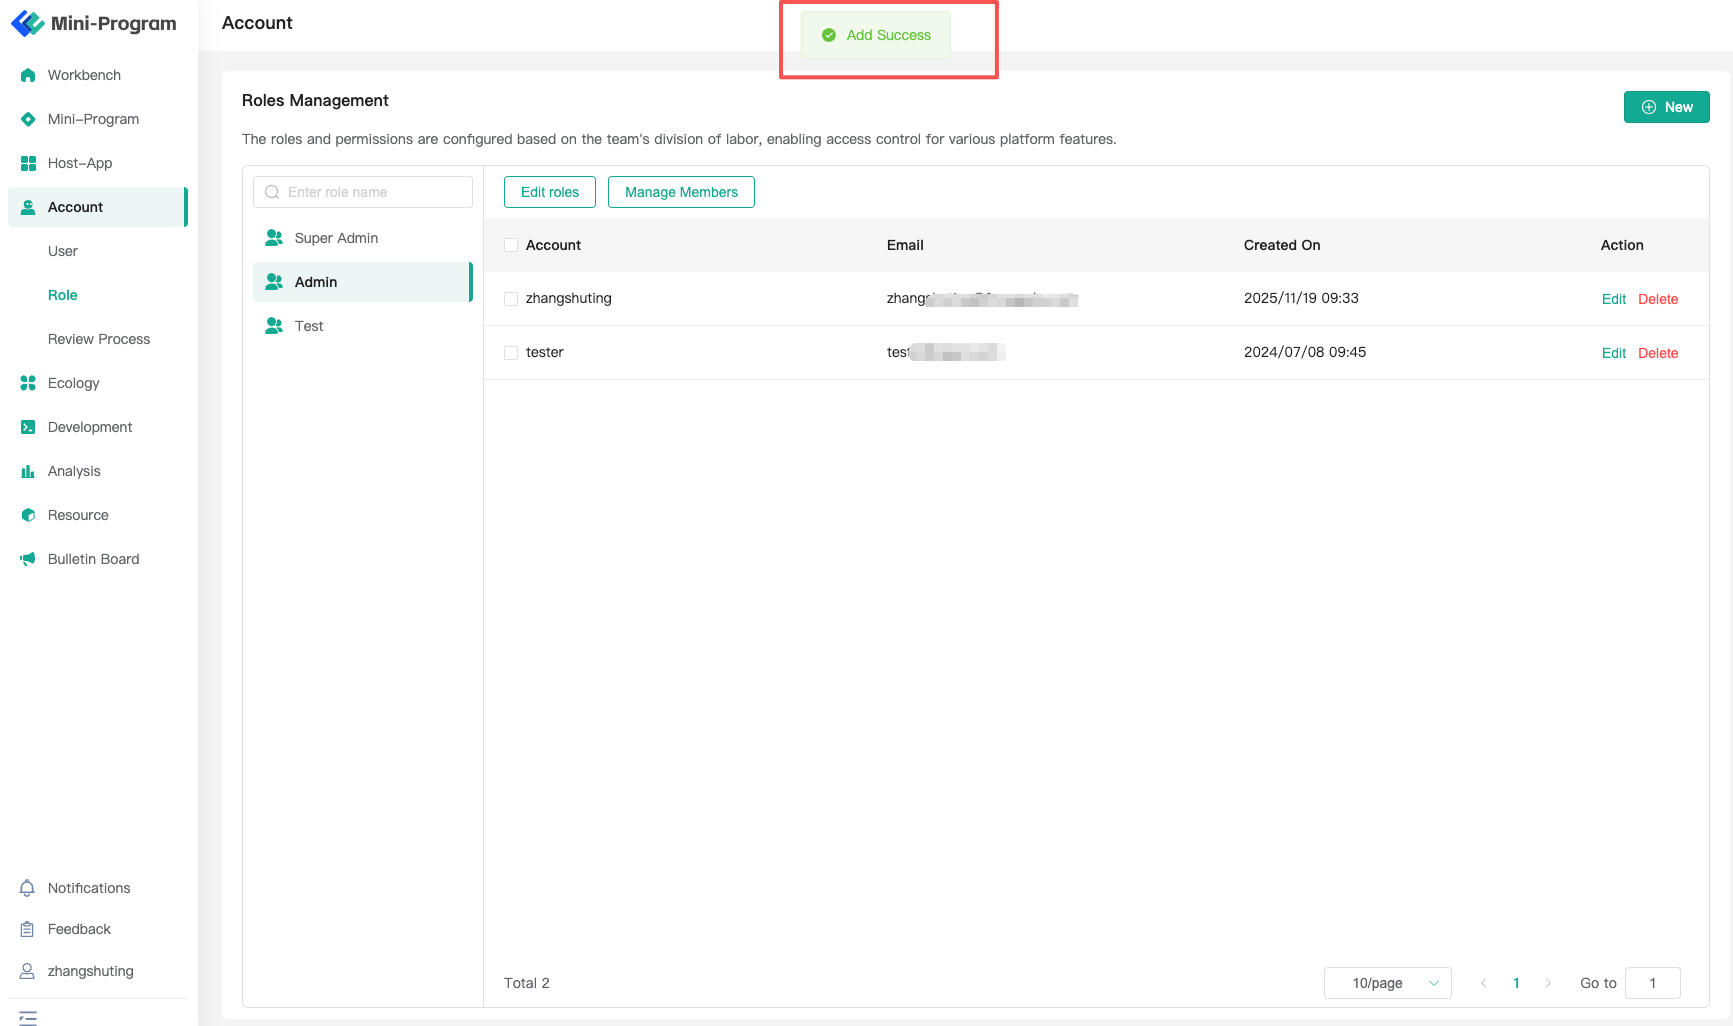
- Step 4: Configuration Successful, Role Login
When an account assigned a specific role logs into the platform, that account will only have the functional permissions assigned to that role. Other unassigned functional permissions will be invisible or inaccessible. Please note: if an account has multiple roles, the account's permissions will be the union of the permissions from all assigned roles.
# 1.3 Approval Process
The approval configuration in the Operation Center currently includes the enterprise registration approval process, Mini-Program release approval process, and domain name approval process. By default, these are all handled by the Super Administrator. You can customize the approval process by configuring approval roles, supporting three methods: joint signature (AND), single signature (OR), and sequential approval.
Taking the enterprise registration approval process as an example, the main steps are as follows:
- Default: Approved by the admin account.
- Custom Process: Enter the configuration page via the "Configure" function, select the approval role(s) and approval method, and it takes effect immediately upon submission.
- If a role has multiple members, approval by one member is considered as approval by the role.
- Joint Signature (AND): Requires approval consent from all selected roles.
- Single Signature (OR): Requires approval consent from any one of the selected roles.
- Sequential Approval: Requires approval consent from all selected roles in sequence.
- Reset: Supports resetting the approval process to 'Approved by the admin account'.
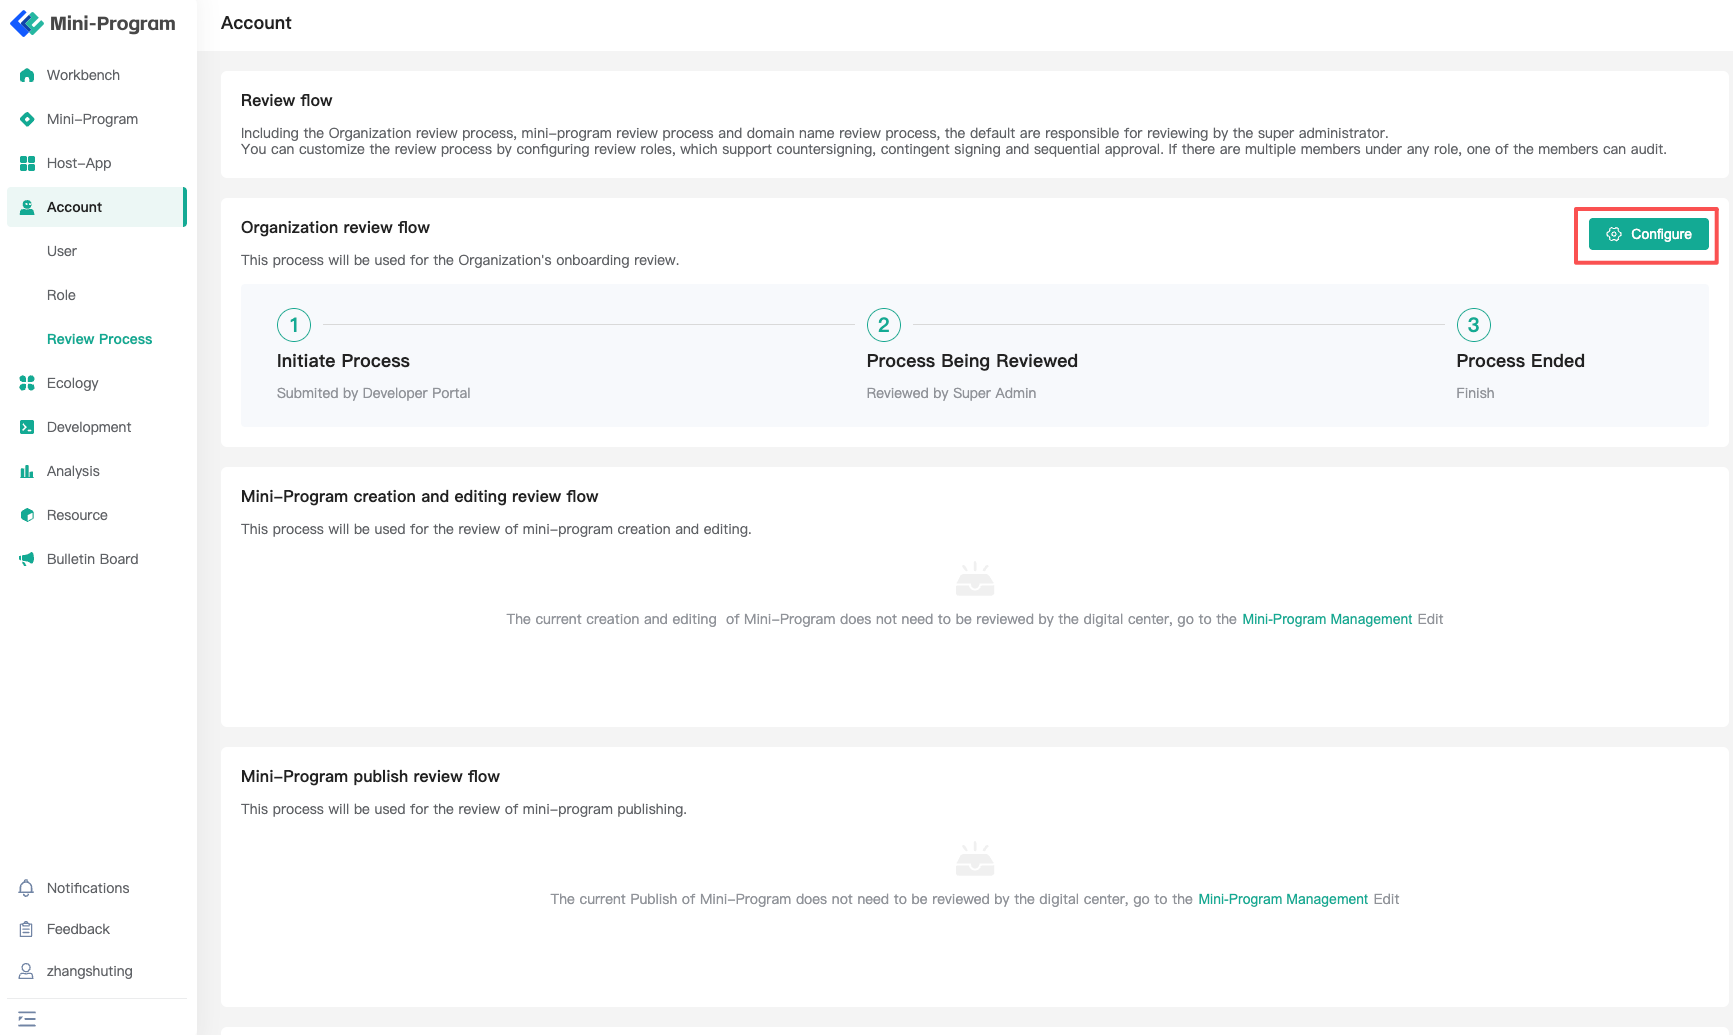
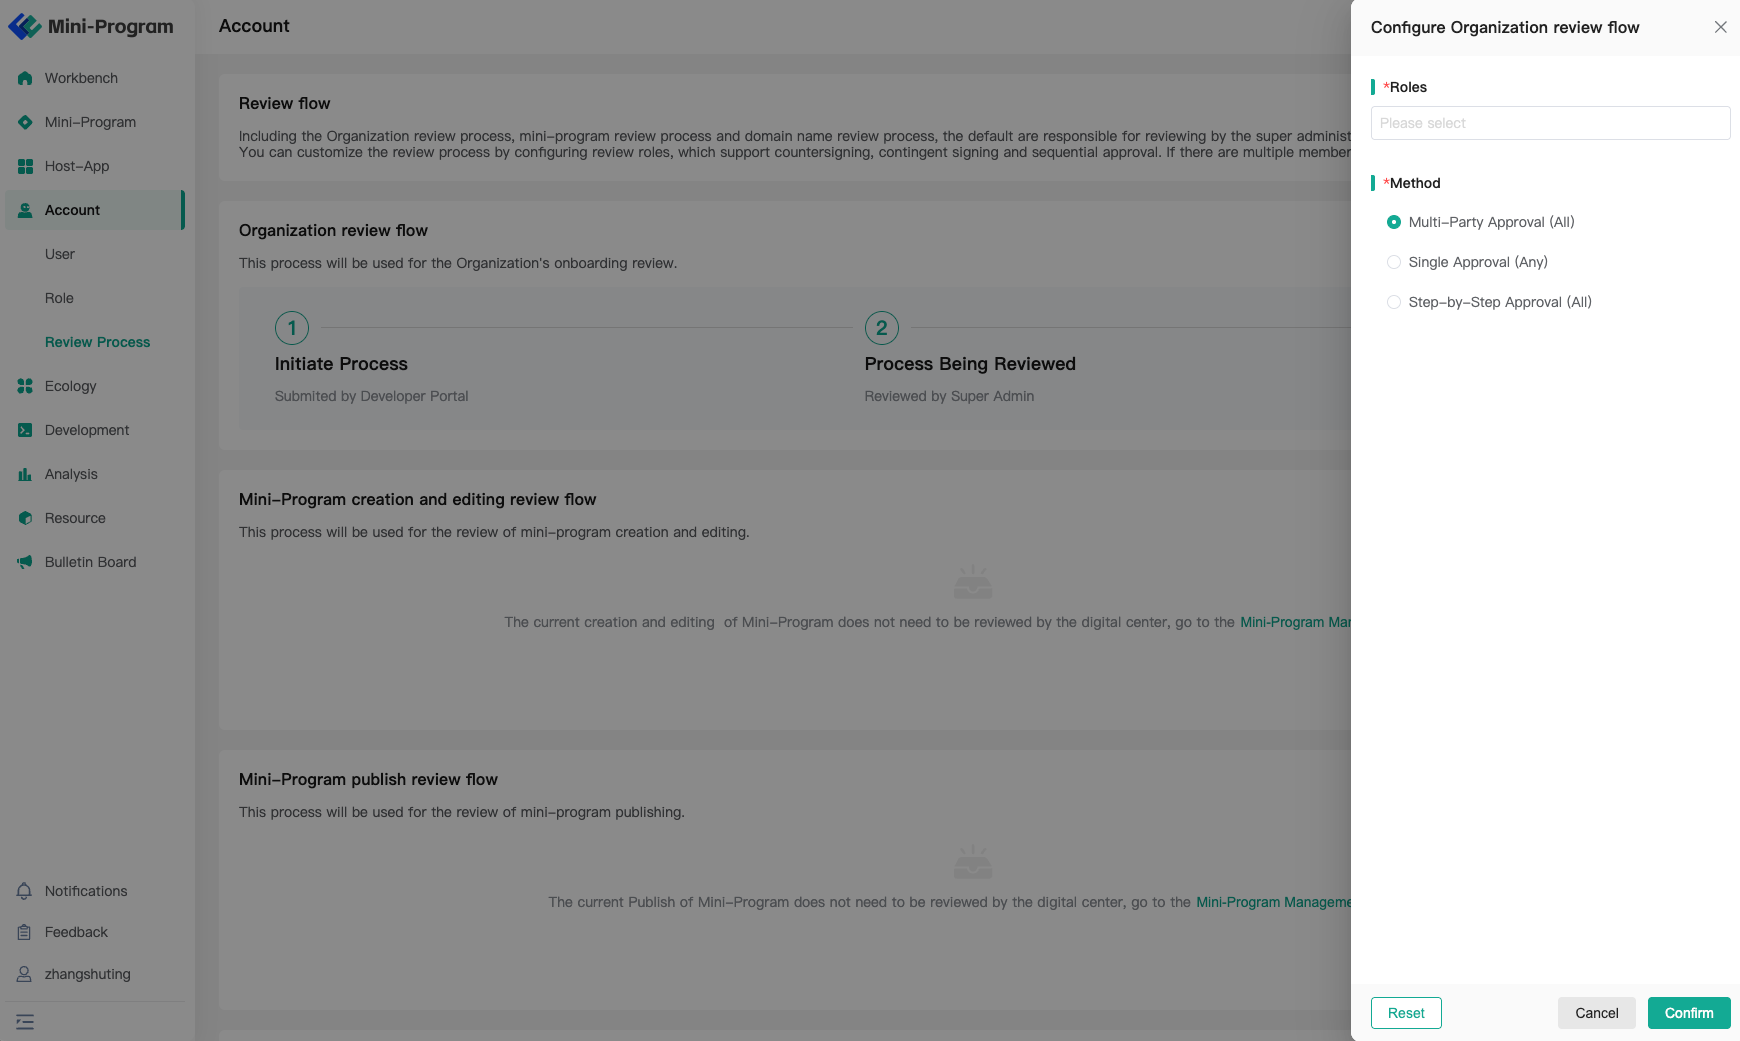
Notes on Edge Cases
- When configuring an approval flow, if no roles are selected, the approval process will default to being handled by the Super Administrator (admin account).
- If a new role is added to an existing approval flow, members under the new role cannot process historical pending tasks (e.g., if a Mini-Program submission for approval was made at 12:00, and member A is added to the approval flow at 14:00, member A will not be able to see the pending Mini-Program for approval).
# 2. Ecosystem Management
# 2.1 Organization Management
Operators can view the certification status of all registered enterprises or organizations in the Organization Management section. The certification statuses are:
- Certified: Indicates the enterprise's certification review has been approved.
- Not Certified: Indicates the enterprise's certification review was rejected.
- Under Review: Indicates the enterprise's certification application has been submitted but not yet reviewed.
- Expired: Indicates the enterprise's certification has expired (certification is valid for one year) and needs renewal.
- Frozen: Indicates the enterprise has been frozen and cannot use related functions.
Click "View Details" to see specific information about an enterprise. If the enterprise is not certified, you can approve or reject its certification. If the enterprise is certified, you can freeze it; frozen enterprises can also be unfrozen.
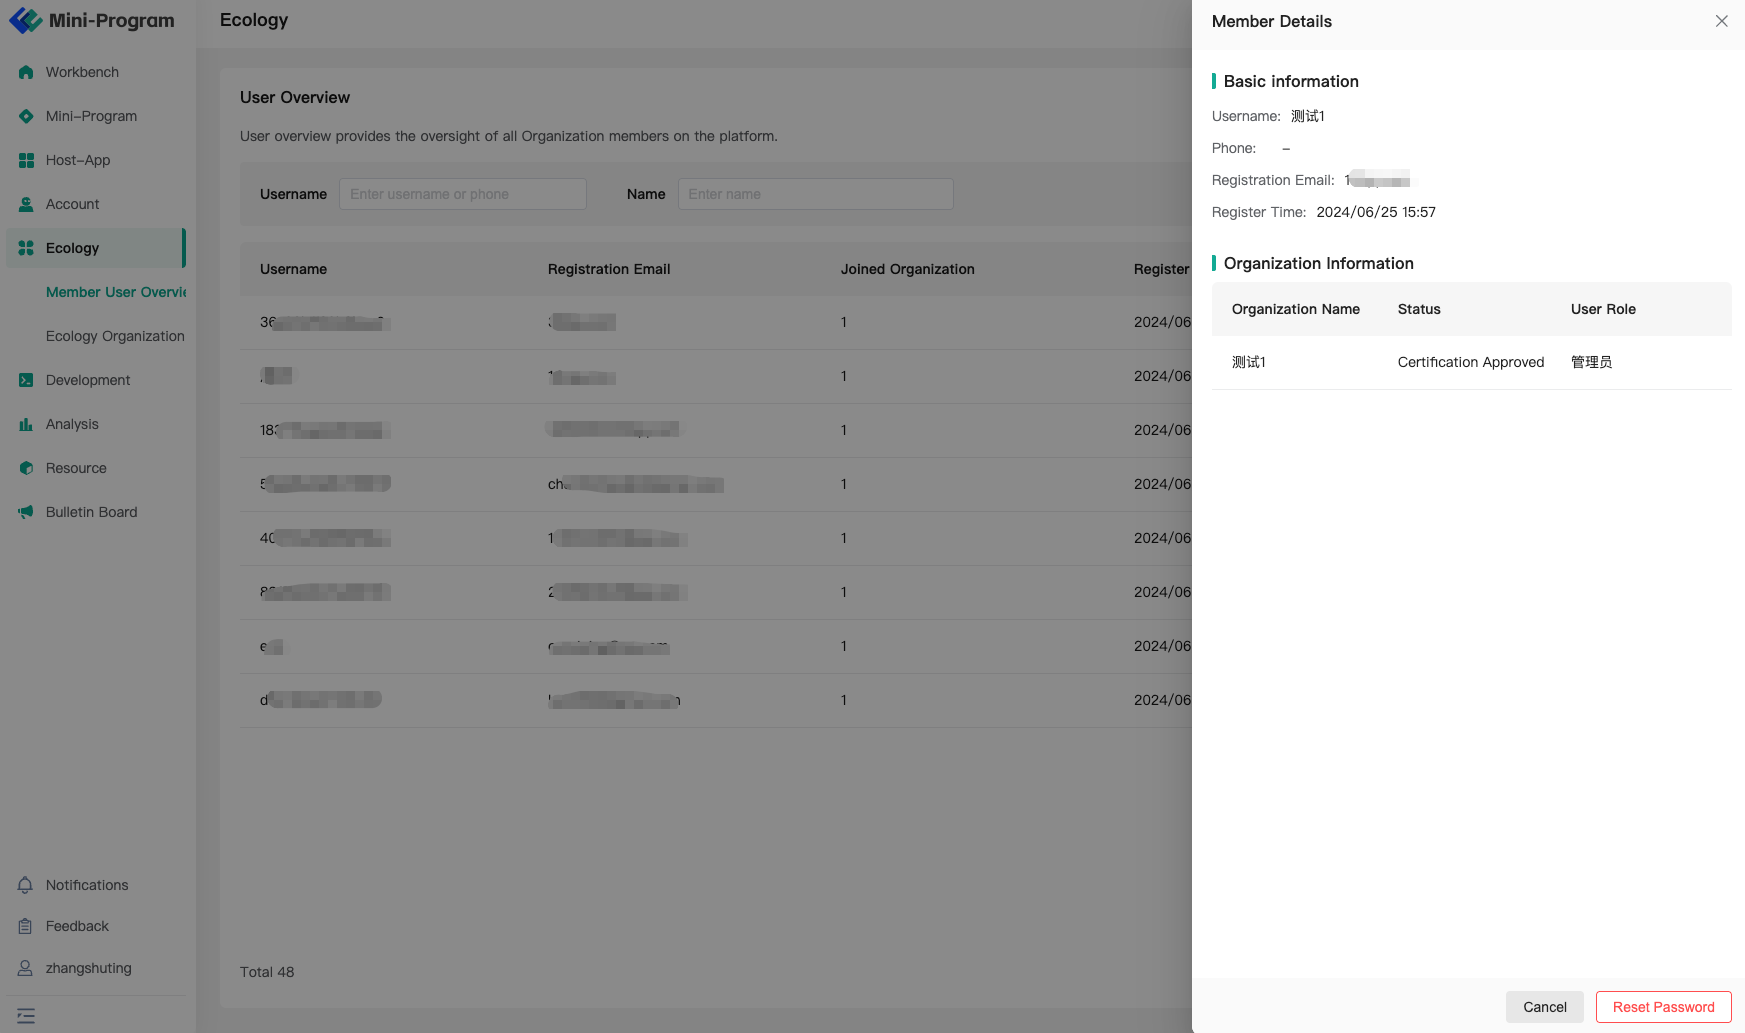
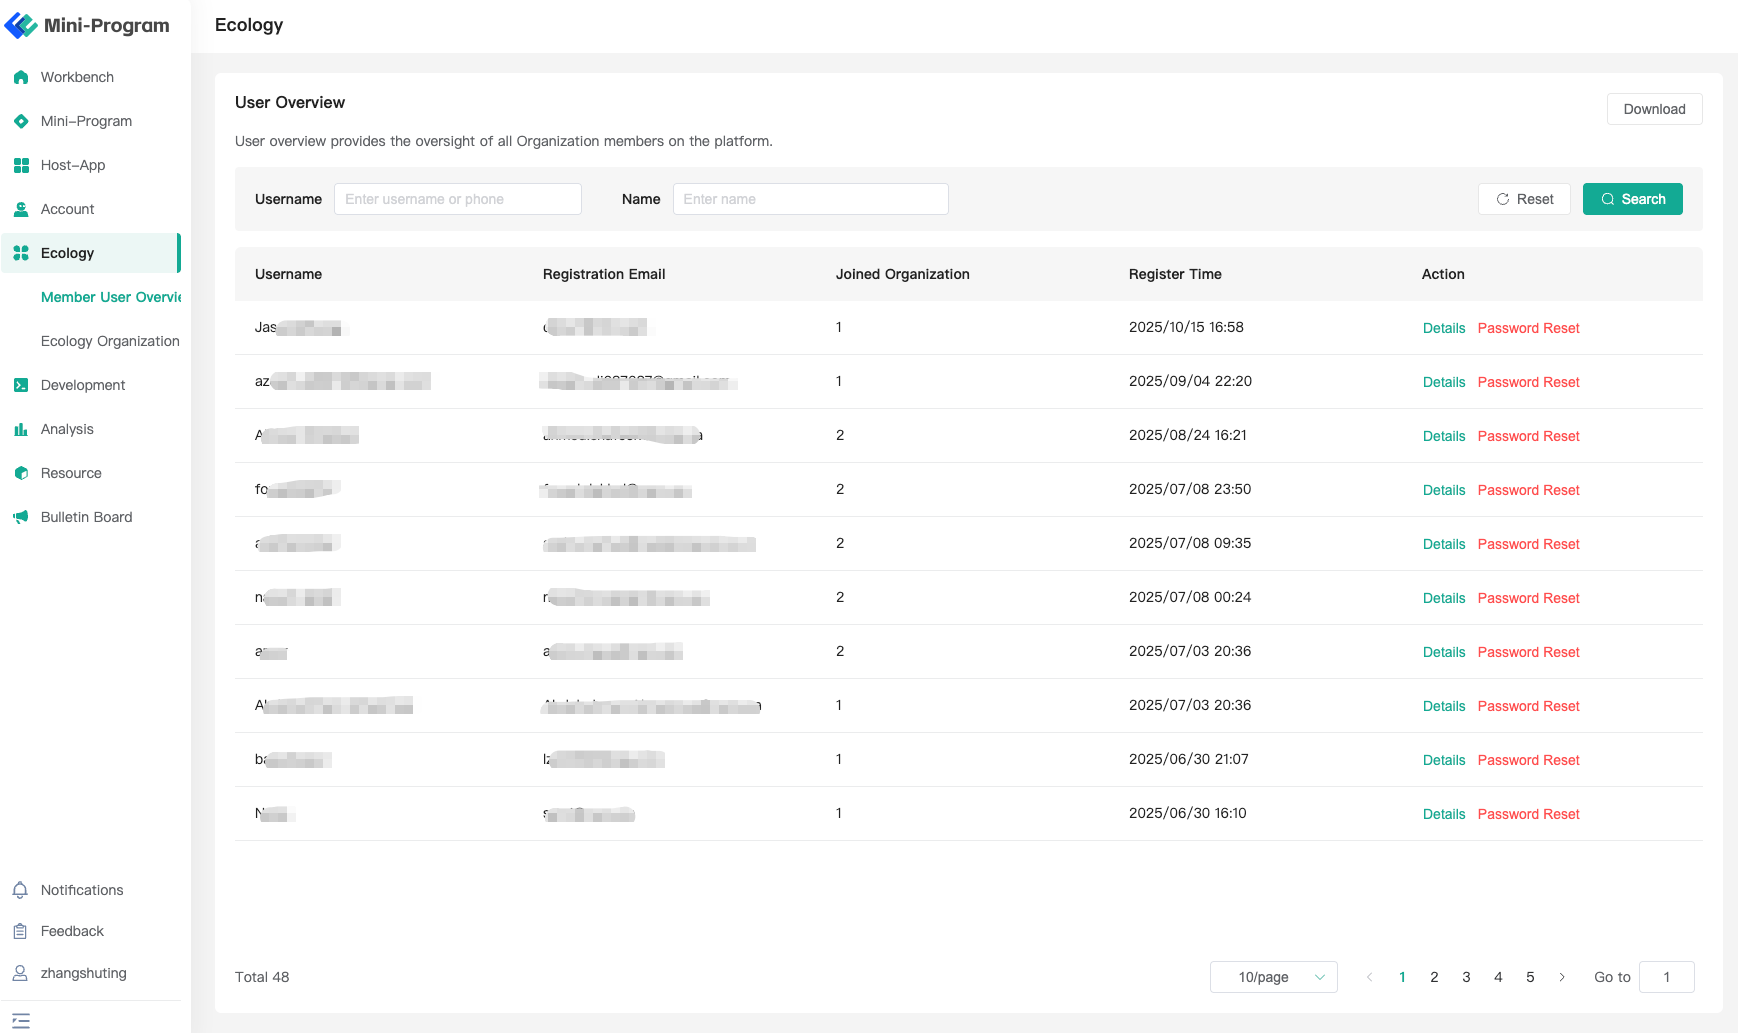
# 2.2 Member Management
Operators can view all organization members in the Member Management section and reset member passwords.

# 3. Mini-Program Management
# 3.1 Mini-Program Management
In the Mini-Program Management module, you can perform operations such as Mini-Program release audit settings, viewing Mini-Program information, and taking Mini-Programs offline. Specific examples are as follows:
# 3.1.1 Audit Settings
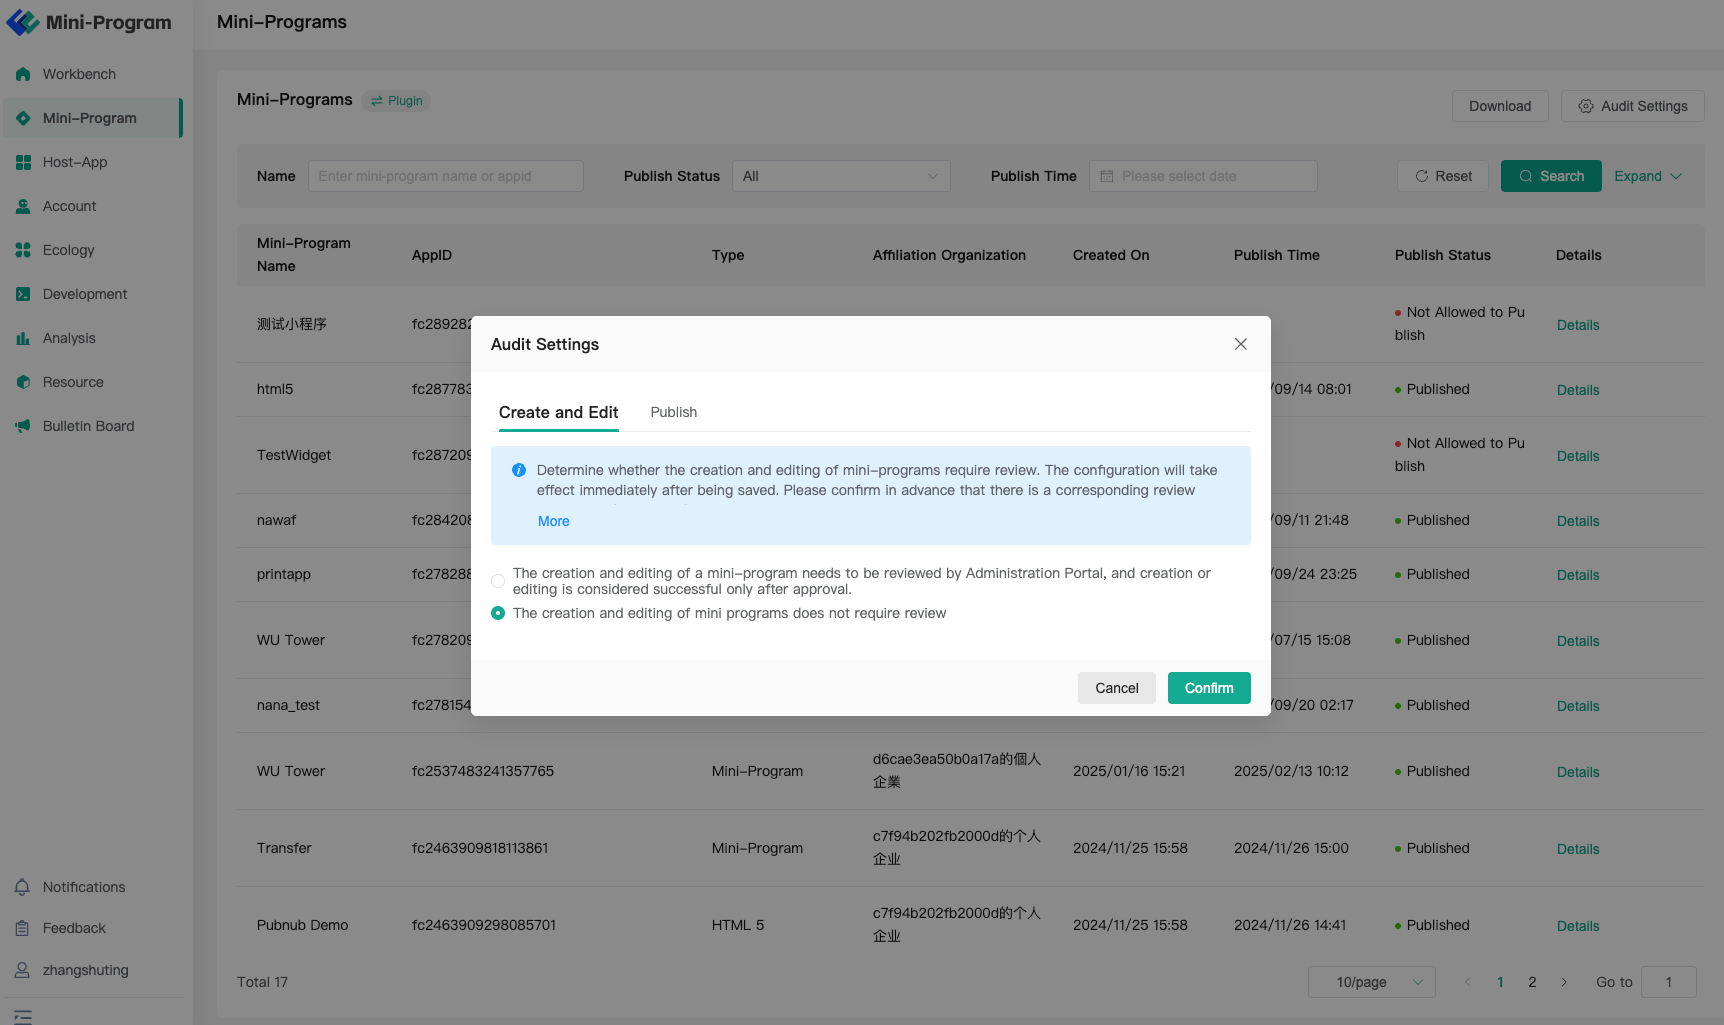
Click "Mini-Program Approval Settings" on the Mini-Program list page to configure the Mini-Program release audit process. The options are: 1) Can be self-approved by the Developer Center; 2) Must be approved by the Operation Center (Note: The approval flow can be configured separately. For operations, please refer to: Role Management - Approval Process).
# 3.1.2 View Mini-Program Information
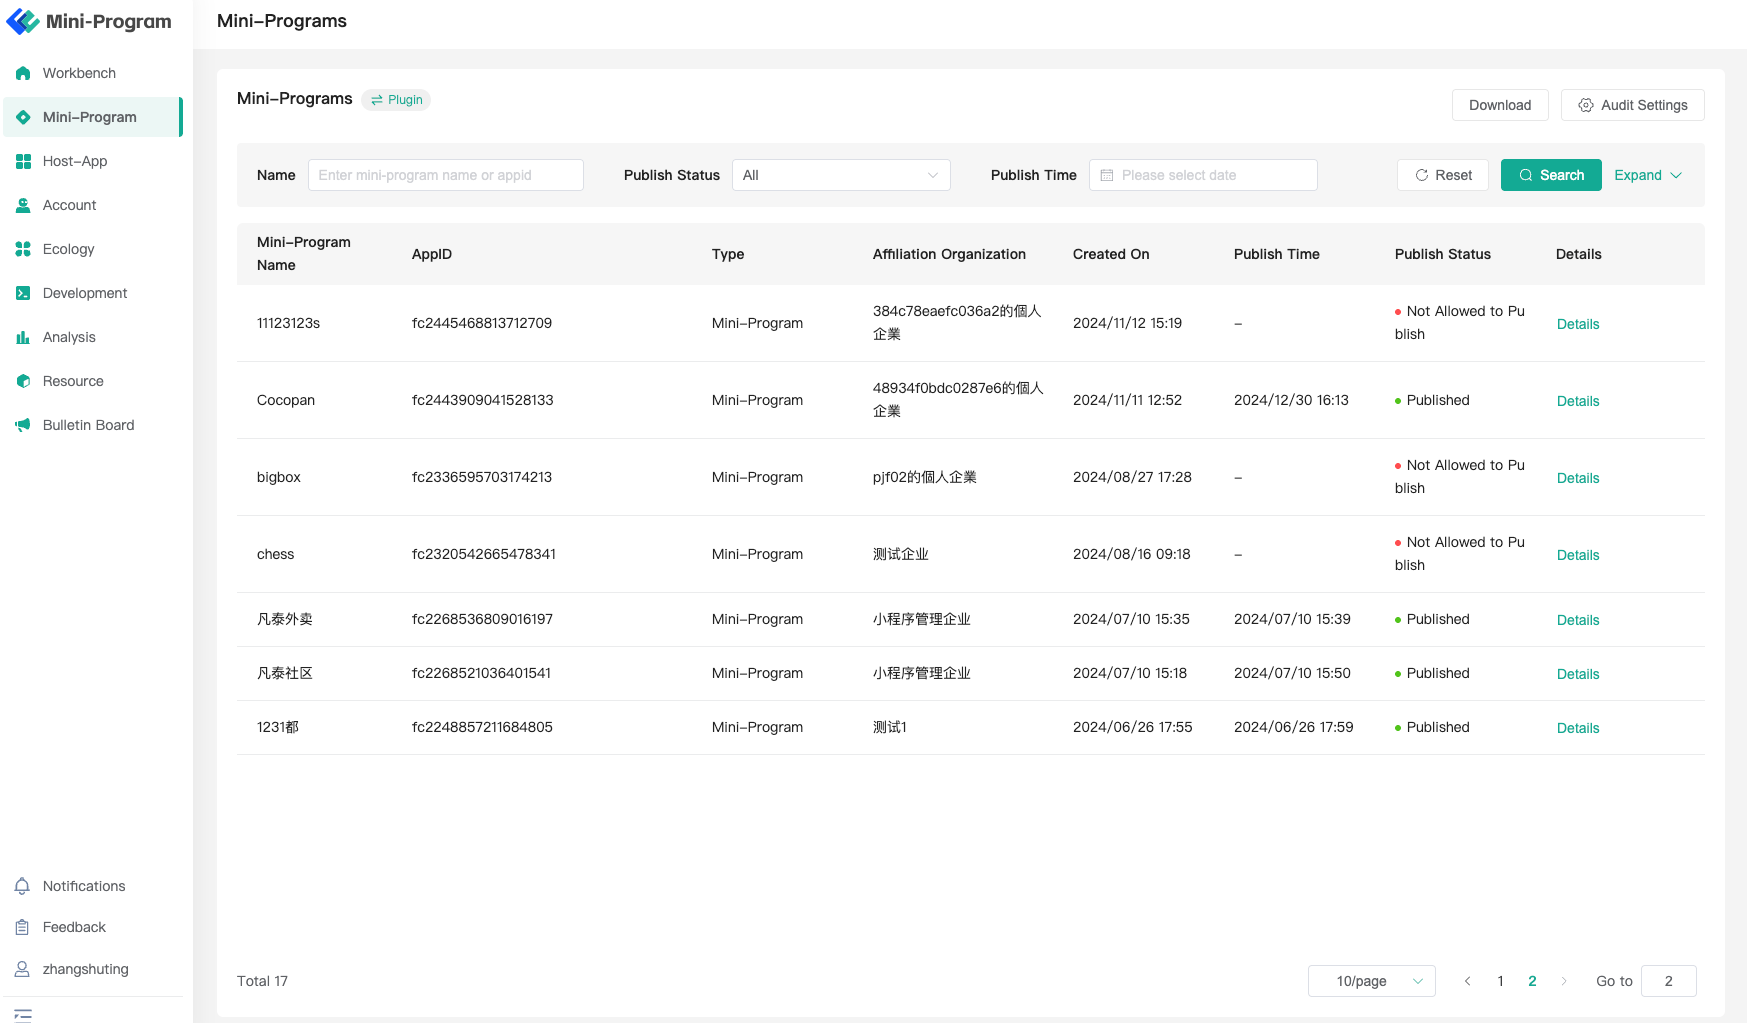
You can retrieve and view Mini-Program information using the filter components at the top of the page.
# 3.1.3 Take Mini-Program Offline
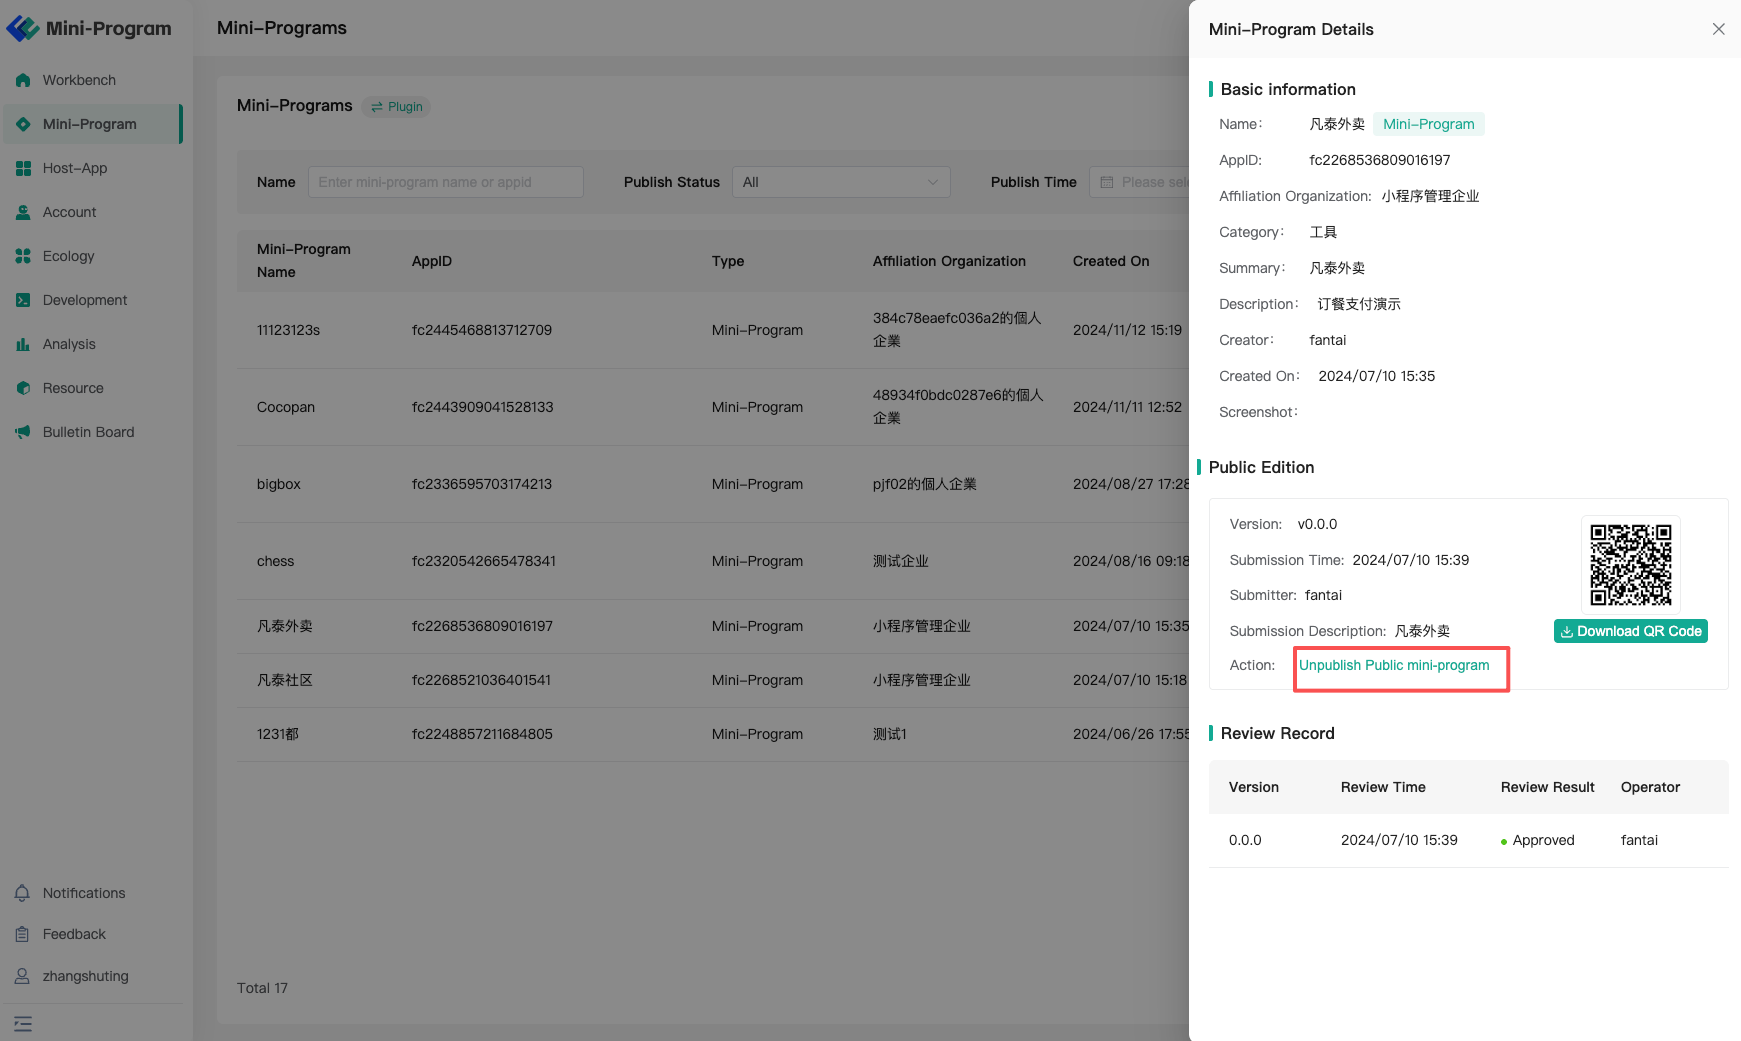
On the Mini-Program details page, you can operate on published Mini-Programs and take them offline (Approval for publishing needs to be handled in the Pending Center).
# 4. Application Management
# 4.1 Application
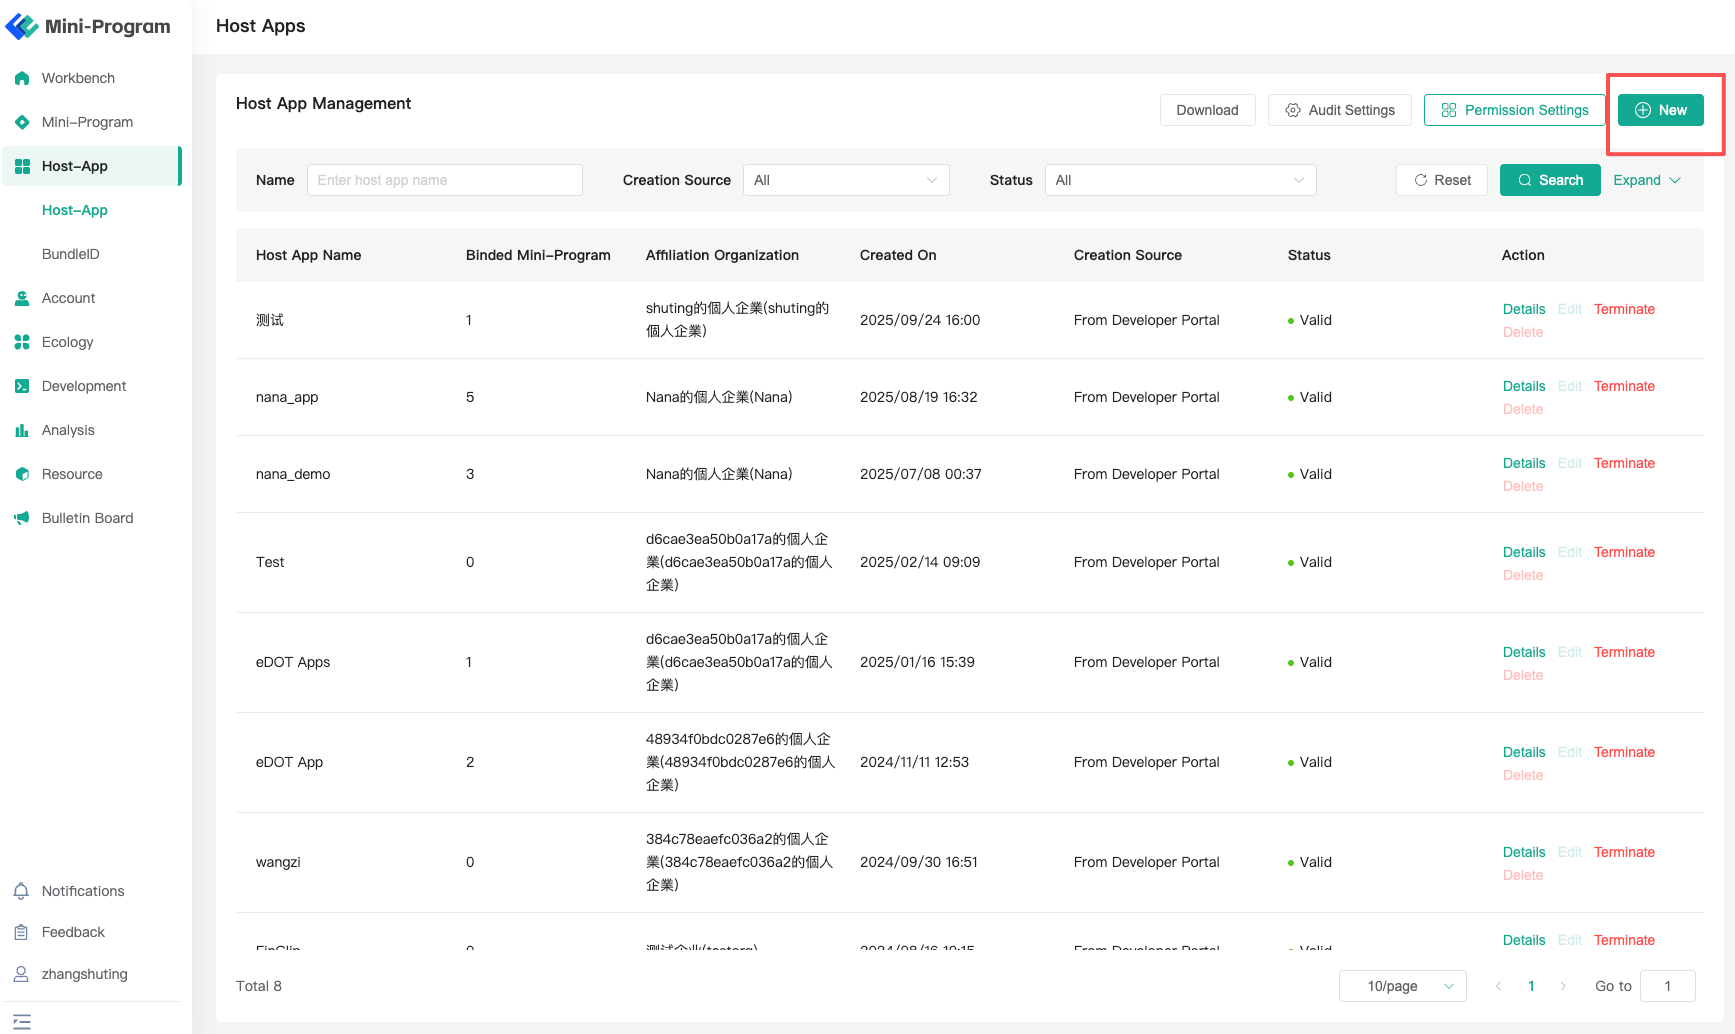
The Applications section on the Operation Center side displays application information created by both the Developer Center and the Operation Center. Operators can create applications in the Operation Center and configure whether the application is visible on the Developer Center side and whether it automatically associates with Mini-Programs.
# 4.1.1 Add Application
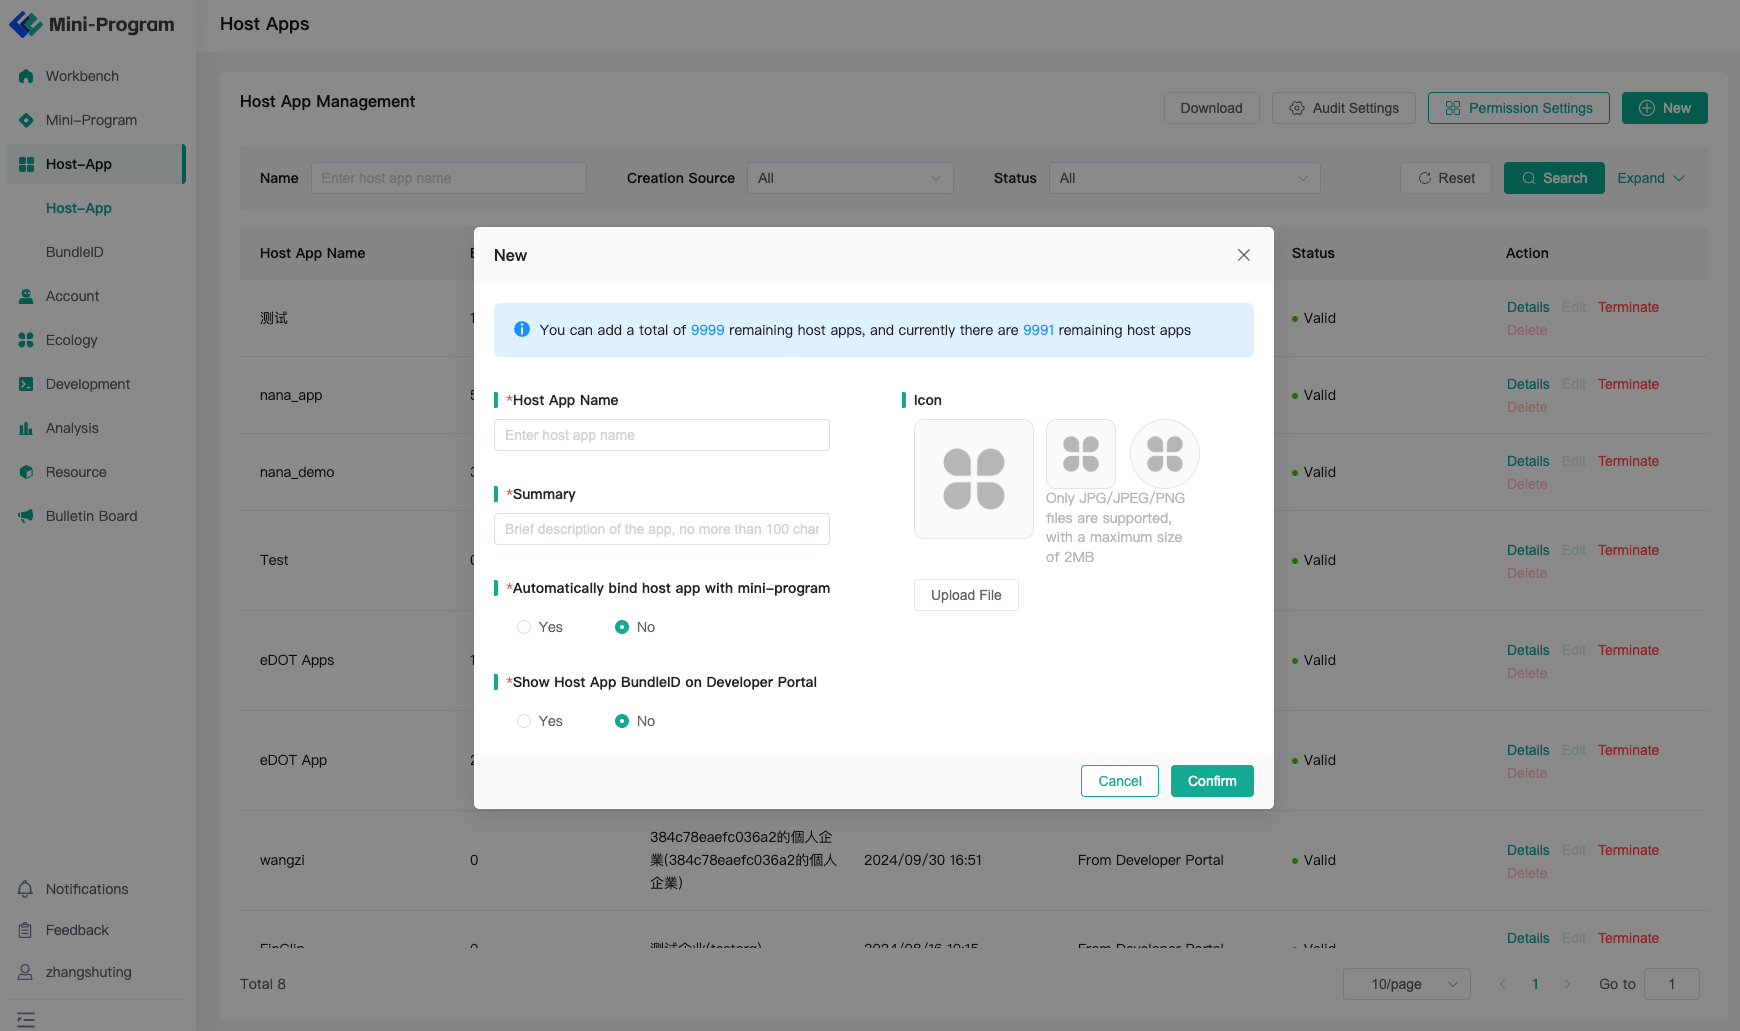
Click "Add Cooperative Application" on the application list page. You can set basic information such as the application name, description, icon, and Bundle ID. Additionally, you can configure "Whether the Application Bundle ID is displayed in the Developer Center" and "Whether the application automatically associates with Mini-Programs".
# 4.1.2 View and Operate Application Details
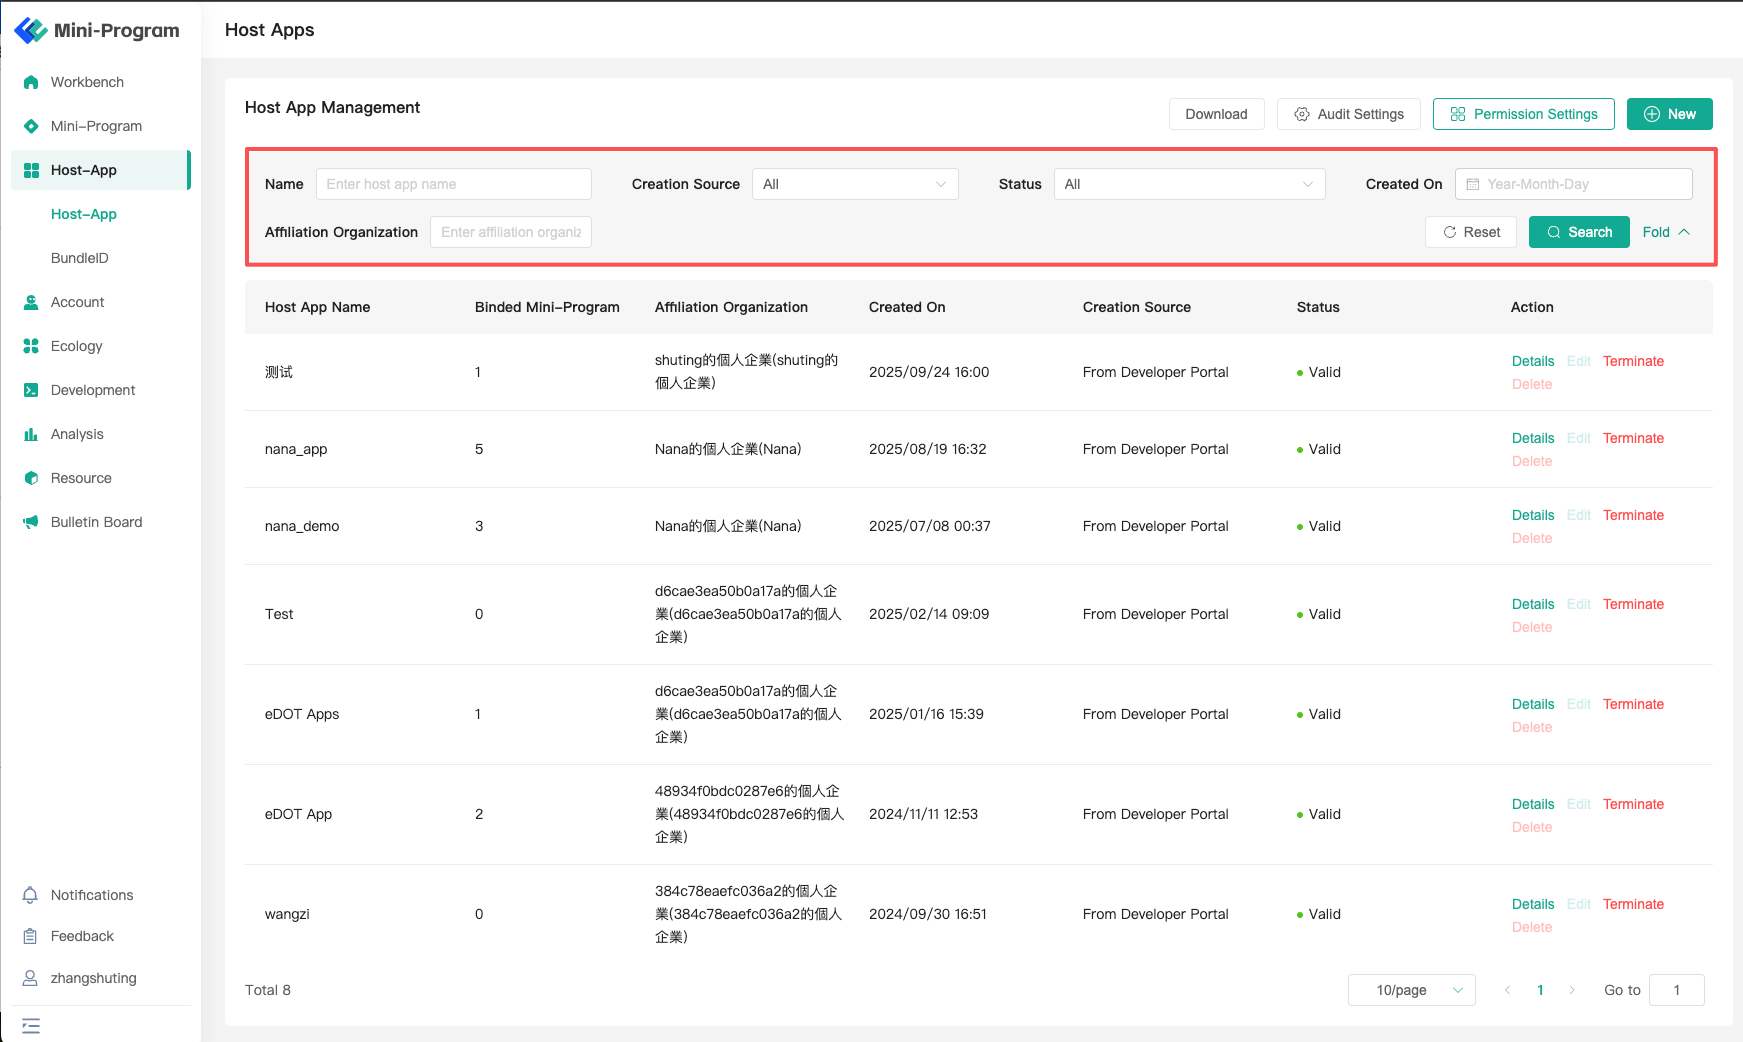
The Operation Center can view global application information. You can query the application information you need to manage using filter conditions.
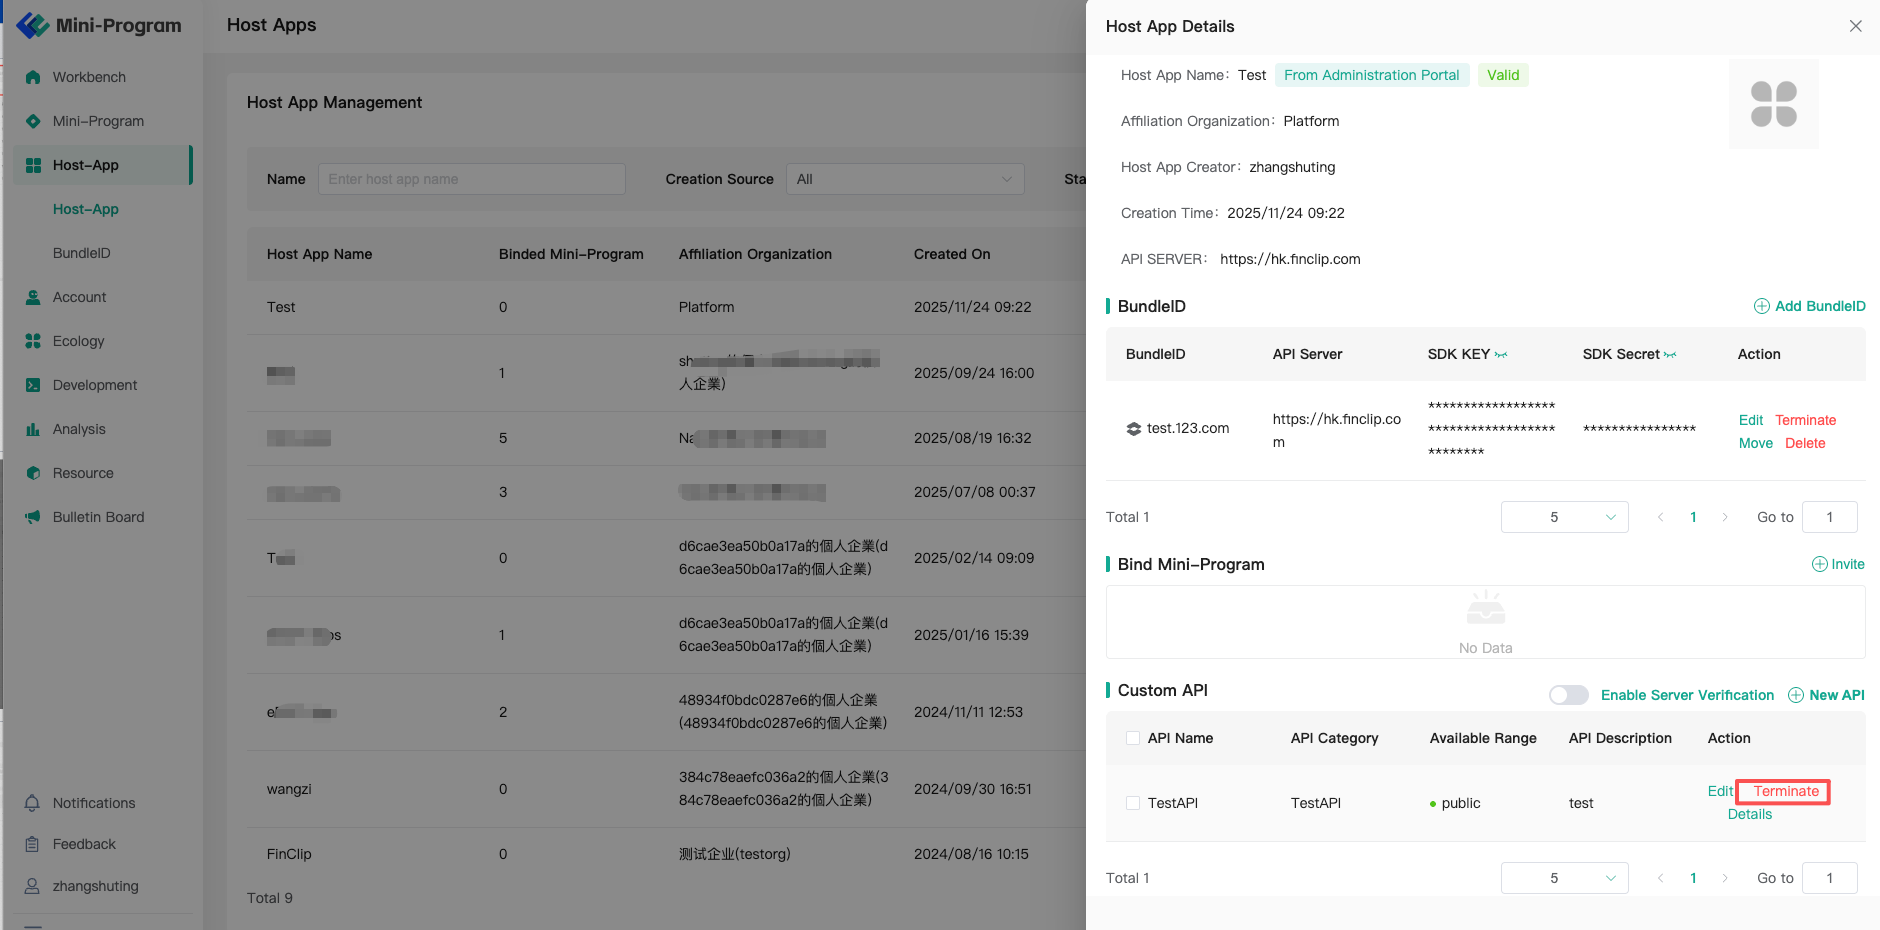
However, depending on the creation source of the application, the corresponding operations available in the Operation Center differ as follows:
Additional Explanation: Applications created by the Operation Center support custom creation and management of APIs and menus. If Mini-Programs under other applications want to apply to call APIs or menus, approval operations can be performed on the specific API/menu (approvals can also be handled in the Pending Center). Furthermore, if an API/menu was previously approved but now needs to be disabled, go to the Application - API/Menu details and click "Disable".
# 4.1.3 Application Permission Settings
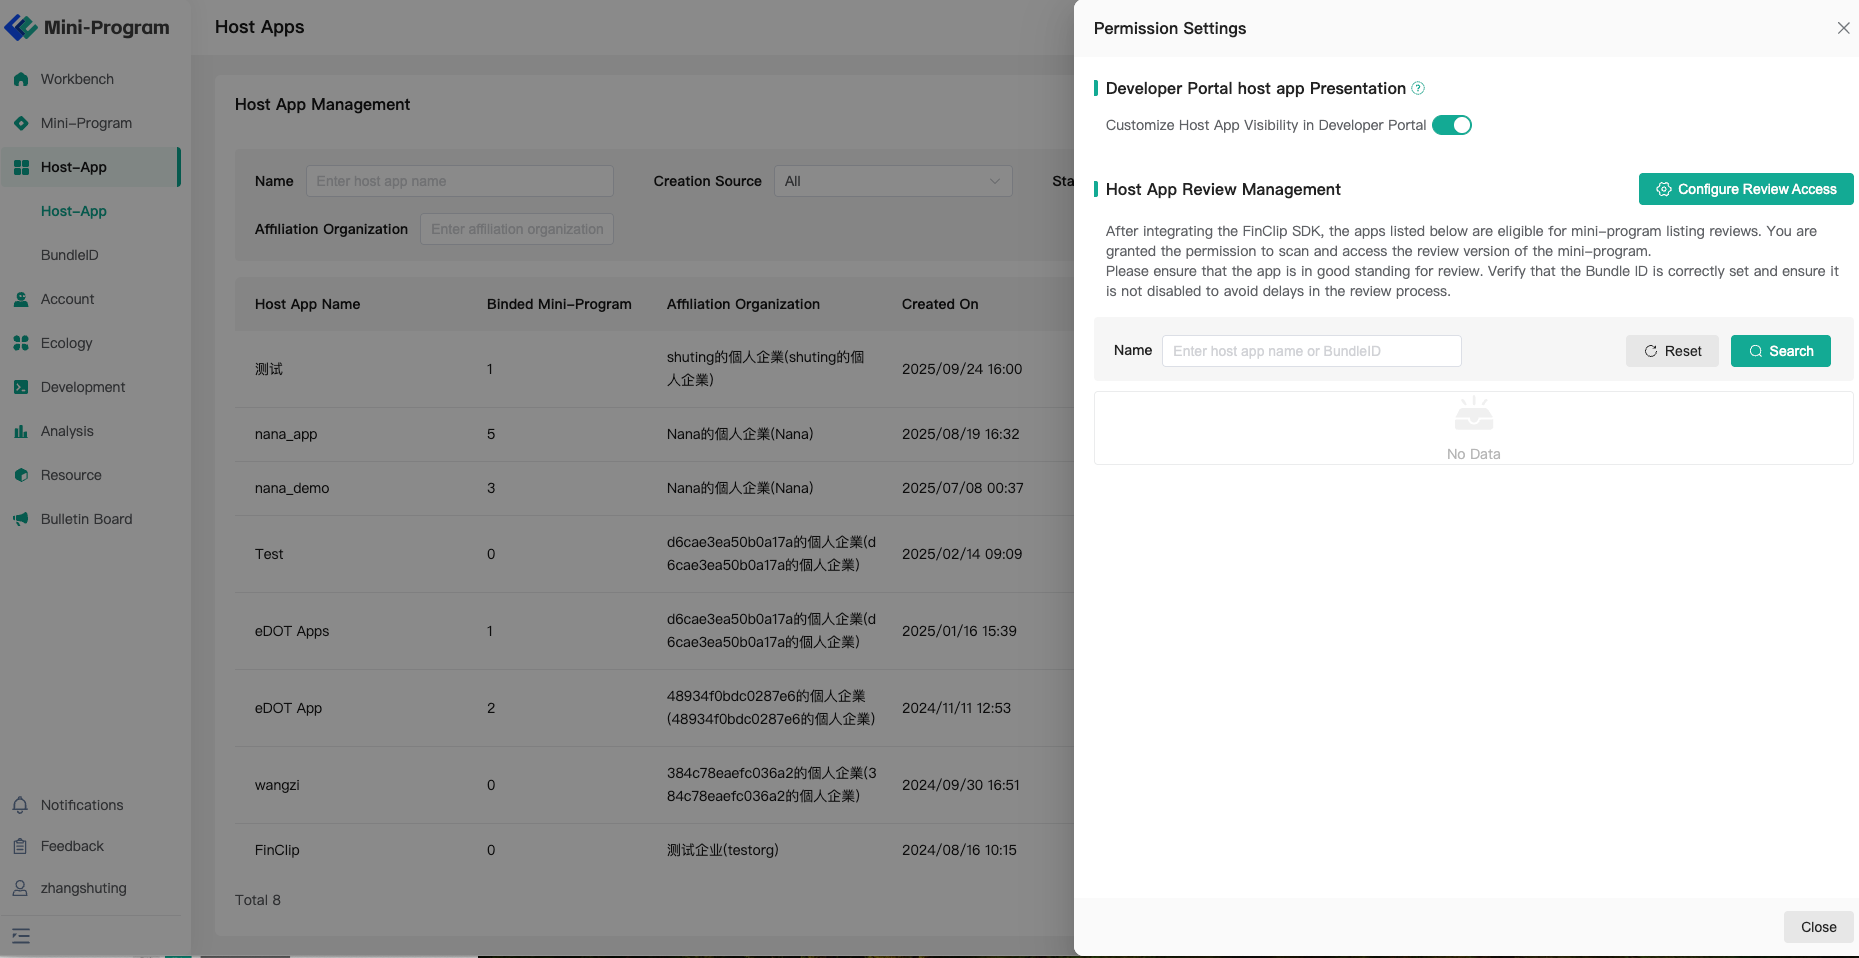
Click "Application Permission Settings" on the application list page to configure "Developer Center Application Settings" and "Audit Application Settings".
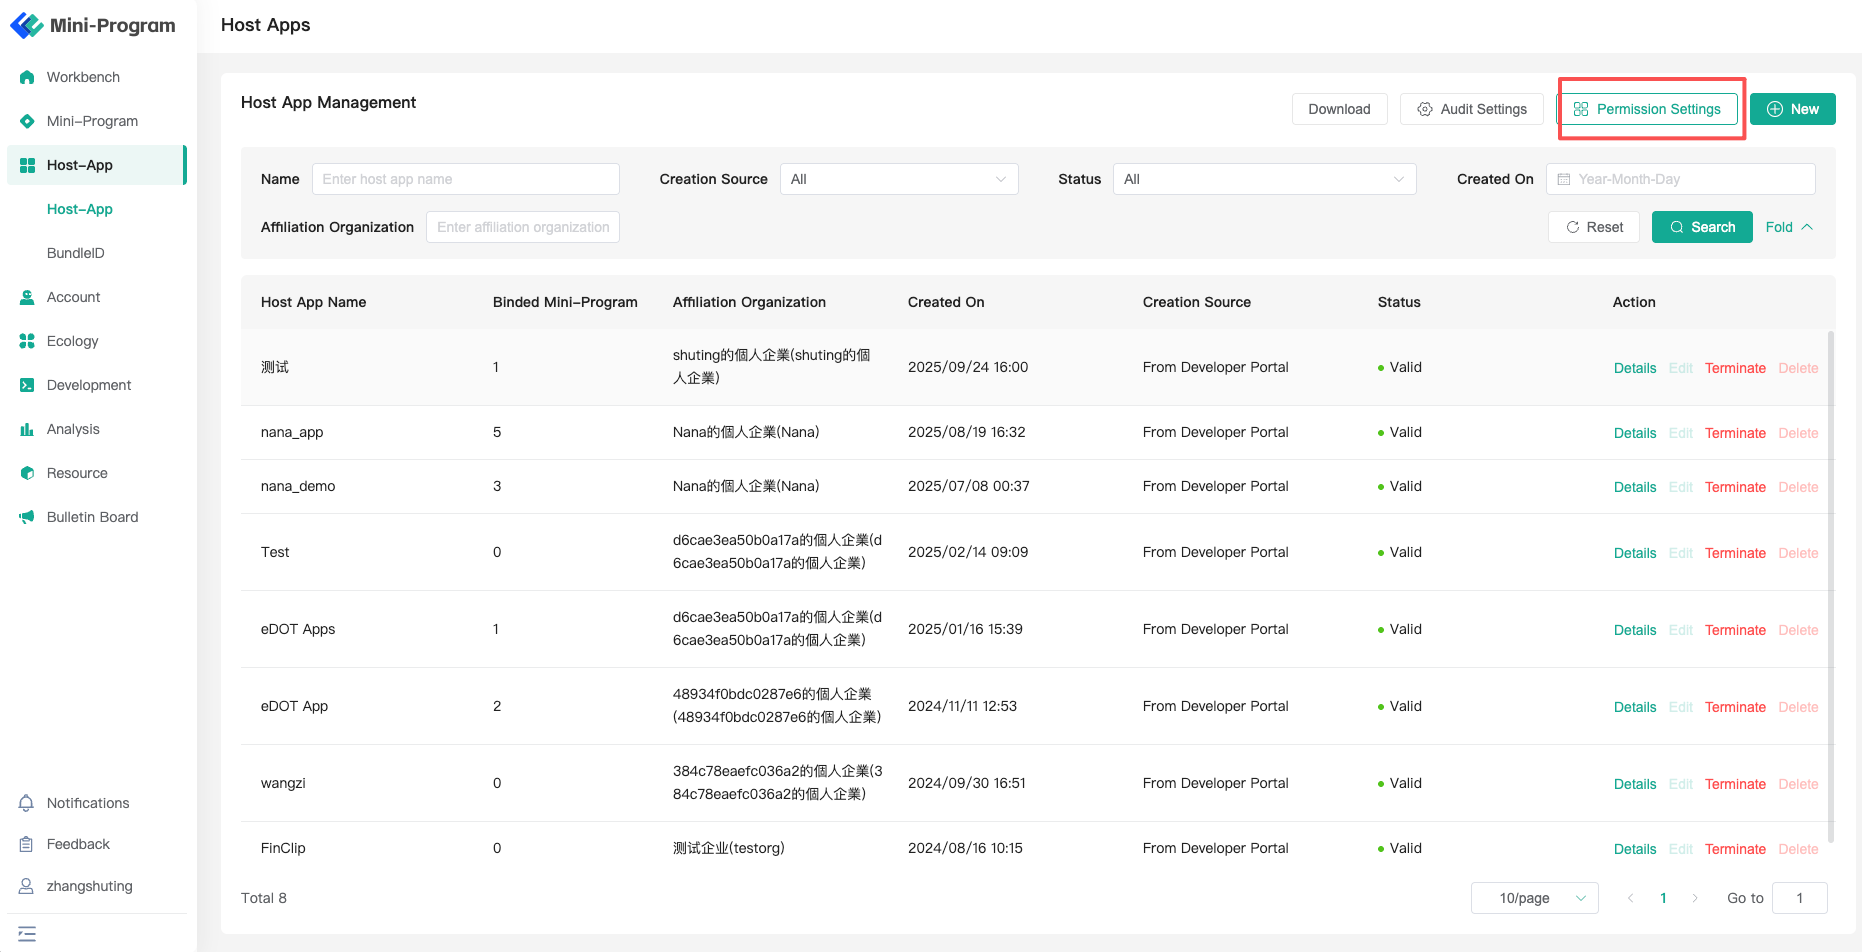
- Developer Center Application Settings: After enabling this switch, the Developer Center can independently set the application's visibility and Bundle ID display settings.
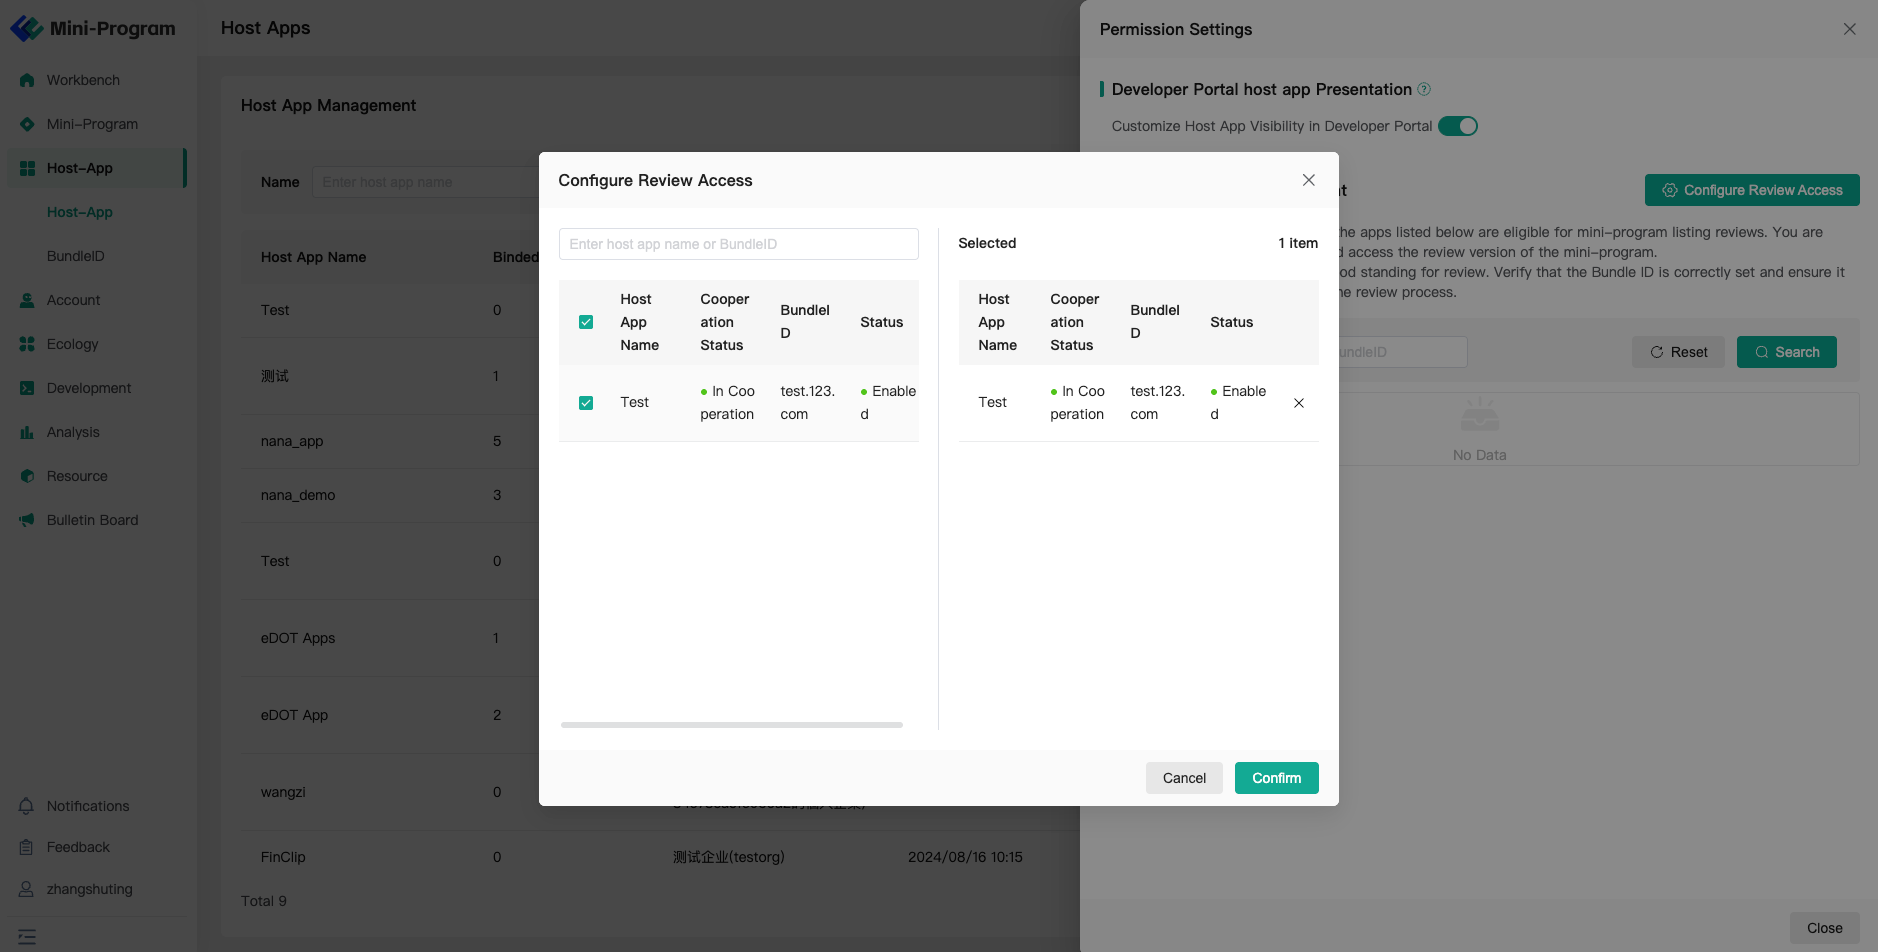
- Audit Application Settings: Here you can select some applications created by the Operation Center and set them as audit applications. After integrating the FinClip Mini-Program SDK, audit applications can be used for Mini-Program release audits and have the permission to scan codes to open the audit version of Mini-Programs. Audit applications need to have a normal cooperation status. If you need to use an audit application, please confirm that the set Bundle ID is correct and that the Bundle ID is not disabled.
# 4.2 Bundle ID
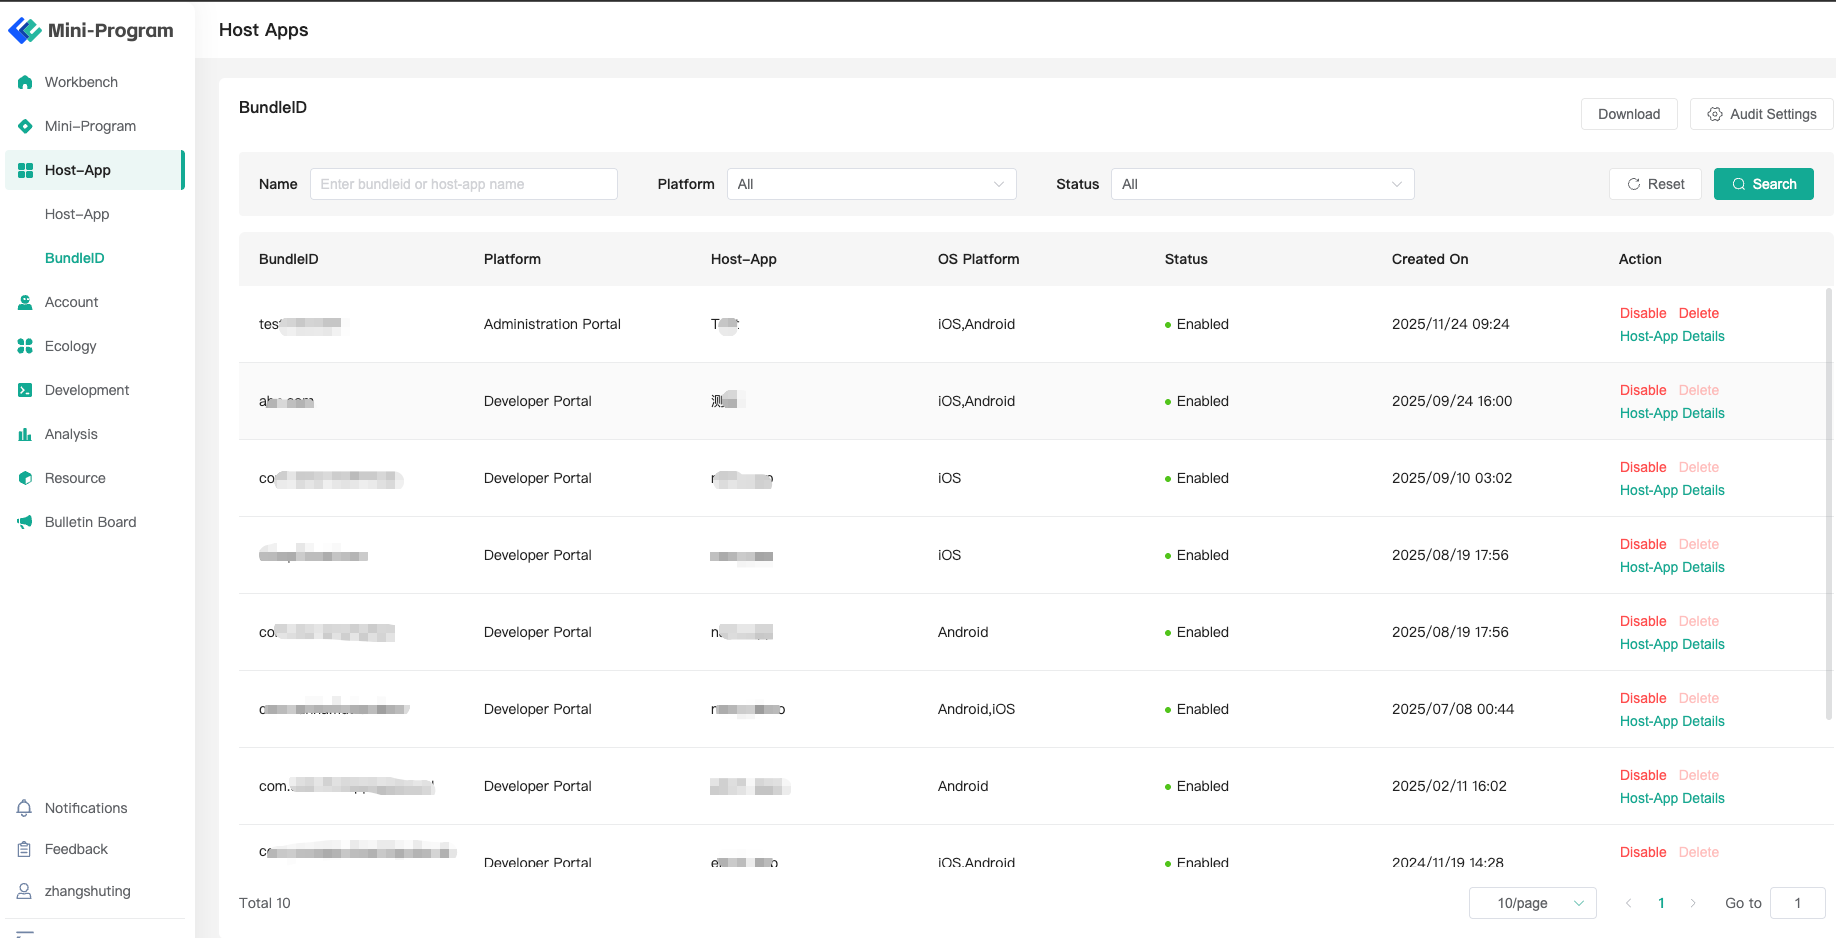
Here you can manage Bundle IDs created by the Operation Center and the Developer Center, enabling or disabling them, etc.
# 5. Development
# 5.1 Domain Name Configuration
In business scenarios, Mini-Programs need to access specific domain names. To ensure the security of data requests made by Mini-Programs, the Mini-Program platform provides the "Domain Name Management" function for administrators to configure domain names. Mini-Programs can only access domain names after successful configuration.
# 5.1.1 Configure Blacklist/Whitelist
Open the configuration window via the "Manage" function. Currently supports HTTP protocol (http/https) and WebSocket protocol (ws/wss). Asterisks can be used to make the configuration effective for second-level domains and above. Domain name configurations typically take effect within 10 minutes.
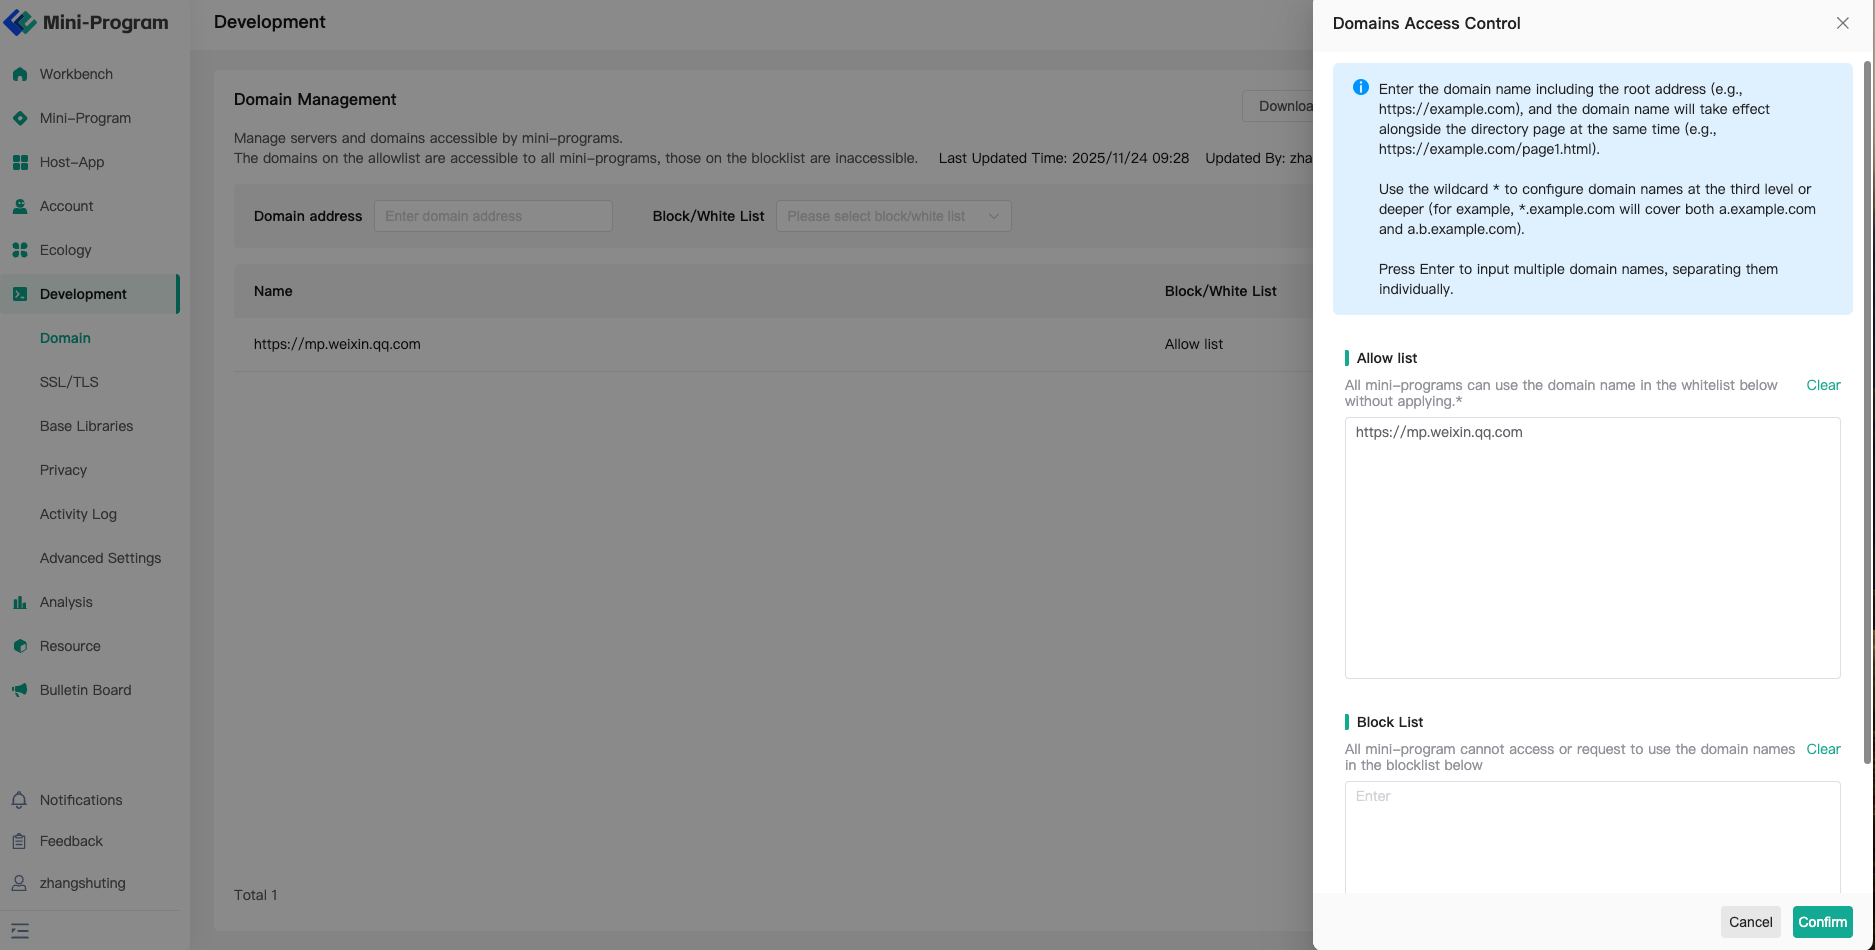
Please Note Blacklist and whitelist domain names currently do not support configuration of root domains. However, after configuring a domain name, the directories and pages under that domain name will also take effect (e.g., https://example.com/page1.html (opens new window) and https://example.com/page (opens new window) will both take effect after adding https://example.com (opens new window)).
# 5.1.2 View Organization Domain Name List
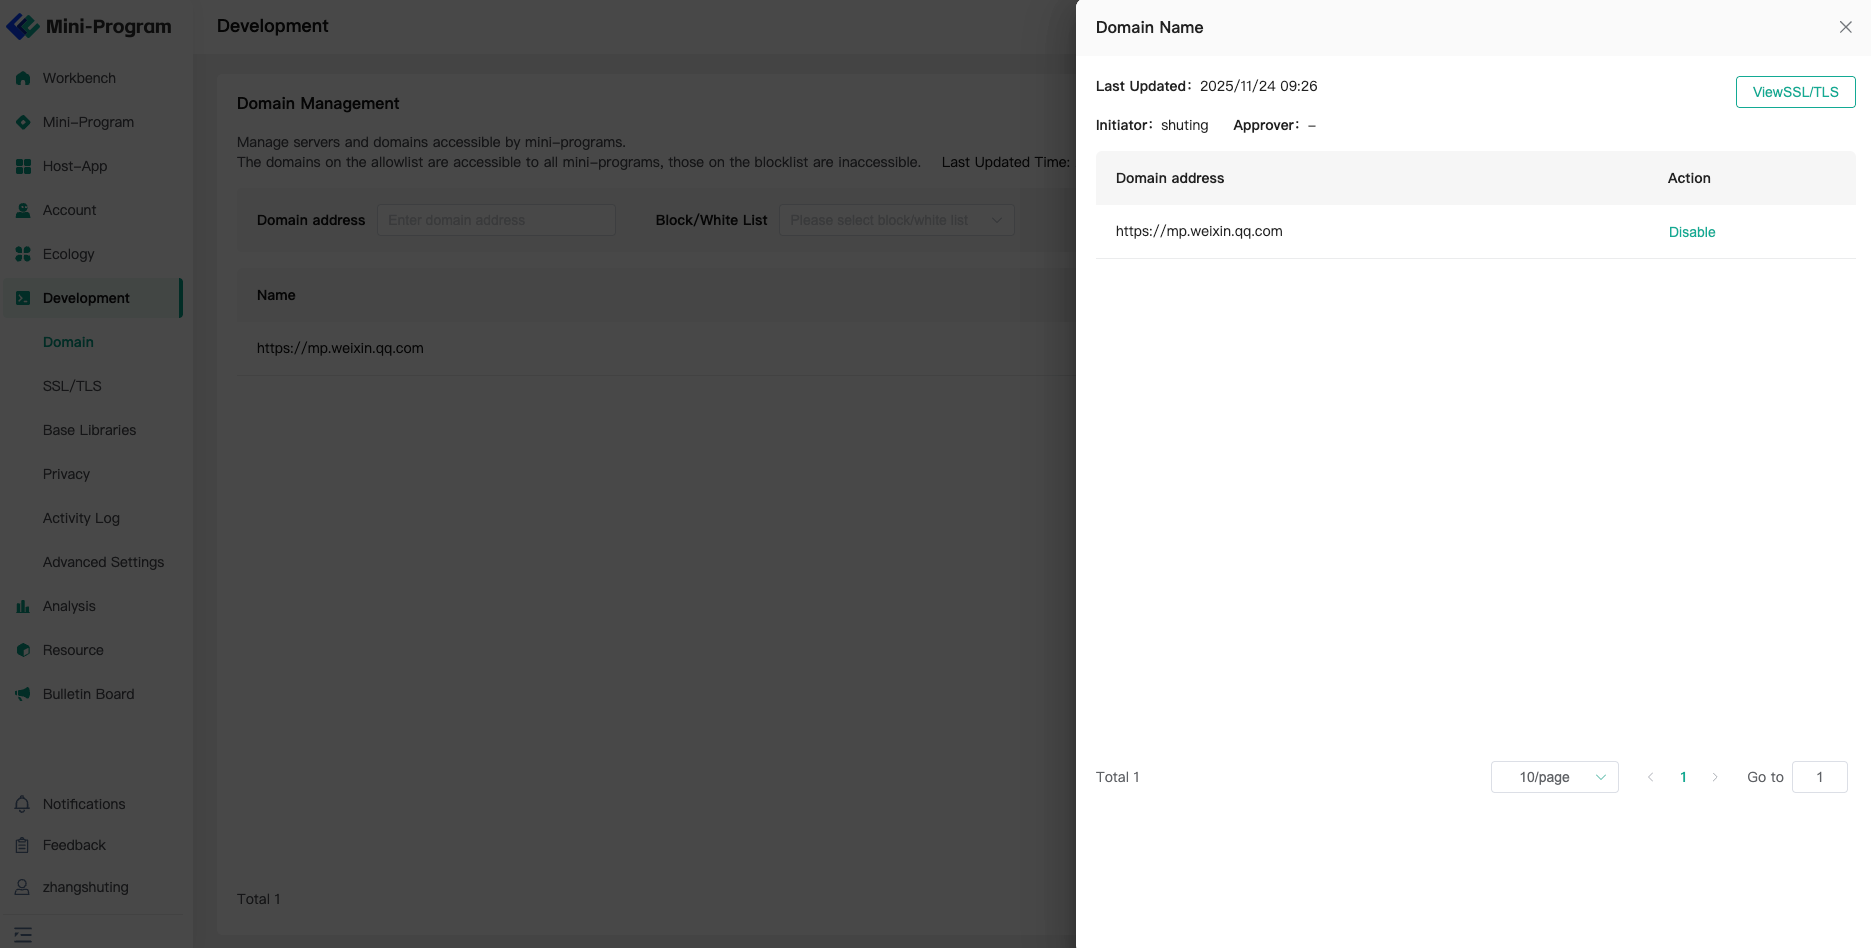
Go to the organization list page via "Organization Owned Domain Names", and click the domain name details of any organization to view all its domain names.
# 5.1.3 Audit Settings
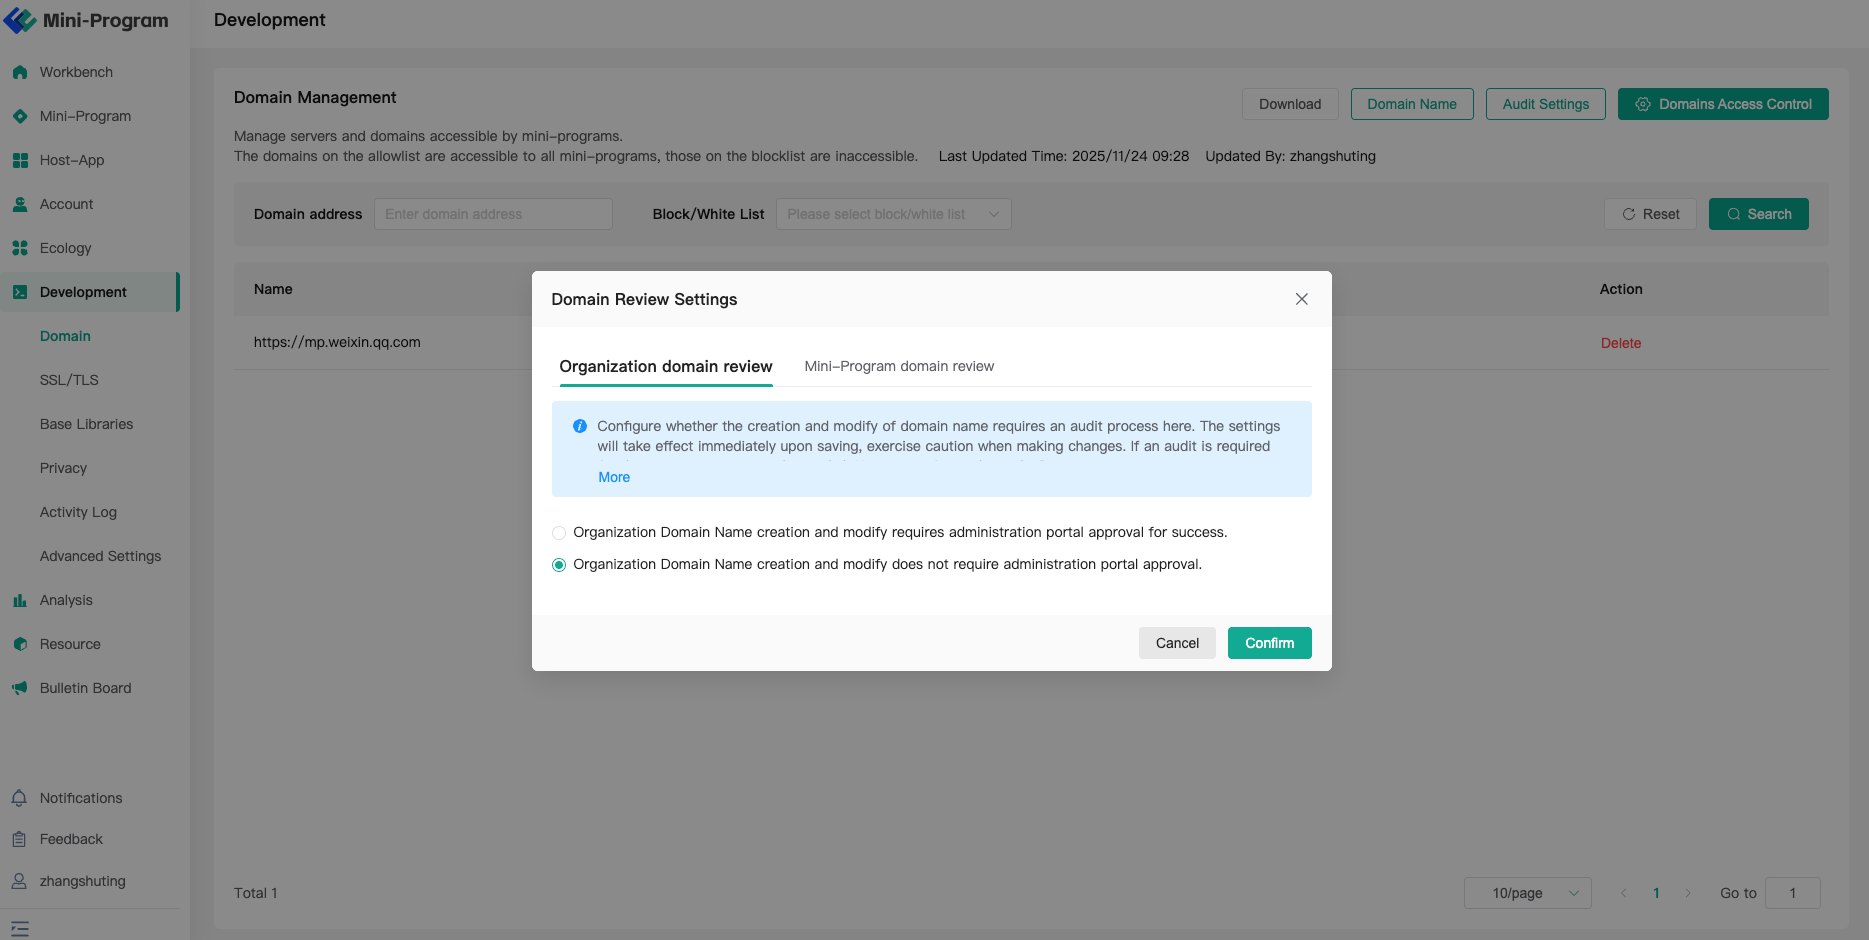
Use the "Settings" function to configure whether domain name usage by organizations in the Developer Center requires approval by the Operation Center. The default is no approval required.
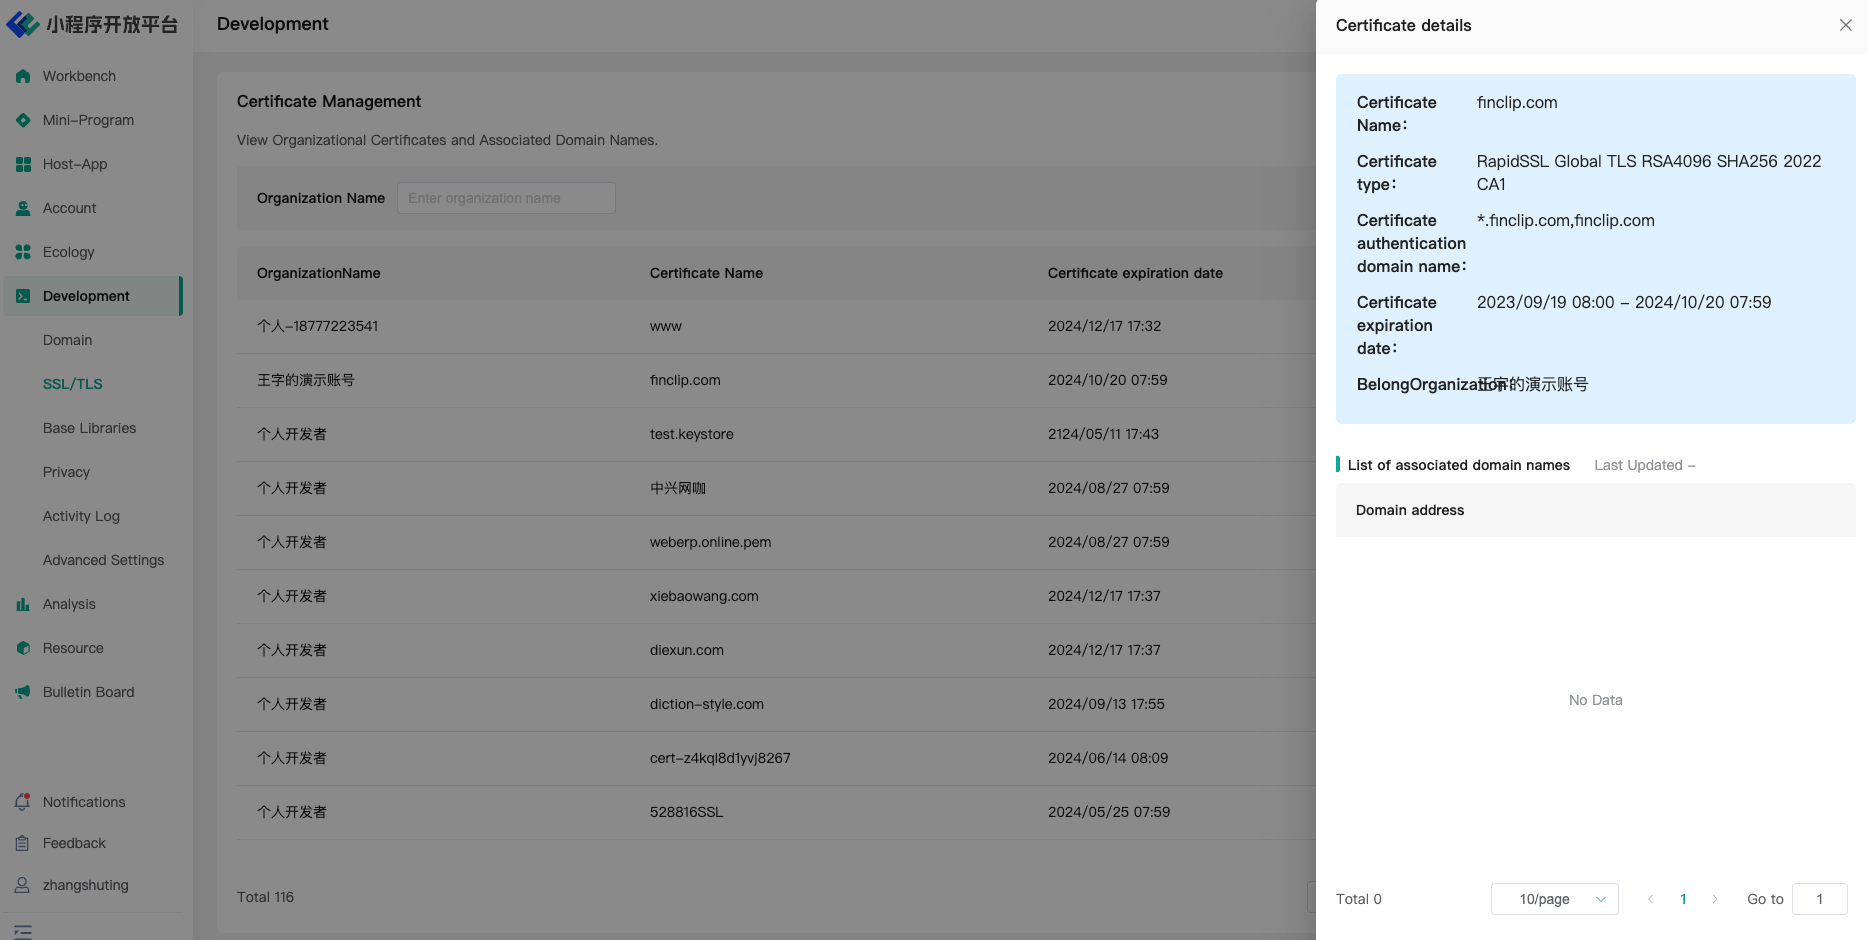
# 5.2 Certificate Management
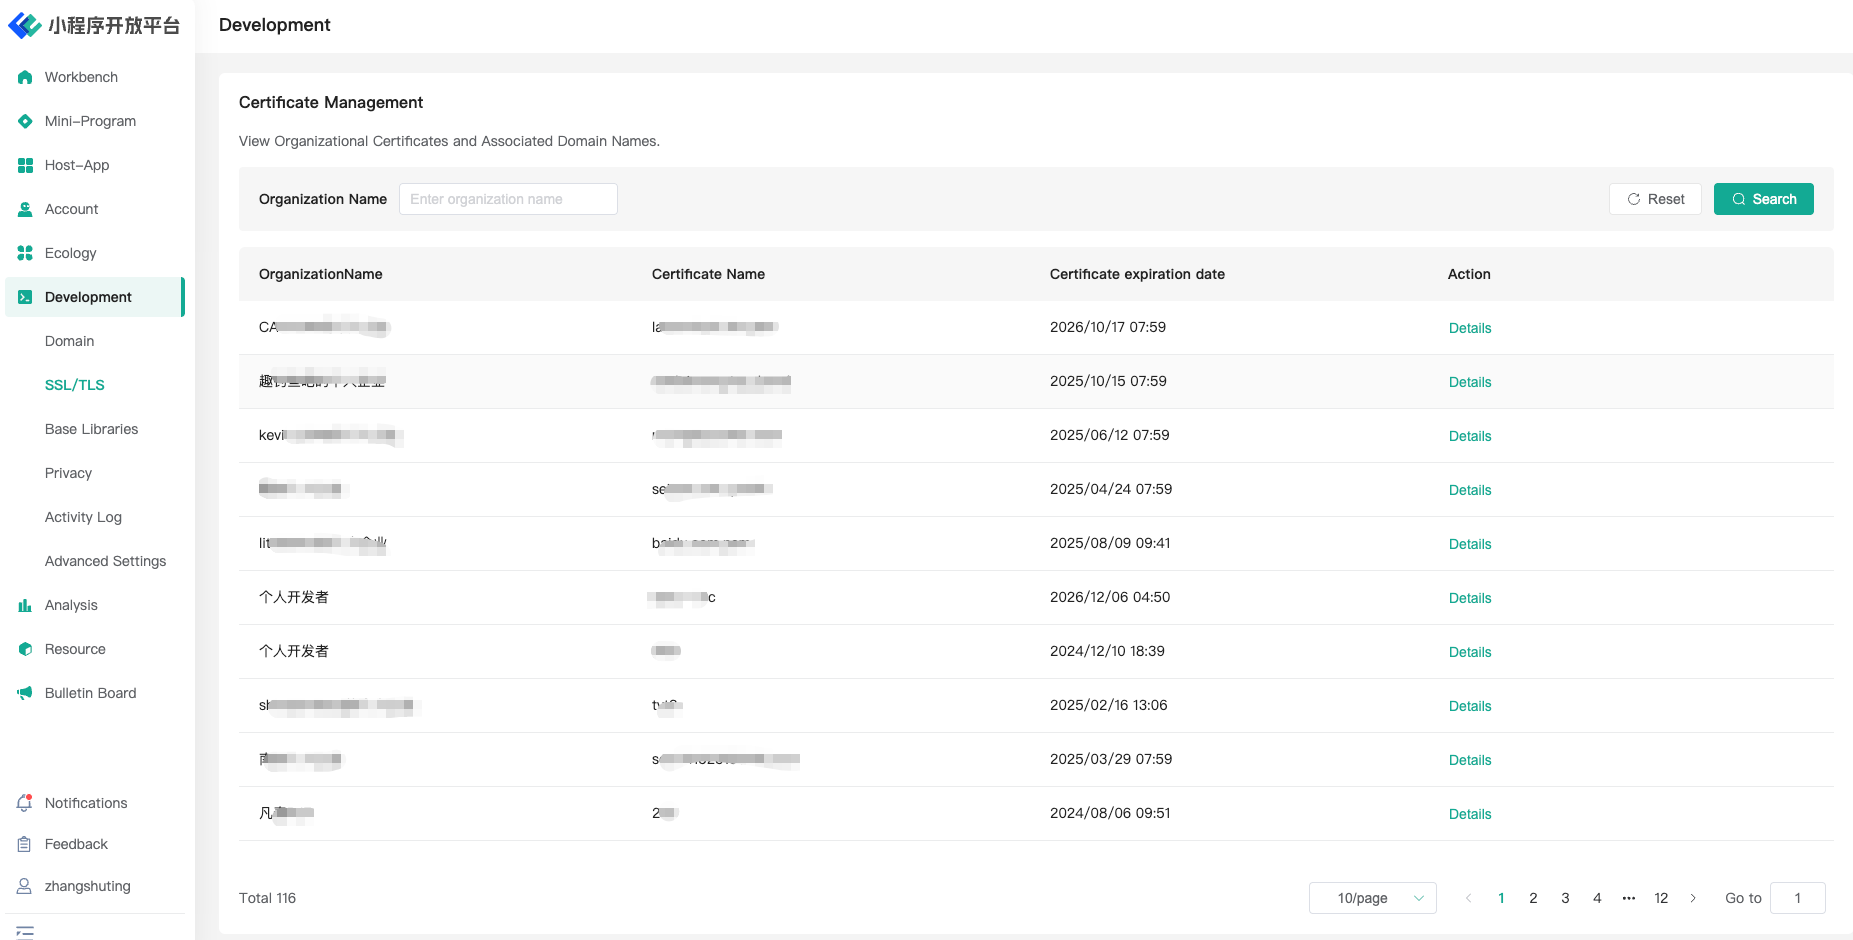
On the Developer Center side, the Mini-Program platform provides the function to upload certificates for associating with domain names. Correspondingly, the Operation Center provides viewing functionality.
# 5.3 Base Library Update
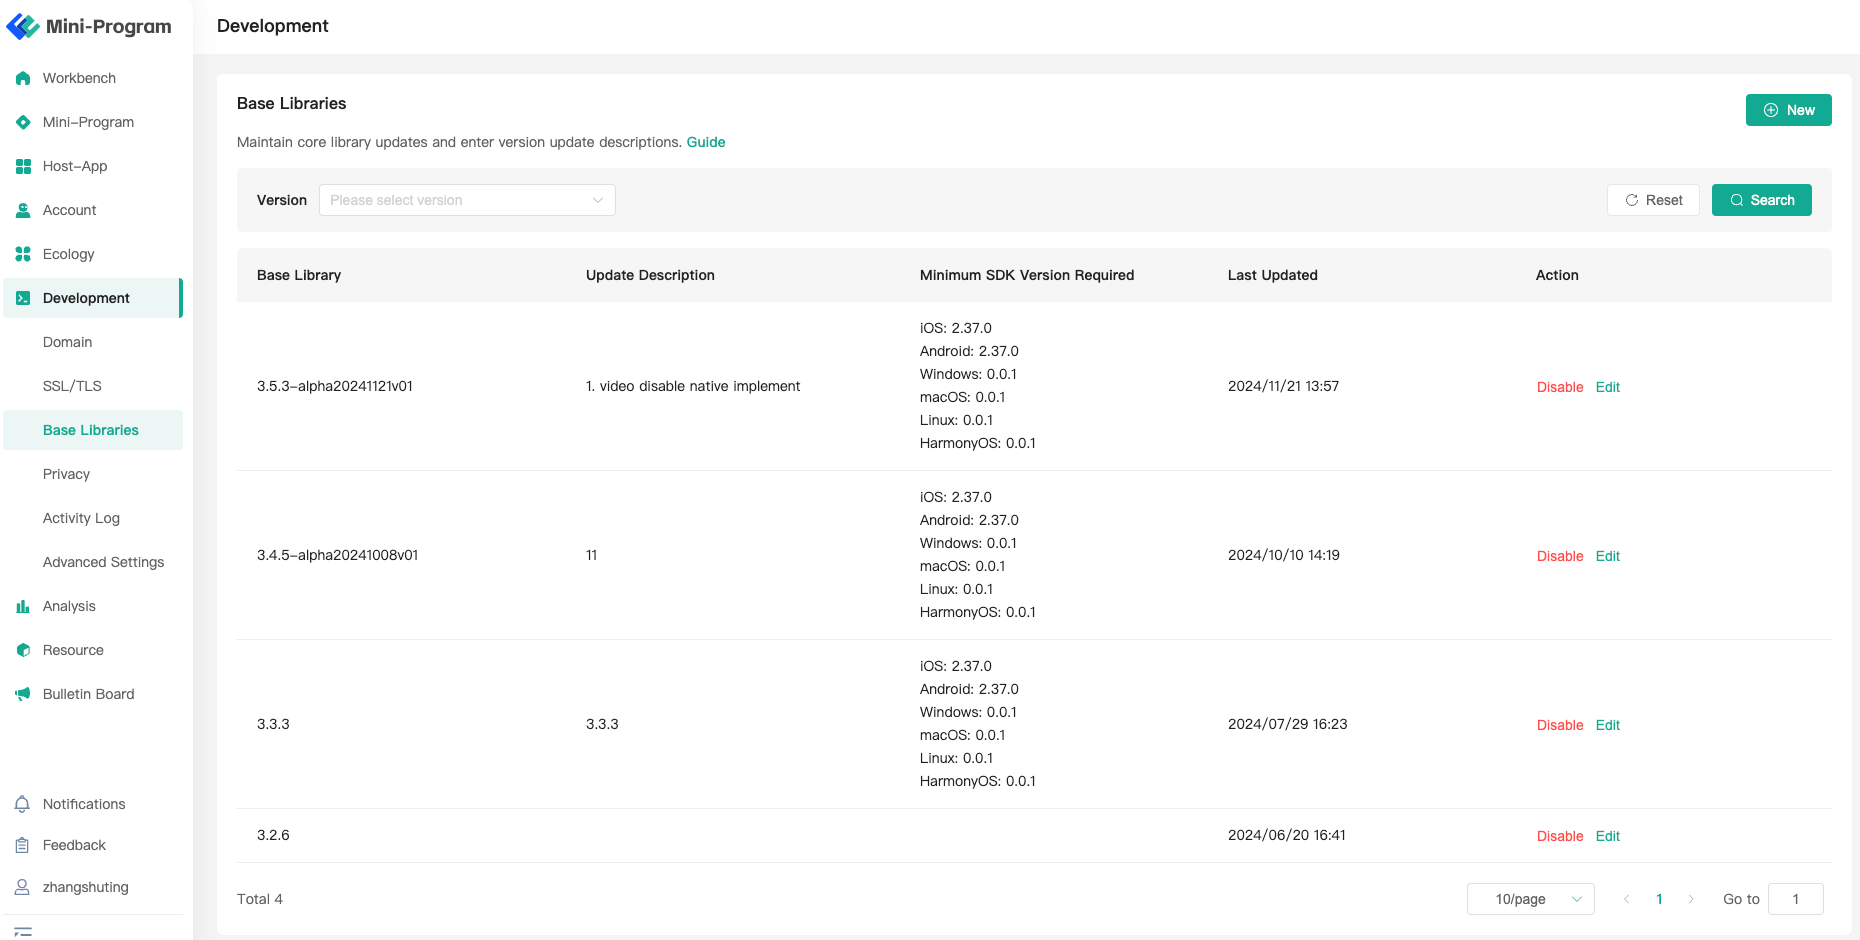
- Updates to the Mini-Program Base Library can be completed on this page. Click "Enable" and the updated Base Library will take effect in real-time.
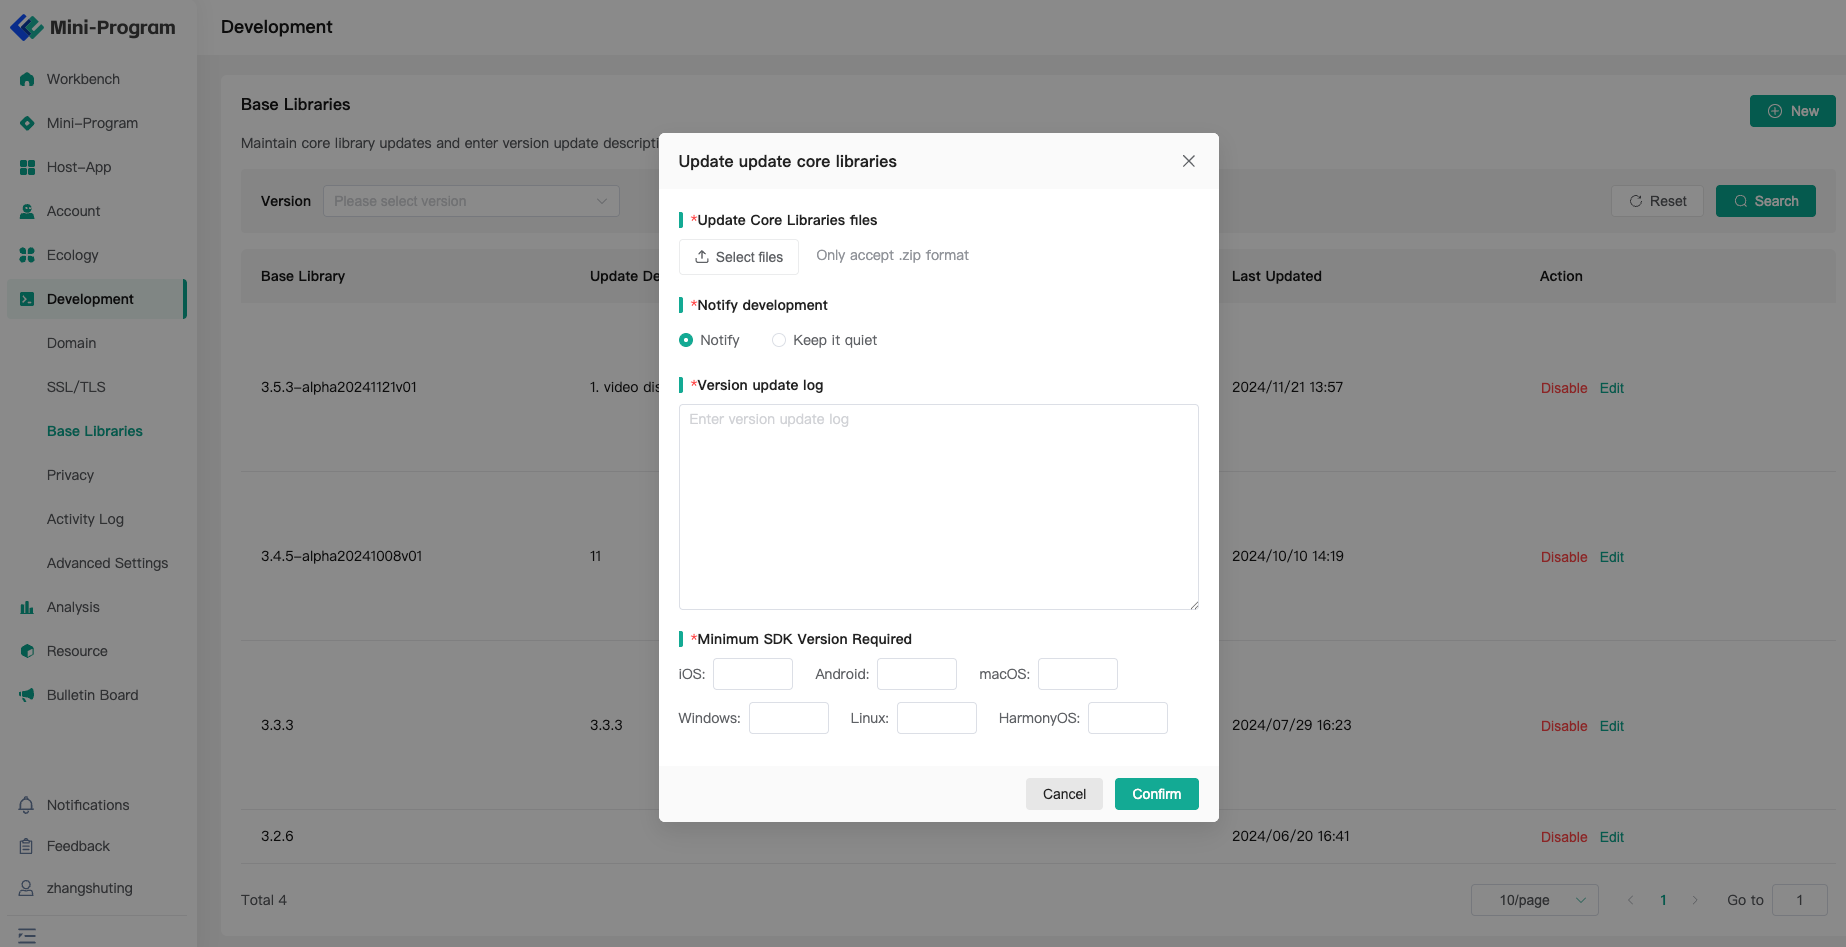
- Click the "Add" button to upload a Base Library code package.
- When uploading a Base Library, simply select the Base Library zip package; there is no need to manually enter the version number (the server will read the version number from the zip package automatically).
# 5.4 Custom Configuration
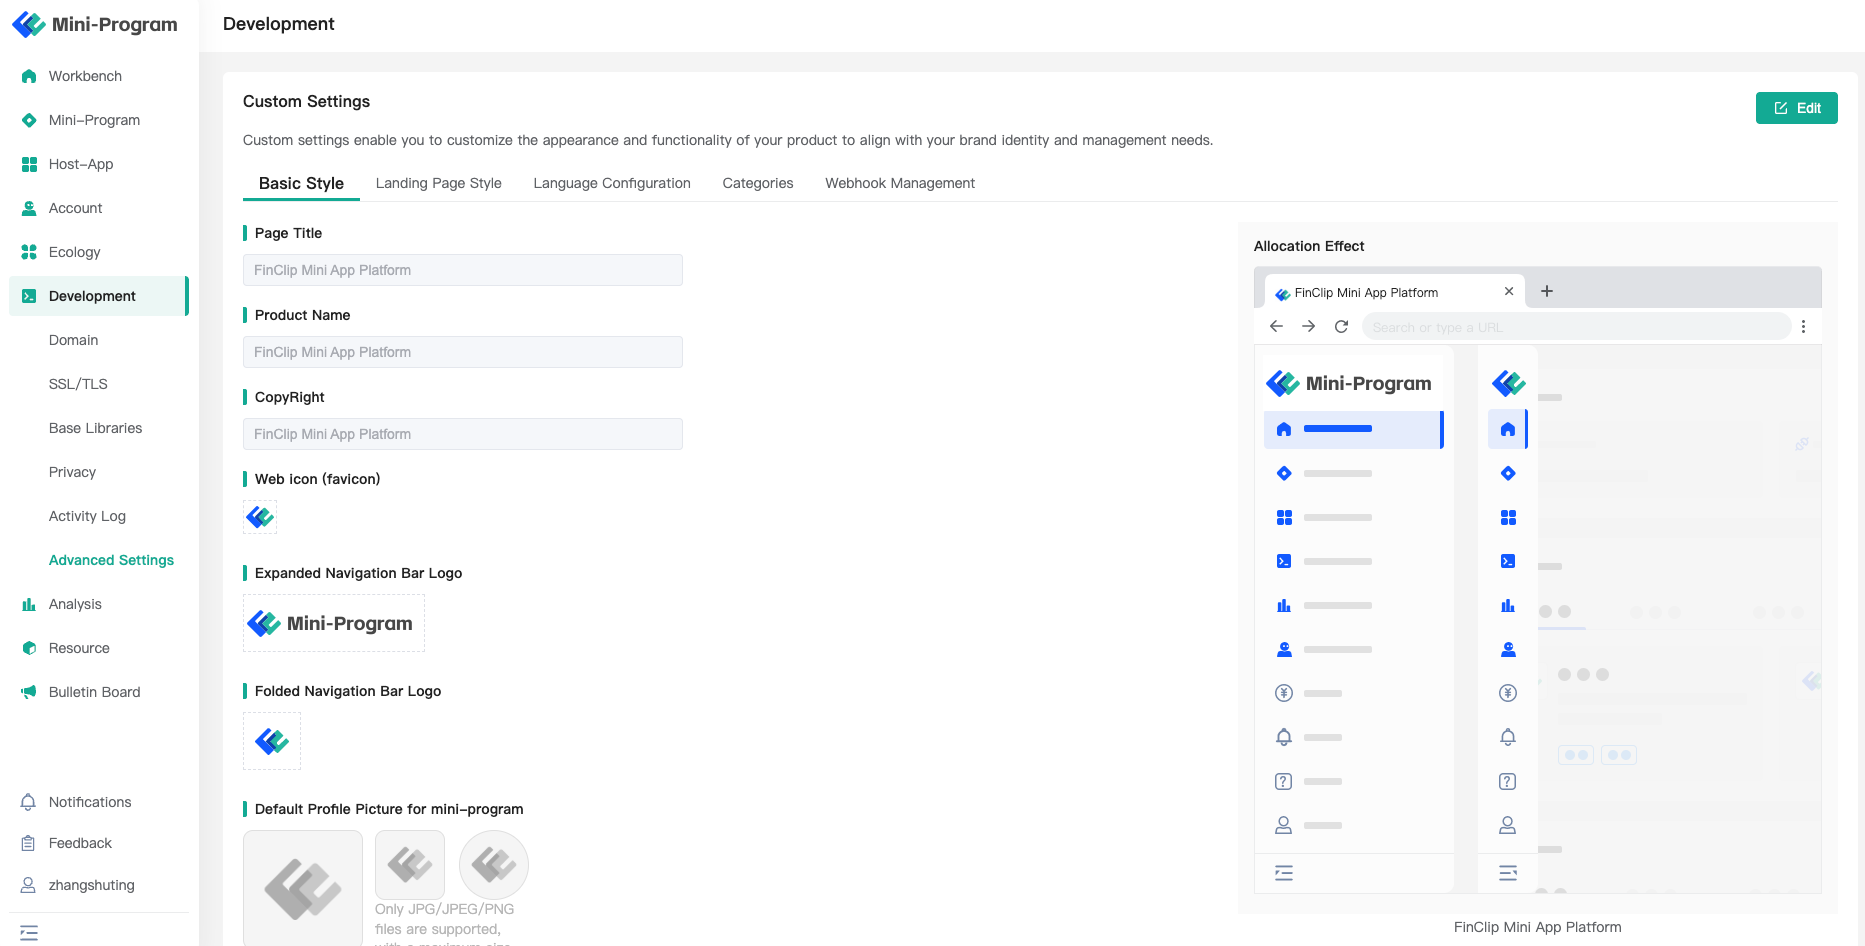
Here you can customize the following: basic product styling, registration/login page styling, Mini-Program categories and tags, and product security configurations.
# 5.5 Operation Logs
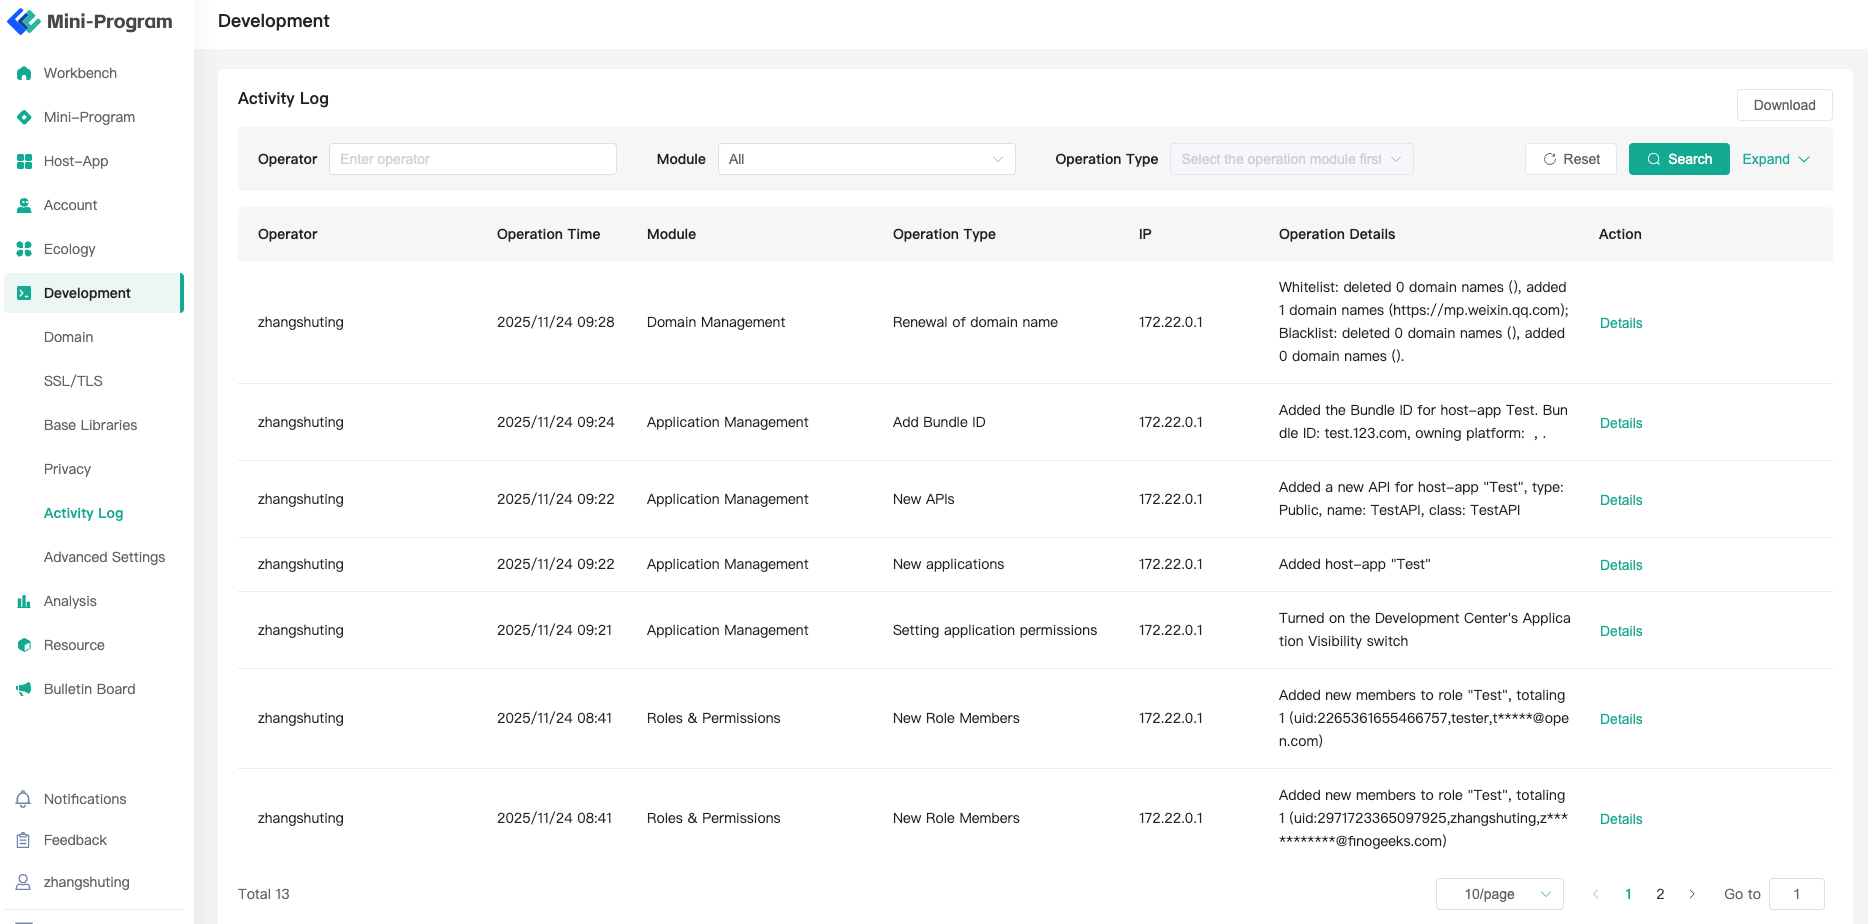
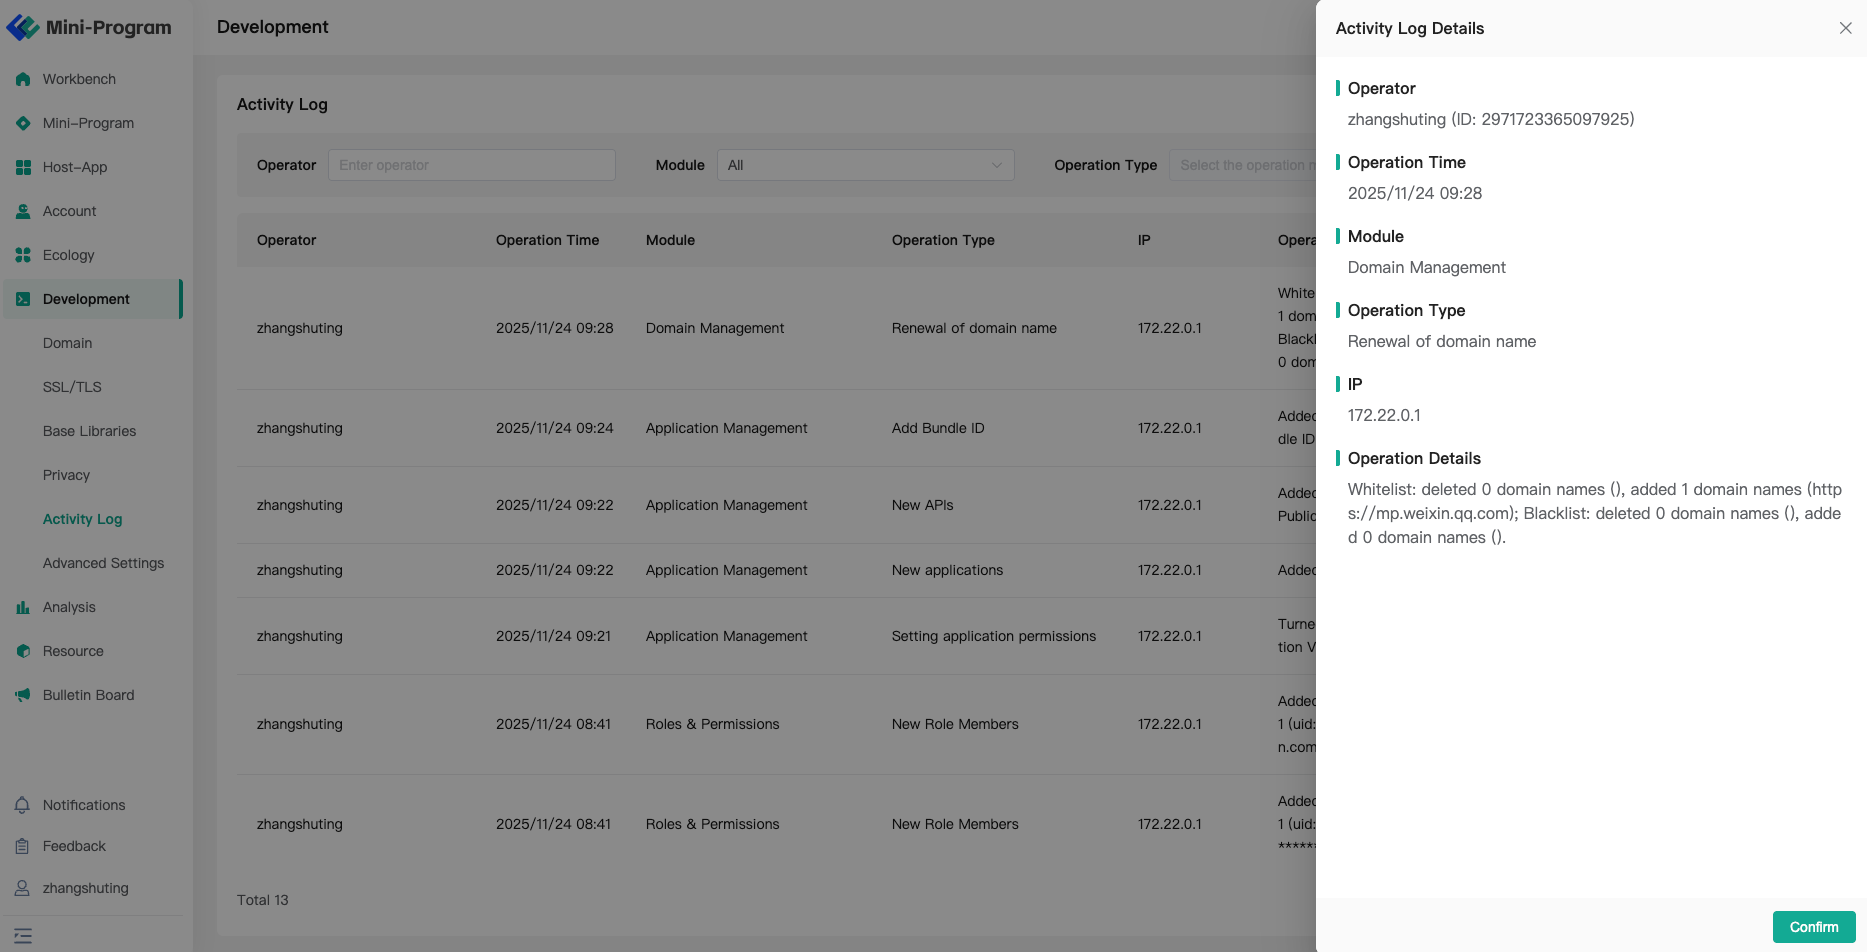
On the "Operation Logs" page, you can filter by operator and functional module according to your needs to facilitate viewing of global operation logs. By clicking "Details", you can view specific operation content, including the operation type, time, data changes before and after the operation, and other information. (Note: The Operation Center will additionally record some operational data generated by the Developer Center, such as team ownership transfers.)
# 6. Ticket Management
# 6.1 Consultation & Feedback
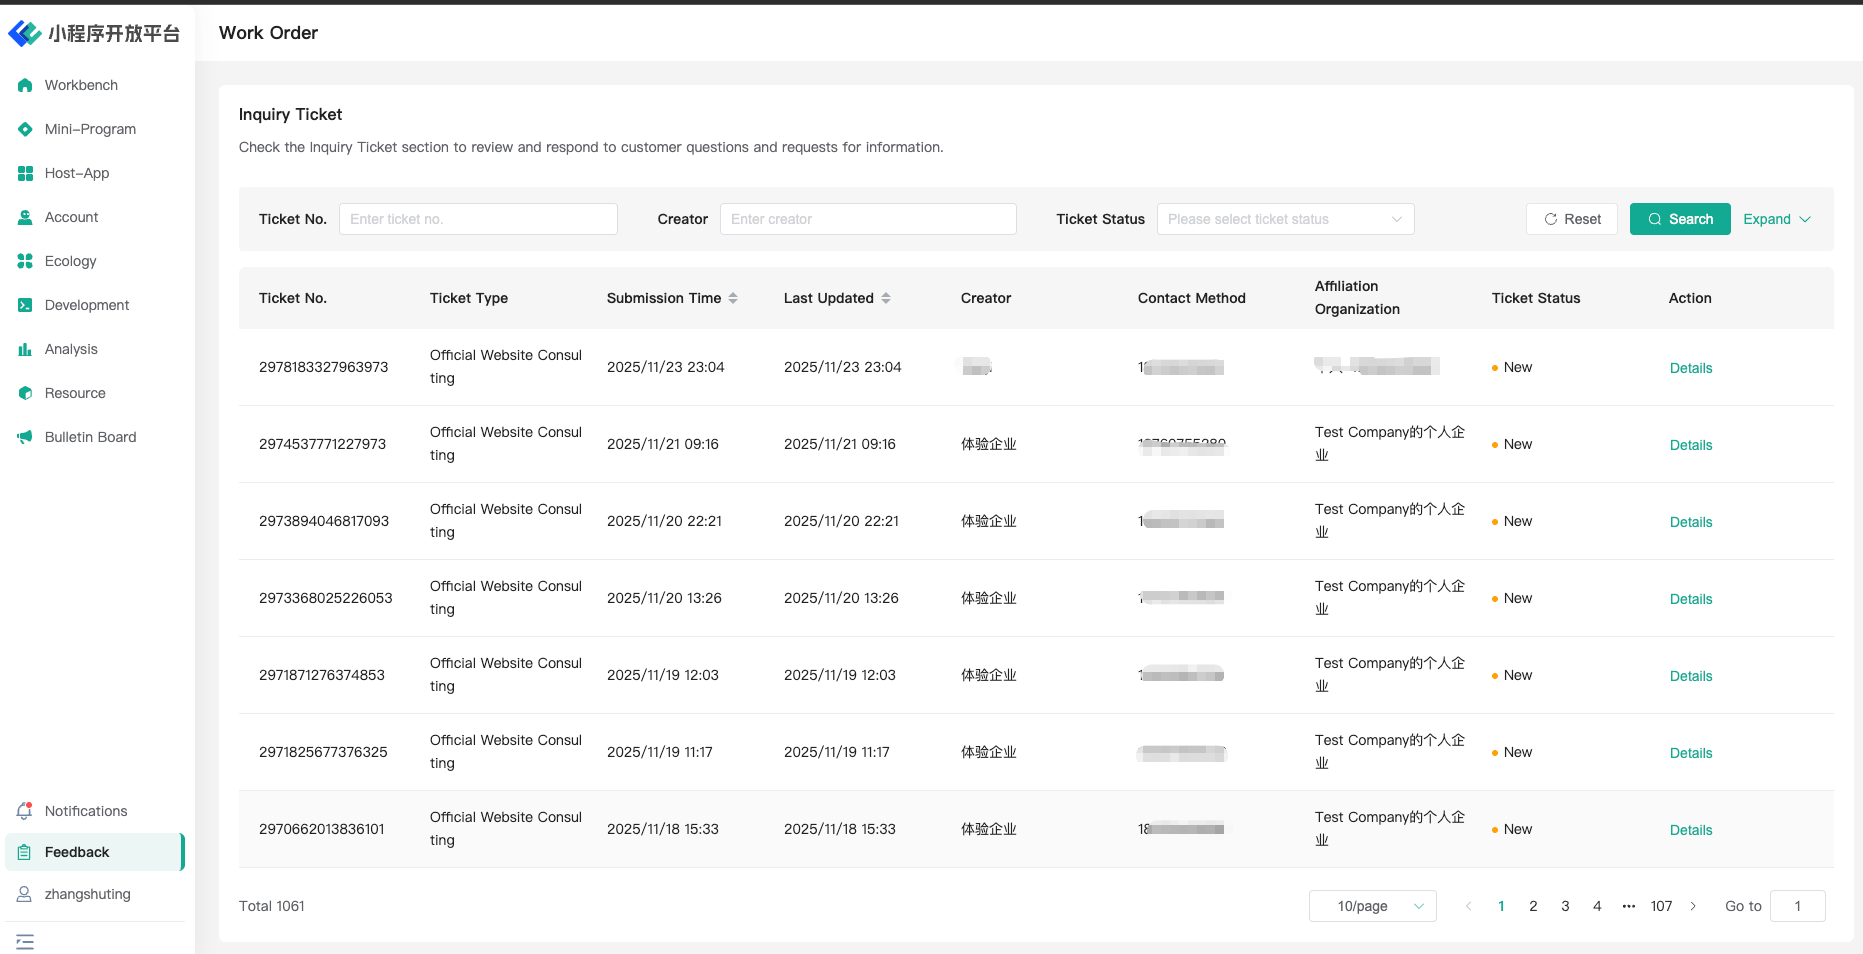
Click "View Details" on the ticket list page to view the corresponding ticket submission information and reply information. You can reply to or supplement the ticket within the dialog box. You can also upload additional attachments for supplementary explanation. If you believe the issue is invalid or the ticket has been resolved, you can click "Close Ticket".
# 6.2 Complaints & Reports
The Mini-Program SDK of the Open Platform provides a function entry for collecting user feedback or complaints/reports. Click "..." in the upper left corner of the Mini-Program to see the entry, as shown below:
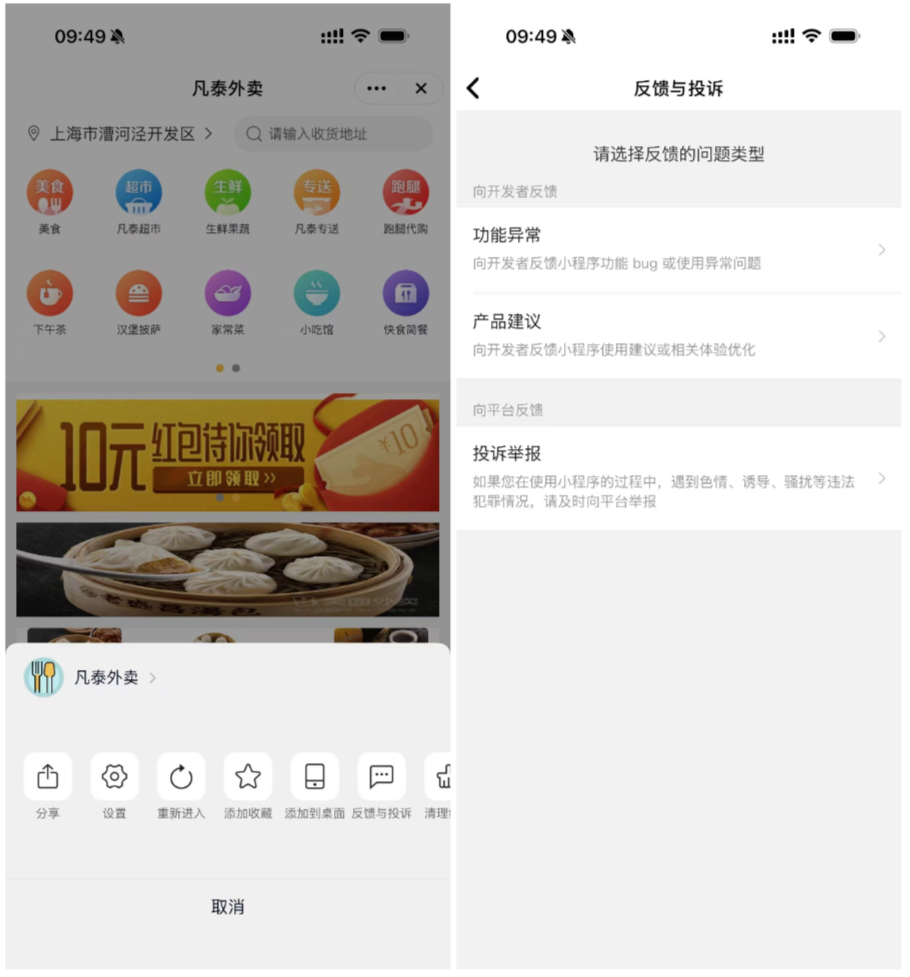
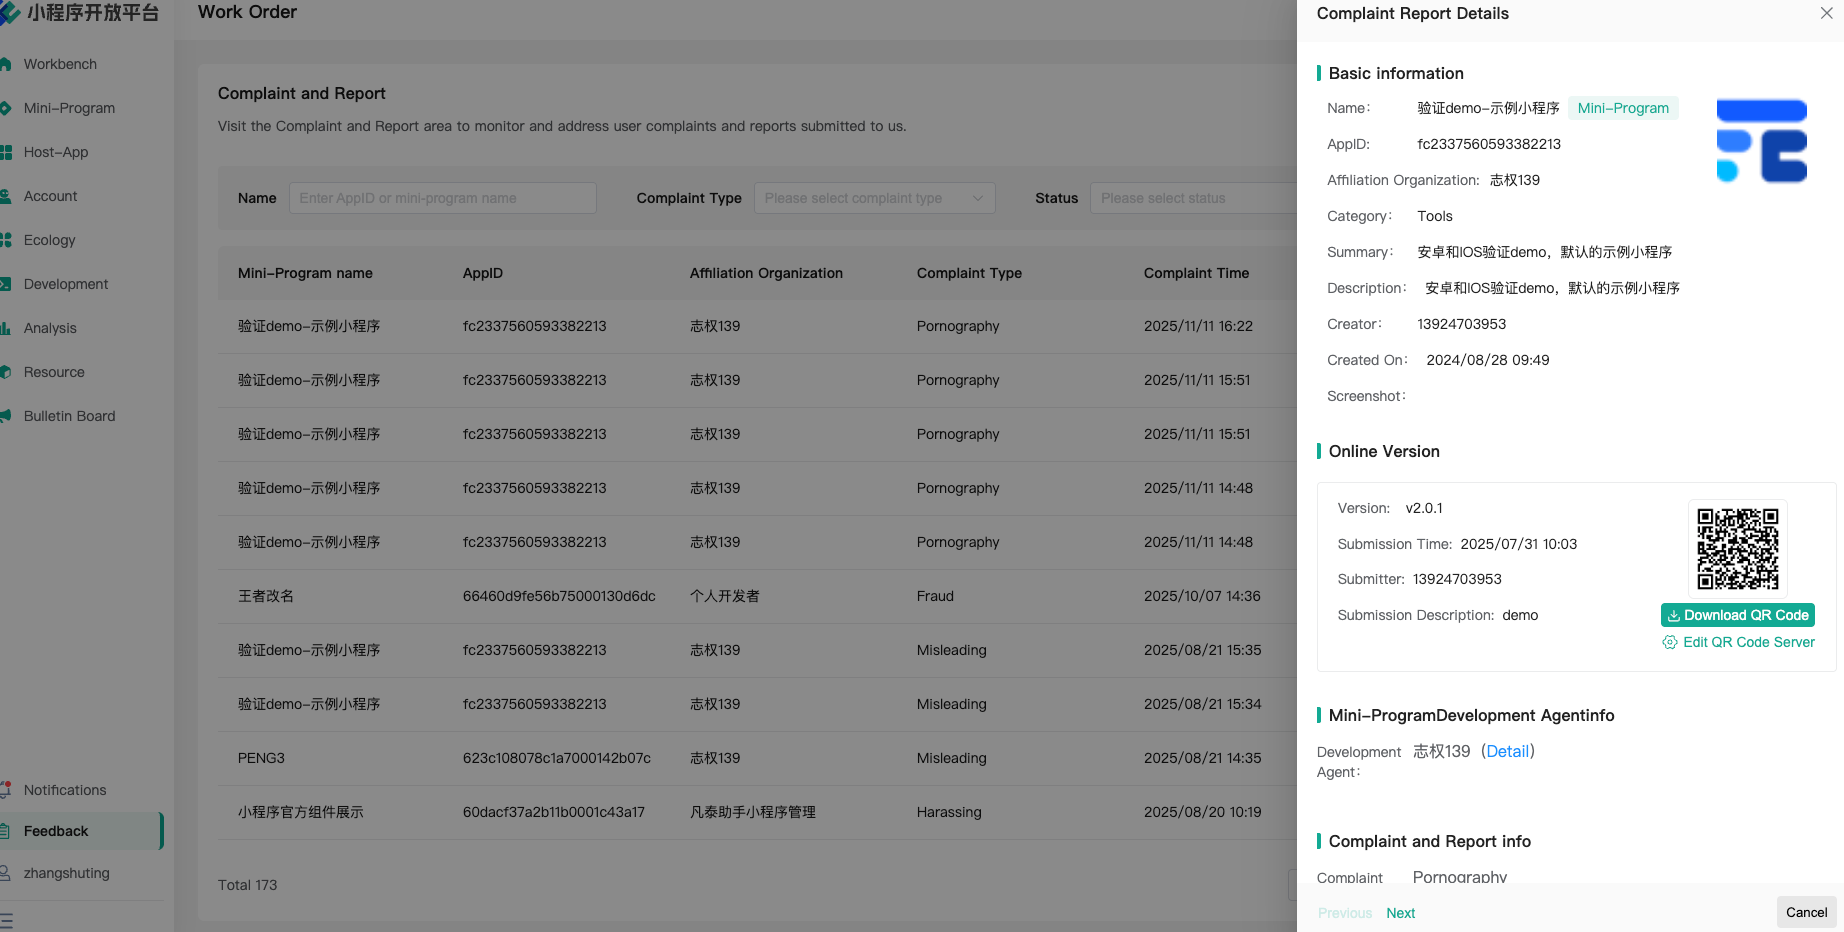
Among these, "Complaints & Reports" will be collected into the Operation Center's Complaints & Reports section (there is also an entry in the Homepage - Pending Center). Please handle them promptly.
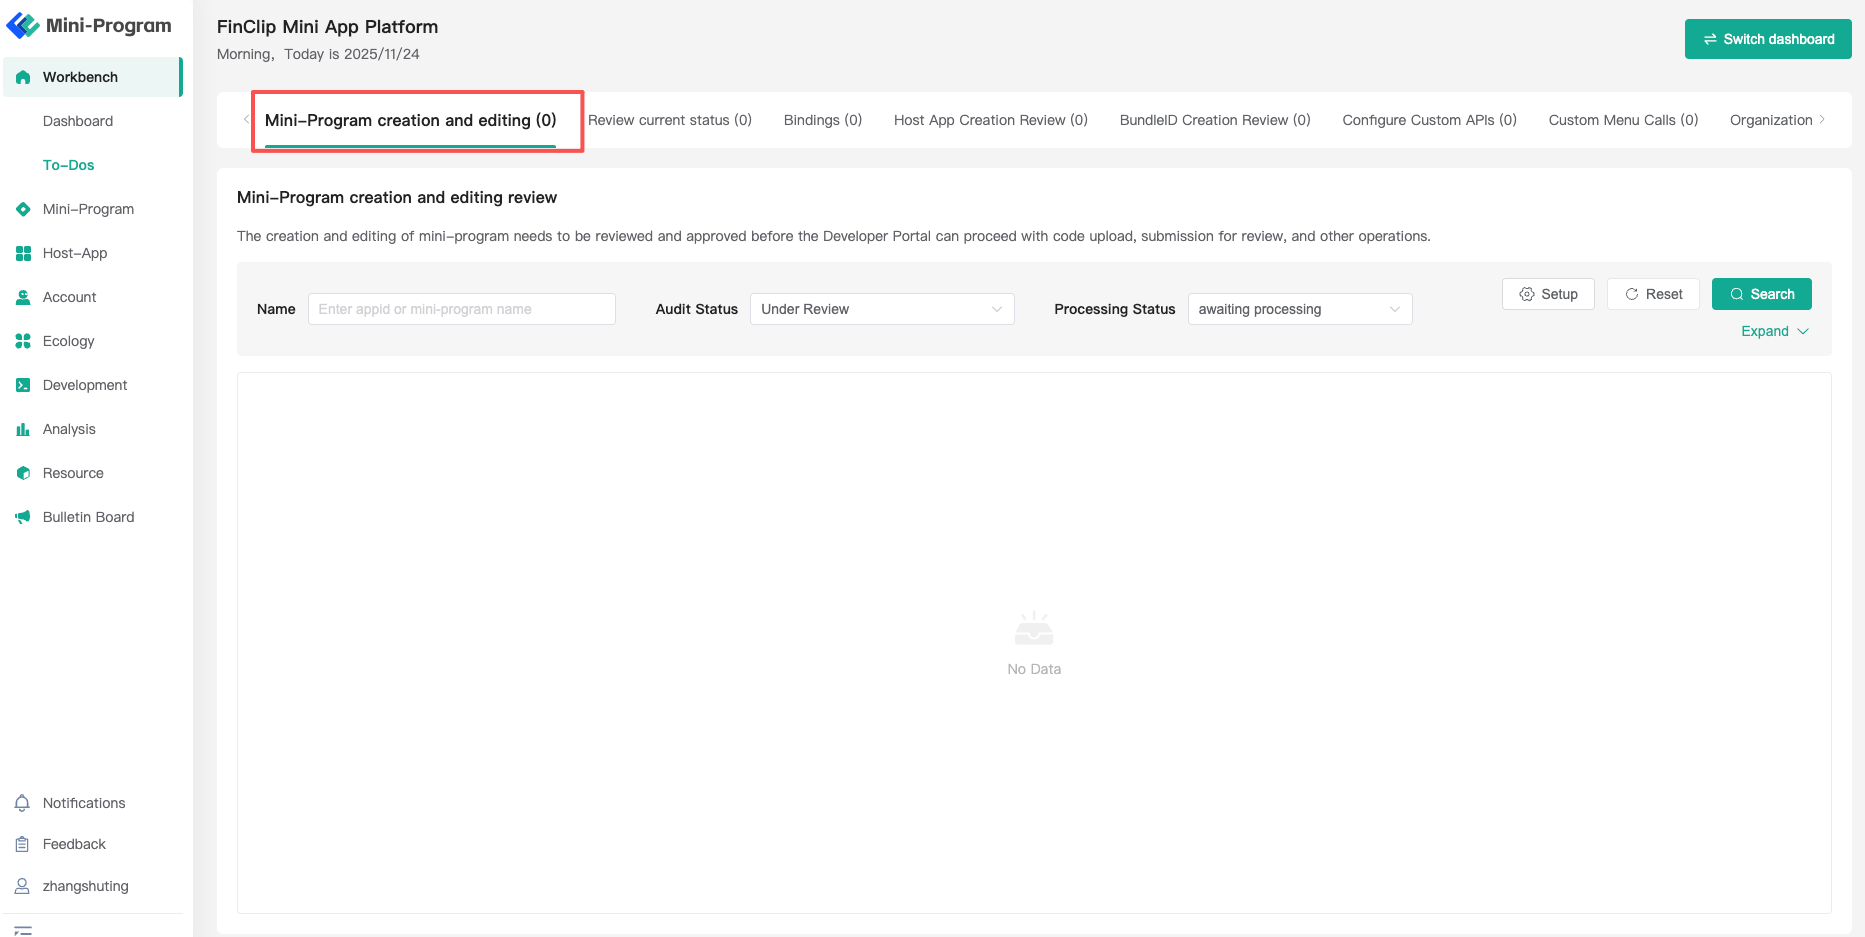
# 7. Pending Center
For other operations requiring your attention, you can access them via the "Pending Center" entry in the upper right corner of the homepage. This includes relevant business processes you need to handle (such as Mini-Program audits, Mini-Program binding, custom API calls, etc.). The Pending Center allows you to quickly enter the business processes that need handling, assisting you in carrying out related business activities.