这篇文章主要为大家详细介绍了小程序电影影评实例开发简介及优势分析,具有一定的参考价值,感兴趣的小伙伴们可以参考一下
本文实例为大家分享了微信小程序制作影评小程序的具体代码,供大家参考,具体内容如下
这是博主的项目包含的文件截图:
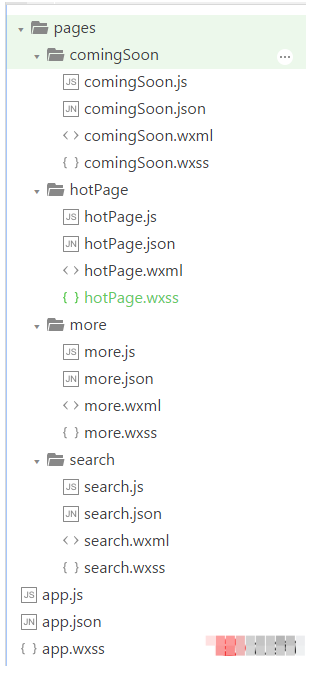
首先如图建立文件夹和page页面
然后app.json页面更新代码如下:
1 2 3 4 5 6 7 8 9 10 11 12 13 14 15 16 17 18 19 20 21 22 23 24 25 26 | {
"pages": [
"pages/hotPage/hotPage",
"pages/comingSoon/comingSoon",
"pages/search/search",
"pages/more/more"
],
"window": {
"backgroundTextStyle": "light",
"navigationBarBackgroundColor": "#fff",
"navigationBarTitleText": "WeChat",
"navigationBarTextStyle": "black"
},
"tabBar": {
"list": [{
"pagePath": "pages/hotPage/hotPage",
"text": "本地热映"
},{
"pagePath": "pages/comingSoon/comingSoon",
"text": "即将上映"
},{
"pagePath": "pages/search/search",
"text": "影片搜索"
}]
}
}
|
是app.wxss页面(为后面的页面样式写的):
1 2 3 4 5 6 7 8 9 10 11 12 13 14 15 16 17 18 19 20 21 22 23 24 25 26 27 28 29 | .container {
height: 100%;
display: flex;
flex-direction: column;
align-items: center;
justify-content: space-between;
padding: 200rpx 0;
box-sizing: border-box;
}
.movies{
display:flex;
}
.myimage{
flex: 1;
}
.moveInfo{
flex: 2;
}
.yanyuanlist{
display:flex;
}
.left{
flex:1;
}
.right{
flex:2;
}
|
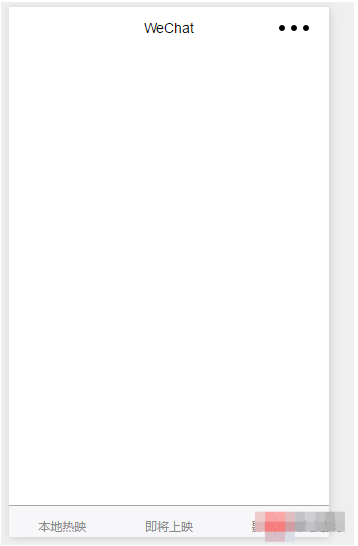
页面显示如图:
然后是hotPage.wxml页面:
1 2 3 4 5 6 7 8 9 10 11 12 13 14 15 16 17 18 19 20 21 22 23 24 25 26 27 | <view class="movies" wx:for="{{movies}}" id="{{item.id}}" bindtap="jumpTomore">
<view class="myimage">
<image src="{{item.images.medium}}"></image>
</view>
<view class="moveInfo">
<view class="title">
名称:{{item.title}}
</view>
<view class="daoyan">
导演:{{item.directors["0"].name}}
</view>
<view class="yanyuanlist">
<view class="left">演员:</view>
<view class="right">
<block wx:for="{{item.casts}}">{{item.name}} </block>
</view>
</view>
<view class="fenlei">
分类:{{item.genres}}
</view>
<view class="year">
上映时间:{{item.year}}
</view>
</view>
</view>
|
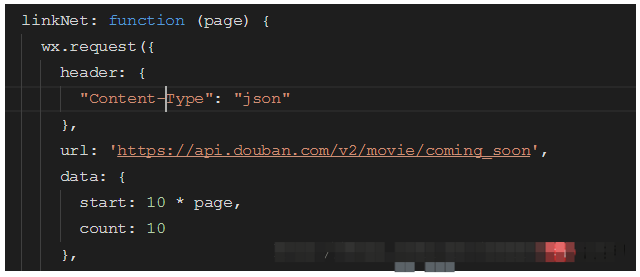
然后是hotPage.js页面:
1 2 3 4 5 6 7 8 9 10 11 12 13 14 15 16 17 18 19 20 21 22 23 24 25 26 27 28 29 30 31 32 33 34 35 36 37 38 39 40 41 42 43 44 45 46 47 48 49 50 51 52 53 54 | var that;
var page = 0;
Page({
data: {
movies: []
},
onLoad: function (options) {
that = this;
that.linkNet(0);
},
jumpTomore: function (e) {
console.log(e.currentTarget.id);
wx.navigateTo({
url: '/pages/more/more?id=' + e.currentTarget.id,
})
},
linkNet: function (page) {
wx.request({
header: {
"Content-Type": "json"
},
url: 'https://api.douban.com/v2/movie/in_theaters',
data: {
start: 10 * page,
count: 10,
city: '成都'
},
success: function (e) {
console.log(e);
if (e.data.subjects.length == 0) {
wx.showToast({
title: '没有更多数据',
})
} else {
that.setData({
movies: that.data.movies.concat(e.data.subjects)
})
}
}
})
},
onReachBottom: function () {
that.linkNet(++page);
}
})
|
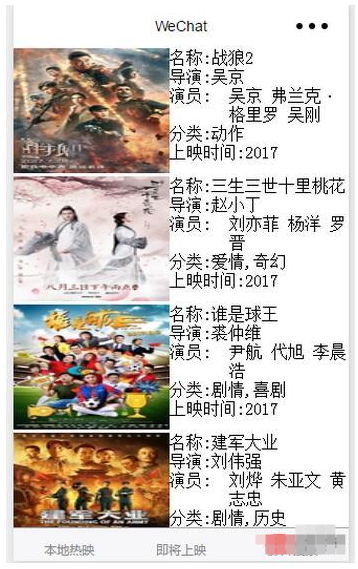
运行程序结果如图:
然后是hotPage.wxss:
1 2 3 4 | image{
width:350rpx;
height:280rpx;
}
|
接着是第二个页面的布局和第一个页面一样,所以直接把第一个页面hotPage.wxml代码copy过来就好了;
同样comingSoon.js代码和hotPage.js代码也差不多,唯一需要改动的地方只有一个:
url和data改一下就好了
.wxss代码一致;
运行结果如下:

接着是第三个页面的代码:
search.wxml页面代码:
1 2 3 4 5 6 7 8 9 10 11 12 13 14 15 16 17 18 19 20 21 22 23 24 25 26 27 28 29 30 | <input placeholder="输入关键字" bindinput="myInput">
<button bindtap="mySearch">搜索</button>
<view class="movies" wx:for="{{movies}}" id="{{item.id}}" bindtap="jumpTomore">
<view class="myimage">
<image src="{{item.images.medium}}"></image>
</view>
<view class="moveInfo">
<view class="title">
名称:{{item.title}}
</view>
<view class="daoyan">
导演:{{item.directors["0"].name}}
</view>
<view class="yanyuanlist">
<view class="left">演员:</view>
<view class="right">
<block wx:for="{{item.casts}}">{{item.name}} </block>
</view>
</view>
<view class="fenlei">
分类:{{item.genres}}
</view>
<view class="year">
上映时间:{{item.year}}
</view>
</view>
</view>
|
页面代码:
1 2 3 4 5 6 7 8 9 10 11 12 13 14 15 16 17 18 19 20 21 22 23 24 25 26 27 28 29 30 31 32 33 34 35 36 37 | var input;
var that;
Page({
data: {
movies: []
},
onLoad: function (options) {
that = this;
},
myInput: function (e) {
input = e.detail.value;
},
mySearch: function () {
wx.request({
header: {
"Content-Type": "json"
},
url: 'https://api.douban.com/v2/movie/search?q=' + input,
success: function (e) {
that.setData({
movies: e.data.subjects
})
}
})
}
})
|
.wxss代码同hotPage.wxss代码一致;
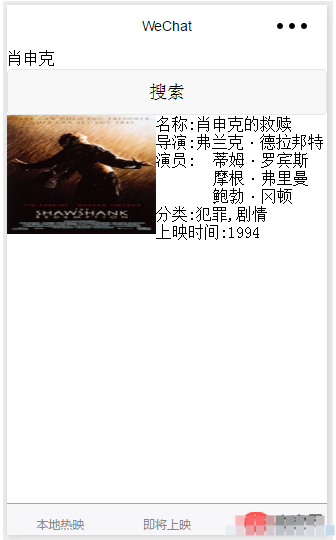
运行代码结果如下:
最后是详情页面,点击影片后会跳转到详情页面获得影片的详细信息:
more.wxml页面代码:
1 2 3 4 5 6 7 8 9 10 11 12 13 | <image src="{{imageUrl}}"></image>
<view class="moveInfo">
<view class="title">名字:{{title}}</view>
<view class="director">导演:{{director}}</view>
<view class="castleft">主演:</view>
<view class="casts" wx:for="{{casts}}">
<block class="castright">{{item.name}}</block>
</view>
<view class="year">年份:{{year}}</view>
<view class="rate">评分:{{rate}}</view>
<view class="summary">介绍:{{summary}}</view>
</view>
|
more.js代码:
1 2 3 4 5 6 7 8 9 10 11 12 13 14 15 16 17 18 19 20 21 22 23 24 25 26 27 28 29 30 31 32 33 34 35 36 37 38 39 40 41 42 43 | var that;
Page({
data: {
title: 0,
imageUrl: 0,
director: 0,
casts: [],
year: 0,
rate: 0,
summary: 0
},
onLoad: function (options) {
that = this;
wx.request({
header: {
"Content-Type": "json"
},
url: 'https://api.douban.com/v2/movie/subject/' + options.id,
success: function (e) {
console.log(e)
that.setData({
title: e.data.original_title,
imageUrl: e.data.images.large,
director: e.data.directors["0"].name,
casts: e.data.casts,
year: e.data.year,
rate: e.data.rating.average,
summary: e.data.summary
})
}
})
}
})
|
运行代码结果如下:

以上就是小程序电影影评实例开发简介及优势分析的详细内容。
版权声明:本文内容由网络用户投稿,版权归原作者所有,本站不拥有其著作权,亦不承担相应法律责任。如果您发现本站中有涉嫌抄袭或描述失实的内容,请联系我们jiasou666@gmail.com 处理,核实后本网站将在24小时内删除侵权内容。