这篇文章主要为大家详细介绍了微信小程序实现顶部选项卡效果,具有一定的参考价值,感兴趣的小伙伴们可以参考一下
微信小程序顶部选项卡在开发中是非常常用的,下面用一点时间实现了一下。
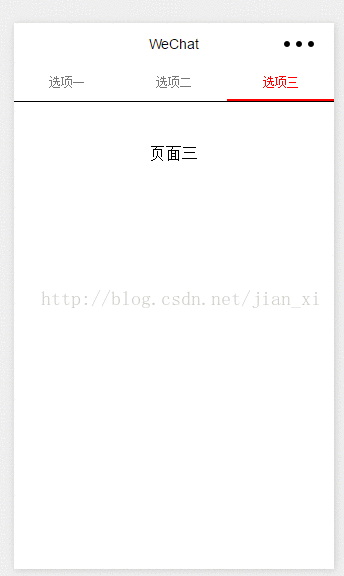
效果图:
下面直接上代码:
wxml:
1 2 3 4 5 6 7 8 9 10 11 12 13 14 15 16 17 18 | <view class="swiper-tab">
<view class="tab-item {{currentTab==0 ? 'on' : ''}}" data-current="0" bindtap="swichNav">选项一</view>
<view class="tab-item {{currentTab==1 ? 'on' : ''}}" data-current="1" bindtap="swichNav">选项二</view>
<view class="tab-item {{currentTab==2 ? 'on' : ''}}" data-current="2" bindtap="swichNav">选项三</view>
</view>
<swiper current="{{currentTab}}" class="swiper" duration="300" style="height:{{winHeight - 30}}px" bindchange="bindChange">
<swiper-item>
<view>页面一</view>
</swiper-item>
<swiper-item>
<view>页面二</view>
</swiper-item>
<swiper-item>
<view>页面三</view>
</swiper-item>
</swiper>
|
wxss:
1 2 3 4 5 6 7 8 9 10 11 12 13 14 15 16 17 18 19 20 21 22 23 24 25 | .swiper-tab{
width: 100%;
text-align: center;
line-height: 80rpx;
border-bottom: 1px solid #000;
display: flex;
flex-direction: row;
justify-content: center;
}
.tab-item{
flex: 1;
font-size: 30rpx;
display: inline-block;
color: #777777;
}
.on{
color: red;
border-bottom: 5rpx solid red;
}
.swiper{ display: block; height: 100%; width: 100%; overflow: hidden; }
.swiper view{
text-align: center;
padding-top: 100rpx;
}
|
js:
1 2 3 4 5 6 7 8 9 10 11 12 13 14 15 16 17 18 19 20 21 22 23 24 25 26 27 28 29 30 31 32 33 34 35 36 37 38 39 40 41 42 43 44 45 46 47 48 49 50 51 52 53 54 55 56 57 58 59 60 61 62 63 64 65 66 67 68 69 70 71 | Page({
data: {
winWidth:0,
winHeight:0,
currentTab:0
},
onLoad: function (options) {
var that = this;
wx.getSystemInfo({
success: function (res) {
that.setData({
winWidth: res.windowWidth,
winHeight: res.windowHeight
});
}
});
},
bindChange: function (e) {
var that = this;
that.setData({ currentTab: e.detail.current });
},
swichNav: function (e) {
var that = this;
if (this.data.currentTab === e.target.dataset.current) {
return false;
} else {
that.setData({
currentTab: e.target.dataset.current
})
}
} ,
onPullDownRefresh: function () {
},
onReachBottom: function () {
},
onShareAppMessage: function () {
}
})
|
以上是实现过程,总体上没什么难度。可以参考参考。
版权声明:本文内容由网络用户投稿,版权归原作者所有,本站不拥有其著作权,亦不承担相应法律责任。如果您发现本站中有涉嫌抄袭或描述失实的内容,请联系我们jiasou666@gmail.com 处理,核实后本网站将在24小时内删除侵权内容。